How to Cut Crown Molding Laying Flat – With Easy Reference Templates
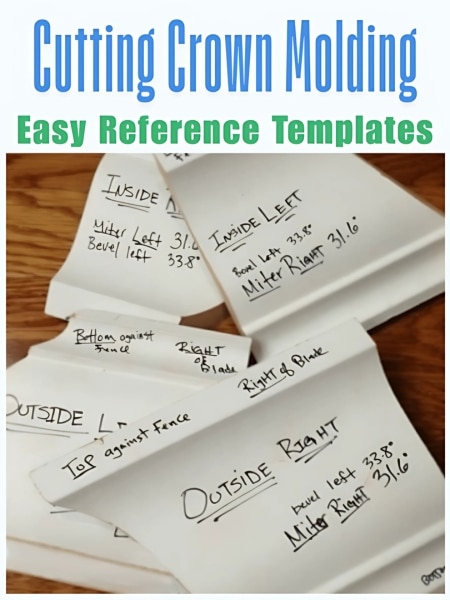
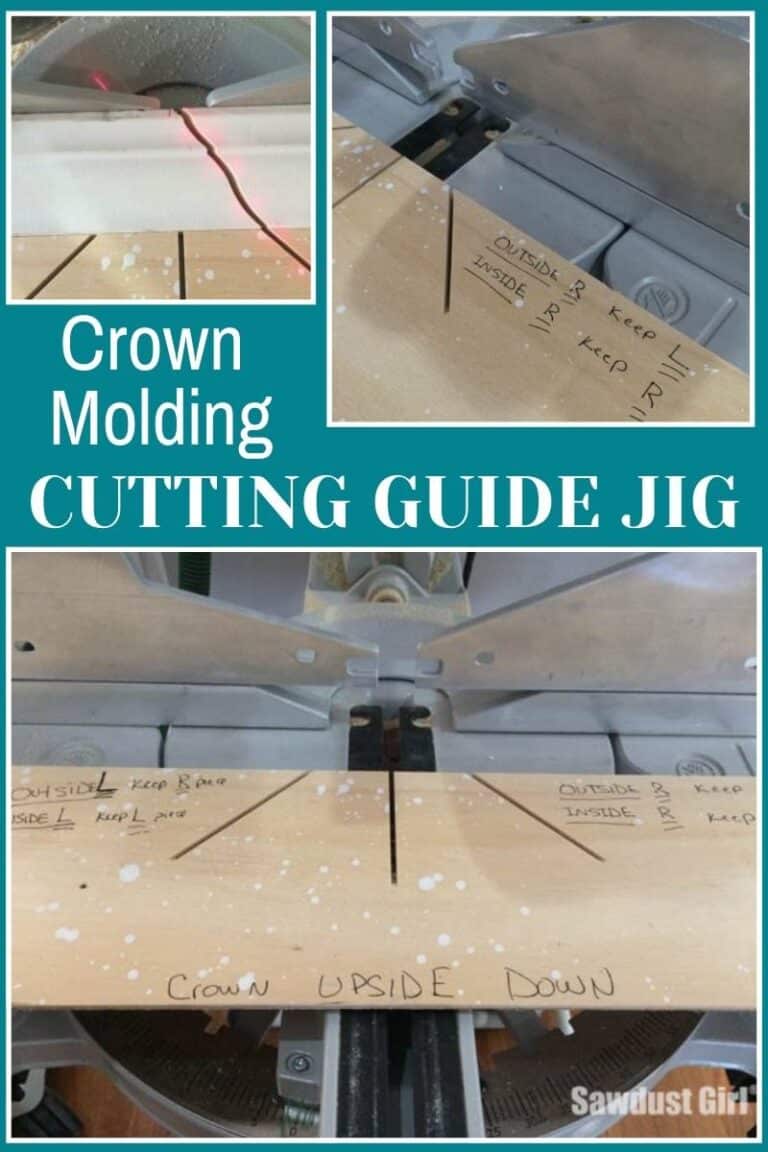
This tutorial explains how to cut crown molding flat, on any miter saw (provided your molding isn’t wider than your saw’s cutting area). It’s easy to get confused about which side of what corner you’re cutting by the time you take your length measurement and get to the saw. Creating a set of templates will give you a visual guide that you can use in the room to mock up the corner you’re working on – and take with you to the saw.
*This tutorial assumes you have 90° wall to ceiling joints and wall to wall joints. If you are working with a funky wall corners or vaulted ceiling – this tutorial will not be helpful.
Spring Angle
First off, it is important to understand that crown molding is manufactured with varying spring angles. It is essential to know the spring angle of the crown molding you are using because it determines the saw settings you will use to cut the molding. Check out this post if you need help Finding the Spring Angle of your crown molding.
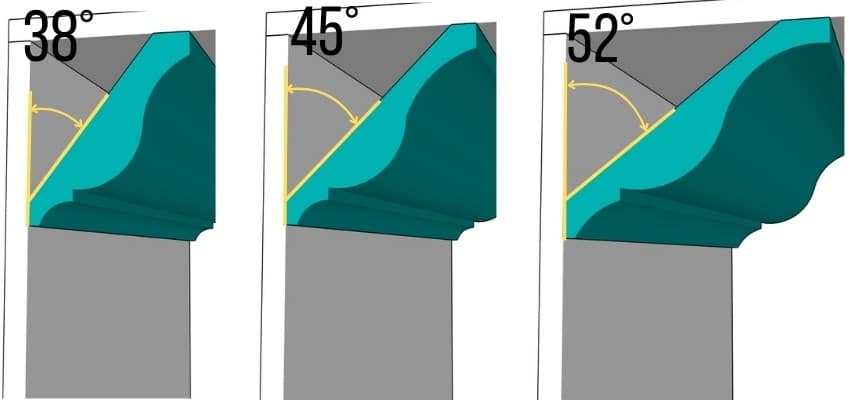
Saw’s Miter and Bevel Settings
I am demonstrating settings for 38° spring angles in this post. If you need to create templates for 45° or 52° spring angles, use the appropriate substitutions below.
45° Spring Angle Substitutions
Crown molding with a 45° spring angle is traditional choice, great for ceilings 9′-10′ heigh.
- Left bevel set to 30°
- Miter cuts will be R and L 35.3°
52° Spring Angle Substitutions
52° spring angle crown molding is generally chosen for heigh ceilings, 10′ and above.
- Left bevel set to 25.8°
- Miter cuts will be R and L 38.2°
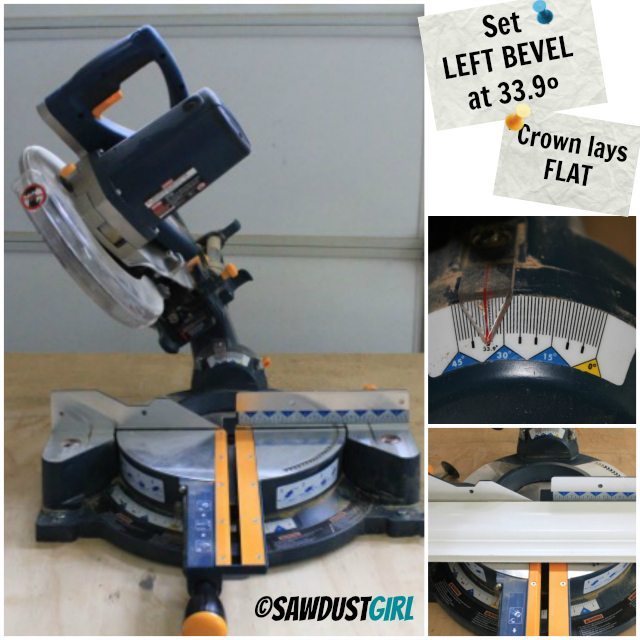
Constants
These two things will be true for every cut:
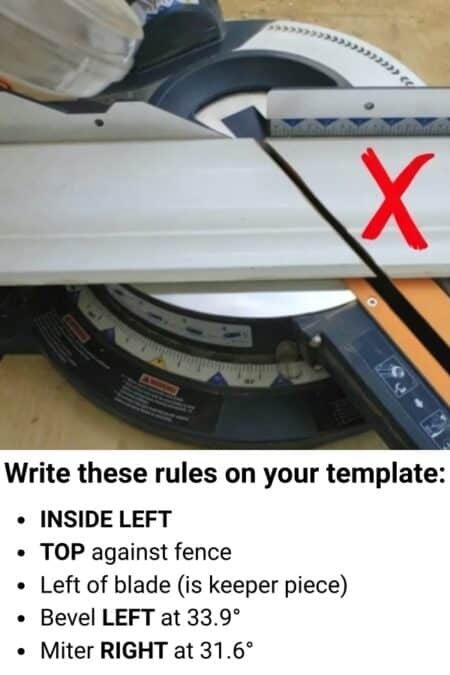
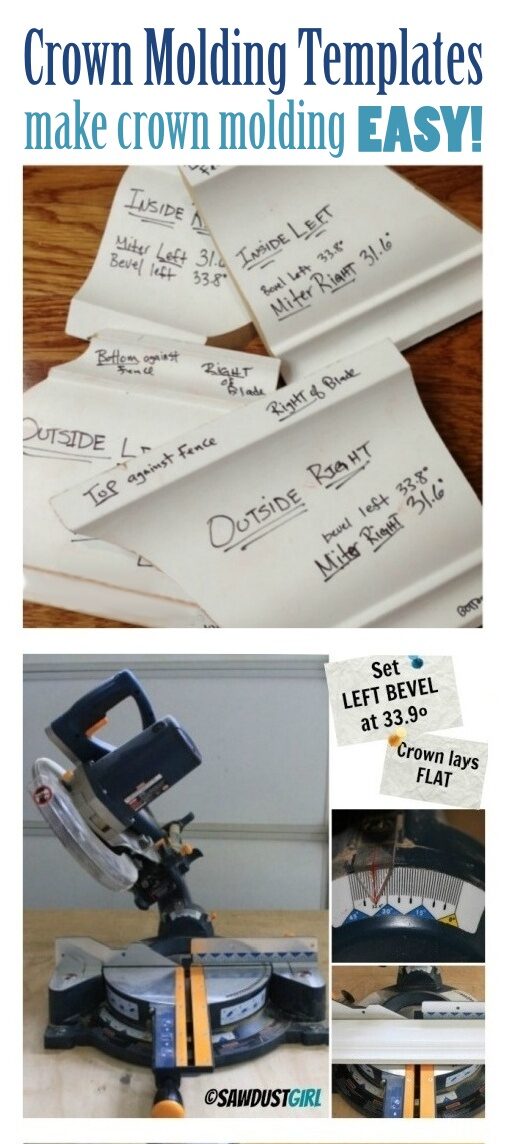
- The left bevel will remain set to 33.9• for every cut. (Your saw might say 33.8 – and that’ll do just fine.)
- The backside of the crown molding will always lay flat on the saw surface.
Variables
These two things will change depending on the cut you are making.
- The miter will flip between left and right – but always at 31.6•.
- The edge of the molding that rests against the fence will flip between top and bottom. (Remember the decorative edge is the bottom.)
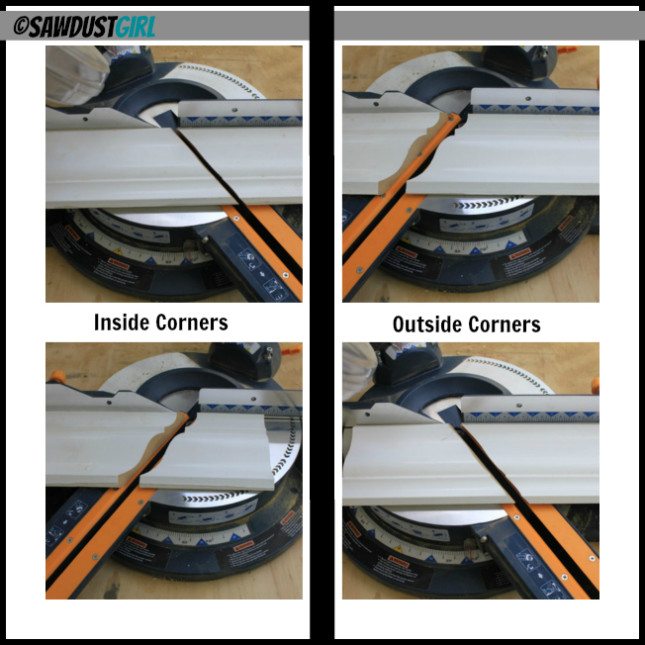
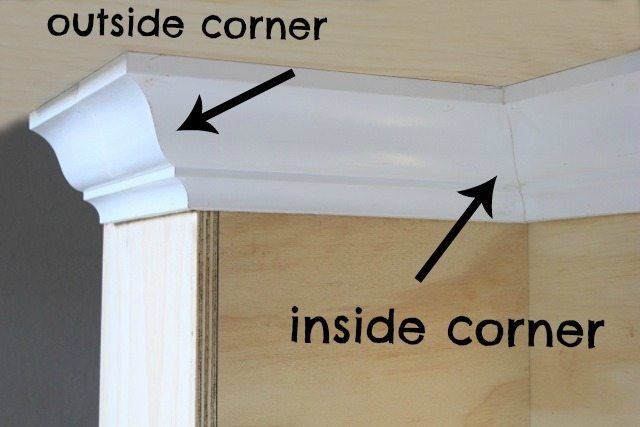
Inside Corners – Outside Corners
The reason crown molding gets so confusing is because you are accounting for the angle between the wall and ceiling and the angle between the wall and wall for every cut.
Make your Crown Molding Templates
Cut each template about 8″ long.
Remember that you will only flip your saw between right and left miter – AND flip your crown so the edge that rests against the saw fence changes.
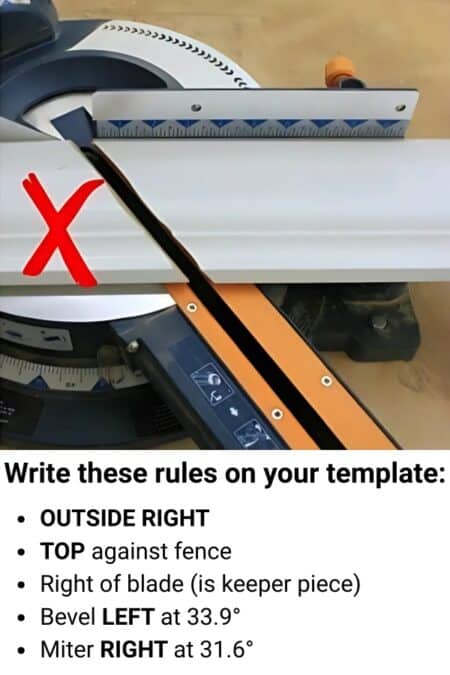
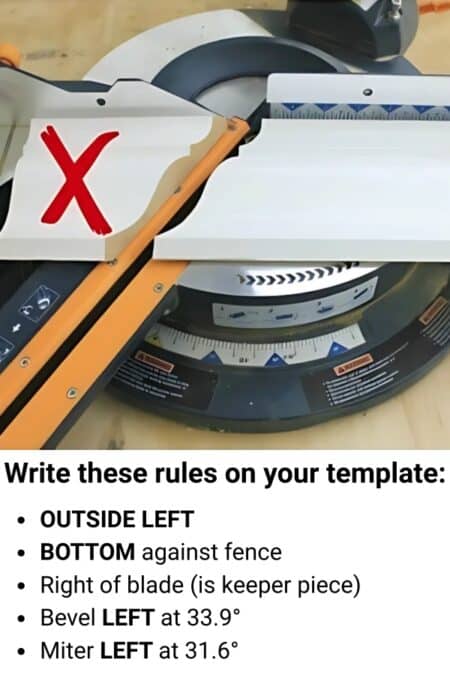
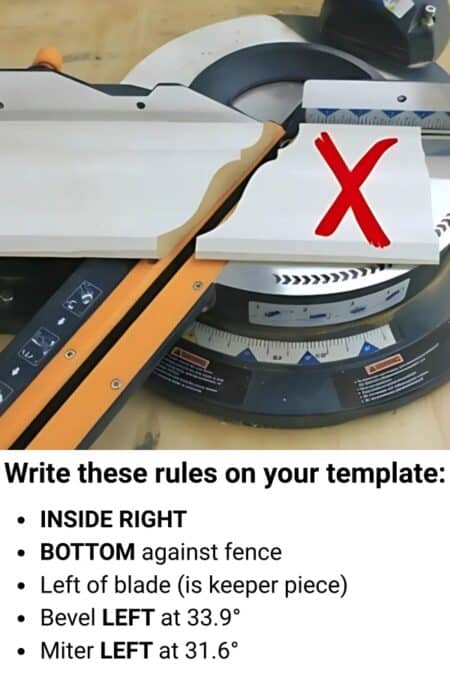
Cut each template according to the instructions I’ve included below each picture and then write the instructions directly onto each template. In SHARPIE!
Outside Right
Outside Left
Inside Right
Inside Left
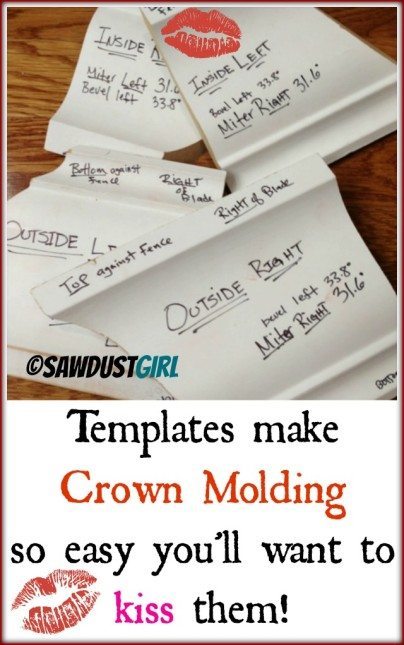
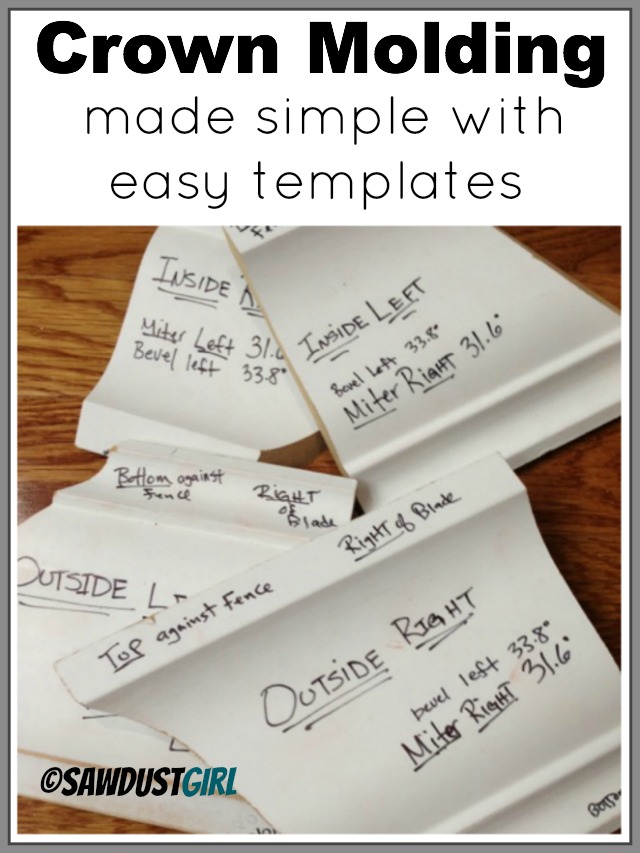
Now you should have four of your very own crown molding templates that are going to make your job so much easier!
I’ve been doing this for a good long while and I still need templates. My brain is very visual. It doesn’t translate, “left outside corner” into any kind of usable information. I HAVE to look at my visual guide – EVERY SINGLE TIME. They’re still handy after all these years!
Also, if you corners are out of square, you’ll either have to make micro adjustments to your saw settings to get a perfect corner joint– OR, you can use my little trick to fix gaps that you might end up having.


LOL electrical tape to hold together a miter saw. So funny! Do what works though. Glad my instructions were helpful!
My husband would not listen to me, and this old house had him building fences for saw that didn’t work, I showed him the “girl” explanation and suddenly it became clear to him…and he’s using my compound mitre saw that he broke and taped together with electrical tape! Told him he owes me a new saw.
Thank you for your response. It’s nice to know I’m not alone! And it’s a nice reminder not to be so hard on myself and to not give up before the miracle happens.
Thank you sooooooo much! I’m working on my first project with crown moulding and was all turned around and upside down! Then I remembered I pinned your templates. Wow, this will save me a lot of cuts and frustration! Very grateful! Thanks again.
Genius!! Thanks so much. I’ve been tentative about trying this on some very expensive molding. But now I’m going to buy some cheap “practice” molding and give it a whirl.
Thanks so much…