• Home
  • About
    • Personal Posts
  • Privacy
  • Shop
    • My Account
    • Checkout
    • Email
    • Facebook
    • Instagram
    • Pinterest
    • Twitter
    • YouTube
Sawdust Girl®

Sawdust Girl®

Renovation, cabinet building and woodworking plans and tutorials. Build like a Girl®

  • My Home
    • Clinton TN House
      • Clinton TN House in Progress
    • Maryville TN House
      • Maryville TN House Tour – Completed Rooms
      • Maryville TN House in Progress
        • Basement
        • Basement Storage Closet
        • Bedroom Office
        • Craft Room
        • Dining Room
        • Entry
        • Garage
        • Guest Bedroom
        • Hallway
        • Jack and Jill Bathroom
        • Kitchen
        • Kitchen Entry
        • Laundry Room
        • Library
        • Living Room
        • Loft
        • Madison’s Room
        • Master Bedroom
        • Master Closet
        • Pantry
        • Porch
        • Powder Room
        • Wes’ Office
    • Illinois House
    • Calderwood Cottage
  • My Workshop
    • Clinton Workshop
  • Build & Breakfast
  • Cabinet Making 101
    • Cabinets
    • Doors
    • Drawers
  • Projects and Plans
    • Countertops
    • Beds
    • Benches
    • Bookshelves
    • Desks
    • Gift Ideas
    • Holiday
      • Christmas
      • Halloween
    • Home Accessories
    • Kids
    • Kitchen Cabinets
    • Lockers
    • Nightstands
    • Organization accessories
    • Recipes
    • Sewing
    • Tables
    • Vanities
    • Wardrobes
    • Woodworking
      • Wood Finishing
    • Workshop
    • Workshop Storage and Organization
  • Remodeling 101
    • Baseboard and Trim
    • crown molding
    • Demolition
    • Door and Window Casings
    • Door Installation
    • Drywall
    • Electrical work
    • Flooring
    • Home Maintenance
    • Painting
    • Plumbing
    • Resources
    • Safety
    • Tile
    • Wall and Ceiling Treatments
  • Sawdust Squad
  • The Sawdust Diaries
    • Andrea
    • Ava D.
    • Beckie F.
    • Cara C.
    • Courtney B
    • Fawn T.
    • Jenn D.
    • Kelly C.
    • Kristy K.
    • Lara T.
    • Malisa B.
    • Marnie D.
    • Robin C.
    • Val F.
  • Tools
    • Products
    • Tool Reviews & Overviews
    • Inspiration & Ideas

Handmade Wooden Ruler – DIY Gift Idea

All Posts, Gift Ideas, Projects and Plans

A handmade wooden ruler makes an excellent gift for anyone with an appreciation for beautiful desk accessories. They are a beautiful and tactile gift that is fun to use, and the receiver will never guess how fast, easy, and cheap they are to make. Plus they are a great way to use up small wood pieces and save them from the scrap heap.Handmade Wooden Ruler - Great DIY gift idea!
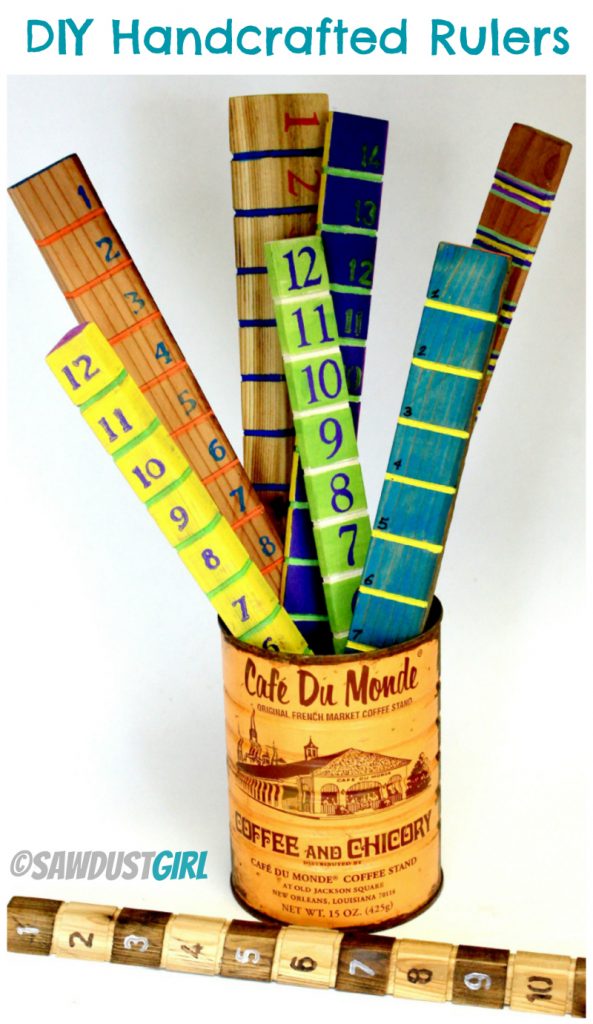
How To Make a Wooden Ruler:

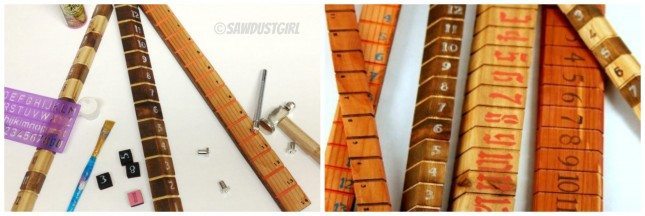
Find some wood scraps and cut them to your desired length. I did mine in 12 and 14 inch lengths.  Then cut the wood on the table saw to the desired width. On some of the rulers I angled the table saw so that the edges would have varying bevels on them. Some I just left as simple rectangles. I even used a couple of paint sticks with the ends trimmed off.
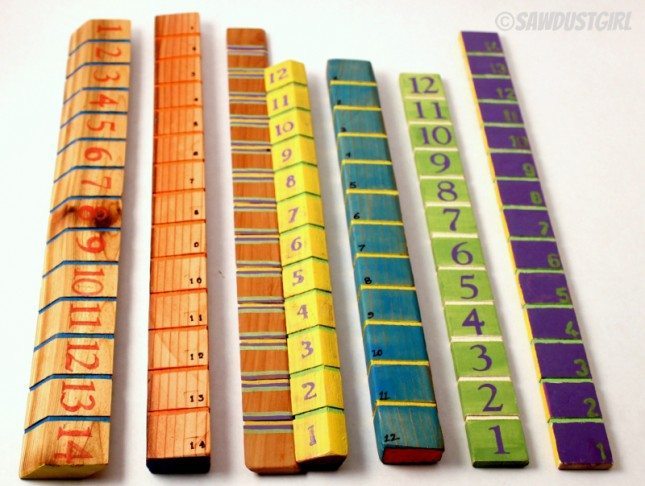
Handcrafted rulers - Super easy and inexpensive gift idea!

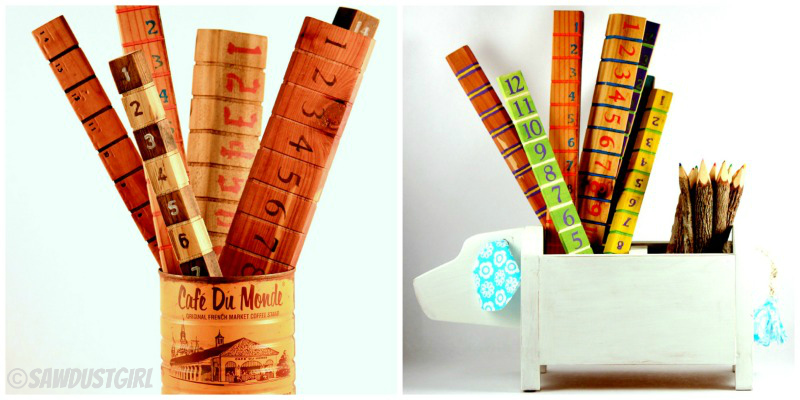
Here you can see the variety of shapes that will work. The two at the end on the right are made from paint sticks.

Next using a table saw with the blade lowered, cut shallow grooves (about 1/16” deep) around the rulers at each inch to create a measure line. Remember that most table saws are set so that the inside edge of the blade reflects the measurement setting on the guide. My table saw blade is 1/8” wide and I wanted the inch marks to be centered, so I set my guide at the inch minus 1/16 “–so 15/16, 1 15/16, 2 15/16, …
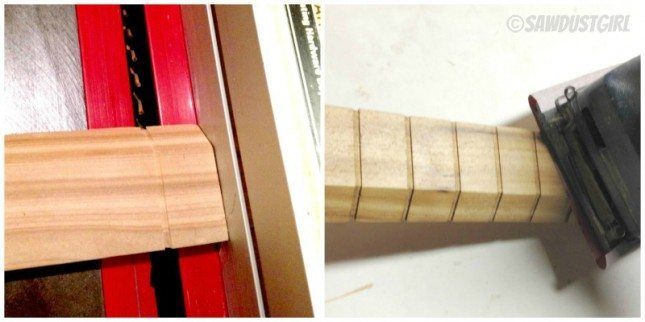
Handcrafted rulers - Super easy and inexpensive gift idea!

Next sand your rulers nice and smooth and paint or stain any base colors that you wish. For rulers where you want to leave the grooves natural, it is easiest to cut the grooves after you have applied the stain or paint.

Handcrafted rulers - Super easy and inexpensive gift idea!

Next Apply numbers. I used stamps and stencils, and even leather stamps to engrave the numbers into the rulers. Once the numbers are dry, apply a sealer or finish to the rulers. I used a clear paste wax as I love how it makes the wood feel and smell, but you could use a clear coat poly, or oil finish if you prefer.

DIY Gift-Handcrafted Ruler and Dog Caddy. Gifts for under $5!


There you have it, a super easy to make, handcrafted gift that anyone on your list will love!  (The Dog Caddy is another under $5 gift too!)
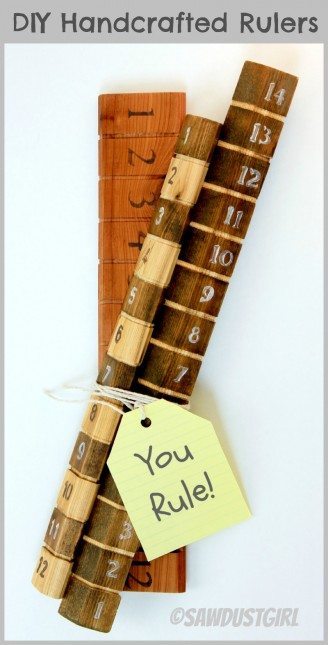
Handcrafted rulers - Cheap and Easy gift idea!

December 2, 2014 · Leave a Comment

« Fun and Inexpensive Gift ideas for DIY’ers
DIY Holiday Sign – it’s the most wonderful time of the year »

Leave a Reply Cancel reply

Your email address will not be published. Required fields are marked *

New Post email notification signup

You Subscribed!

Categories

Legal Stuff

Terms of Use

Privacy Policy

Disclosure

Recent Posts

  • Remove Baseboard with the Trim Puller
  • March 2023 Lodge Update- Moved in
  • January 2023 Lodge Update
  • Lodge Update – Floors, Cabinets, Countertops, and Appliances
  • Lodge Kitchen Cabinet Progress

Disclaimer:

Although it is my intention to provide accurate plans and clear instructions, not all plans have been tried and tested. Using plans or information found on SawdustGirl.com indicates that you agree with the Terms of Use policy and will accept full responsibility for the process and outcome of any project you attempt. All plans are for private use only. Plans and information published on SawdustGirl.com may not be reproduced, republished or distributed in any manner without written permission from Sandra Powell, Sawdust Girl. Actual projects built using Sawdust Girl plans may be published on your own site without instructions or "tutorial" as long as you provide a link to my original post with full post title or "SawdustGirl.com" as link title.

Copyright © 2023 · anchored theme by <a target="_blank"