• Home
  • About
    • Personal Posts
  • Privacy
  • Shop
    • My Account
    • Checkout
    • Email
    • Facebook
    • Instagram
    • Pinterest
    • Twitter
    • YouTube
Sawdust Girl®

Sawdust Girl®

Renovation, cabinet building and woodworking plans and tutorials. Build like a Girl®

  • My Home
    • Clinton TN House
      • Clinton TN House in Progress
    • Maryville TN House
      • Maryville TN House Tour – Completed Rooms
      • Maryville TN House in Progress
        • Basement
        • Basement Storage Closet
        • Bedroom Office
        • Craft Room
        • Dining Room
        • Entry
        • Garage
        • Guest Bedroom
        • Hallway
        • Jack and Jill Bathroom
        • Kitchen
        • Kitchen Entry
        • Laundry Room
        • Library
        • Living Room
        • Loft
        • Madison’s Room
        • Master Bedroom
        • Master Closet
        • Pantry
        • Porch
        • Powder Room
        • Wes’ Office
    • Illinois House
    • Calderwood Cottage
  • My Workshop
    • Clinton Workshop
  • Build & Breakfast
  • Cabinet Making 101
    • Cabinets
    • Doors
    • Drawers
  • Projects and Plans
    • Countertops
    • Beds
    • Benches
    • Bookshelves
    • Desks
    • Gift Ideas
    • Holiday
      • Christmas
      • Halloween
    • Home Accessories
    • Kids
    • Kitchen Cabinets
    • Lockers
    • Nightstands
    • Organization accessories
    • Recipes
    • Sewing
    • Tables
    • Vanities
    • Wardrobes
    • Woodworking
      • Wood Finishing
    • Workshop
    • Workshop Storage and Organization
  • Remodeling 101
    • Baseboard and Trim
    • crown molding
    • Demolition
    • Door and Window Casings
    • Door Installation
    • Drywall
    • Electrical work
    • Flooring
    • Home Maintenance
    • Painting
    • Plumbing
    • Resources
    • Safety
    • Tile
    • Wall and Ceiling Treatments
  • The Sawdust Diaries
    • Andrea
    • Ava D.
    • Beckie F.
    • Cara C.
    • Courtney B
    • Fawn T.
    • Jenn D.
    • Kelly C.
    • Kristy K.
    • Lara T.
    • Malisa B.
    • Marnie D.
    • Robin C.
    • Val F.
  • Tools
    • Products
    • Tool Reviews & Overviews
    • Inspiration & Ideas

Long Floating Shelves – Closet Shelves

Craft Room, Floating Shelves, Loft, Projects and Plans

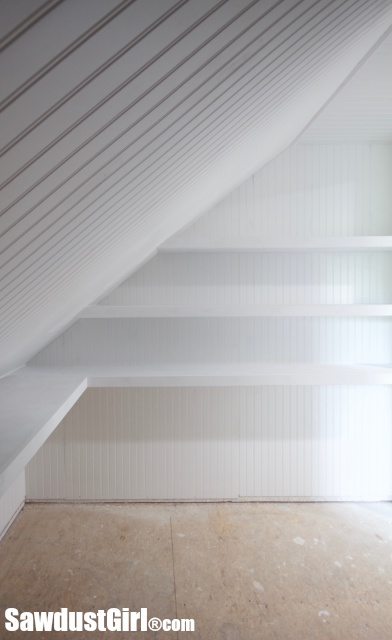
I built in long floating shelves in my studio closet with the extra space I created by moving my doorway over 8″.  Moving the doorway was extra work but it was worth it to create all this new storage on these closet shelves.

*This project is sponsored by LIQUID NAILS Fuze*It,  Don’t Just Glue It. Fuze*It
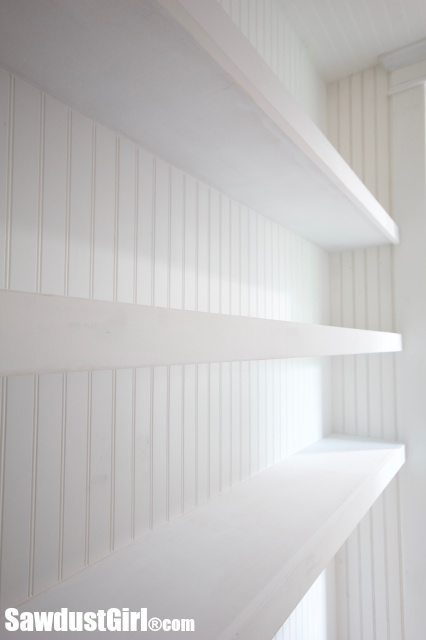
Long Floating Shelves in my Craft room!

Building Long Floating Shelves

Door over against the wall = no storage.  Move the door over = storage potential.  Having shelves spanning this whole wall = tons of new storage!  Shelves are so much more functional than piles of “things” scattered around on the floor. Which is what I had going on in here before, so I had to tackle the closet!
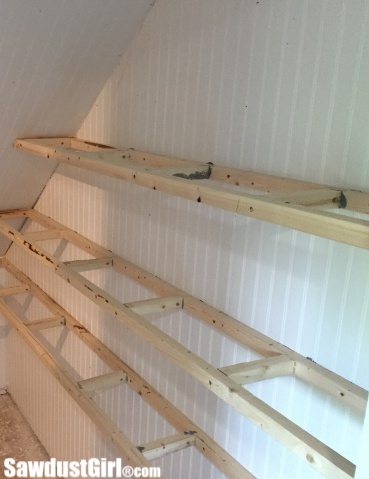
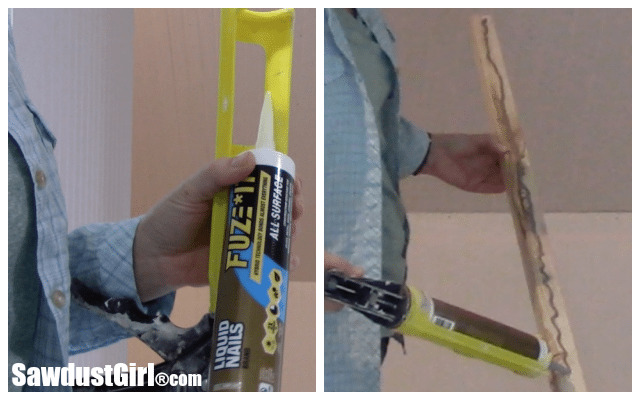
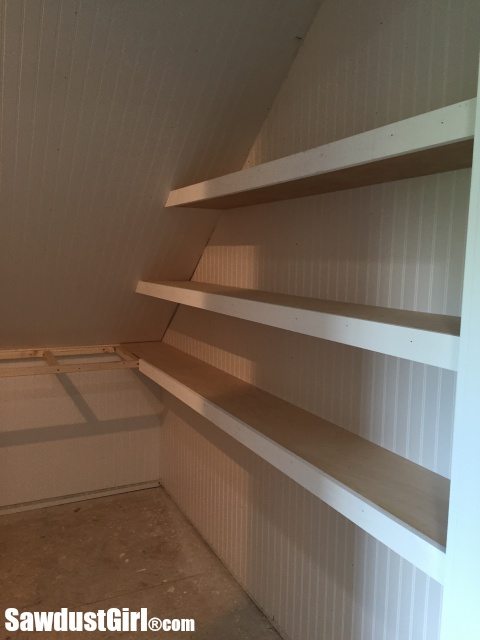
I built three floating shelves along one wall in this closet.  These shelves are 10″ wide by about 9′ long. I used LIQUID NAILS Fuze*It and 3″ long fasteners to build the 2×2 skeleton of my floating shelves and secure it to the walls.  I thought LIQUID NAILS Fuze*It would be helpful on this project because it’s instant grab feature could replace my need for a third (forth and fifth) hand.  Building floating wood shelves

Install back cleats

I applied a bead of adhesive onto my 2×2 and pressed it into place and then secured it with 3″ fasteners into the studs.  Liquid nails Fuze It
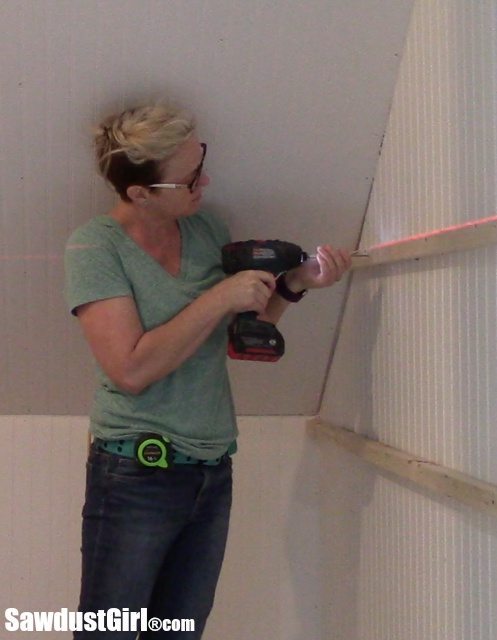
I used a laser level to create a level point of reference while securing my 2x2s to the wall.  If you don’t have a laser level,  draw a line on the wall using a long straight edge and level before building your shelves. Building shelves

Install side cleats

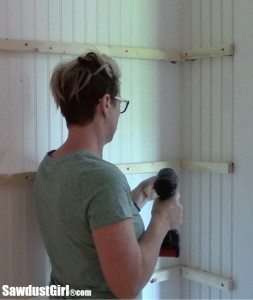
LIQUID NAILS Fuze*It grabs almost instantly while still allowing you to reposition.  I added screws into the studs on three walls for permanent support.Floating corner shelves

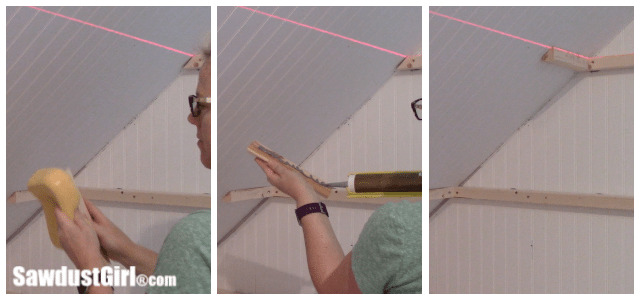
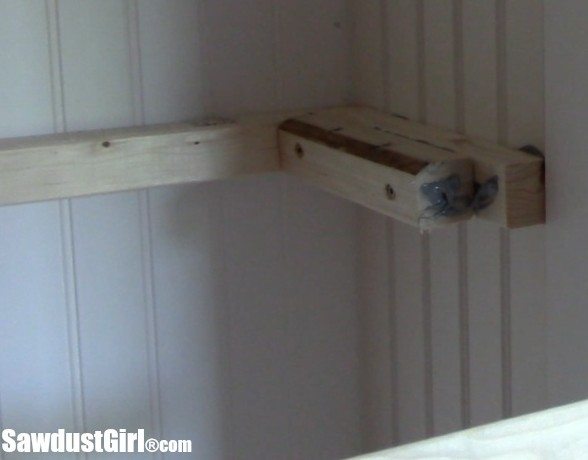
The opposite side is the slanted ceiling and my shelves aren’t deep enough to hit a second stud.  Therefore I’m relying on a screw on one end and adhesive and a few nails on the other end. LIQUID NAILS Fuze*It bonds almost anything to almost anything else and creates a durable, flexible bond that is twice as strong as fasteners alone.  I’m relying on that strength in this one corner but I added screws through studs everywhere I could.
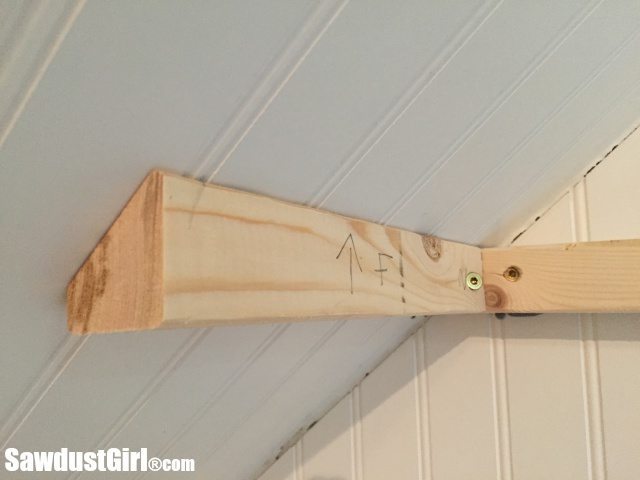
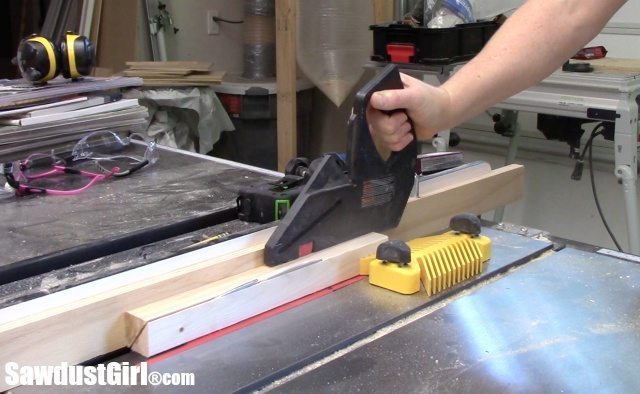
Building wall mounted shelvesI ripped short pieces of 2×2 at an angle for this side support.  Cutting beveled cleats on table sawLIQUID NAILS Fuze*It can be applied interior and exterior in hot, cold, wet or dry environments to porous or smooth surfaces.  IF you slightly wet the surface before applying it, it bonds faster!  I wet both the wall and the 2x2s that I applied on this slanted ceiling so the adhesive would bond quickly and I could make sure it stayed in place without being fastened to a second stud. Building wall shelves and ledges
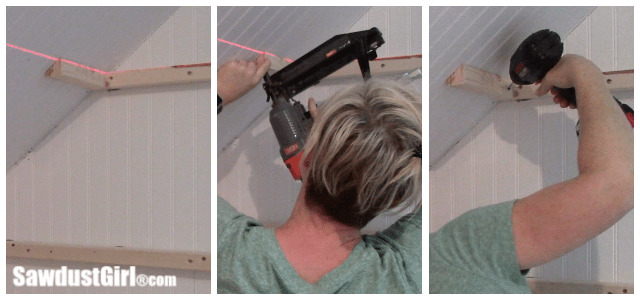
I used my nail gun to shoot a few nails into the wall/ceiling and drove a screw into the corner where I could hit a stud.Building Shelves After securing the back and side 2×2 into place, I secured a long 2×2 across the front.  I found it was easier to secure the front 2×2 if I added a brace behind it, against the first side piece.  Hanging shelves

Create shelf ribs

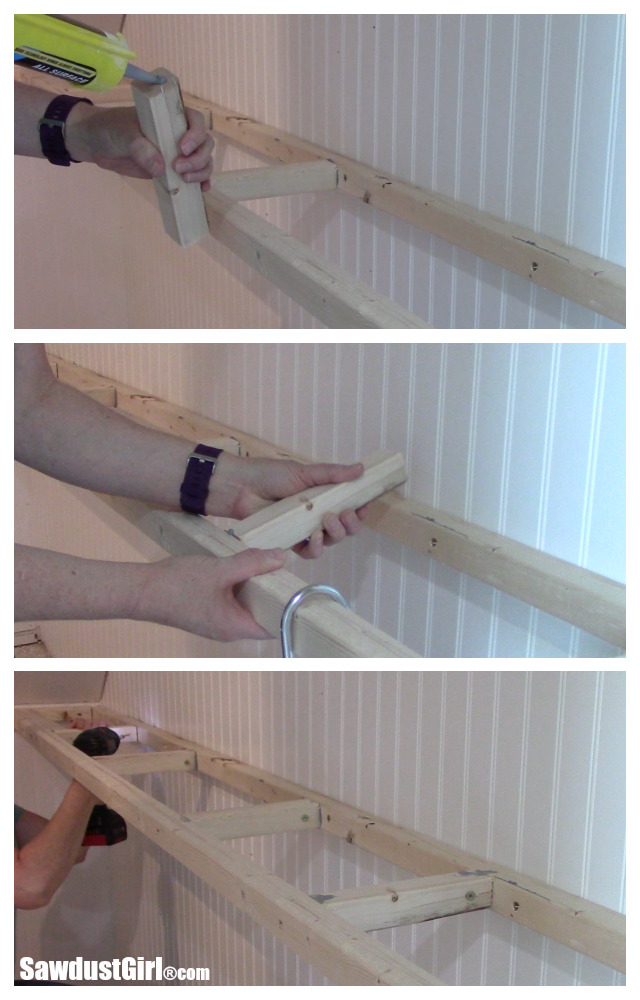
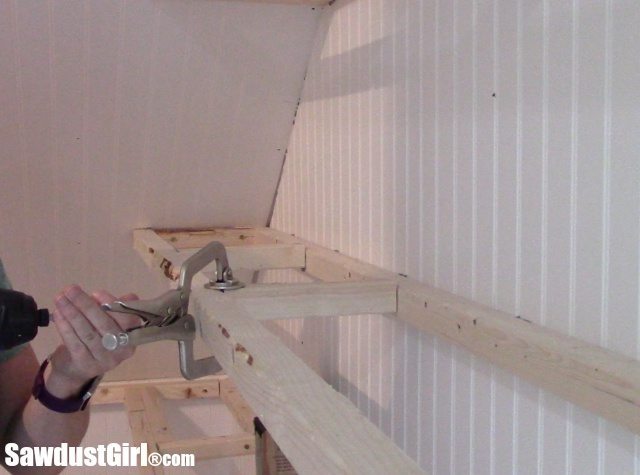
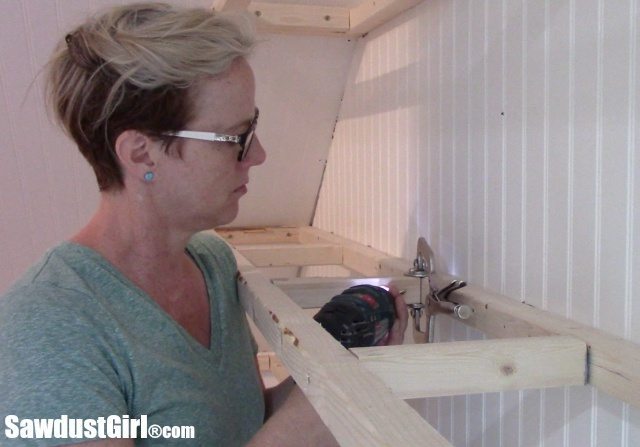
I used Fuze*It and screws to secure all the 2×2 pieces to each other. Wall mounted shelvesI added all the inside ribs by glueing up both ends, pulling the front 2×2 forward and sliding the ribs in place.  After inserting each rib, I secured it to the front 2×2 with one 3″ screw.   I used a clamp to keep both pieces flush with each other while driving the screw.installing wooden shelves

After all the inside ribs were in place, I secured them all to the back 2×2 with screws. Again, I used a clamp to keep the surfaces flush with each other while securing.  Making floating shelves

Attach plywood

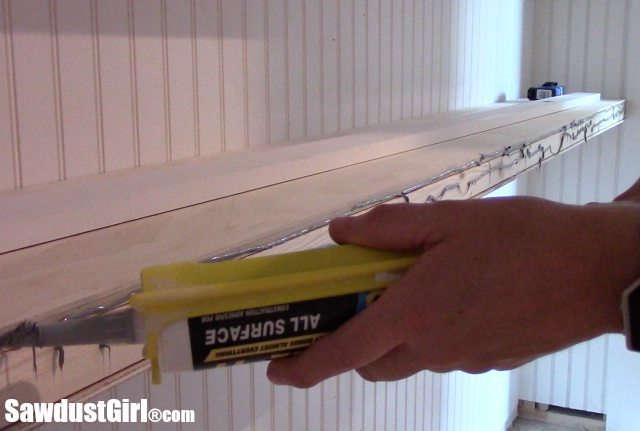
Once my 2×2 skeletons were built, I added plywood.  I ran a bead along the sides of my plywood as well as on the ribs Building long floating shelves

The LIQUID NAILS Fuze*It really held this light 1/4″ plywood in place once I pressed the two surfaces together.  So, I felt confident using 23 ga nails to hold it in place while the adhesive set up. Making wall shelving
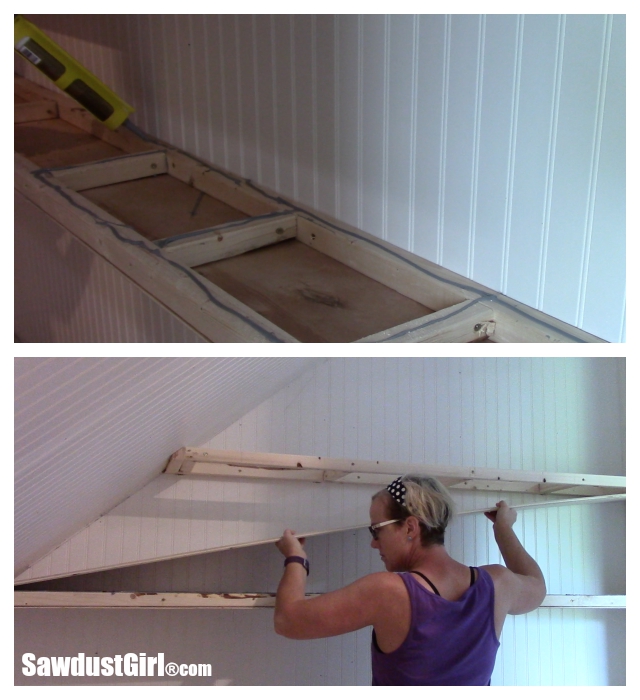
I used 1/2″ plywood on the tops and secured that with adhesive and nails as well.  Building decorative shelves
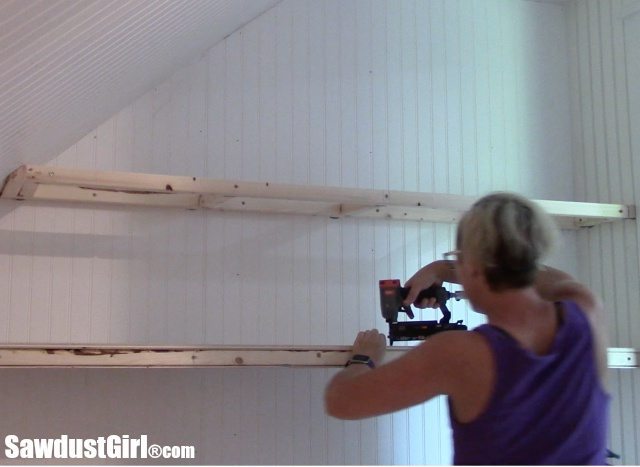
Building wooden closet shelves

Install shelf fronts

1×3 primed pine is an easy front of my floating shelves.  I applied LIQUID NAILS Fuze*It to the front of the 2×2 and as much plywood as I could because I wanted the front to bond to the whole “wood sandwich”.   Building Floating Shelves
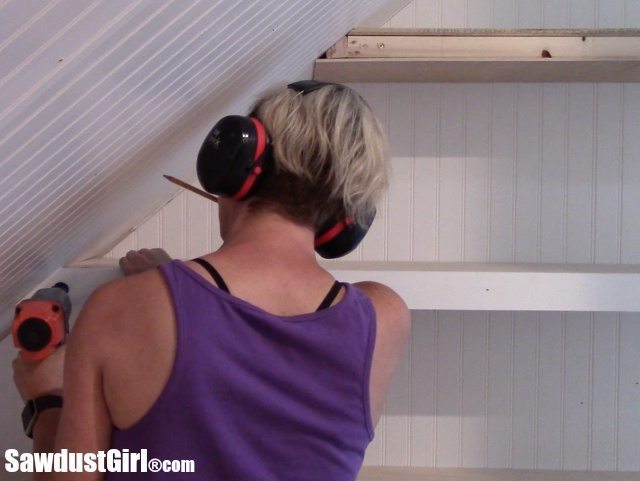
I used 16 ga nails to secure the face to the shelves.Making floating wall shelves

In addition to the three shelves on the side wall, I put a 22″ wide by 8′ long shelf along the back wall.  Building closet shelves in the craft room

At that width and depth, the 2×2 ribs are not going to be enough to fully support it.  I used 1/2″ plywood on the top and bottom to give it additional strength and I’ll be adding a little support after I get the flooring installed.  I went ahead and built the shelf now though, so I could get it sanded, caulked and painted with the other shelves before the flooring goes in.
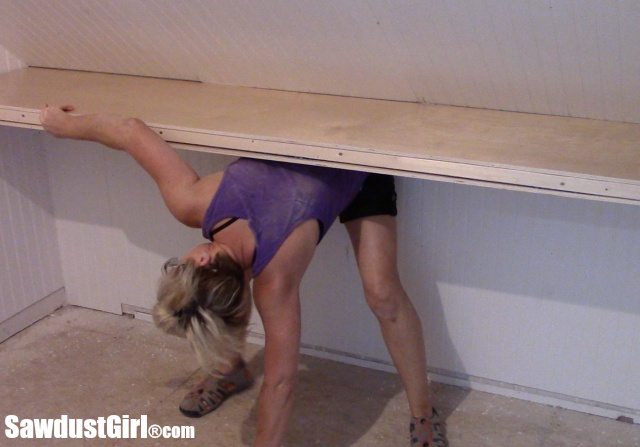
The 1/2″ plywood was to heavy for the Fuze*It to hold it in place. I hadn’t brought up enough clamps so I had to get creative while I got some nails in there.Building Floating Shelves

Prime and Paint

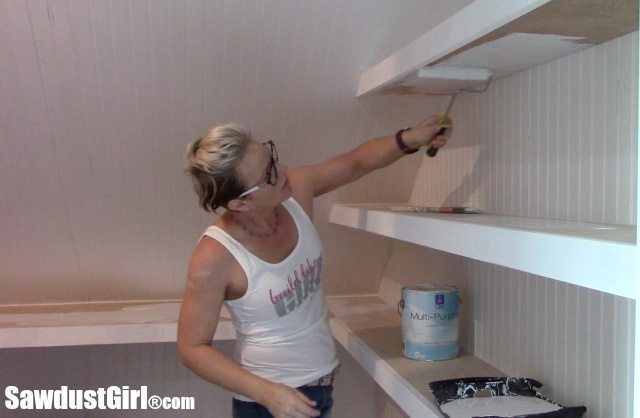
After building all my shelves I just had to fill the nail holes, sand, prime and paint.
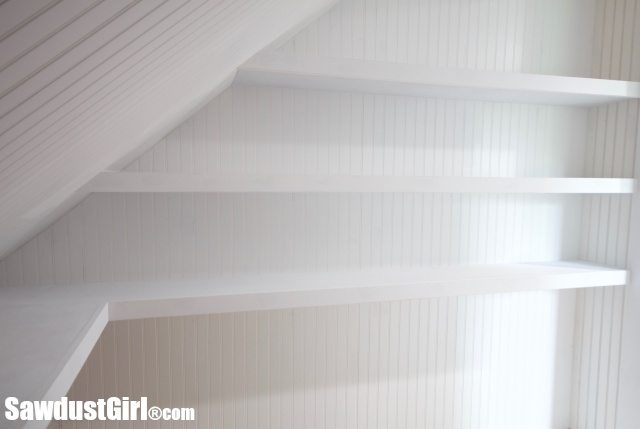
Painting white floating shelves

White wall shelves
Before I installed my shelves, I installed beadboard on the ceiling and walls. It is 100 times more work to install beadboard in between your floating shelves than before you put them up.  I learned that the hard way in my hall closet with floating shelves.

Now I just have to install my flooring and this closet will be done!
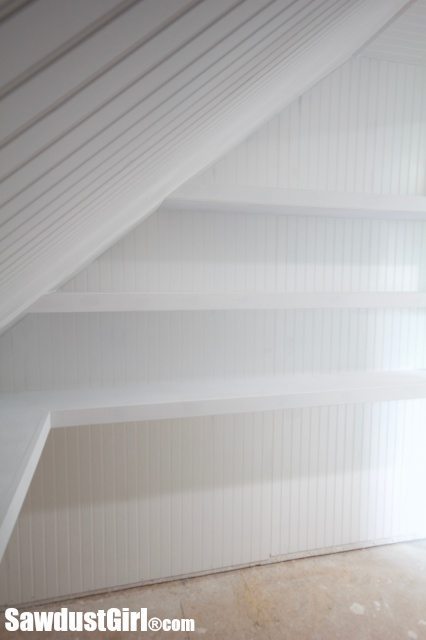
White Floating Shelves

These closet shelves provide SO much storage space. I’ll be so glad to organize my tools while I continue building the rest of my studio!  Then, once the building is complete I’ll have plenty of shelving for my crafting supplies. Can’t wait!

White Long Floating Shelves

White corner wall shelf

This post is sponsored by LIQUID NAILS Fuze*It, available exclusively at The Home Depot.  I was compensated for my time and effort in creating this project to share with you.

May 13, 2016 · 12 Comments

« Cork Wall in Studio
Settling right in…again »

Comments

  1. Angela-Rose says

    May 13, 2016 at 7:19 am

    Absolutely gorgeous! Will have to try the Fuze it! Also can’t believe how flexible you are after back surgery just a couple years ago!

    Reply
    • Sandra says

      May 13, 2016 at 8:50 am

      Thank you so much. I’m still a little sore almost every morning but it forces me to work out because I always feel great afterward.

      Reply
  2. Tammara says

    May 13, 2016 at 8:54 am

    Looks good! THe Fuze-It stuff really works well.

    Reply
    • Sandra says

      May 13, 2016 at 10:44 am

      It really did!

      Reply
  3. Emma Kate says

    May 13, 2016 at 9:28 am

    Could you add an ‘Older Post’ link on your blog? I’d love to scroll back in time and see how this all began. Thanks.

    Reply
    • Sandra says

      May 13, 2016 at 10:44 am

      Weird, there used to be one. Every update seems to change how I have things set up around here and I constantly have to change it back to how I want it! LOL

      Reply
  4. C Glass says

    May 26, 2016 at 12:33 pm

    Hi, Sandra! Firstly, let me compliment you on your hair. I really like the hairdo. Stating that your elaborative post on floating shelves helped saved my life, might almost be an understatement. My needs have been increasing, however; the size of my room remains the same. I didn’t want to spend a lot of money on increasing space through fancy interior professionals. Your simplified procedure seems do – able and extremely practical too. Thank you so much! I was wondering when i’ll be hearing from you next!

    Reply
  5. Frank D says

    February 4, 2018 at 9:14 pm

    Fantastic loft project! Been hopping from article to article.

    Why not pre-build the 2x frames, then attach to the studs?

    What will be used for extra bracing? Kind of critical for such a span … and not something that I see a concealed option for, unless with manufactured steel hidden inside the shelf.

    Reply
    • Meb says

      May 12, 2018 at 7:02 am

      Hi – I was also looking for info on what you used for extra support for the 8’ long shelf. I’m about to build an 8’ long shelf in a closet and was going to use your tutorial but I am not sure what to do for the extra support.

      Reply
      • John says

        April 23, 2020 at 3:37 pm

        For added shelf weight support you could modify her design and install additional supports made for floating shelves (Floating Shelf Brackets). You can find them at most home improvement stores and they are usually metal pipe welded to a piece of metal flat stock with mounting holes pre-drilled. This will add cost to your build but also might give you the piece of mind your shelves can handle the weight.

        Reply
  6. Doug L. says

    February 29, 2020 at 1:18 pm

    Hi Sandra,
    Just discovering your work as I prep to build/install floating shelves in our pantry. Really appreciate your work and the way you convey your experience and wisdom! ;o)
    What kind of load are your shelves (with 2×2 framing and 3″ wall fasteners) able to sustainably support? (I’d like to slim down to 1-1/4 struts”, with support in rear and sides, if reasonable for pantry-scale loads).
    Cheers!
    Doug

    Reply
    • Sandra says

      March 1, 2020 at 9:29 pm

      I have no idea, honestly.

      Reply

Leave a Reply Cancel reply

Your email address will not be published. Required fields are marked *

Categories

New Post email notification signup

You Subscribed!

Legal Stuff

Terms of Use

Privacy Policy

Disclosure

Recent Posts

  • White Wash Pine Wood Ceiling
  • Lodge and Life Update
  • How to Choose Which Track Saw to Buy in 2021
  • How to Choose a Paint Sprayer to Buy in 2021
  • How to Install a Smart Door Lock

Disclaimer:

Although it is my intention to provide accurate plans and clear instructions, not all plans have been tried and tested. Using plans or information found on SawdustGirl.com indicates that you agree with the Terms of Use policy and will accept full responsibility for the process and outcome of any project you attempt. All plans are for private use only. Plans and information published on SawdustGirl.com may not be reproduced, republished or distributed in any manner without written permission from Sandra Powell, Sawdust Girl. Actual projects built using Sawdust Girl plans may be published on your own site without instructions or "tutorial" as long as you provide a link to my original post with full post title or "SawdustGirl.com" as link title.

Copyright © 2022 · anchored theme by <a target="_blank"