Cut Crown Molding and Install like a Pro – Tips and Tricks
Crown is one of the fastest and cheapest ways to add architectural interest and WOW to any room, but it can be a bit tricky to install. Here are my favorite tips and tricks that will help you cut and install crown molding like a boss!
How to Cut Crown Molding and Install like a Pro
First up there is some terminology that it helps to know when approaching crown molding installation:
Crown Molding Terminology
- Miter Joint – A joint made by beveling each joint piece equally to form a corner.
- Miter Cut – Angled cut across the face of the material
- Bevel Cut – Angled cut to the edge of the material
- Scarf Joint – This joint is used to splice two pieces together to create a longer run of material. One piece is cut with a 45° angle facing out and the other piece with a 45° angle facing in. This allows one piece to slide perfectly over the top of the other creating an almost invisible seam.
- Coped Joint – For inside corners, one piece of the joint is butted up to the wall and the other side is scribed so that it fits the contours of the opposite side perfectly. A coped joint compensates for corner variability and gives you a clean professional fit every time.
Step 1: set-up
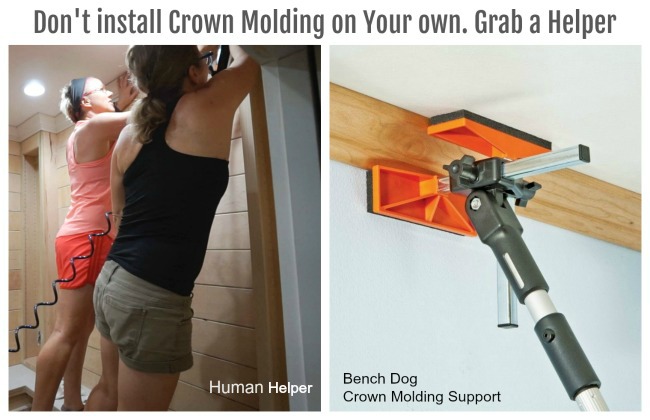
Grab a partner! This job is so much easier (and more fun) if you have someone to help. If you don’t have another human that can lend a pair of hands, the Bench Dog Crown Molding Support is the next best thing. No need for a second ladder, easy to move, and no coffee breaks—the Crown Molding Support might be better than a human assistant.
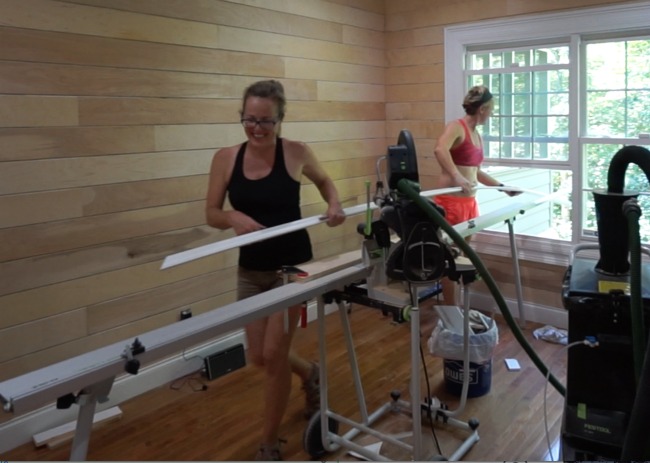
The most efficient set up is to cut the crown in the room where you are installing it, or close by. Good dust extraction will make that a lot less messy, my current favorite is the Bosch 14 Gallon Dust Extractor with auto clean filter. To get the space to cut long runs of crown, set your saw up so you can take advantage of adjoining halls, rooms, even windows that can be opened to create the space you will need to cut in the room. If cutting in the room is not possible, try to find a space close by. This will make the process faster and more efficient.
Step 2: Plan
Look at your room and determine the least prominent corner. This should be your starting point and thus your last corner to complete. The last corner usually takes more finesse to get together and so tends to be the least pretty. Are there any walls that are longer than the trim molding? If yes, they will require a scarf joint. Plan where you want the scarf joint to be so that it will have the least visual impact. Sometimes that means using one long run with two short pieces at each end, etc. You just want to set yourself up so that the trickiest components are not the most prominent.
Step 3: Measure
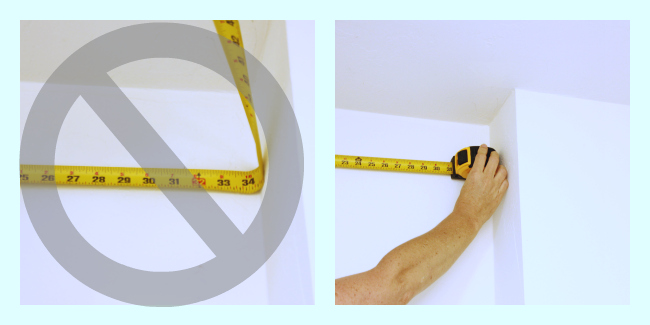
First check your tape. When you pull on the end hook it should move 1/16″. This accounts for length of the end hook when you are pulling the tape along your material vs pushing it against the wall. As tape measures get used and abused, the rivet holes that hold the end hook in place can get stretched and allow for greater movement. For the most accurate measurements, make sure that your end hook moves no more than 1/16″. When measuring from inside corner to inside corner it can be helpful to make a tic mark 5 inches from the corner. Then measure from the opposite wall to the mark and add 5″ to the measurement. This will give you a more reliable measurement over measuring the whole wall and trying to read the tape bent into the corner.
Also, measure at the approximate level where the bottom of the crown will be. So if the crown extends down the wall 3 inches take your measurement 3 inches down as well.
Step 4: Cut
Determine how you will cut your crown. The easiest method is to have the crown vertically nested on a miter saw with the crown bottom along the fence (upside down). This allows for simple miter cuts with no bevel. If your molding is larger than what your saw can accommodate vertically, or if you want to cut it lying flat for other reasons, you can use my handy crown molding templates to simplify the process of making the compound cuts.
If using the vertical nest method, use a jig to hold the crown in place consistently across all of your cuts. For large jobs I like to use the Bench Dog, but for smaller jobs I usually just clamp a cleat made with a scrap piece of 1 x 2 on the miter saw table and that works fine as long as it doesn’t get bumped or jiggled too hard. The important thing is to make sure that the flat edges of the crown are set flush against the saw and that the crown is upside down. Then you just make simple 45° miter cuts (remember it’s upside down). I like to cut on the long side of my measure marks–better to be too long than too short!
How to Cut Crown Molding – Inside Corners
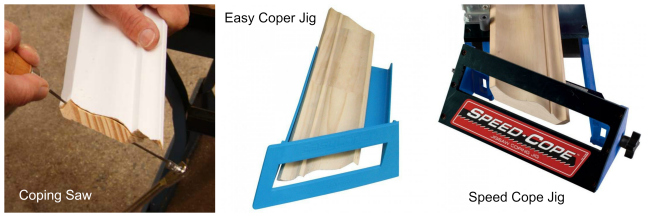
There are two methods for cutting inside corners—Coping or straight miter. Coping gives a clean professional look, especially on corners that are far out of square. It also requires several more steps, takes more time, and is a general PITA. I much prefer using a regular mitered joint for inside corners. Then I shim, putty, and caulk if I need to accommodate corner variability.
Sometimes I encounter a corner that is just too far out of whack to get a decent miter finish. In these situations I use the EasyCoper Jig and have been happy with the results. If I ever have a project where I need to cope more than one or two corners, I would spring for the Rockler Speed-Cope Crown Molding Jig. It looks like it would be a little faster and easier to use with less fiddle factor. For my purposes, the Easycoper suits me fine, since I rarely cope corners and it is 1/3 the price.
Step 5: Install
I usually install crown on planked walls or cabinets which gives me a sturdy nailing surface. However, if installing on drywall, I either mark the studs, or install a backer board to nail into. If using a backer board, secure it to the framing at the ceiling joint. Then you have a solid surface to nail the crown to. Some people recommend cutting the backboard at the same spring angle as the crown. I am cheap and lazy always looking for ways to save time and money and have found that a 2 x 2 with no bevel works fine as long as the crown is large enough to accommodate it. Then nail your crown molding to the ceiling and wall and through to the backer board every 16 inches or so.
How to install Crown Molding – Outside Corners
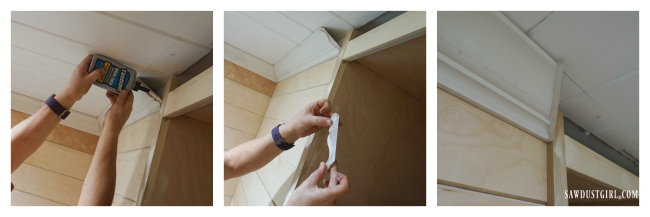
Outside corners can be tricky to get pretty, especially short runs. I like to glue the corner before nailing in place. I have tried a number of glues – hot glue, Instantbond, FastCap, etc, and I really like Titebond’s Thick and Quick for this application. It bonds really fast with just hand pressure and it has about 3 minutes of reposition time. Versus the instant ones where you gotta get it right in 3 seconds or less.
Step 6: Finish
Fill all of the nail holes and scarf joints with putty and caulk the seams. Use multiple coats of putty to repair damaged sections, letting it dry and sanding between coats to achieve a smooth finish. Once all of these flaws are filled in you will be amazed at how professional the finish looks. Then paint or use finish of your choice and your crown molding installation is complete

Ligea says
Thanks for the tips! A photo of what the vertical nesting looks like and the jig to hold it would be very helpful.
Amber says
Need some help figuring out the miter angle for coping the inside corner, 38 degree spring angle, corner is nearly 90 degrees, any tips? I also have to cut the crown flat, should I be mitering and beveling? What angle for each?