Library wall to wall bookcases – Bookcase Plans
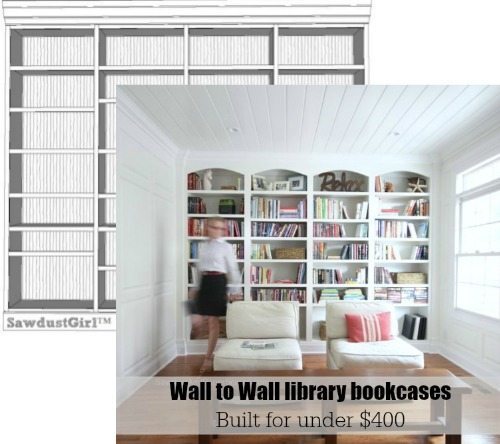
Today I’m sharing detailed bookcase plans for my wall to wall bookcases. These plans utilize straight top rails instead of arches in the faceframes. If you want to do arches, simply follow my tutorial to create uniform arches for the top rail when you get to the faceframe.
These plans utilized the most basic and simplest cabinet building techniques. You can modify this plan to utilize other building methods if you have the tools to implement them. Check out my Cabinet Building 101 eBook for all my cabinet building tips, techniques and instructions for different building methods. Links in this post may be affiliate links.

Materials:
- 3/4″ plywood or MDF
- 1/4″ beadboard or plywood for backs
- material for faceframes (3/4″ hardwood)
I built my bookcases out of MDF because, at that time, MDF was much less expensive than plywood. However, lumber prices vary and fluctuate so make sure to price out your materials. Look at my post on selecting the right material for your project for help deciding.
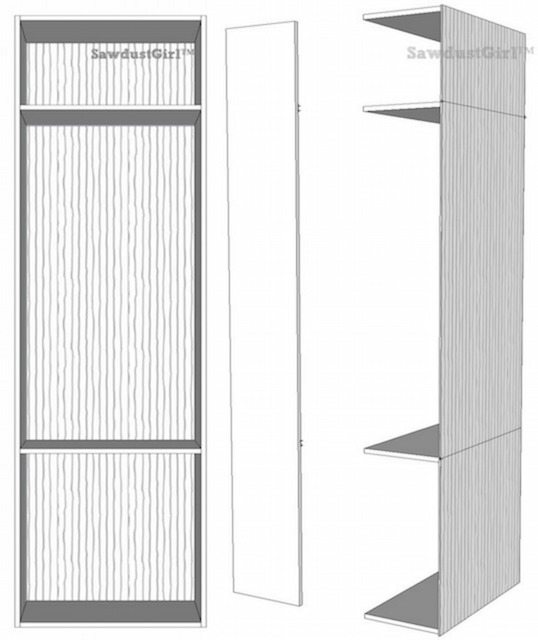
These bookcases are 8′ tall and 14″ deep. The shelves are cut at 28 1/2″ wide. When installed inside 3/4″ thick material, each case is a total of 30″ wide.
The cutlist below is for four bookcases. The 6″ piece left over can be cut down and used for cleats.
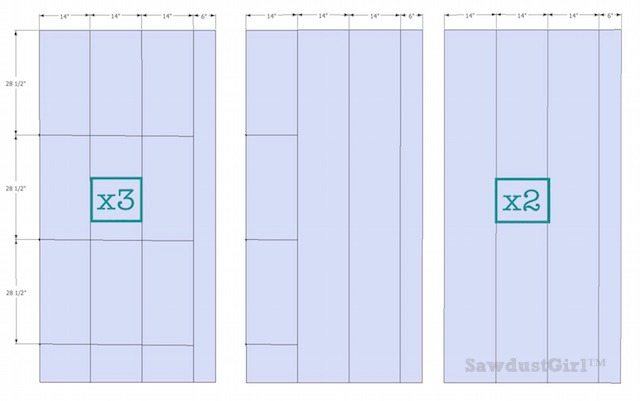
Step 1: Mark and Drill
Mark location for fixed shelves and drill shelf pin holes for adjustable shelves.
It’s definitely easier to drill your shelf pin holes before you assemble your cabinet. I create a custom template out of inexpensive pegboard. This ensures that my shelf pins are even and perfectly spaced and located. Follow my tutorial for drilling holes and using a stop block.
These bookshelves are too tall to have adjustable shelves span the entire case. For stability, I’ve installed a fixed shelf near the top and in the bottom 1/3.

Step 2: Install fixed shelves to one side
Use wood glue and 1 3/4″ wood screws to assemble the fixed shelves to side 1. Use right angle clamps to make sure your shelves are square to the side.
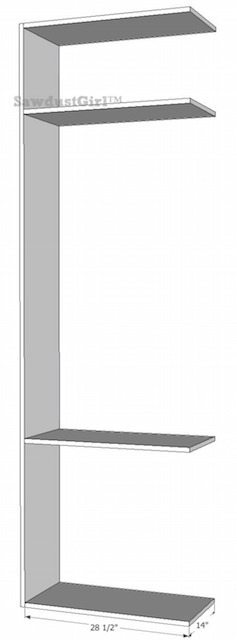
Step 3: Attach second side
Attach side 2 with wood glue and screws as well.
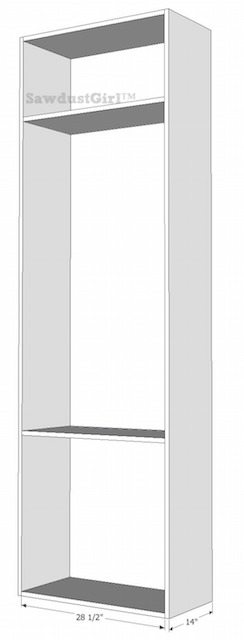
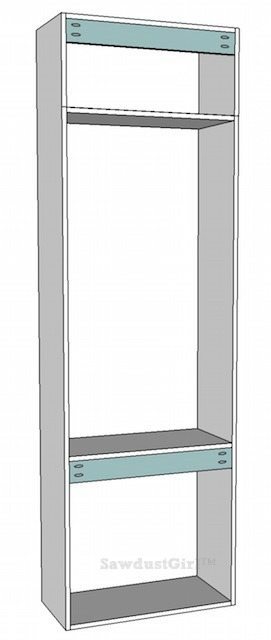
Step 4: Install Nailers
Nailers are necessary for securing the cabinet to the wall (into studs) during installation for built-ins. Use wood screws or pocket hole screws to secure the cleat at the back of the cabinet. For tall cabinets like this, I generally put a nailer at the top and under a lower fixed shelf or at the bottom.
Step 5: Attach back
Square up your bookcase and then attach your backing material. This can be secured with 1″ or longer staples or wood screws.
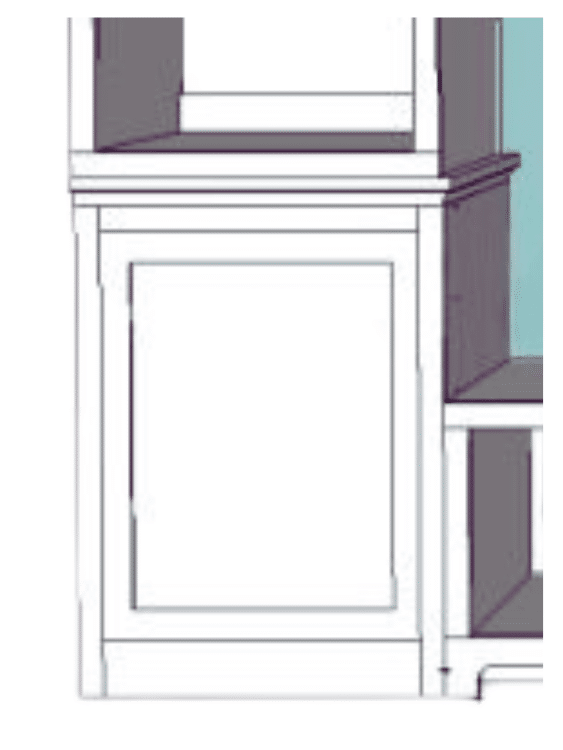
Step 6: Build Cabinet Base
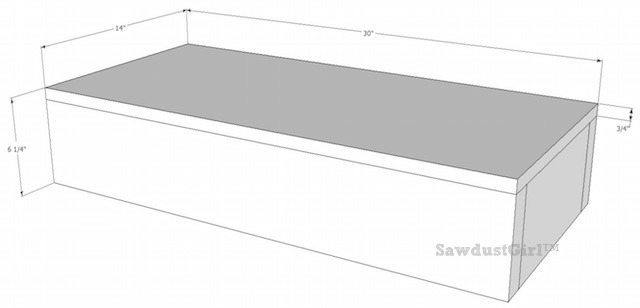
Depending on the height of your baseboard, you will need to adjust the height of your cabinet base so your baseboard doesn’t cover your bottom faceframe once installed.
My baseboards are 5 1/2″ tall so I built my cabinet base out of 2×6 (which are 5 1/2″ tall) and topped it with 3/4″ material.
Step 7: Configure and Install Bookcases
Configure your bookcases depending on the space you have to fill and the look you want to create. Butt the bookcases up together or leave some space in between each. Your custom configuration will require you to modify your faceframe.
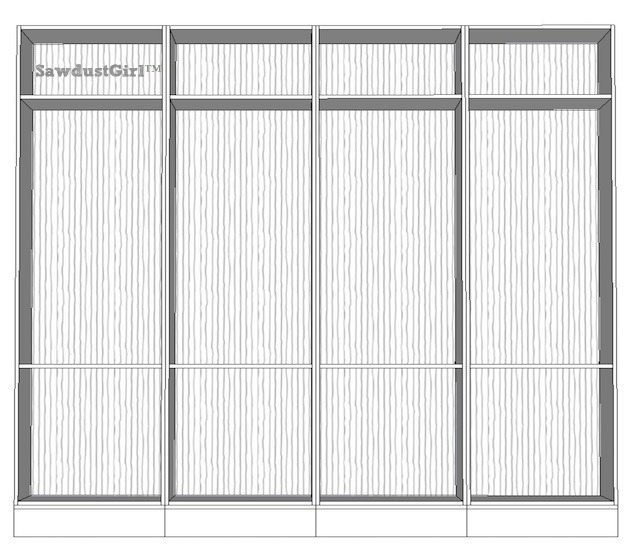
*Secure your bookcases to the wall studs through the nailers you installed at the back of the bookcases. Use shims under or behind the bookcases to ensure each bookcase is level and plumb before securing it to the wall.
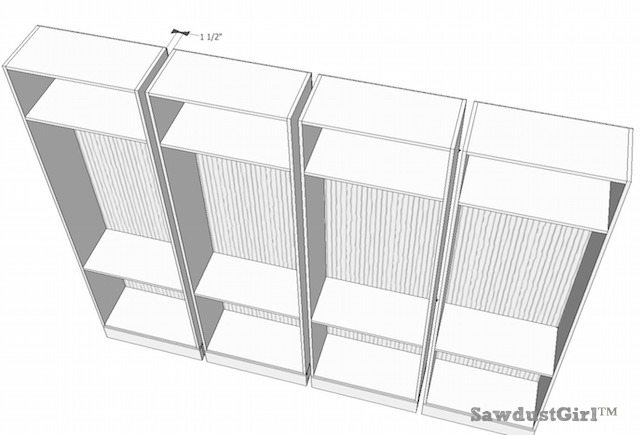
I left 1 1/2″ in between each bookcase. I put scraps of 2×4 in between to maintain even spacing. This allowed me to use a wider faceframe for a chunkier look (which I like).
Step 8: Install Faceframe
Because the built-ins are so large, it would be super difficult to impossible to build and attach a one piece faceframe. The faceframe will be installed in pieces using wood glue and brad nails. The drawings below show 1×2 faceframe material.
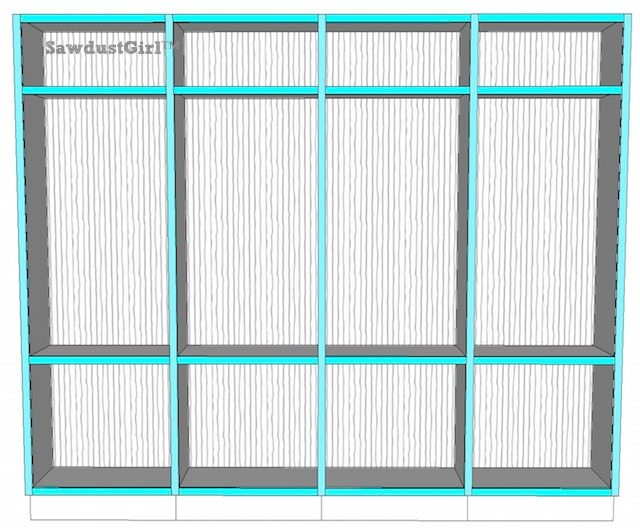
Stiles
Start with the vertical pieces (stiles). A 1×2 should completely cover the 3/4″ sides of the adjoining bookcases leaving no overlap — so the faceframe is flush with the bookcase sides. To maintain uniformity, make sure to install the outside stiles flush with the bookcase side. This will mean the outside faceframe sticks out beyond the outside bookcase by 3/4″.
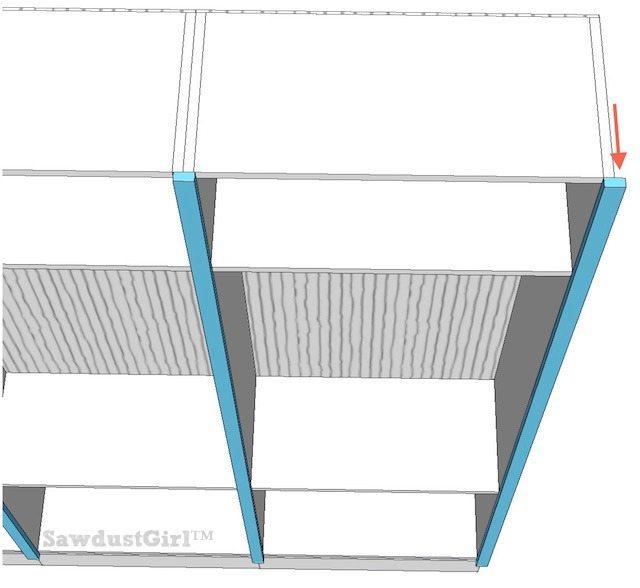
The faceframe stiles should extend beyond the bottom of the bookcases by 3/4″ so it will be flush with the bottom rail once installed.
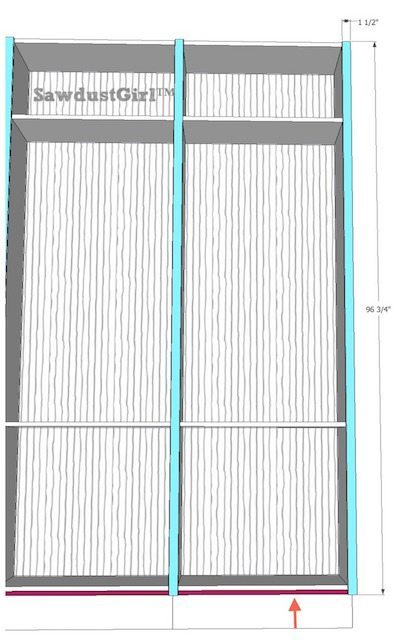
If you left space between each bookcase, you’ll have to use a wider faceframe stile.
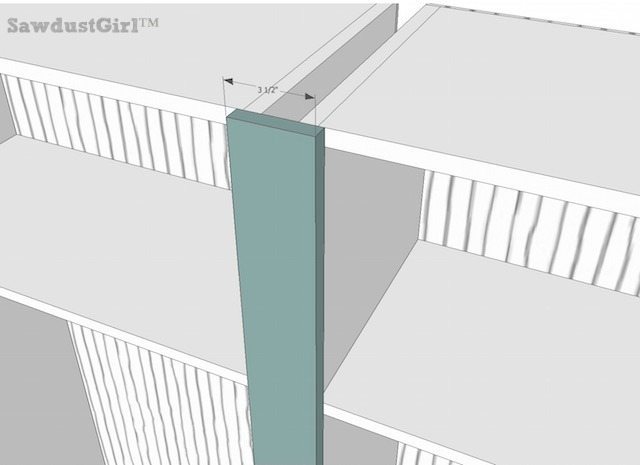
Rails
Install faceframe horizontal pieces (rails) with wood glue and brad nails as well. The rails should be flush with the top of each fixed shelf.
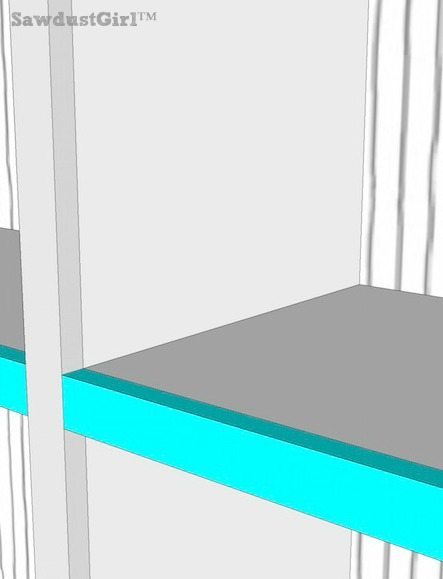
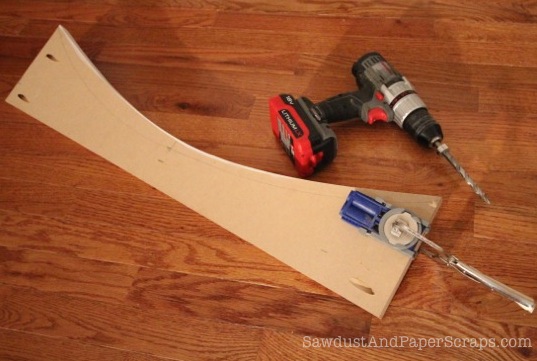
If wanting arched bookcases, simply cut arches into your top rail and install with pocket screws.
Step 9: Baseboard
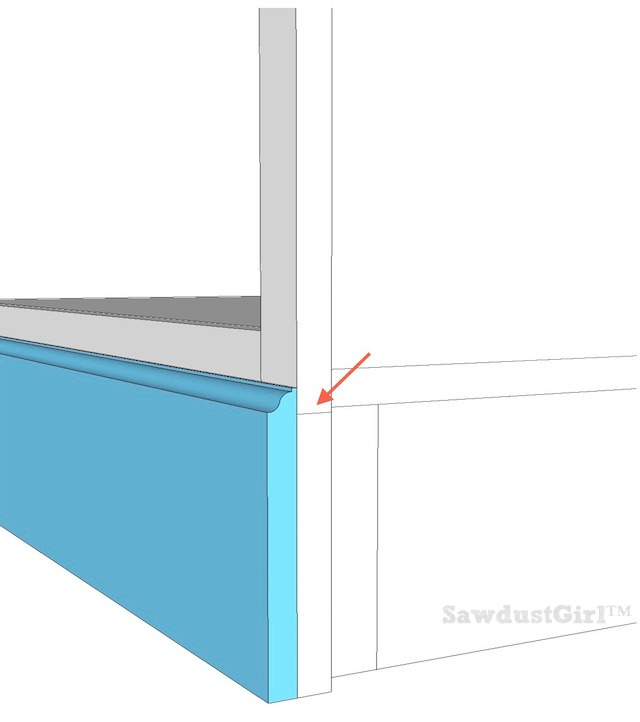
Make sure to leave a portion of your bottom stile exposed. This is why the height of your cabinet base is important. Install with brad nails.
Step 10: Crown Molding
Depending on how much faceframe rail you leave exposed, you may need to add some scrap wood blocks behind your crown moulding to give you something into which you can nail the crown.
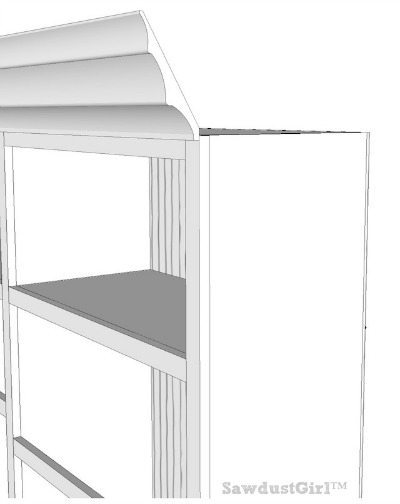
Check out my post on crown molding templates or adding crown molding to cabinets.
*Install adjustable shelves. I put my shelves in place and then glued and nailed a faceframe rail onto each shelf, leaving enough space on the sides of each rail to allow the shelves to be removed and relocated.

You are very kind to post these plans online. Thank-you. I would be willing to pay you for your plans. If you would develop a place to download project plans, I would definitely pay for them. I’m retired now and I would like to build some shelving for my home office. Your plans seem like they will work for me and I’m going to use them. I don’t have all the fancy tools you have; but, I have a nice compound miter saw, a nice circular saw, and Kreg pocket hole and pin hole jigs. I think I’m good to go to build some shelving for my office by modifying your plan online a little bit. Again, I would love to compensate you. I really think you would do well by selling individual project plans. I you already do, please direct me to where I can purchase. BTW, I’m a man–and we like to build too!
The only part that is not clear is that the cleat is installed and then a backing installed. Does the cleat go behind the backing or in front?
Thank you for the tutorial Sandra! It has been super helpful for the built in bookshelves I am making. I made my bookshelves fixed instead of adjustable. Would you caulk the seams of fixed shelves or do you just leave them as is? Thank you!
Omg, these are gorgeous !! (And ranunculus is one my favorite flowers)I used these for my blog banner
Awesome instructions (thank you)! Wall to wall bookcase <3 <3 <3