• Home
  • About
    • Personal Posts
  • Privacy
  • Shop
    • My Account
    • Checkout
    • Email
    • Facebook
    • Instagram
    • Pinterest
    • Twitter
    • YouTube
Sawdust Girl®

Sawdust Girl®

Renovation, cabinet building and woodworking plans and tutorials. Build like a Girl®

  • My Home
    • Clinton TN House
      • Clinton TN House in Progress
    • Maryville TN House
      • Maryville TN House Tour – Completed Rooms
      • Maryville TN House in Progress
        • Basement
        • Basement Storage Closet
        • Bedroom Office
        • Craft Room
        • Dining Room
        • Entry
        • Garage
        • Guest Bedroom
        • Hallway
        • Jack and Jill Bathroom
        • Kitchen
        • Kitchen Entry
        • Laundry Room
        • Library
        • Living Room
        • Loft
        • Madison’s Room
        • Master Bedroom
        • Master Closet
        • Pantry
        • Porch
        • Powder Room
        • Wes’ Office
    • Illinois House
    • Calderwood Cottage
  • My Workshop
    • Clinton Workshop
  • Build & Breakfast
  • Cabinet Making 101
    • Cabinets
    • Doors
    • Drawers
  • Projects and Plans
    • Countertops
    • Beds
    • Benches
    • Bookshelves
    • Desks
    • Gift Ideas
    • Holiday
      • Christmas
      • Halloween
    • Home Accessories
    • Kids
    • Kitchen Cabinets
    • Lockers
    • Nightstands
    • Organization accessories
    • Recipes
    • Sewing
    • Tables
    • Vanities
    • Wardrobes
    • Woodworking
      • Wood Finishing
    • Workshop
    • Workshop Storage and Organization
  • Remodeling 101
    • Baseboard and Trim
    • crown molding
    • Demolition
    • Door and Window Casings
    • Door Installation
    • Drywall
    • Electrical work
    • Flooring
    • Home Maintenance
    • Painting
    • Plumbing
    • Resources
    • Safety
    • Tile
    • Wall and Ceiling Treatments
  • The Sawdust Diaries
    • Andrea
    • Ava D.
    • Beckie F.
    • Cara C.
    • Courtney B
    • Fawn T.
    • Jenn D.
    • Kelly C.
    • Kristy K.
    • Lara T.
    • Malisa B.
    • Marnie D.
    • Robin C.
    • Val F.
  • Tools
    • Products
    • Tool Reviews & Overviews
    • Inspiration & Ideas

Skull Book Ends

All Posts, Halloween, Kids

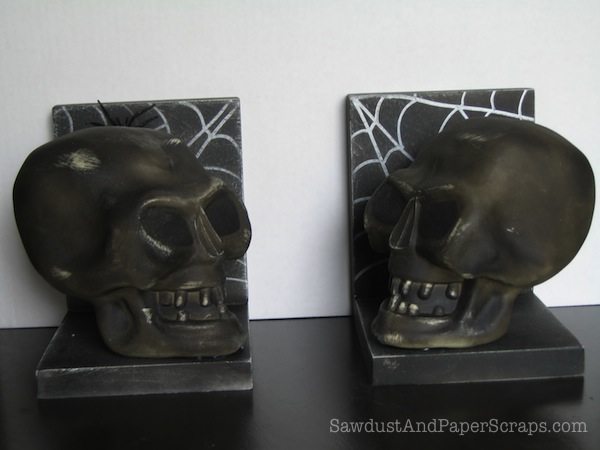
skull bookends

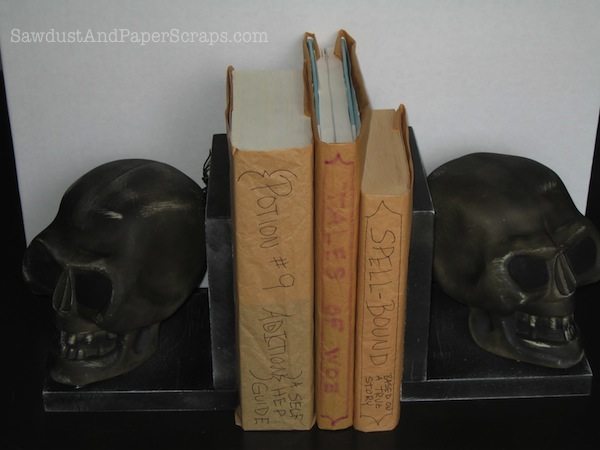
It turns out I bought about a dozen of these dollar store skulls last year.  I found them all in my Halloween boxes now that I’m finally getting around to digging through them.  {Apparently I thought they were going to run out and I stocked up!}

I just threw those book covers together so don’t judge.  But the titles are pretty funny I think!

“Potion #9 Addiction:  a self help guide”
“Tales of Woe”
“Spell-Bound:  based on a true story”


{Hahahaaaa hahhaha   haa!  Sometimes I just amuse myself!}

OK, back on task!

I am replacing all the tchotchkes in the Library {Whatever room} with spooky fare so I decided that some bookends would be in order.
Halloween skull bookend tutorial

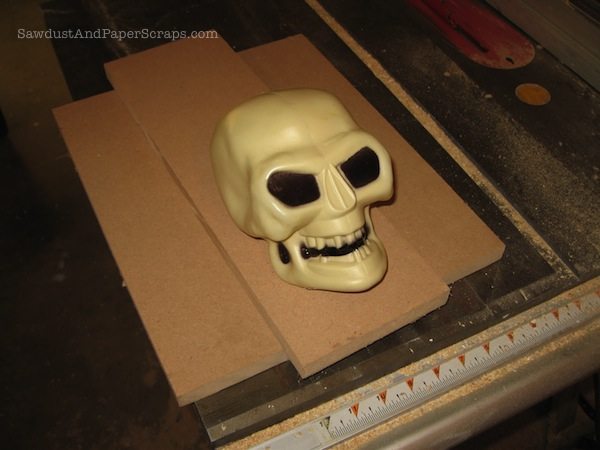
I’m using some scrap MDF and a skull {x2 because that’s how many I’m making}.

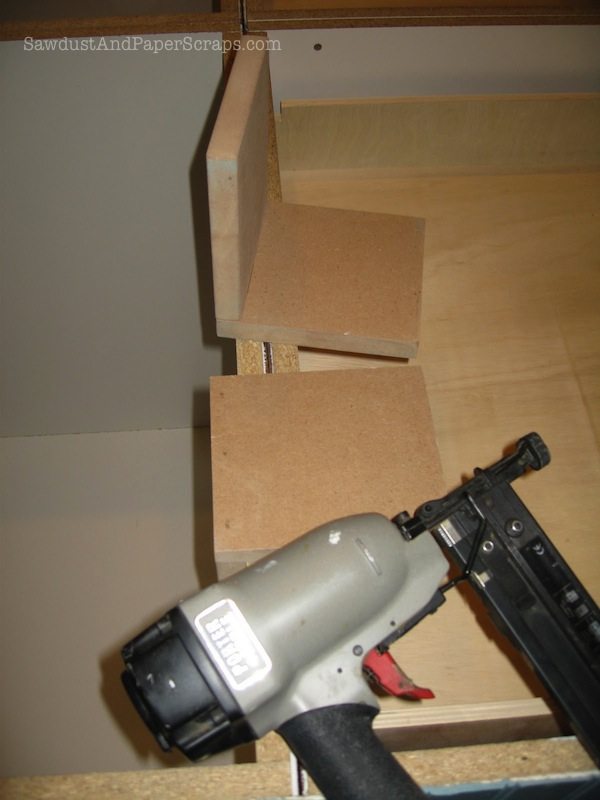
1.  First, decide how big to cut your MDF.  I cut mine 6″ tall and 5″ wide.

2.  Sand all the corners so they’re not sharp.

3.  Glued and nailed the MDF pieces together, like so.

Skull bookend tutorial


4.  Lightly sprayed the skulls with black paint.

5.  Primed the MDF with Problock, oil based primer from Sherwin Williams.  Let it dry and then sanded the edges smooth.  {Refer to this tip for more on that.}

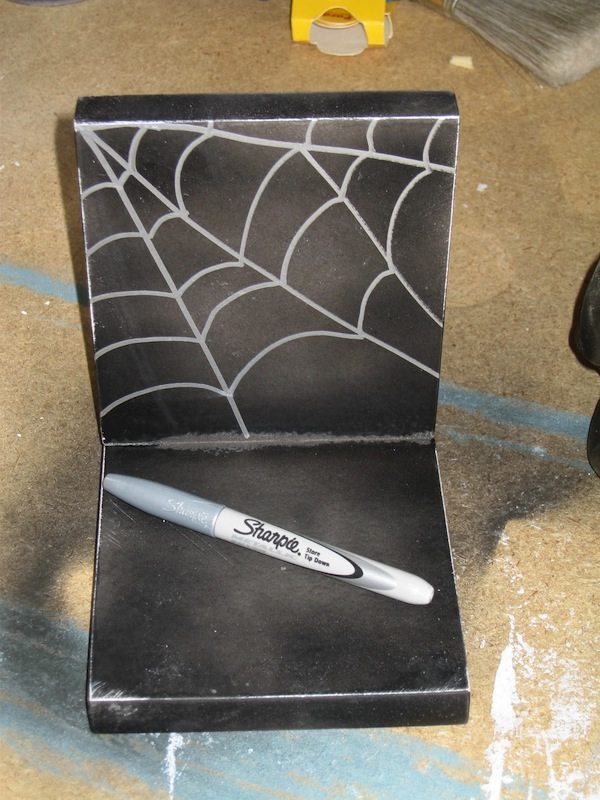
6.  Then I spray painted the bookend black and distressed the edges.    Set the skull on that…but it needed something else.

Skull bookend tutorial 2

7.  I used a silver Sharpie to draw a big spiderweb on my bookend.
spiderweb bookend

8.  Hot glued the skulls in place.  {I didn’t even burn myself again and my previous blisters are almost completely healed!}
skull bookends 3


I have 9 days until my Halloween party.
Yep, I sent the invitations so there’s no turning back now!
It’s not like I HAVE to do any more Halloween projects, but I already purchased a garage full of “crap” for them so I might as well use it all.
I finally got to a stopping point on my stinking island project.  I’m not completely done but I can take a break now.  So I’m shifting all my attention to Halloween for the next week.  Then I’ll shift to cleaning my house.  Then to preparing some frozen drinks and food items.  Oh, and I have to complete my costume!
I’m determined to just go with it, where ever I am next Friday!  Clean house?  Projects done?  Basement cleared of construction debris?  Whatever!  It’s Halloween so the chaos just adds…something.

October 20, 2010 · 18 Comments

« “Trapped Soul” {Halloween Decoration}
DIY Beaded Chandelier Tutorial »

Comments

  1. Chris says

    October 20, 2010 at 11:25 am

    Those bookends are great! You are just so creative!

    Reply
  2. Sourkraut says

    October 20, 2010 at 12:21 pm

    Now you're making me wish I'd bought even more at the Dollar Store! My husband might not think that's possible but I doubt I have the supplies on hand to make something this great. They definitely don't look like cheap $1 skulls by the time you finished with them.

    Reply
  3. Stephanie says

    October 20, 2010 at 3:00 pm

    Those are fun! Yeah, why do we do that? Buy up so many of one item…just in case. Your house, your party, it will all come together.

    Reply
  4. Life in Rehab says

    October 20, 2010 at 4:31 pm

    *Furiously scribbles instructions* Those would look great in my foyer display flanking some classic horror. I may have to get on this pronto!

    Reply
  5. Glory says

    October 20, 2010 at 4:48 pm

    I wanna be like you when I grow up. ;-)Sure wish I'd taken Wood Shop in High School. Maybe I can try a little when my kids are older.Mmmm wooood…

    Reply
  6. Tuesdee says

    October 20, 2010 at 7:47 pm

    Those are Great!!!I need more tools so I can play with wood too!! 🙂 I know what I'm asking Santa for, for Christmas… 🙂

    Reply
  7. Delia says

    October 20, 2010 at 8:07 pm

    These are so cool my friend! You made those cheap plastic skeletons look really expensive. Amazing.

    Reply
  8. stephaniegiese says

    October 21, 2010 at 2:09 am

    The Spider webs are my favorite part!! What a cute accessory it could even be without the skulls for a little boy's Spiderman room! Or a play set…I could totally see making one to use as a backdrop for some Spiderman action figure imaginative play. 🙂

    Reply
  9. melissasamuels says

    October 21, 2010 at 2:48 am

    So creative!! Love it!

    Reply
  10. Cristie says

    October 21, 2010 at 2:53 am

    These are so cool. I'm need to go to the dollar store more often. Have a lovely week.

    Reply
  11. Dacia says

    October 21, 2010 at 6:29 am

    Another great project!

    Reply
  12. Katie says

    October 21, 2010 at 11:48 am

    LOVE these book ends! I'm adding this to my Halloween 2011 project list! lol. Thanks for linking up to Sew Woodsy!

    Reply
  13. Desert Domicile says

    October 21, 2010 at 6:31 pm

    I love those bookends! If I didn't know you made them, I would've asked you where you bought them haha

    Reply
  14. Whimsical Creations says

    October 22, 2010 at 1:50 am

    How creative!

    Reply
  15. Katie says

    October 22, 2010 at 12:28 pm

    I featured this on Sew Woodsy today!http://sewwoodsy.blogspot.com/2010/10/friday-features-giveaway-winner.htmlCongrats & hope to see you back next week!

    Reply
  16. Jami says

    October 23, 2010 at 4:31 am

    uh-oh! Looks like I need to go to the Dollar store again! These turned out great! Thanks for linking up to Theme Party Thursday. 🙂

    Reply
  17. morganmadeit says

    October 24, 2010 at 10:45 pm

    Thanks for the great idea! These will look great on our mantel.

    Reply
  18. Metal Wall Art says

    January 23, 2011 at 1:47 pm

    Really eerie book ends. That would look good on a Halloween house. But the do-it-yourself part shouts some frugality, which i like. Maybe I'd try this but with a different design.

    Reply

Leave a Reply Cancel reply

Your email address will not be published. Required fields are marked *

Categories

New Post email notification signup

You Subscribed!

Legal Stuff

Terms of Use

Privacy Policy

Disclosure

Recent Posts

  • Building and Installing a Giant Faux Beam on the Ceiling
  • White Wash Pine Wood Ceiling
  • Lodge and Life Update
  • How to Choose Which Track Saw to Buy in 2021
  • How to Choose a Paint Sprayer to Buy in 2021

Disclaimer:

Although it is my intention to provide accurate plans and clear instructions, not all plans have been tried and tested. Using plans or information found on SawdustGirl.com indicates that you agree with the Terms of Use policy and will accept full responsibility for the process and outcome of any project you attempt. All plans are for private use only. Plans and information published on SawdustGirl.com may not be reproduced, republished or distributed in any manner without written permission from Sandra Powell, Sawdust Girl. Actual projects built using Sawdust Girl plans may be published on your own site without instructions or "tutorial" as long as you provide a link to my original post with full post title or "SawdustGirl.com" as link title.

Copyright © 2022 · anchored theme by <a target="_blank"