• Home
  • About
    • Personal Posts
  • Privacy
  • Shop
    • My Account
    • Checkout
    • Email
    • Facebook
    • Instagram
    • Pinterest
    • Twitter
    • YouTube
Sawdust Girl®

Sawdust Girl®

Renovation, cabinet building and woodworking plans and tutorials. Build like a Girl®

  • My Home
    • Clinton TN House
      • Clinton TN House in Progress
    • Maryville TN House
      • Maryville TN House Tour – Completed Rooms
      • Maryville TN House in Progress
        • Basement
        • Basement Storage Closet
        • Bedroom Office
        • Craft Room
        • Dining Room
        • Entry
        • Garage
        • Guest Bedroom
        • Hallway
        • Jack and Jill Bathroom
        • Kitchen
        • Kitchen Entry
        • Laundry Room
        • Library
        • Living Room
        • Loft
        • Madison’s Room
        • Master Bedroom
        • Master Closet
        • Pantry
        • Porch
        • Powder Room
        • Wes’ Office
    • Illinois House
    • Calderwood Cottage
  • My Workshop
    • Clinton Workshop
  • Build & Breakfast
  • Cabinet Making 101
    • Cabinets
    • Doors
    • Drawers
  • Projects and Plans
    • Countertops
    • Beds
    • Benches
    • Bookshelves
    • Desks
    • Gift Ideas
    • Holiday
      • Christmas
      • Halloween
    • Home Accessories
    • Kids
    • Kitchen Cabinets
    • Lockers
    • Nightstands
    • Organization accessories
    • Recipes
    • Sewing
    • Tables
    • Vanities
    • Wardrobes
    • Woodworking
      • Wood Finishing
    • Workshop
    • Workshop Storage and Organization
  • Remodeling 101
    • Baseboard and Trim
    • crown molding
    • Demolition
    • Door and Window Casings
    • Door Installation
    • Drywall
    • Electrical work
    • Flooring
    • Home Maintenance
    • Painting
    • Plumbing
    • Resources
    • Safety
    • Tile
    • Wall and Ceiling Treatments
  • Sawdust Squad
  • The Sawdust Diaries
    • Andrea
    • Ava D.
    • Beckie F.
    • Cara C.
    • Courtney B
    • Fawn T.
    • Jenn D.
    • Kelly C.
    • Kristy K.
    • Lara T.
    • Malisa B.
    • Marnie D.
    • Robin C.
    • Val F.
  • Tools
    • Products
    • Tool Reviews & Overviews
    • Inspiration & Ideas

Sliding Bit Storage Tray – Workshop Organization

All Posts, Projects and Plans, Workshop (My), Workshop Storage and Organization

I’m still organizing my workshop and I built a cool sliding bit storage tray.  I’ve kinda gotten deep into it and am loving being able to find — everything for which I’ve built a storage compartment so far.  I’ve been using this storage tray for all my driver bits and it’s awesome to go open my drawer, grab the right size of the right style bit and get back to work.
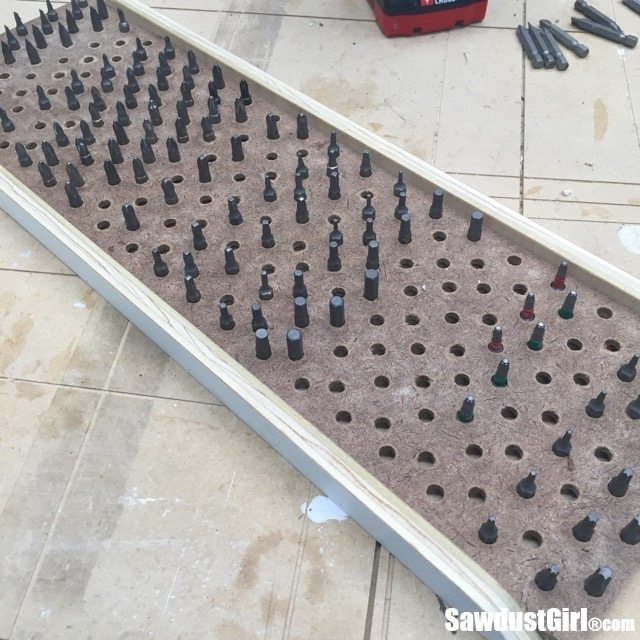
Sliding storage tray to organize bits!

Making a Sliding Bit Storage Tray

I got tired of all the loose bits rolling around in my drawers.  I tried using plastic containers to contain different bits but the containers were not secured in the drawer so they slid around constantly and the chaos was just an invitation for me to throw any odd thing that I didn’t know what to do with into the drawer as well.  So I took my “odds and ends” drawer, dumped it out on my assembly table and sorted all the loose bits into a pile and pushed everything else into a corner to be dealt with later.
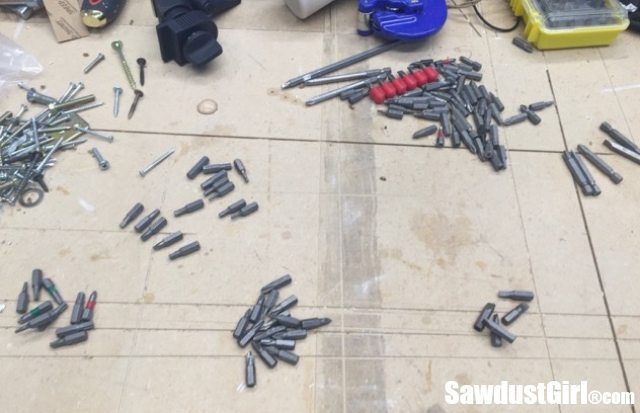
How to make a Sliding bit Storage Tray

I decided to use a piece of pegboard as my base, although that turned out being more work in the end so I’d just use 1/4″ MDF to begin with if I were doing it again.
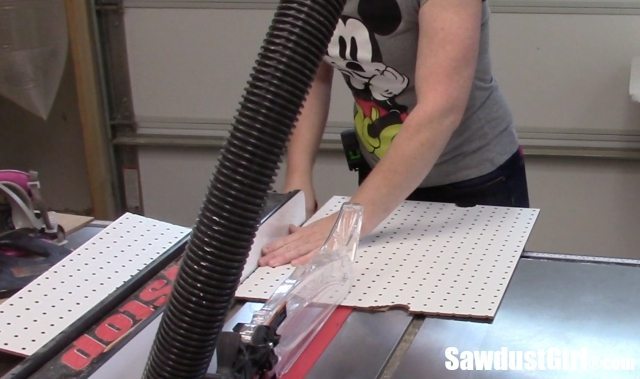
How to make a Sliding bit Storage Tray

I used a speed square to make a grid so I could add more holes.  I used the intersections as my guide and offset the new holes with the existing ones.
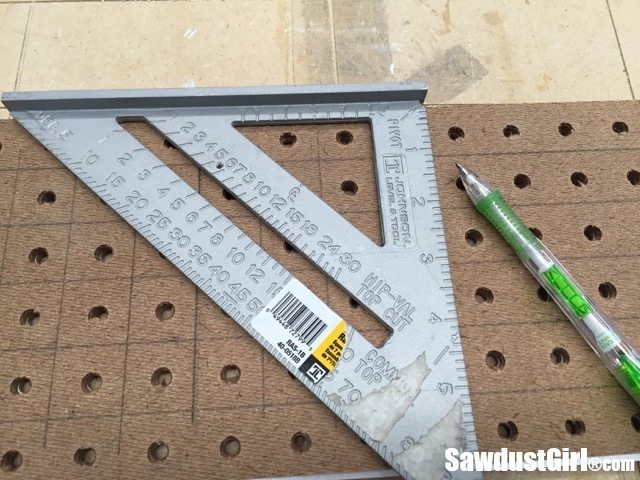
How to make a Sliding bit Storage Tray

I used a drill gauge to figure out what size holes to drill.
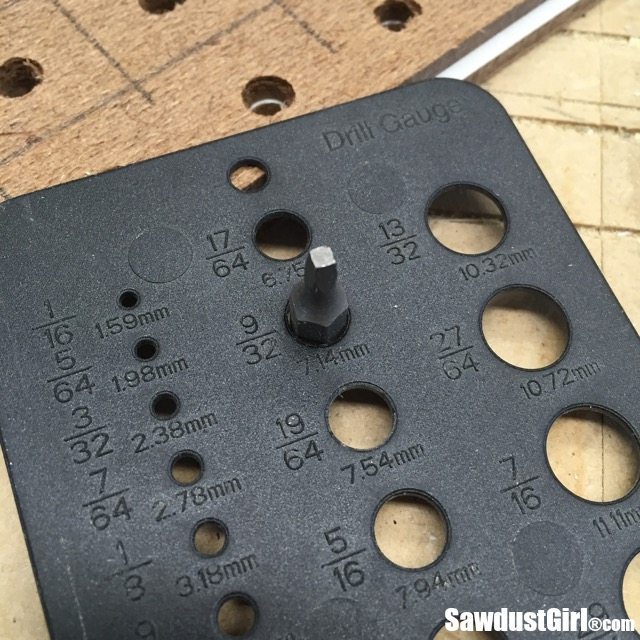
How to make a Sliding bit Storage Tray

I seemed to make sense to me at the time to use the pegboard, however, the existing holes were not actually large enough to hold a bit so I had to drill ALL the holes.
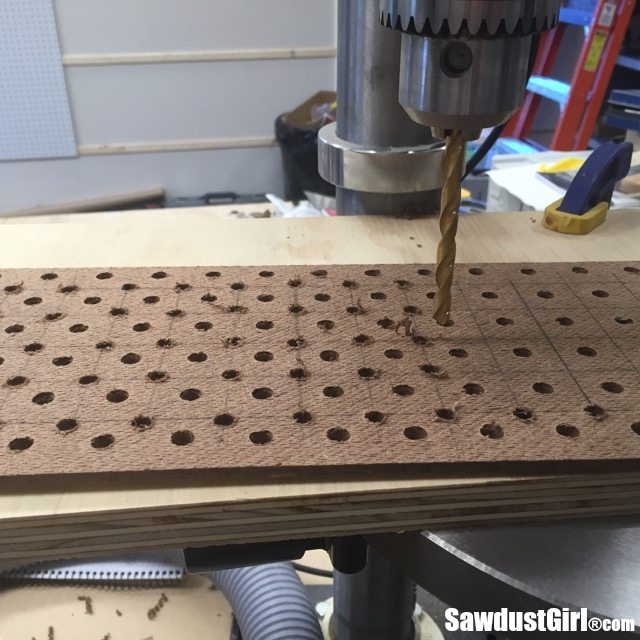
How to make a Sliding bit Storage Tray

And the melamine on the top of the pegboard tore out as I drilled through it so I had to sand it smooth.  It sanded smooth really easily but I ended up sanding off ALL the melamine because I wanted the color to be consistent.
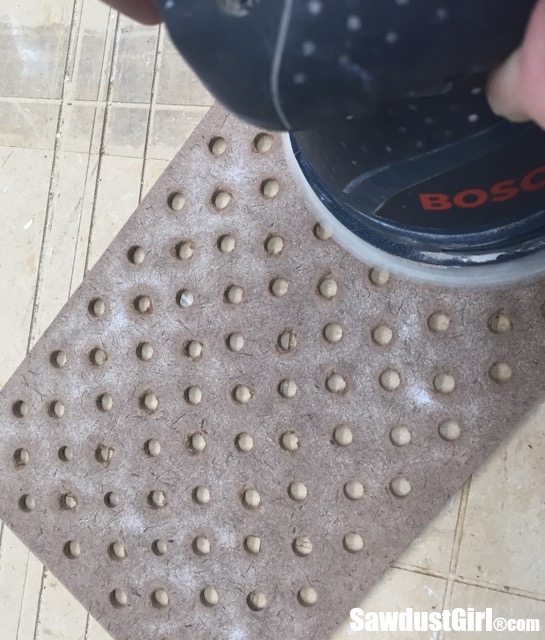
How to make a Sliding bit Storage Tray

Then I cut a bottom and some thin strips out of 1/4″ plywood.  The thin strips are sandwiched between the top and bottom creating some space to allow the bits to seat a little deeper than just the thickness of the top “pegboard”.  They were a little wobbly without the extra depth.
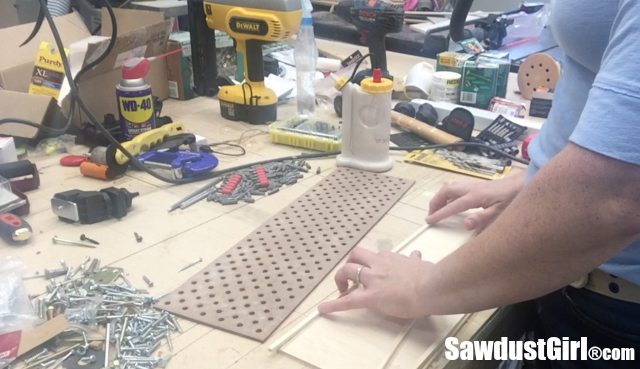
How to make a Sliding bit Storage Tray

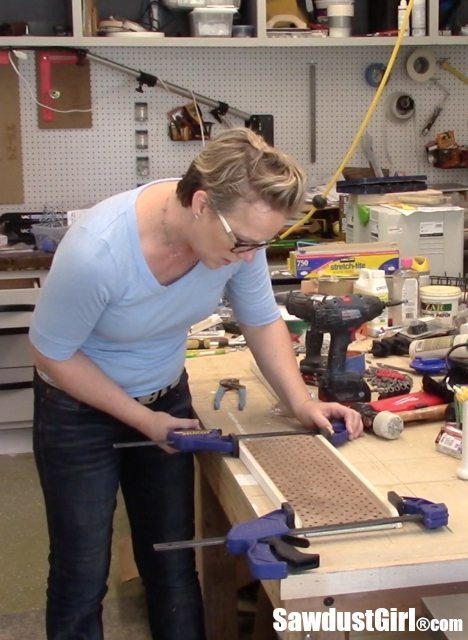
I used glue, tape and heavy objects that were within grabbing distance to hold things in place while the glue set.How to make a Sliding bit Storage Tray
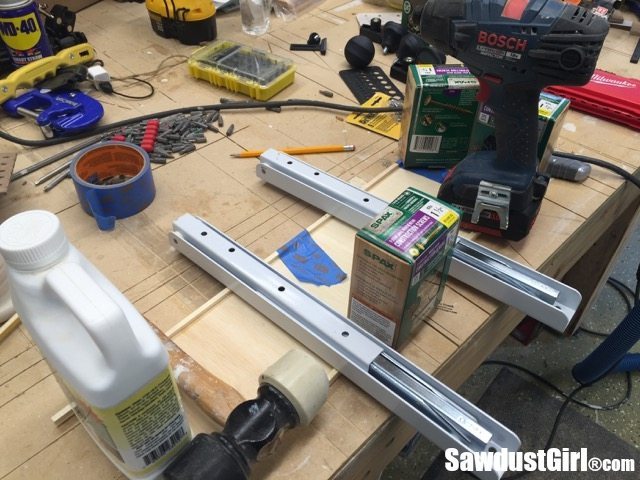
Then I wanted taller pieces on the front and back.  I angled the ends on my miter saw and then used my orbital sander to round over the sharp edges.
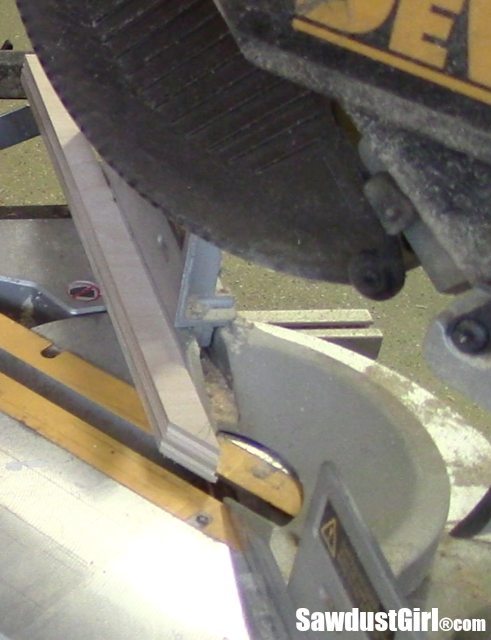
How to make a Sliding bit Storage Tray

I secured these pieces with glue and nails.How to make a Sliding bit Storage Tray
The drawer preparation was simple.  I cut strips of plywood to fit into my drawer.  I added a cross strip to create a compartement in the front of the drawer.
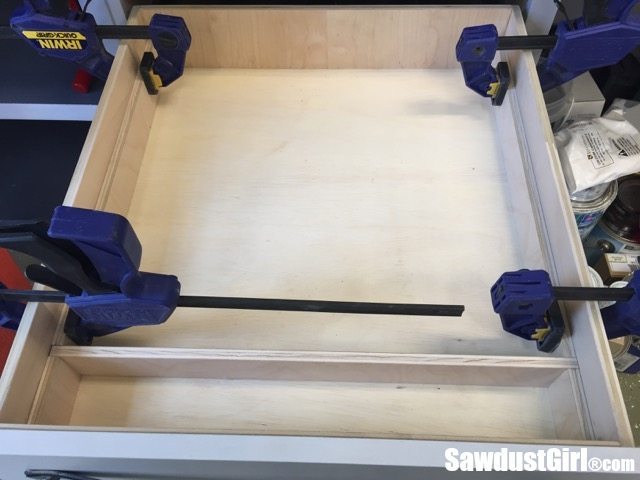
How to make a Sliding bit Storage Tray

I covered the “seam” with another piece of plywood which spanned the full length of the drawer.  I didn’t want my tray to catch the edge of any of those pieces of wood.  I wanted to make sure my sliding bit storage tray would slide smoothly.
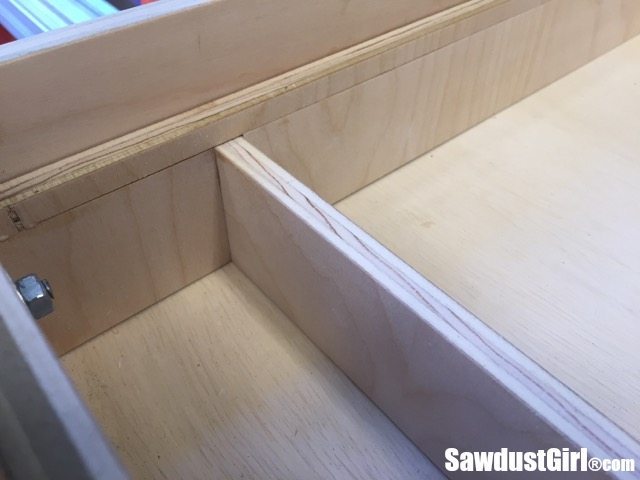
how_to_make_a_storage_tray_for_driver_bits_9

I sanded everything very smooth and added wax as well.  ‘Cause I was worried it might not glide smoothly.
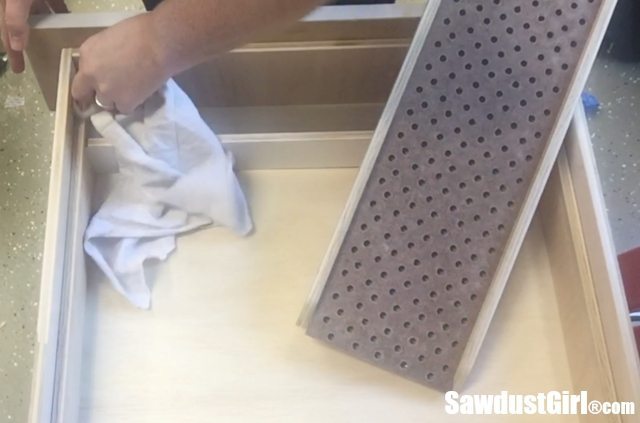
How to make a Sliding bit Storage Tray

Then it was time to sort and store.  I organized them by type of bit and stored them small to large, leaving some room between each type so my collection could grow if needed.
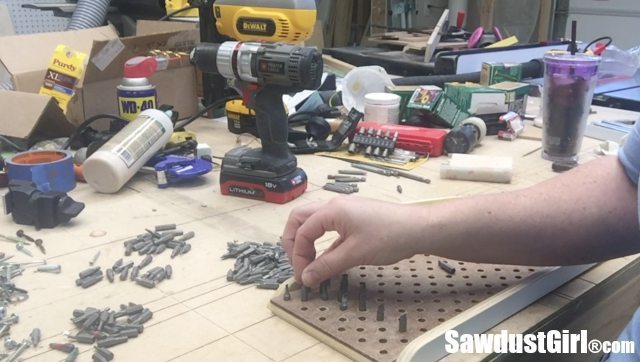
How to make a Sliding bit Storage Tray

It’s a thing of beauty!

Sliding storage tray to organize bits!

I put it into place and that baby slid like there was no tomorrow!
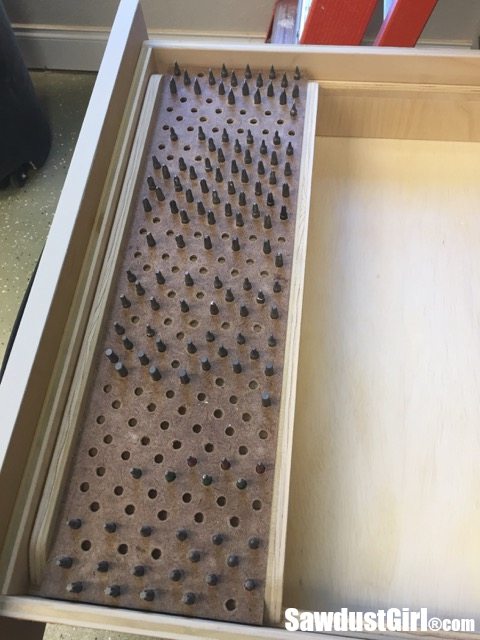
How to make a Sliding bit Storage Tray
And that front compartment?  It houses a couple interchangeable bit screw drivers I have.  I actually added another piece of plywood creating two compartments since there was room for it.  The left side now holds my long pocket screw bits.  There was so much room left in this drawer that I’ve added a few more customized “bit storage” sections:  Drill Bit Storage Tray, Drawer storage, and Adjustable Drawer Divider Storage
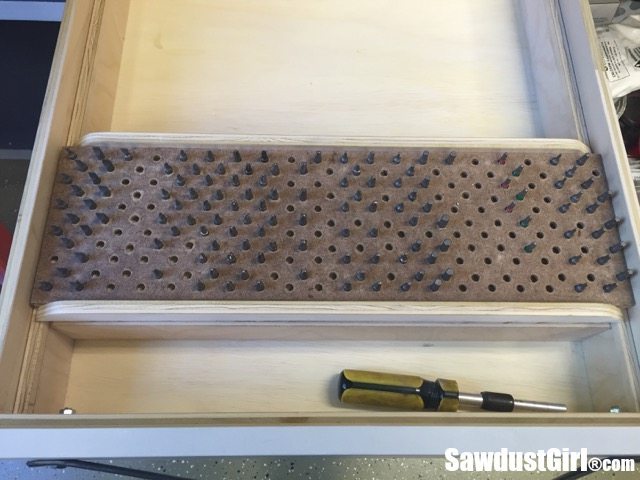
How to make a Sliding bit Storage Tray

November 4, 2015 · 1 Comment

« Router Bit Storage Drawer
Workshop in Need of Work »

Comments

  1. Michel MARIE says

    October 29, 2018 at 10:00 am

    Très intéressant. De bonnes idées pour le rangement et l’organisation de son atelier.

    Reply

Leave a Reply Cancel reply

Your email address will not be published. Required fields are marked *

Categories

New Post email notification signup

You Subscribed!

Legal Stuff

Terms of Use

Privacy Policy

Disclosure

Recent Posts

  • January 2023 Lodge Update
  • Lodge Update – Floors, Cabinets, Countertops, and Appliances
  • Lodge Kitchen Cabinet Progress
  • Halloween Mad Gab – Halloween Party Ideas
  • Concrete Backsplash or Vertical Wall Treatment

Disclaimer:

Although it is my intention to provide accurate plans and clear instructions, not all plans have been tried and tested. Using plans or information found on SawdustGirl.com indicates that you agree with the Terms of Use policy and will accept full responsibility for the process and outcome of any project you attempt. All plans are for private use only. Plans and information published on SawdustGirl.com may not be reproduced, republished or distributed in any manner without written permission from Sandra Powell, Sawdust Girl. Actual projects built using Sawdust Girl plans may be published on your own site without instructions or "tutorial" as long as you provide a link to my original post with full post title or "SawdustGirl.com" as link title.

Copyright © 2023 · anchored theme by <a target="_blank"