• Home
  • About
    • Personal Posts
  • Privacy
  • Shop
    • My Account
    • Checkout
    • Email
    • Facebook
    • Instagram
    • Pinterest
    • Twitter
    • YouTube
Sawdust Girl®

Sawdust Girl®

Renovation, cabinet building and woodworking plans and tutorials. Build like a Girl®

  • My Home
    • Clinton TN House
      • Clinton TN House in Progress
    • Maryville TN House
      • Maryville TN House Tour – Completed Rooms
      • Maryville TN House in Progress
        • Basement
        • Basement Storage Closet
        • Bedroom Office
        • Craft Room
        • Dining Room
        • Entry
        • Garage
        • Guest Bedroom
        • Hallway
        • Jack and Jill Bathroom
        • Kitchen
        • Kitchen Entry
        • Laundry Room
        • Library
        • Living Room
        • Loft
        • Madison’s Room
        • Master Bedroom
        • Master Closet
        • Pantry
        • Porch
        • Powder Room
        • Wes’ Office
    • Illinois House
    • Calderwood Cottage
  • My Workshop
    • Clinton Workshop
  • Build & Breakfast
  • Cabinet Making 101
    • Cabinets
    • Doors
    • Drawers
  • Projects and Plans
    • Countertops
    • Beds
    • Benches
    • Bookshelves
    • Desks
    • Gift Ideas
    • Holiday
      • Christmas
      • Halloween
    • Home Accessories
    • Kids
    • Kitchen Cabinets
    • Lockers
    • Nightstands
    • Organization accessories
    • Recipes
    • Sewing
    • Tables
    • Vanities
    • Wardrobes
    • Woodworking
      • Wood Finishing
    • Workshop
    • Workshop Storage and Organization
  • Remodeling 101
    • Baseboard and Trim
    • crown molding
    • Demolition
    • Door and Window Casings
    • Door Installation
    • Drywall
    • Electrical work
    • Flooring
    • Home Maintenance
    • Painting
    • Plumbing
    • Resources
    • Safety
    • Tile
    • Wall and Ceiling Treatments
  • Sawdust Squad
  • The Sawdust Diaries
    • Andrea
    • Ava D.
    • Beckie F.
    • Cara C.
    • Courtney B
    • Fawn T.
    • Jenn D.
    • Kelly C.
    • Kristy K.
    • Lara T.
    • Malisa B.
    • Marnie D.
    • Robin C.
    • Val F.
  • Tools
    • Products
    • Tool Reviews & Overviews
    • Inspiration & Ideas

Drawer Storage for Driver Bits

All Posts, Workshop (My), Workshop Storage and Organization

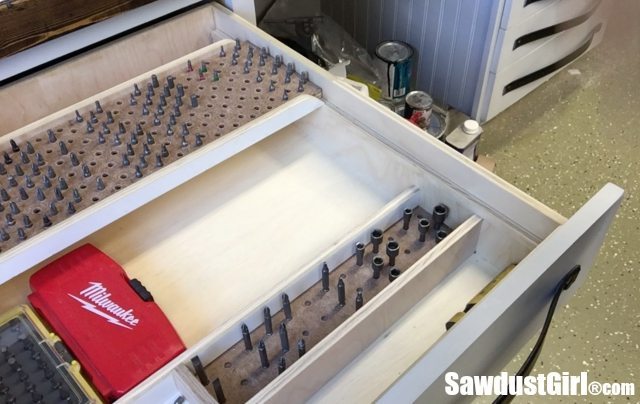
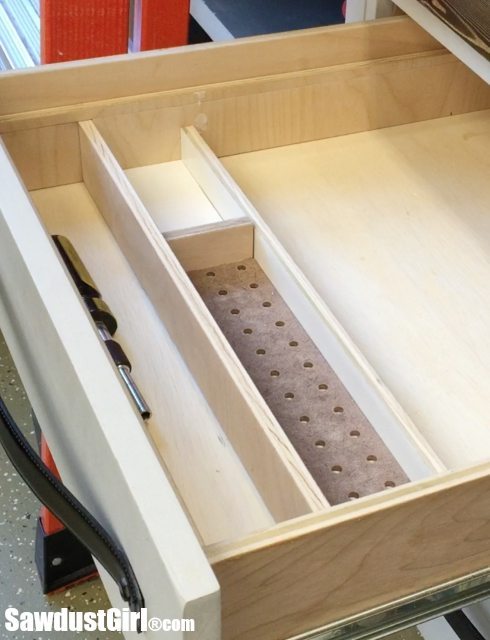
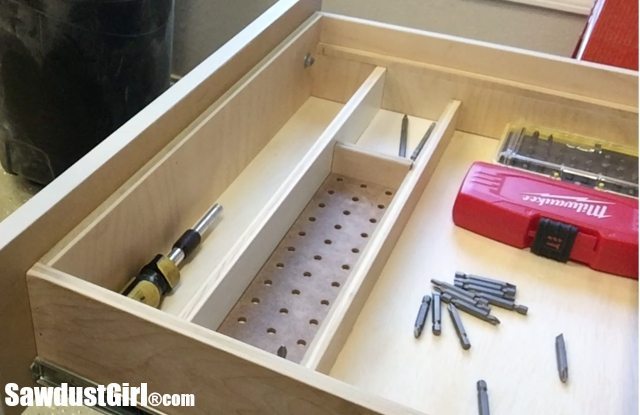
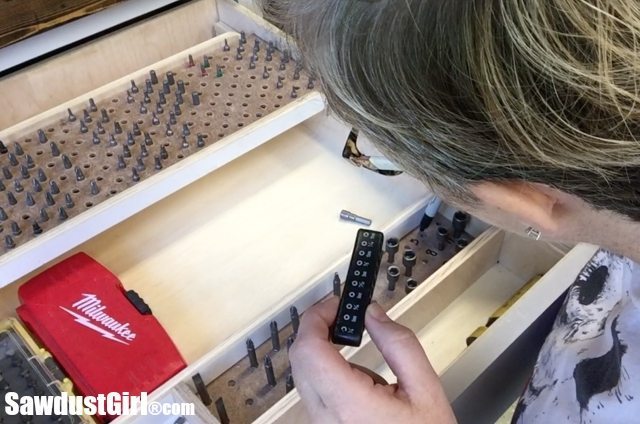
I built a second tier to my driver bit drawer storage.  After building my sliding driver bit storage tray, I needed additional storage for my bits that are too long to store in that top tray.  I don’t have that many, but everything needs a home so these bits needed their own little storage area.

Drawer Storage for Bits

How to make a Sliding bit Storage Tray

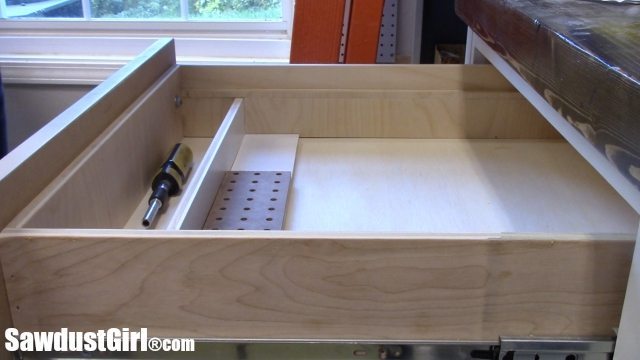
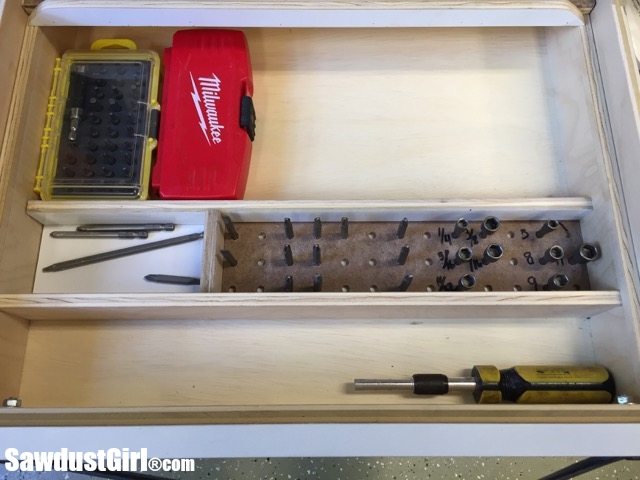
I decided to build that home for the tall bits, right behind the little cubby that houses my screw drivers.

Drawer Storage for Driver Bits

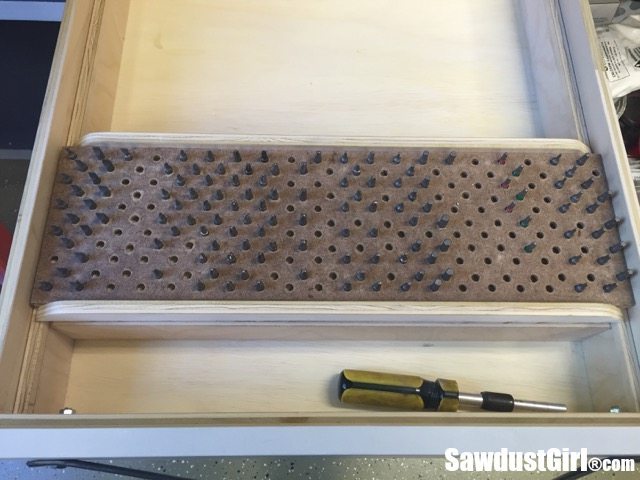
I cut a strip of 1/2″ plywood to fit the width of the drawer and then cut a piece of pegboard to cover about 2/3 the width of that plywood.Drawer storage and organizer for driver bits.

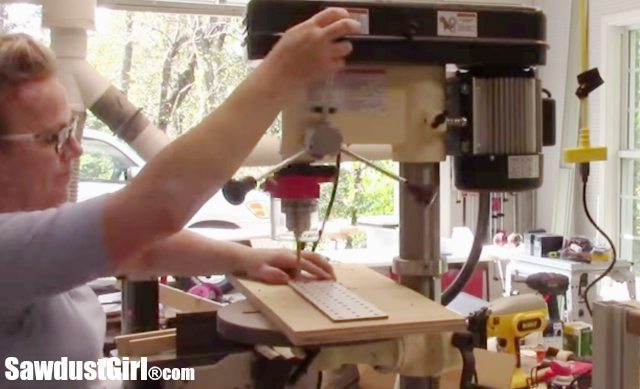
I had to drill the holes in the pegboard larger but I didn’t add additional holes like I did in the sliding bit storage tray.Drawer Organizer for Driver Bits. #storage #organization #workshop

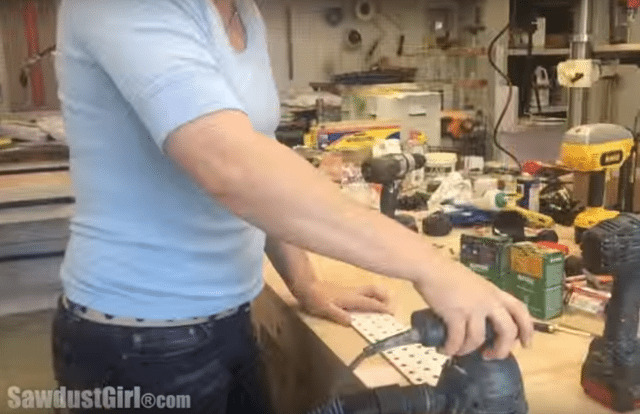
And, once again, drilling holes chipped out the melamine coating on the pegboard so I sanded that smooth (and removed most of the white melamine coating for color uniformity).Drawer Organizer for Driver Bits. #storage #organization #workshop

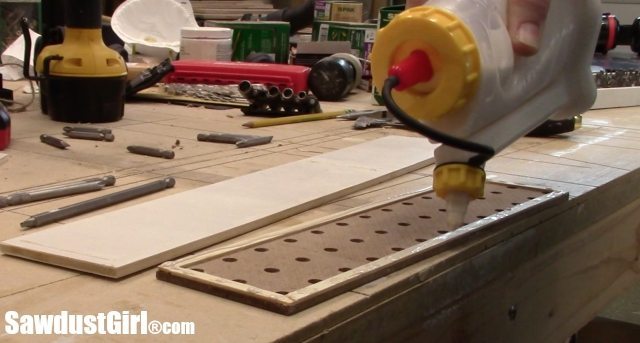
I glued a strip of thin wood around the perimeter of the pegboard and glued that to the 1/2″ plywood base.  This strip created a little extra height to insert the bit shanks into so they don’t wobble.  Drawer storage and organizer for driver bits.

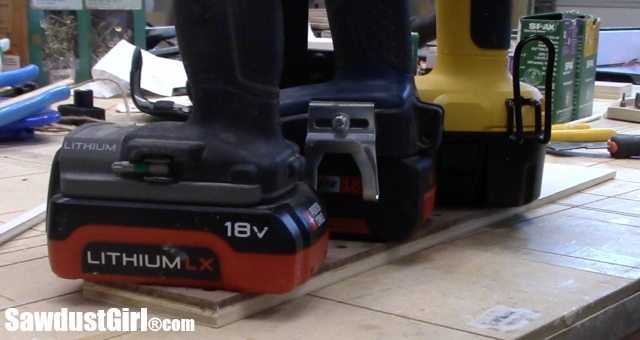
My glue-up weights.Drawer storage and organizer for driver bits.

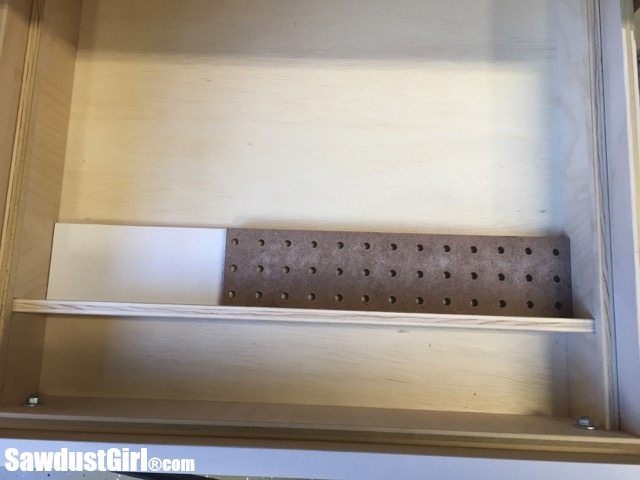
The blank area to the left of the pegboard is for even longer bits which will lay horizontally in this space so I needed a back to keep them from rolling OUT of their home.Drawer storage and organizer for driver bits.

I added a side divider to completely enclose them.Drawer Organizer for Driver Bits. #storage #organization #workshop

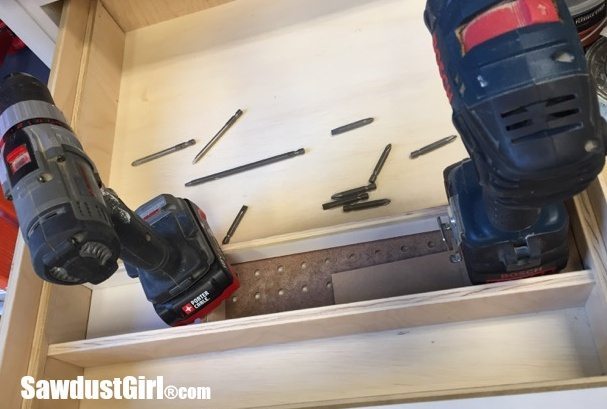
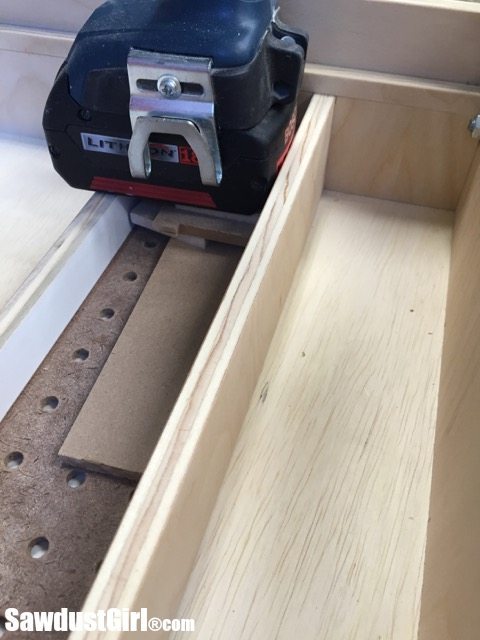
I glued and nailed the back divider onto the 1/2″ plywood bottom and then glued the bottom down so this portion so the bits didn’t lift up the entire storage piece when trying to remove them.  Drawer storage and organizer for driver bits.

Again, my drills are great weights for glue-ups.  I added a stack of scrap wood under the back of the drill to keep the weight even.Drawer storage and organizer for driver bits.

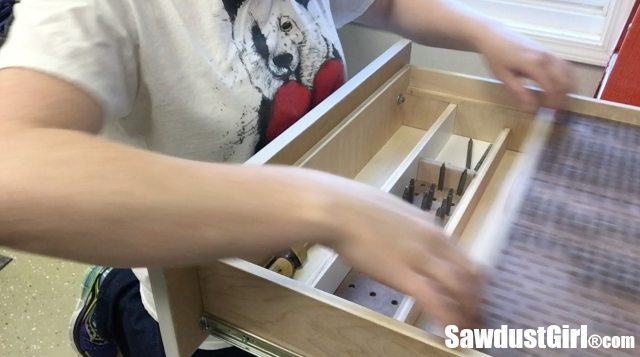
I’m repeatedly surprised by how much of a time and sanity saver it is to utilize this drawer storage.  Ever other day I ask myself why I didn’t do this 4 years ago.Drawer Organizer for Driver Bits. #storage #organization #workshop

I have some socket bits (that I don’t ever use but might someday so I better keep them) stored in a little clippy thing that I didn’t want to keep so I hand wrote the sizes of each bit next to it’s home.  Drawer Organizer for Driver Bits. #storage #organization #workshop

AND I hate how messy it looks so I ran out and bought myself a label maker for all my upcoming projects.  BUT I’m really proud of myself for leaving this as is and not redoing it with the label maker. That’s kinda big for me and my perfectionistic tendencies.Drawer storage and organizer for driver bits.

Drawer storage and organizer for driver bits.

November 29, 2015 · 2 Comments

« sCrap Wood Projects – Ideas for your scrap wood pile
DIY Drawer Organizer – With Pegboard »

Comments

  1. Bonnie says

    November 29, 2015 at 1:38 pm

    I was on YouTube and came upon one of your projects and i’m hooked!!! You are so inspirational! I feel I am the only woman in the lumber and tool section at the hardware store. I am not afraid to tackle a home project, however, I do keep the projects small. I find damaged items and fix them (not all successfully). I will be visiting your site for inspiration and motivation. The next project will be expanding my mantel. With the addition of a larger TV, my fireplace mantel looks too small. Wish me luck!

    Reply
    • Sandra says

      November 29, 2015 at 8:02 pm

      Hi Bonnie. Not all my projects are successful either. The key is to keep trying anyway. Good luck with your fireplace mantel!

      Reply

Leave a Reply Cancel reply

Your email address will not be published. Required fields are marked *

Categories

New Post email notification signup

You Subscribed!

Legal Stuff

Terms of Use

Privacy Policy

Disclosure

Recent Posts

  • January 2023 Lodge Update
  • Lodge Update – Floors, Cabinets, Countertops, and Appliances
  • Lodge Kitchen Cabinet Progress
  • Halloween Mad Gab – Halloween Party Ideas
  • Concrete Backsplash or Vertical Wall Treatment

Disclaimer:

Although it is my intention to provide accurate plans and clear instructions, not all plans have been tried and tested. Using plans or information found on SawdustGirl.com indicates that you agree with the Terms of Use policy and will accept full responsibility for the process and outcome of any project you attempt. All plans are for private use only. Plans and information published on SawdustGirl.com may not be reproduced, republished or distributed in any manner without written permission from Sandra Powell, Sawdust Girl. Actual projects built using Sawdust Girl plans may be published on your own site without instructions or "tutorial" as long as you provide a link to my original post with full post title or "SawdustGirl.com" as link title.

Copyright © 2023 · anchored theme by <a target="_blank"