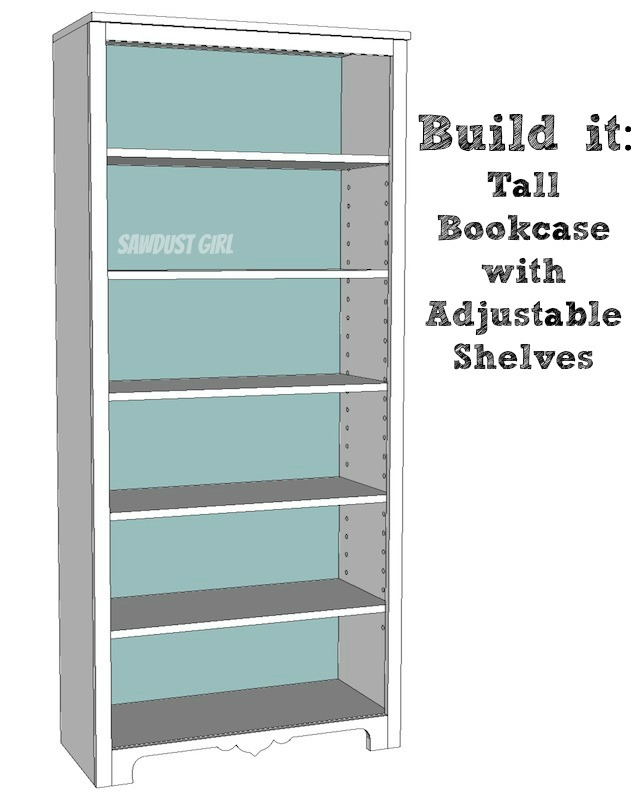
Tall Bookcase with Adjustable Shelves
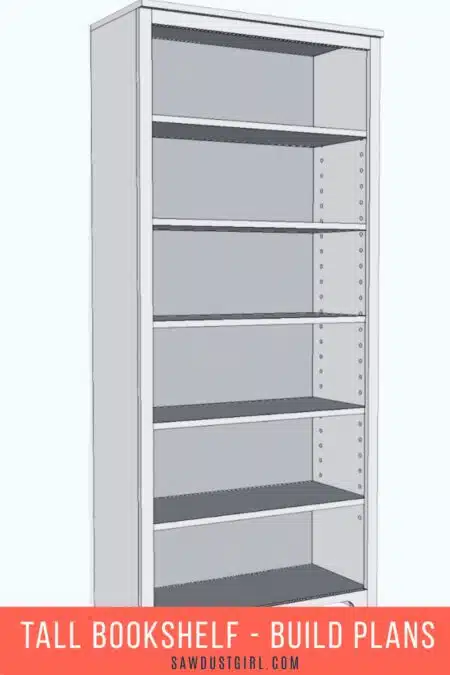
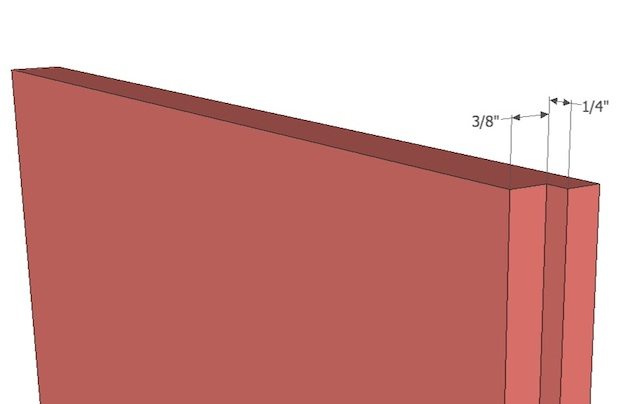
This tall bookshelf with adjustable shelves is 72 3/4″ but you can modify to suite your needs. This plan used a rabbet cut into the bookshelf sides to hide the cabinet back. It’s easiest to cut on a table saw if you have a long out feed table. If you don’t, you could use a plunge router or a circular saw and rip guide with the blade set to cut into the material only 1/4 – 3/8″ deep. Refer to my Dado (and Rabbet) Cabinet building post.
If you don’t feel comfortable with the rabbet, simply attach the back panel to the bookcase back and adjust your face frame to extend 1/4″ on each side to accommodate a side panel to hide the side of the back panel as shown in my Faceframe post.
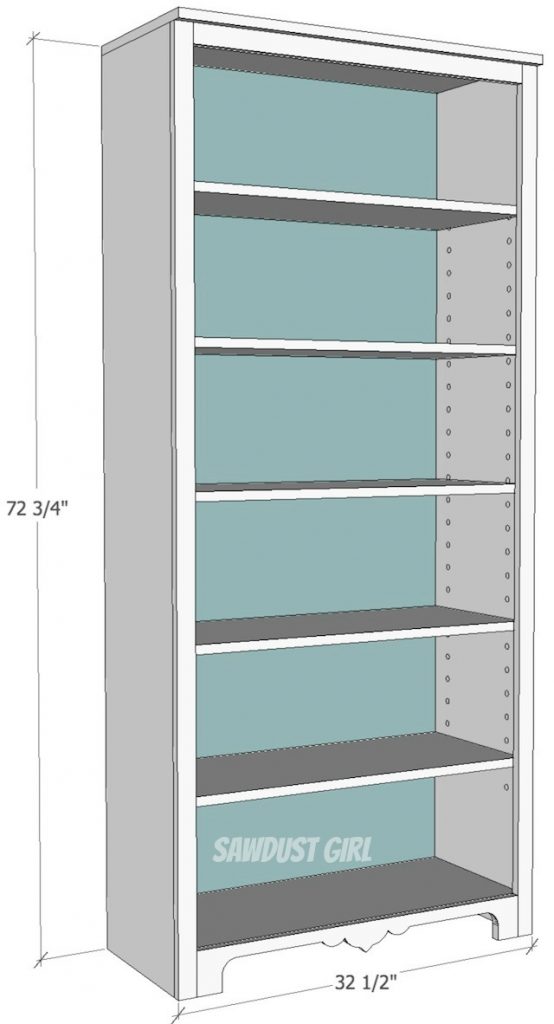
Tall Bookshelf with adjustable shelves
Materials
- pocket hole jig and 1 1/4″ pocket hole screws
- wood glue
- 1×2 pine or poplar for faceframe
- 1/4″ backer material (beadboard, plywood or masonite)
- 34 x 13 1/2″ solid wood piece for bookshelf top (pine or poplar)
- 1 sheet of 3/4 plywood or MDF cut as shown below
- If you want a taller or shorter bookshelf you can modify the sides to whatever length you like.
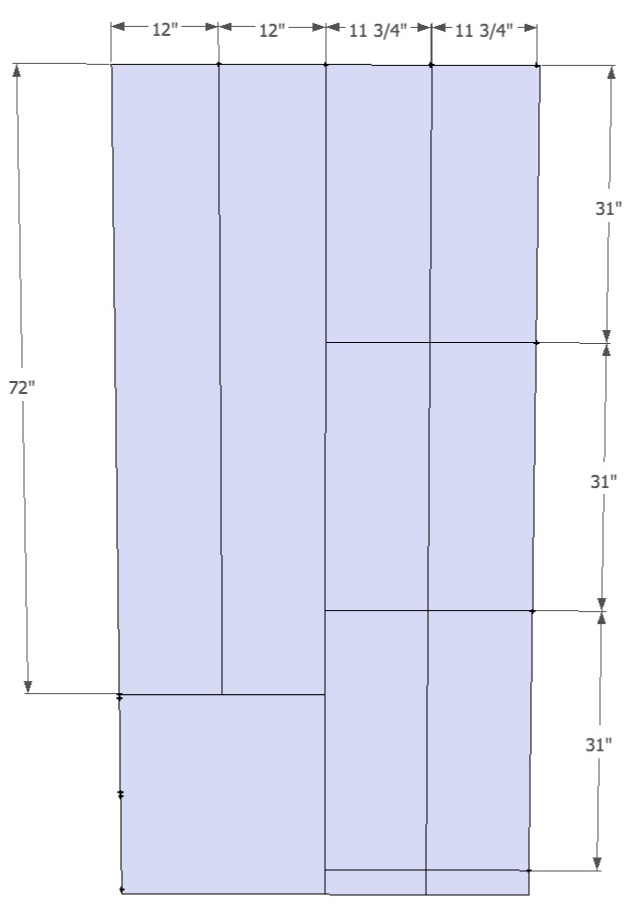
Step 1: Prepare Sides
- cut rabbets 3/8″ deep and 1/4″ wide. (Rabbet/dado/groove tutorial)
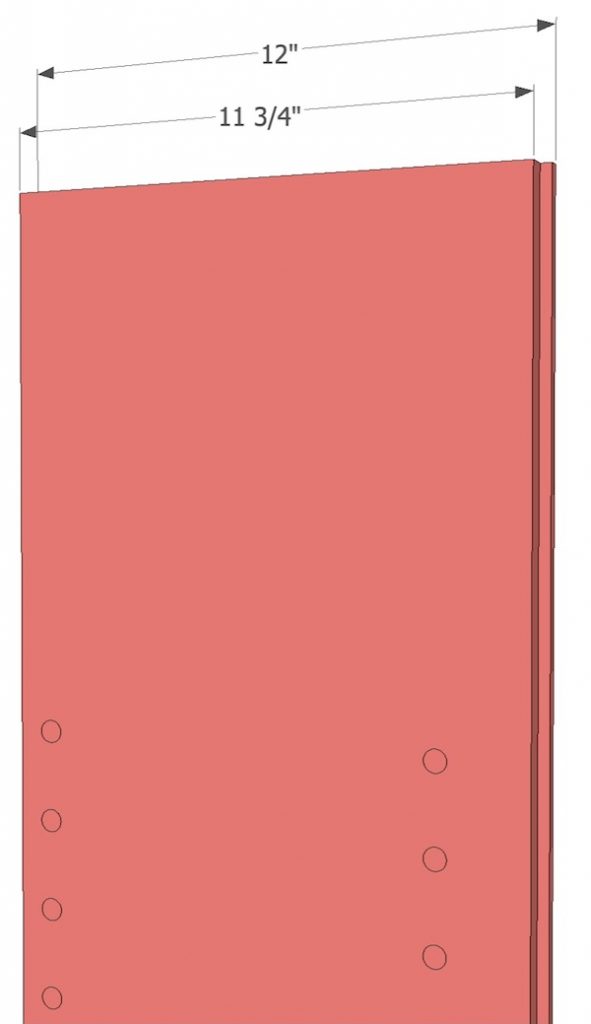
- drill shelf pin holes (Refer to my tutorial on making a template and stop block.)
Step 2: Attach top and bottom to sides
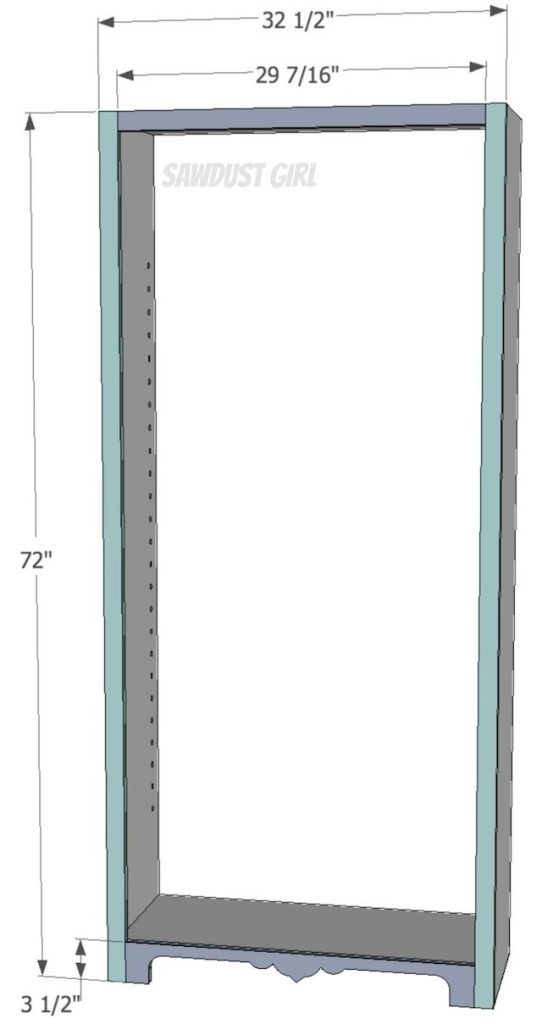
- Bottom should be located up 3 1/2″
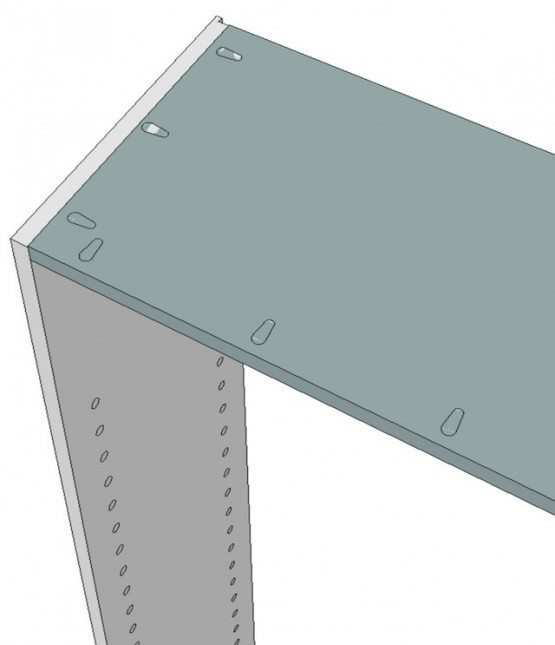
- Use pocket hole screws from the bottom of cabinet so screws are hidden on the inside of bookcase

- When drilling pocket holes, drill 3 holes on on the front of the shelves (top and bottom pieces) too to attach to face frame.
- All pocket holes and screws should be hidden from the inside of the bookcase
- Make sure all pieces are flush on the front so the rabbet is open in the back
Step 3: Build and attach Faceframe
- Use 1×2 for sides and top
- Use 1×4 for bottom. You can leave straight or cut a decorative pattern into it.
- Use pocket holes to construct
- Attach with wood glue and brad nails on styles, pocket holes on top and bottom. Or you can use biscuits. (Build and Attaching Faceframe Tutorial)
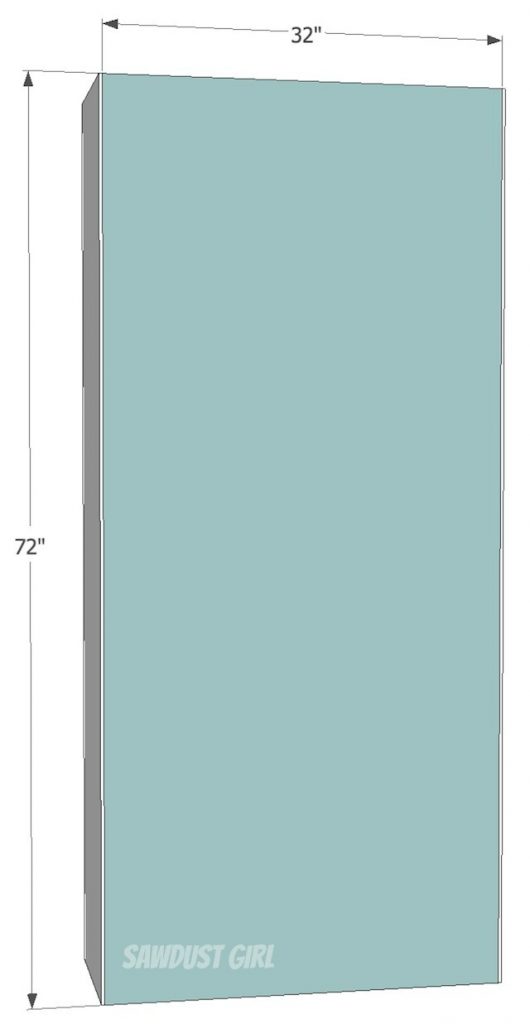
Step 4: Attach back panel
- If you cut rabbets into your sides, insert panel into that recess and nail or staple in place. Be careful to keep fasteners IN the wood. 🙂
- If you didn’t cut rabbets, adjust your back panel to extend across the whole back and adjust face frame to accommodate side panels that will hide that visible back. (Cabinet Building Basics Tutorial)
- Make sure you measure your actual cabinet and size your panel correctly.
Step 5: Attach Bookshelf Top
- Use a piece of solid wood to cover the bookshelf. It should be flush with the back but extend over the front and sides by about 3/4″. It will add dimension and interest as well as your pocket hole screws that are in the top.
Step 6: Add shelf pins and shelves
- cover the front of your plywood shelves with edge banding to hide the plywood layers or you can fill and sand really well and paint.
Finish and enjoy!
You might also like my Cabinet Building tutorial library.


Thanks for sharing this.
Thank you! There are so many bookcase plans that gloss over the details. Thank you for providing such a comprehensive tutorial.
Thank you for continuing to share your extensive DIY knowledge with everyone even though you are recovering! I hope you find a worthy apprentice cause that is a great idea. Get well soon!
-Maria