Kristy Collection – Queen Platform Bed with Storage
This bed is made for ultimate storage in a small bedroom. This frame consists of a storage bench at the head portion of this Kristy bed. This extra storage is not going to be accessed very often but it’s there for those that need to utilize every inch of possible storage. If you’re looking for a more traditional bed, check out my plans for this Queen bed with storage drawers.
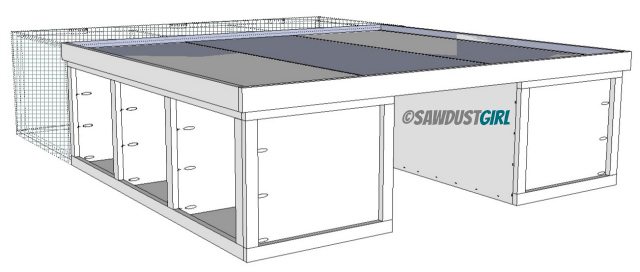
Because of the amount of dividers supporting the top, I’ve chosen to design this plan for 1/2″ material. The entire platform bed will be topped with another piece (or pieces) of material further strengthening the entire platform. You should be well supported!
Queen Platform Bed with Storage
Supplies:
- 1/2″ material: MDF or cabinet grade plywood
- wood glue
- brad nails
- wood screws (I use these 1 3/4″ wood screws)
- Pocket hole jig
- 1 1/4″ course thread pocket hole screws
Cut list is for Two Sides.
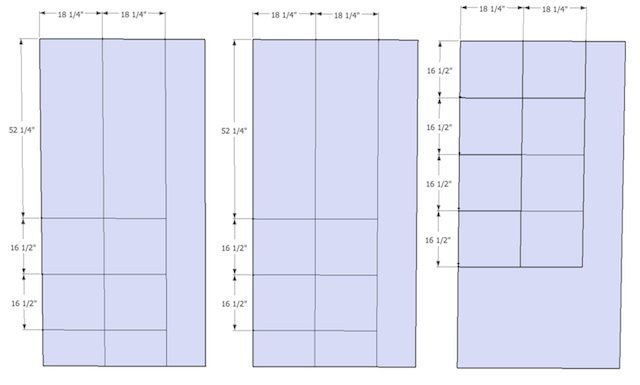
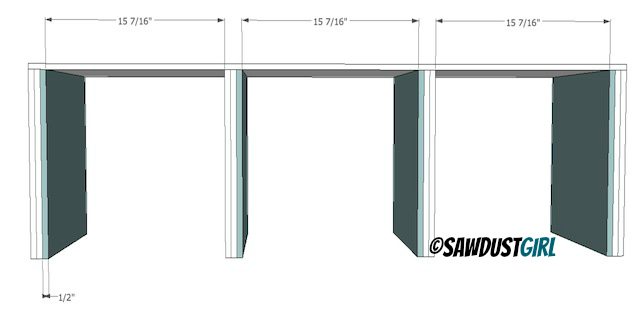
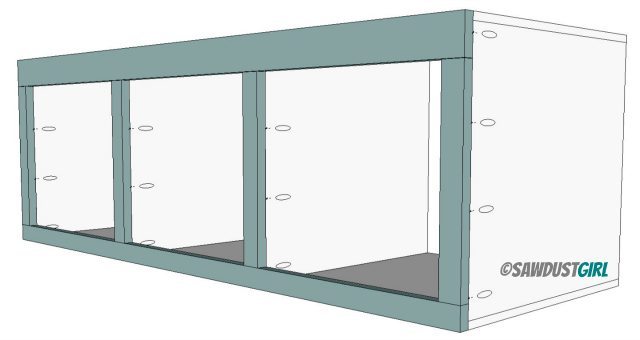
Boxes – you will need to make two of these side boxes.
Step 1. Attach dividers to one side of each box.
- Use wood glue and 1 3/4″ screws.
- Drive screws directly through side into divider. (No need to hide these screws.)
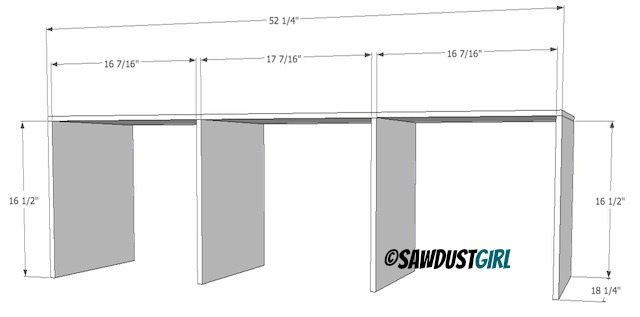
Step 2. Add cleats.
- Glue and brad nail 1/2″ cleats to the dividers as shown.
- Make sure you put the cleats on the correct side of each divider!
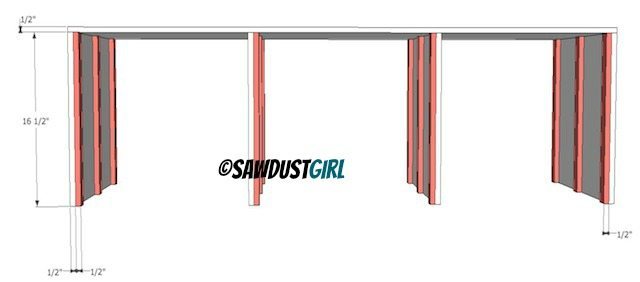
Step 3. Attach additional dividers.
- Use glue and brad nails to attach this divider to the cleats.
- Use 1 3/4″ wood screws to secure to the side like you did in step 1.
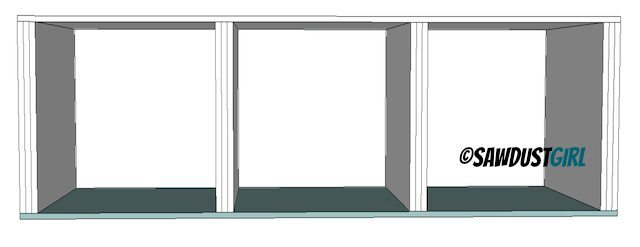
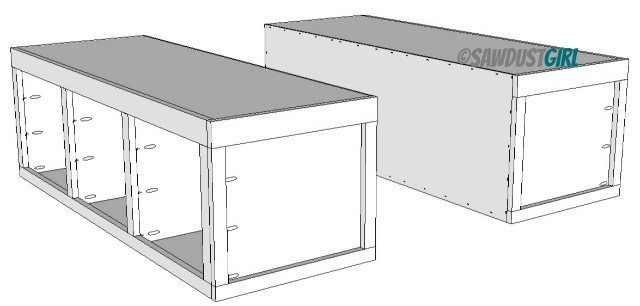
Step 4. Attach second side.
- Apply wood glue on adjoining edge of dividers and cleats
- Use 1 3/4″ wood screws
- Drive screws directly through side into dividers. (No need to hide these screws either.)
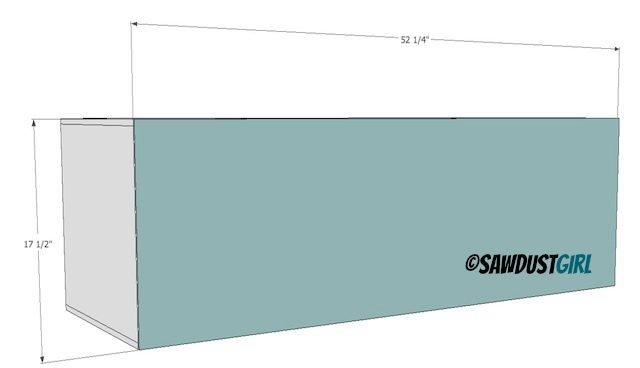
Step 5. Square up and attach back.
- see this tutorial for squaring up if you don’t know how to square up. (Coming soon)
- Use an power stapler with at 3/4″ staples if you have one.
- If you don’t have an power stapler use #6 3/4″ wood screws, or finish nails to secure the back onto the box.
Faceframe Material
-1x poplar wood you will need one for each box.
- One 1×3 at 52 1/4″
- One 1×3 at 19 1/4″
- One 1×2 at 52 1/4″
- One 1×2 at 19 1/4″
- Six 1×2 at 13 1/2″
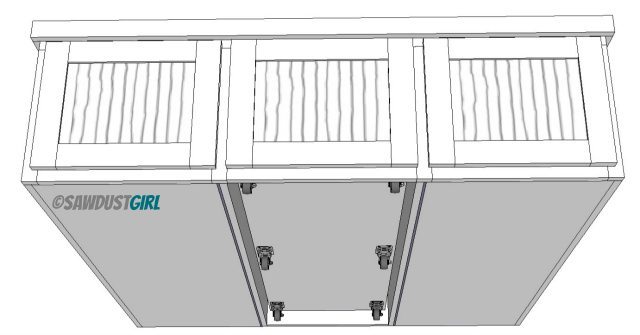
Step 1. Build front faceframe
- Use wood glue and 1 1/4″ pocket hole screws.
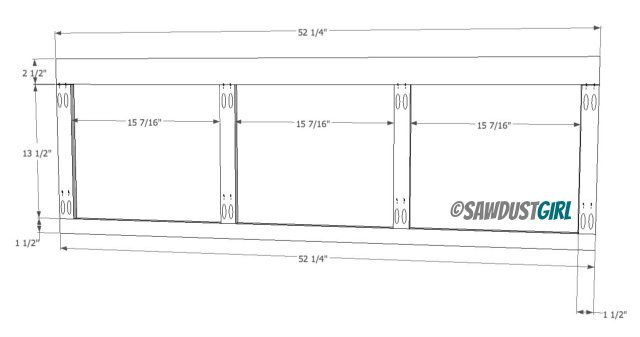
Step 2. Attach front faceframe
- Use wood glue and 1 1/4″ pocket hole screws as illustrated.
Step 3. Build and attach end faceframe
- Build end faceframe with pocket hole screws as illistrated in “Faceframe Step 1”.
- Attach with glue and finish nails.

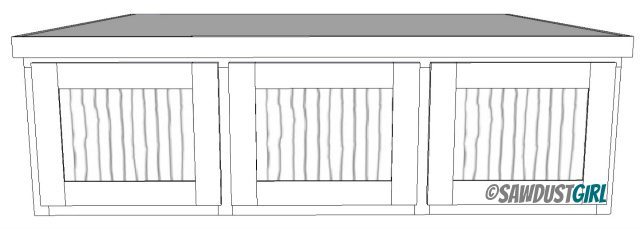
Now you should have two side boxes for you platform bed frame.
Next you’ll build the center section which I’ve designed as a pullout storage trundle!
Even without drawers you now have a Queen platform bed with storage underneath. You could use baskets and be done. Or you can follow this link to build the drawers.
Make sure to check out Kristy’s bedroom reveal for photos of a beautiful finished Kristy collection bed! Get the rest of the woodworking plans for Kristy’s bedroom furniture here:
- Storage Bench – Kristy Queen Bed Extension
- Drawers and Drawer fronts for Queen Bed
- Pull-out Storage Trundle
- Wardrobes with Side Cubby
Check out my other woodworking plans for Beds too.
Get my Cabinet Building 101 eBook. All the information in one place that you can download and keep on hand!
$9.99Add to cart
Hi, did you ever figure out a way to make the plans dowloadable? Even just reviewing online with all the ads is difficult to make sense of it, but I need to download it and print to follow.
Thanks so much!
Brandy
Get it Sue! Drawing out the build plans is a great way to work through the build, before any materials are used. Enjoy the whole process. Especially the end when the product you built is all your accomplishment!
I love your work, I have learned so much from you. Your instructions are so clear. I have learned how to build drawers from you, something I thought I’d never be able to do. I am going to attempt to downsize these complete plans to a full-size bed, I live in a 600-square-foot cottage by the sea with only one closet.. I really need storage, wish me luck!
Hi Rebecca. You are correct on the purpose of the cleats. Since this plan is using 1/2″ material, the cleats are there for filler. The faceframe will be 1 1/2″ thick and if you’re installing drawers, you want the inside of the cabinet flush with the faceframe.
I’m doing a near identical remodel in my bedroom, and after combing dozens of DIY storage bed instructions that required significant modification to accommodate the flanking wardrobes, I FINALLY stumbled on your blog. Gold Mine!
In your original design with the side boxes, could you explain the purpose of the cleats on the drawer box dividers before adding the “additional dividers”? Is it just to thicken them up so the face frame has something to attach to?
Thanks in advance.