• Home
  • About
    • Personal Posts
  • Privacy
  • Shop
    • My Account
    • Checkout
    • Email
    • Facebook
    • Instagram
    • Pinterest
    • Twitter
    • YouTube
Sawdust Girl®

Sawdust Girl®

Renovation, cabinet building and woodworking plans and tutorials. Build like a Girl®

  • My Home
    • Clinton TN House
      • Clinton TN House in Progress
    • Maryville TN House
      • Maryville TN House Tour – Completed Rooms
      • Maryville TN House in Progress
        • Basement
        • Basement Storage Closet
        • Bedroom Office
        • Craft Room
        • Dining Room
        • Entry
        • Garage
        • Guest Bedroom
        • Hallway
        • Jack and Jill Bathroom
        • Kitchen
        • Kitchen Entry
        • Laundry Room
        • Library
        • Living Room
        • Loft
        • Madison’s Room
        • Master Bedroom
        • Master Closet
        • Pantry
        • Porch
        • Powder Room
        • Wes’ Office
    • Illinois House
    • Calderwood Cottage
  • My Workshop
    • Clinton Workshop
  • Build & Breakfast
  • Cabinet Making 101
    • Cabinets
    • Doors
    • Drawers
  • Projects and Plans
    • Countertops
    • Beds
    • Benches
    • Bookshelves
    • Desks
    • Gift Ideas
    • Holiday
      • Christmas
      • Halloween
    • Home Accessories
    • Kids
    • Kitchen Cabinets
    • Lockers
    • Nightstands
    • Organization accessories
    • Recipes
    • Sewing
    • Tables
    • Vanities
    • Wardrobes
    • Woodworking
      • Wood Finishing
    • Workshop
    • Workshop Storage and Organization
  • Remodeling 101
    • Baseboard and Trim
    • crown molding
    • Demolition
    • Door and Window Casings
    • Door Installation
    • Drywall
    • Electrical work
    • Flooring
    • Home Maintenance
    • Painting
    • Plumbing
    • Resources
    • Safety
    • Tile
    • Wall and Ceiling Treatments
  • Sawdust Squad
  • The Sawdust Diaries
    • Andrea
    • Ava D.
    • Beckie F.
    • Cara C.
    • Courtney B
    • Fawn T.
    • Jenn D.
    • Kelly C.
    • Kristy K.
    • Lara T.
    • Malisa B.
    • Marnie D.
    • Robin C.
    • Val F.
  • Tools
    • Products
    • Tool Reviews & Overviews
    • Inspiration & Ideas

Spooky Halloween Stick Wreath

All Posts, Halloween

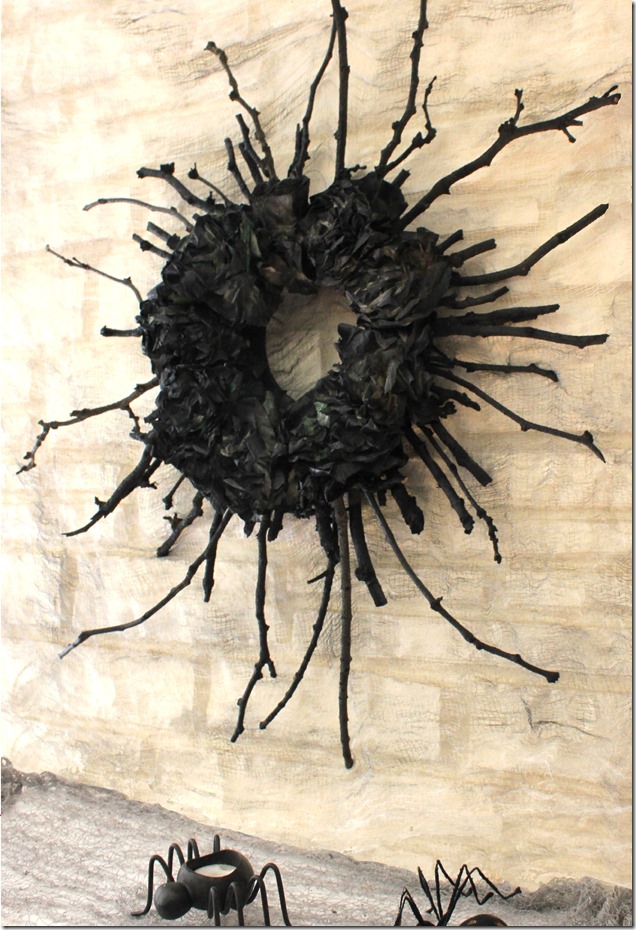
Make this DIY Halloween decoration with a few sticks, some scrap lumber and coffee filters. Cheap, easy, and so spooky!  Complete the project in less than 30 minutes.  It’s a fun project to do with the kids, just wear gloves and masks when painting or you may end up looking zombified long after the season has lost it’s charm.
Spookey_Halloween_Stick_Wreath

Spooky Halloween Stick Wreath

1. Make Flowers

Start by making coffee filter flowers. There are a million tutorials, but my favorite is https://twoshadesofpink.blogspot.com/2012/04/coffee-filter-flowers-and-video.html.

Spooky Stick Wreath

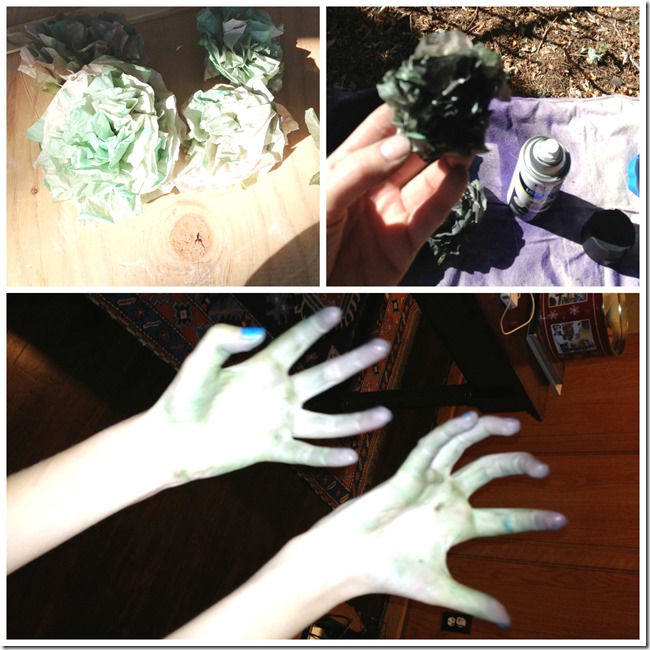
We tried to dye the filters a dark grey/green, but they turned out more of a cheerful green/pink, so I spritzed them with some flat black spray paint.  I let some of the green show through for a little dimension. Tip: wear gloves for this or your hands may turn a spooky color too.

2.  Make Base

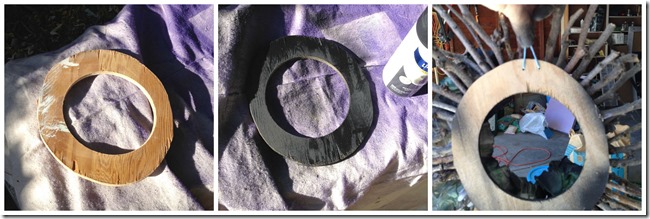
Cut a ¼ inch piece of plywood into a base, don’t worry about perfection just something that is generally round and the approximate size that you want.  I made mine roughly 9 inches in diameter. and spray painted it black. Then drill 2 holes to attach a string for hanging.

Spooky Stick Wreath base

3.  Attach Sticks.

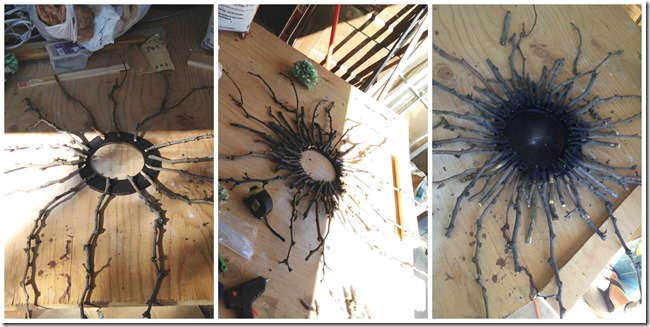
Collect sticks, and begin hot gluing them to the base. We wanted some of our branches to resemble spider legs so we tried to use branches that mimicked that shape. Next fill in with shorter sticks and keep adding until you are happy with the overall shape.  Tip: Branches can be scratchy so use some sticks or pieces of wood around the perimeter of the wreath to lift the sticks up a bit while their glue is setting. Then when you hang your wreath the sticks wont scratch your paint.

Halloween stick wreath

Tip: measure the door or area where you will hang the wreath so that you don’t make it too big. It’s much easier to cut/break the sticks during assembly than when you go to hang the wreath and it doesn’t fit in your space. Start with the longest branches spaced around the wreath.

4.  Hide Glue.

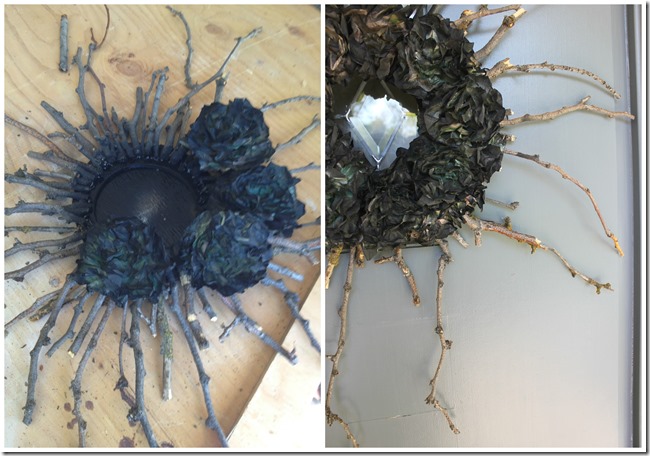
Once the wreath is covered to your liking, spray paint the center and all of that glue, as well as the sticks if you want your sticks to be black.  If you want to leave the branches natural don’t worry about the center being black it will blend after you add the flowers.

5.  Add flowers.

Use a glue gun to attach flowers, be generous with glue so that flowers are secured to the base as well as the sticks.

Spookey_Halloween_Stick_Wreath_1

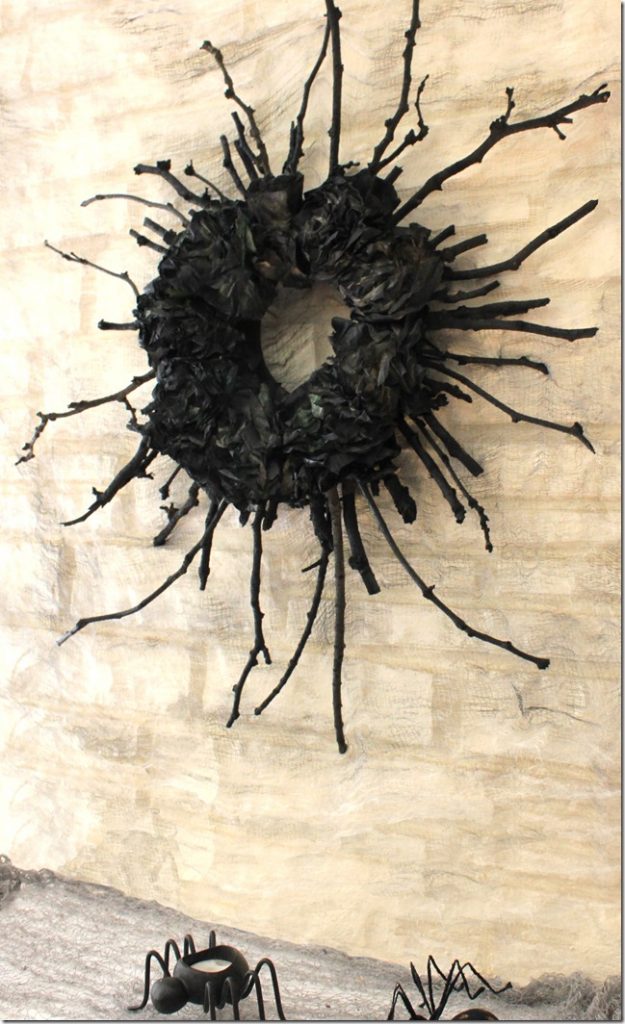
6.  Hang Wreath and Enjoy!

Halloween Wreath 2

October 1, 2013 · 2 Comments

« as seen on tv…
another toilet in my living room »

Comments

  1. Anne Boykin says

    October 2, 2013 at 9:52 am

    Hi Sanda, Totally spooky and totally cool! Thanks for the how-to.

    Reply
  2. Feral Turtle says

    October 14, 2013 at 10:05 am

    This is awesome! So creative and I must say I love your hand shot. hehe

    Reply

Leave a Reply Cancel reply

Your email address will not be published. Required fields are marked *

Categories

New Post email notification signup

You Subscribed!

Legal Stuff

Terms of Use

Privacy Policy

Disclosure

Recent Posts

  • January 2023 Lodge Update
  • Lodge Update – Floors, Cabinets, Countertops, and Appliances
  • Lodge Kitchen Cabinet Progress
  • Halloween Mad Gab – Halloween Party Ideas
  • Concrete Backsplash or Vertical Wall Treatment

Disclaimer:

Although it is my intention to provide accurate plans and clear instructions, not all plans have been tried and tested. Using plans or information found on SawdustGirl.com indicates that you agree with the Terms of Use policy and will accept full responsibility for the process and outcome of any project you attempt. All plans are for private use only. Plans and information published on SawdustGirl.com may not be reproduced, republished or distributed in any manner without written permission from Sandra Powell, Sawdust Girl. Actual projects built using Sawdust Girl plans may be published on your own site without instructions or "tutorial" as long as you provide a link to my original post with full post title or "SawdustGirl.com" as link title.

Copyright © 2023 · anchored theme by <a target="_blank"