I thought I’d share my process to designing a space (and more specifically, designing the built-ins that will go into said room). In case it might be helpful to someone out there wanting to take a leap but not sure where to start.
First, lets go over a little vocab to make sure we’re all on the same page.
Plan view (or floorplan) is a view from above. Looking straight down.
Elevation is a view of one side. Looking at a wall or facade straight on.
I either draw by hand or use Google Sketch Up which is nice if I’m messing around with dozens of different design options without completely starting over each time I make a change.
OK, now on to my process.
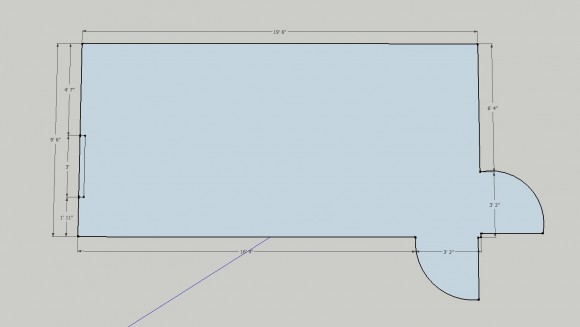
-First, I get the dimensions of the room and draw up a floorplan.
-Then I draw up all the different possible layouts or versions of what I want. Sometimes dozens! To do this, I have to draw up elevations for each wall first, then incorporate that into the floorplan.
I try to optimize every bit of space that I can while getting the look that I want. So, my main focus is on how a space function, then I figure out how to make that look good.
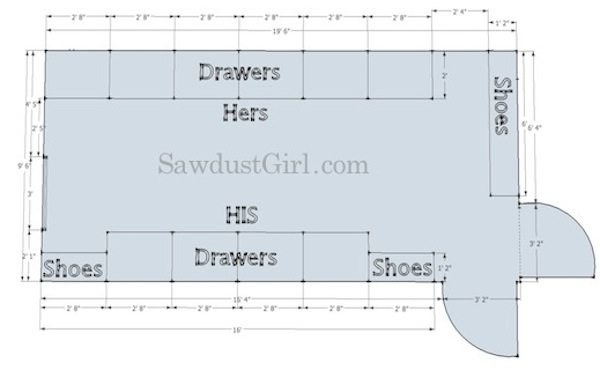
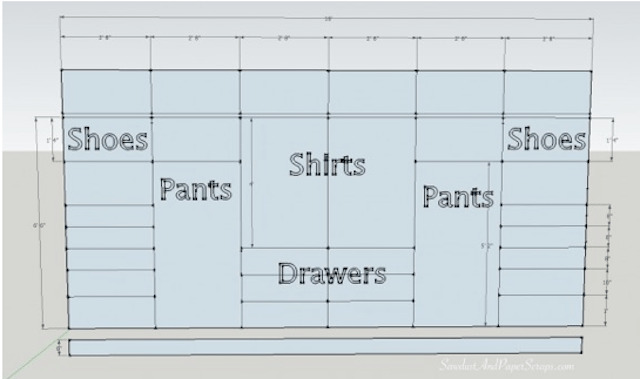
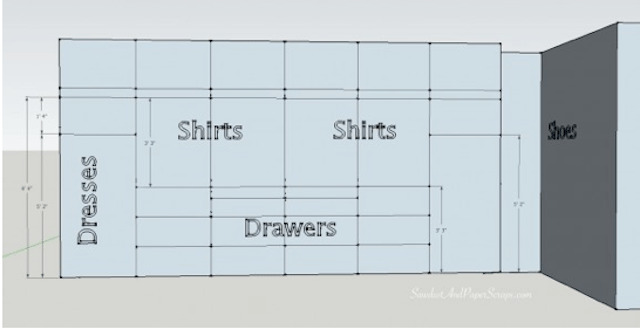
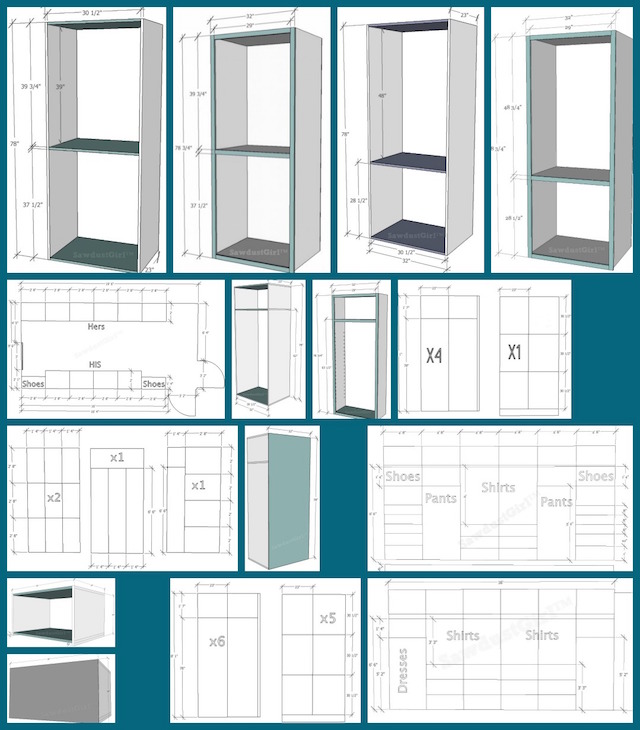
These are my final plans for my master closet.
Floorplan
Elevation for “His” side.
Elevation for “Her” Side
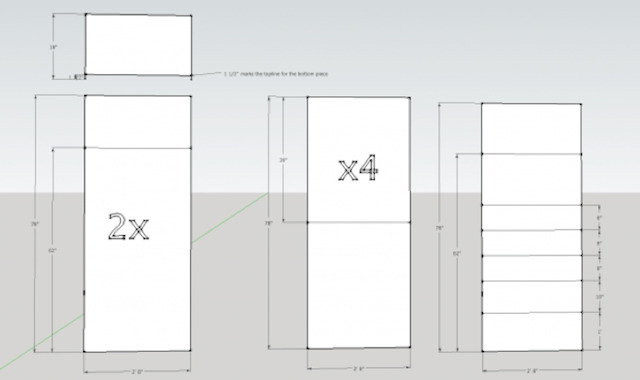
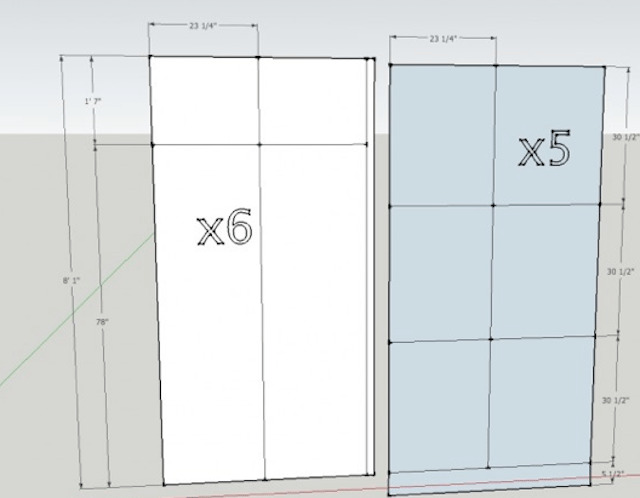
-Then I draw up build plans for each specific cabinet that I will build.
-Then I draw up a cut list so I can maximize my materials and get the least waste possible.
You’ll notice in Wes’ Elevation, I have a 6″ base that the cabinets will sit on top of. I did that to avoid wasting a 48″x12″ section on about 20 sheets of MDF in my cuts! That’s a lot of waste. Sure, I could probably use it sometime in the future but I don’t want to store that much MDF. (My side is also on a 6″ base, I just didn’t draw it in.)
Just a bit of adjusting: creating a separate 6″ base instead of making the cabinets 6″ longer gave me 18″after I cut my 78″ side pieces instead of only 12″ and I can use the 18″ for the sides of the top cabinets.
Of course, it isn’t always possible to use every scrap of material in your project. I was able to because I have 5 1/4″ baseboards and was going to cut my cabinet sides 6″ longer but attach the bottom shelf 6″ from the bottom. Building a separate base achieves the same result.
*I’m also waiting to build the top cabinets until all the main cabinets are built and installed. That way I can remeasure to see if everything is going to fit as originally planned or if I have to make adjustments.
Measure twice, cut once and expect that things still might not be perfect. Then you won’t be irritated/angry if/when it happens.
*Be sure to check out my post: How to plan and design a master closet so you can customize your own closet to fit your specific needs.
You can purchase my Master Closet Plans as well as my Cabinet Building 101 eBook in my “Shop” or below.
Master Closet Plans
$9.99Add to cart
Cabinet Building 101 eBook
$9.99Add to cart

Beckie says
Looks like a great plan. Will be watching for every single update and photo. Will you have a sitting area in the middle? I think you need a plush bench to sit & enjoy the space when you contemplate the fashion for the day!
Catherine says
Yes!
Sawdust and Paper Scraps says
I don’t think there is room. I tried to plan one in there, believe me. Two actually, one under each chandelier. But the closet just isn’t wide enough after the cabinets go in. If I did 18″ deep cabs then I could have a 12″ wide bench in the middle but I decided I’d rather have deeper cabinets. I’m considering a bench window seat but will wait until everything else is in so I can get a “feel” for the room. Sometimes no matter how well you plan, when you get to the installation, you just have to change everything because you decide what you planned feels wrong. Know what I mean? Anyway, I’ll build what I’ve planned and then see what else can go in. If a bench doesn’t make the isles feel too crowded, then we’ll have a bench! 🙂
Catherine says
What a great use of the space! I love the design and setup. Oh how I would love to have a closet like this! 🙂
Jaime says
Sandra thanks for sharing, so pro looking with the sketch up. I’m so old fashioned with pencil and paper! And my eraser gets a lot of use. Great tip about the separate base versus taller cabinet piece, so smart to save on the cuts.
Sawdust and Paper Scraps says
Sometimes old fashioned pencil and paper is faster and easier! If I’m tossing around lots of ideas, I like to be able to save my floorplan and then “Save As” Plan1, Plan 2, etc. It’s so much easier to move a cabinet, stretch out a wall out, delete a section… But I often just grab a pencil too.
Pink Toes and Power Tools says
Thanks for the planning tips–I’m following closely since I want to redo my closet sometime. Although I don’t have all the fantastic space you do!
Brandy Miller says
That is really neat. Well thought out and organized. Unlike all the home remodeling projects my mom attempted over the years. Ugh.
Katie from Sew Woodsy says
WOW! This looks great. I love sketch up. I wish Mr. Woodsy would use it more often. Most of the time he scribbles on a piece of paper that normally gets lost in the shuffle.
Deb says
Fabulous. Just want I needed as I want to do my closet. Looking forward to all the progress and update posts! 🙂
Lucy says
Just found you — don’t ask me how; I just click on links that look interesting, then others on that site, ad infinitum. I did stop here, though, long to look this over and subscribe! Loving it and loving your enthusiasm, skill, energy & vision. Thanks!
Jason says
Excellent work and site. I have a question on the drawers. Did you build them yourself or is there a kit or something to use? I plan on doing something similiar but I don’t know quite how to build the drawers? Are the veneer fronts?
Thanks for the inspiration!
jessica hutchings says
I love your closet!! I am about to attempt…to make my own. Do you have a step by step of your process as well as the full list of materials you used? I know my setup would be a little different but would love to have a idea on all the materials and the steps. Thanks!!!
Ouida says
Can you please send me the dimensions for the items in your closet design?? I am purchasing a home and have a small bed room I plan to transform into a closet….
Ann says
OMG, you did what I have been dreaming to do for 3 years! I have been quoted 64K to do a closet almost exactly as you build it and my dream of having my ‘dream closet’ flew out the window until I saw you did this! Seems like a crazy amount of work to take on.
How did you ever do this big a job? lol
You give me inspiration to go after having the one thing I feel I am lacking in my home, but still scared to diy.
Philip Schmidt says
Hello,
Can you send me the plans above in a more readable manner? I am going to give this a shot but I can not clearly read the actual dimensions on some of the images. If I enlarge the images they just get more blurry? Beautiful work and you have motivated my wife and I to give this a shot with the help of a handyman friend of ours. We basically have a 12×13 room we wish to turn into a really nice walk-in closet with a island in the middle. Love your images, just can quite read them.
maria says
Thats one amazing closet! Would you be able to repost your images with higher resolution? It would be great to see the dimensions.
Love your work!
Tony T says
Closet is just great. You motivated me to build a similar one in our new house. Could you please send me your plans. I’m unable to read the measurements
Sam Haidar says
Hello,
Is it possible to get those plans and can you make them a bit more legible. I am having a really hard time
reading the measurements. Great Work!!!!