Installing LED Shop Lights
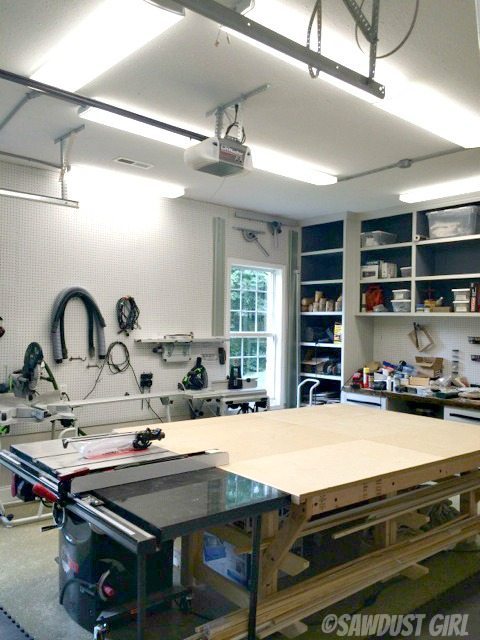
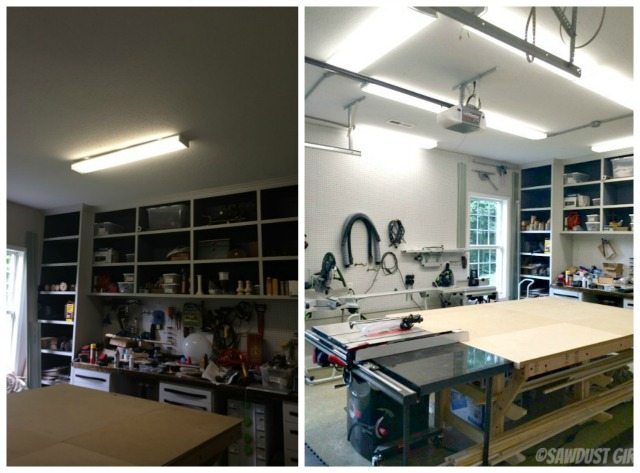
One thing I absolutely had to change about my workshop was the lighting. It previously had a single florescent fixture to light in the entire shop. There are two large windows so on bright, sunny days I can get by. But after the sun goes down I need a head lamp to get anything done. In a workshop, where you’re working with power tools, adequate lighting is a must! I just added 8 more shop lights and it made a world of difference!
The pathetic single shop light I had before.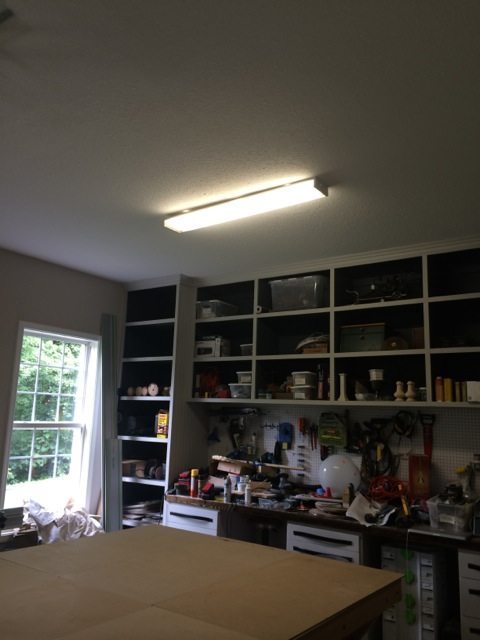
Installing LED Shop Lights
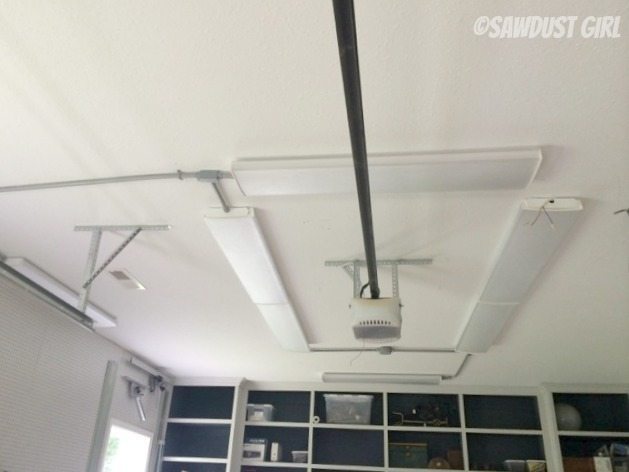
My master bedroom is above this garage so I don’t have attic access and I didn’t want a bunch of holes in the ceiling so I opted to run my electrical lines ON the ceiling.
It’s not pretty but it’s a workshop ceiling. There’s also a garage door track, there will be dust collection, etc. so I’m not so much concerned with aesthetic as function.
LED lights are expensive! I originally purchased four 8′ LED lights that required tube bulbs but I had to practically build the things from scratch with NO instructions (seriously, there were 3 pictures ON the box) and I decided I wanted something different so I returned those suckers! Funny thing is — I can’t even find them on HD online to show you what not to get. They must have pulled them because of all the complaints. ;-D
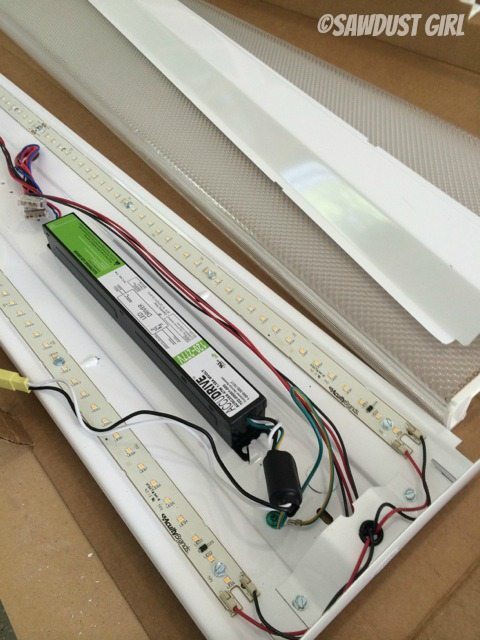
I ended up getting these Luthonia 4′ flush-mount white LED wraparound light. They were pretty easy to install, even without instructions. (Seriously, why is it so difficult to create instructions for the consumer who is buying the product you have created?)
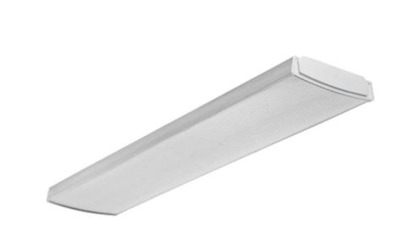 The light comes from LED strips on the outer edge of the fixture and there is a diffusing cover — which is good for diffusing the light but will no doubt be a catch all for every flying and crawling thing that gets lured in by the glowing thing of beauty. I hate cleaning dead bugs from light covers!
I was absolutely adamant about having daylight or white light. For some reason LED manufacturers love to produce the yellow “soft white” lights and it’s a bit harder to find true WHITE color temperature light. I found them though. LED also consumes much less power and does not produce like other light sources and doesn’t product heat. So, it’s good news all around.
LED fixtures
Replacing a light fixture is easy: remove the old light and hook up the new. Adding additional lights on a run with an existing fixture is easy too, and I’ll walk you through how I did it.
My old light was practically falling down already because “they” installed it without drywall anchors and didn’t hit a stud. Sheesh!

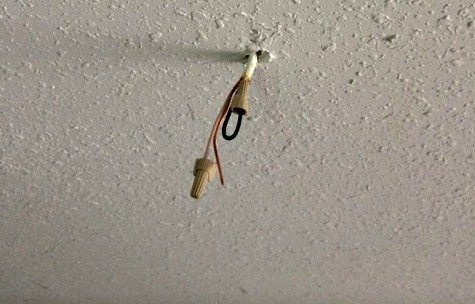
After I removed the old fixture I was left with a short piece of Romex coming out of a hole in the ceiling.
Disclaimer:
*I am NOT a licensed electrician. My eyes glaze over by page 6 just skimming through the 1000 page 2014 NFPA 70 NEC codebook. (NFPA= National Fire Protection Association NEC= National Electric Code)
*What is CODE in my area is not necesarily what is CODE in your area. Every local gov code enforcement division has different rules, regulations and specifications, etc. Be aware and follow proper procedures for YOUR area. My city code enforcement division just adopted 2008 NFPA 70 national electric code in 2013 if that tells you anything…
*I personally would have installed a junction box in the ceiling. However, it was a flush mount light and the connection was made inside the light fixture so technically it was done “to code” according to the current requirements HERE but may not be to code in another part of the country.
*Always shut power OFF before doing electrical work. Flip off the breaker and then double check with a voltage tester.
Junction box
I used a metal junction box and Schedule 40 PVC conduit and fittings because it’s way easier to cut and work with than metal conduit.

Running conduit
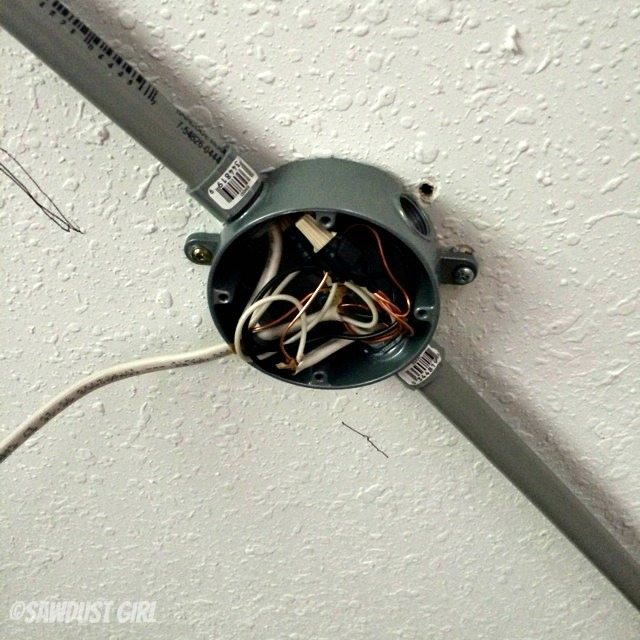
I used a round junction box with 4 ports. This would allow me to easily run conduit and cable in different directions. I installed the junction box over the hole in the ceiling and pulled the wires through. Then I ran PVC conduit to the location of my first light. (I secured all my lights to joists to these puppies aren’t going to be pulling out of the ceiling.)
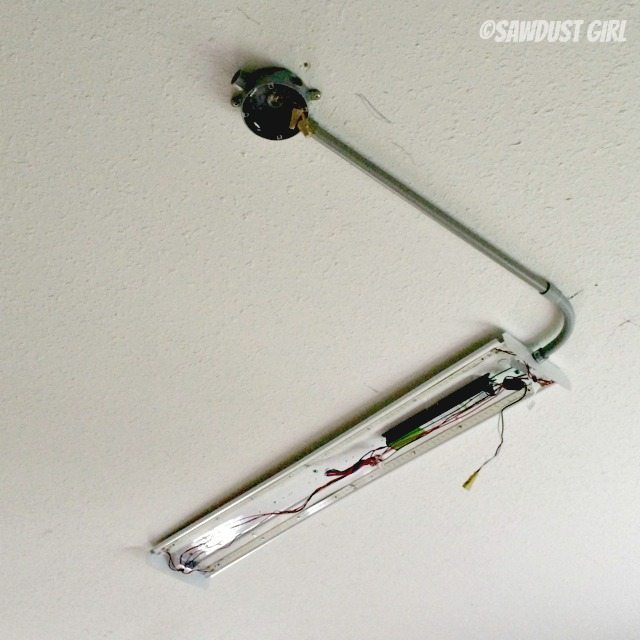
Then I pushed some new 3 wire Romex through the conduit to the light fixture. I’m running wire in three directions from this junction box so I connected all sets of wires to the “feed” wires coming out of the ceiling. I use a flathead plier to twist the wires together and secure with a wire nut. Then I reinforce that with electrical tape.
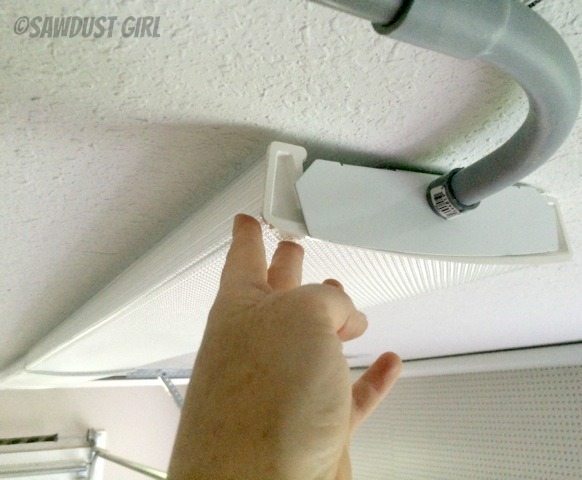
The light fixture needs a fitting that will hold the conduit in place. These lights are silly and require you to unscrew and remove a wire holding bracket so you can get your hands in there to screw the end onto the fitting to hold it in place. Fiddle Factor!

Wiring the shop lights
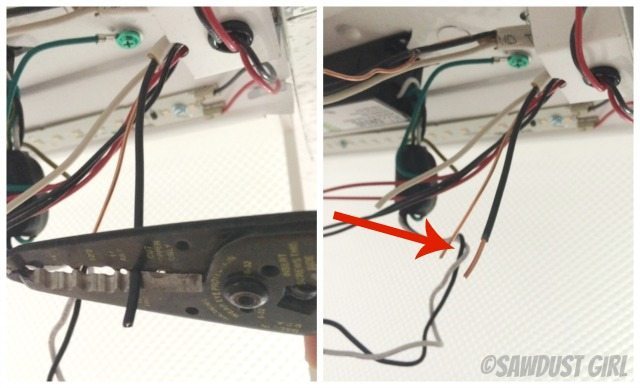
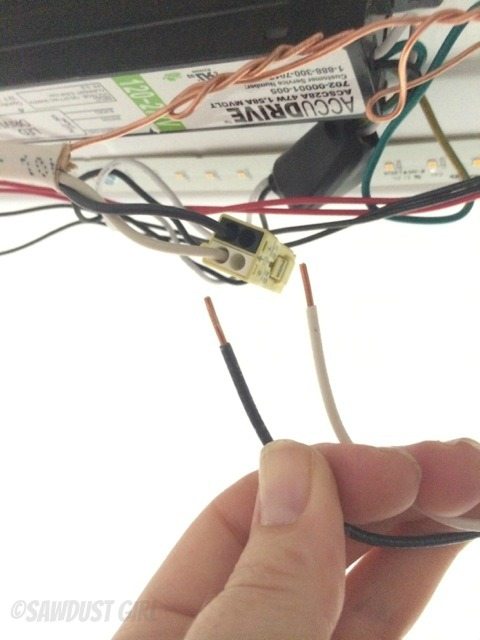
Once the Romex is into the light fixture I stripped a bit of the outer sheathing and then stripped about 3/4″ of the black and white wires.
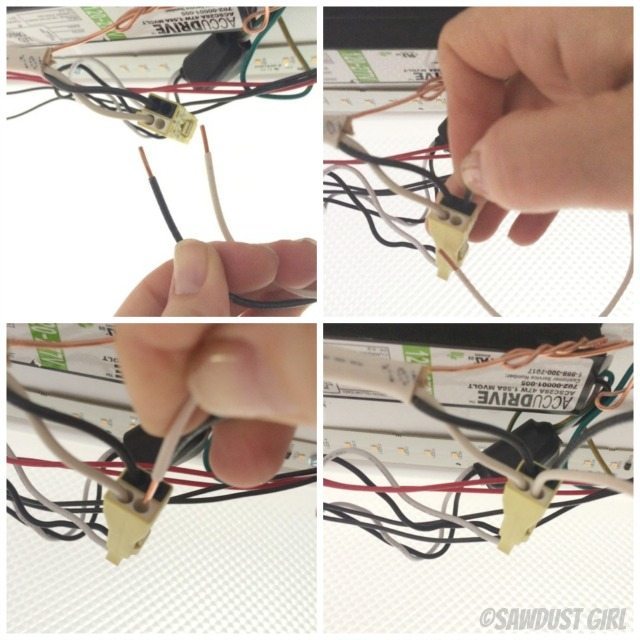
Then I just had to push the wires into the appropriately color coded hole.
When I needed to feed power to an additional light, I cut more Romex to the length I needed to reach the next light and connected one end of the wires to the second set of holes in the thingamajig and ran that Romex to the next light.
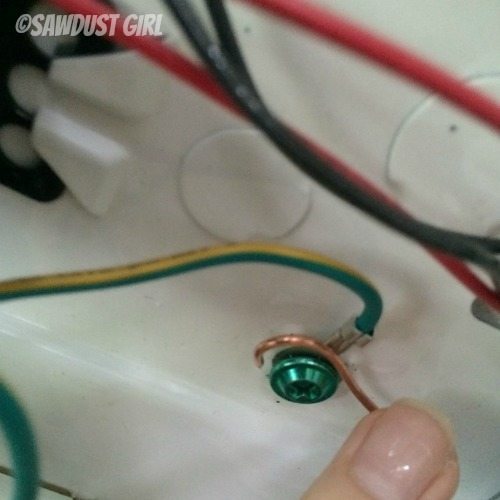
The ground wires are connected to the ground screw in this fixture. Some fixtures will have a green wire that you connect with the ground wire with a wire nut. If feeding power to another light — twist the ground wires together and then connect it to the ground screw.
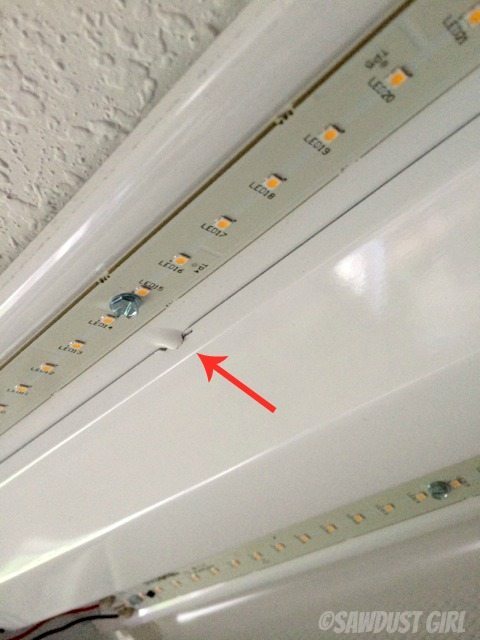
One thing I have my doubts about with these lights is the only thing holding the housing that covers up all the wires inside the fixture is 4 little tabs on the sides. It didn’t feel super secure when I put them up so I’m crossing my fingers, hoping they all stay in place.
Diffuser
The light diffusing cover is also a bit — iffy. I’m not even sure what it’s hanging on. They were all tricky getting up into place, sometimes I had to try 20 times before it would hold. But I had to remove a couple to make alterations to my configuration a few times and it was equally a PITA to remove so I guess the likelihood of them just falling off out of the blue is slim. We’ll see.
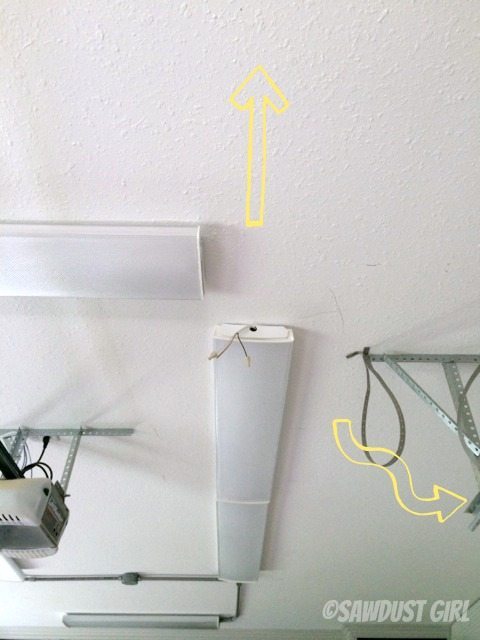
I still have one more light to install (hence the capped wires sticking out of the one light there) but I haven’t decided if it will be more useful on the far right side of the shop or at the end, closer to the garage door so when I have to pull the band saw out to use it I have light to work by. So I’m waiting on that light. Time will tell me where that light needs to go.
I probably don’t need that last light anywhere because it’s pretty dang bright in here already. I MAY put my light switch on a dimmer so I can control the brightness which is another thing I like about LED lights. We’ll see. For now I’m enjoying being able to see what I’m doing in my workshop!
 Next up is building a lot of drawer organizers for all my drill bits, driver bits, router bits…

These are amazing! Will keep in mind for my basement workshop, but will have my son’s friend who is an electrician install since I will need additional outlets as well …I have one – yes ONE – available outlet in the basement!
Another name for those bright white lights is “blue lights” or “cool lights” I love those ones better than the “romantic” warm, yellow tone” lights. The warm ones are good for restaurants and maybe even some offices, but when you need to pay attention to details or build something, the cool light is best!
And since it’s a workshop, who is going to look at the ceiling and think, “OMG, look at all those PVC conduits” My mom had to install a light fan in the bedroom and the electrician had to run the wire from the light switch, and yes, it was up the wall and crawling on the ceiling to the middle of the room where the fan was, not pretty in a bedroom, but a workshop, perfectly acceptable!
You rock! And I got a good chuckle out of the previous little light you had compared to the big mama’s you have in there now!