Cal King Platform Storage Bed
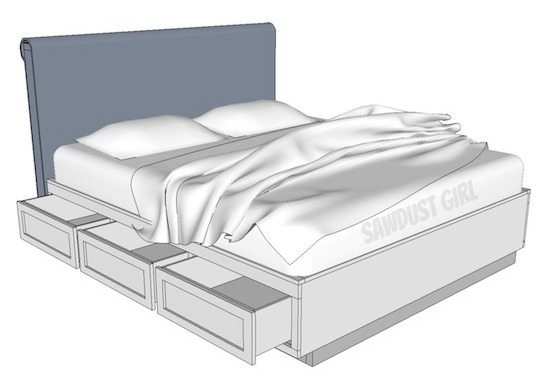
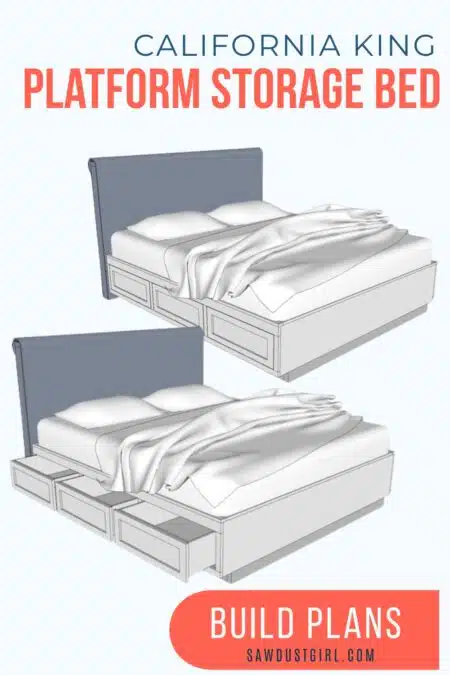
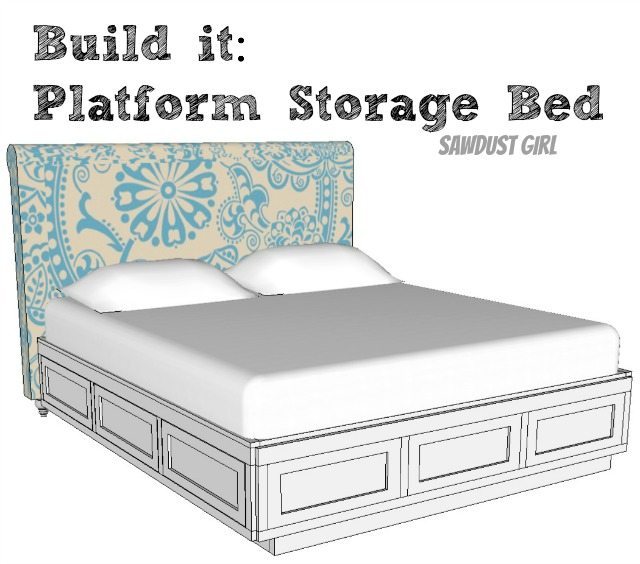
So many people have been asking how to modify Kristy’s platform storage bed to be build without the daybed/bench aspect that I decided just to make up some plans for a “normal” platform storage bed. This post has plans for a Cal King Platform Storage Bed. I also drew up a Queen Storage Bed plan and if needed one could modify either of these plans to work for a regular King bed.
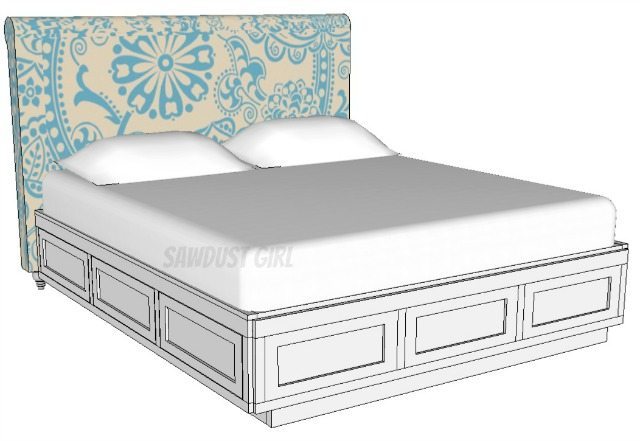
Table of Contents
Materials
- Use 3/4″ plywood or MDF
- Wood glue
- Wood screws in these lengths: 1 1/4″, 1 3/4″, 2″ or 2 1/4″, 3″
Build 6 Storage Boxes
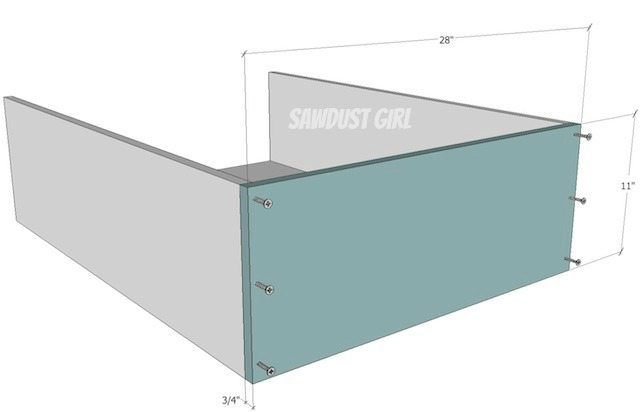
General building instructions: Use 1 3/4″ wood screws, put first and last screws no closer than 1″ from edge then space additional screws about 6″ apart.
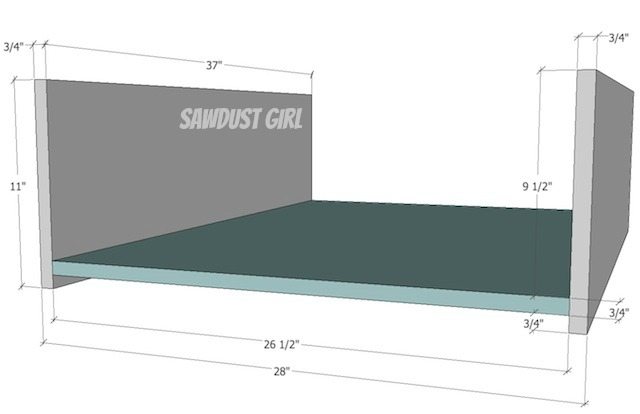
Attach bottom to sides
- The bottom is 3/4″ up from bottom of sides – use a scrap of 3/4″ material to ensure correct placement.

Attach back
Attach top
Use 1 3/4″ wood screws through the top OR pocket hole screws as shown in below photo to secure the top to the box.
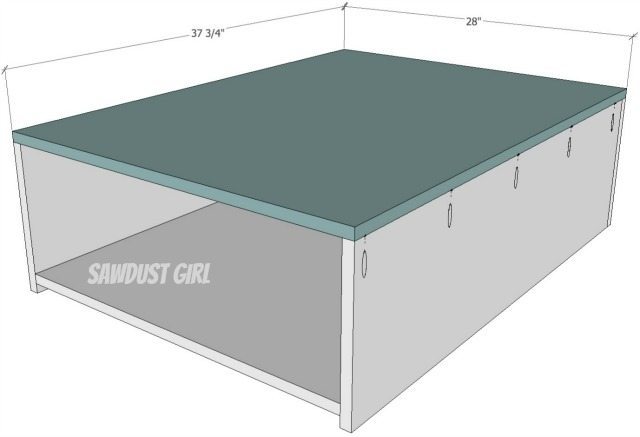
If you put all the compartments together this is what you should have. If your measurements are slightly different, adjust the next steps to fit YOUR compartments.
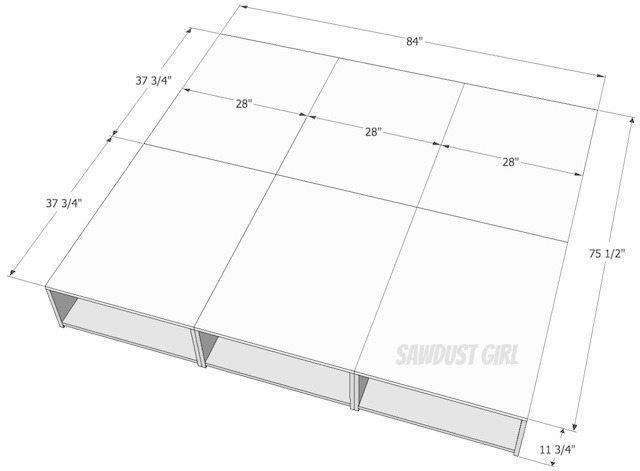
Platform Base
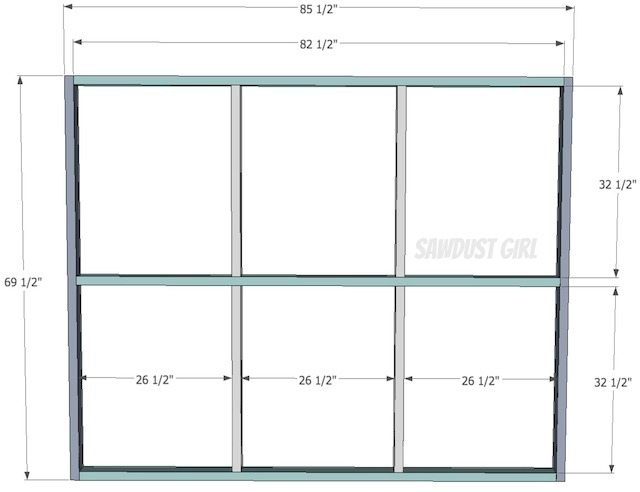
2×4 Base
- Use 2×4’s and 3″ wood screws to assemble as shown below.
2×4 Cleat
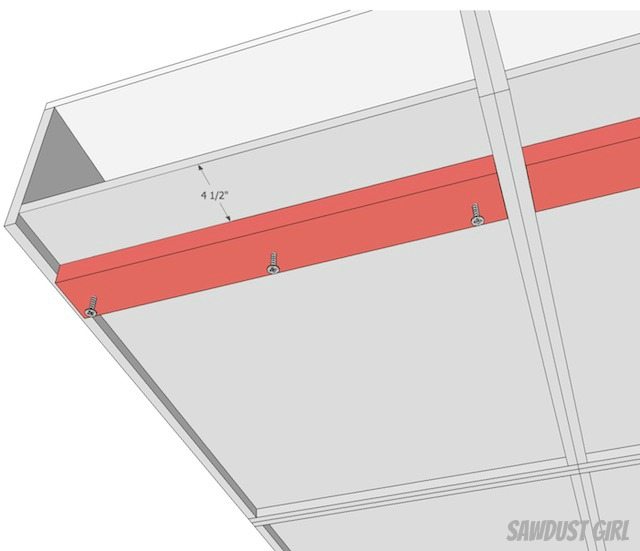
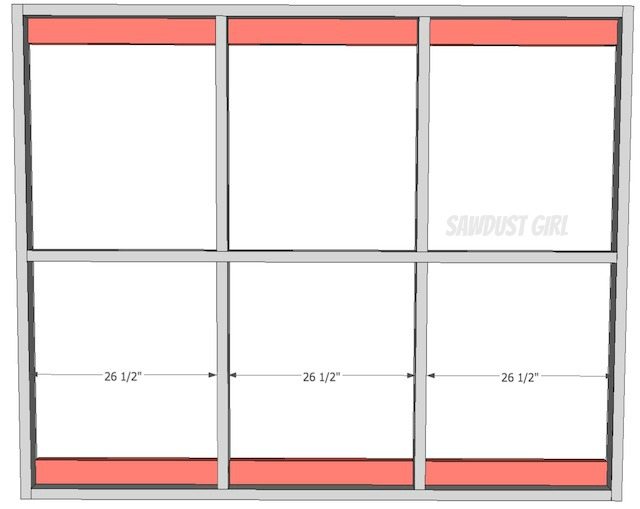
- Use 2″-2 1/4″ screws to attach a 2×4 cleat to bottom of each storage compartment
- Each cleat should fit INSIDE the base so measure your base to ensure proper placement of cleats
Place Boxes Into Base
- Set the storage compartment inside the base and secure the compartments together by driving 1 1/4″ screws into the sides.

Faceframe and Surround
Headboard and Footboard
- 3/4″ MDF or Plywood
- If you plan on doing an upholstered headboard you could upholster the footboard too.
- Attach using 1 1/4″ screws driving through from inside the cabinet compartments. (You might might have to climb inside to get enough screws in there.
- Each board extends above the platform by 1 3/4″
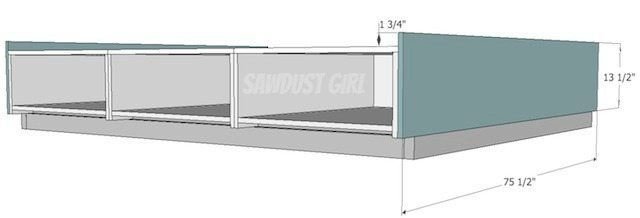
Faceframes
- Use 1×2 and 1×3 poplar.
- Build and attach with 1 1/4″ pocket hole screws.
- refer to post on building and attaching face frames for basic instructions
- Faceframes match height of head and foot

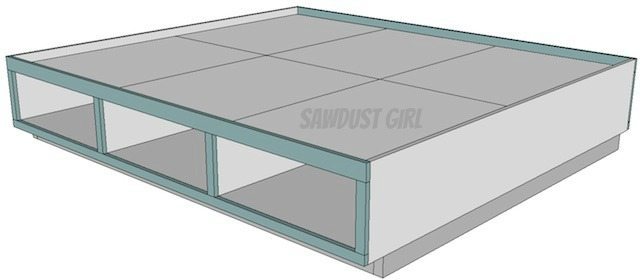
- If you are NOT doing an upholstered footboard you can add a face frame over the footboard and skip adding a filler strip to the footboard area in the next step.
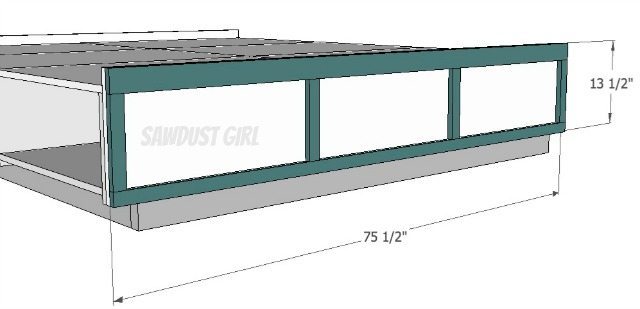
Filler Strip
- Add a 1×2 to the inside of the two sides and then the foot
- Glue and nail (from the inside) the 1×2 flush with the TOP of the face frame and “foot”
- If you added a face frame to the footboard skip adding filler strip to the footboard area as that will already be doubled up.
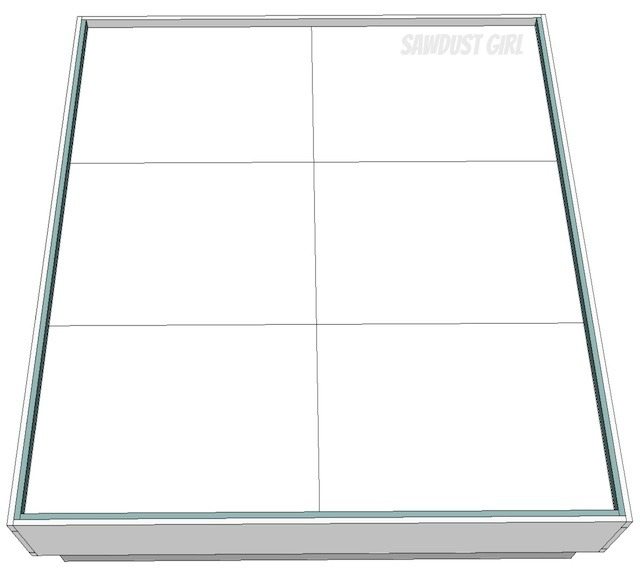
Top Frame
- Add another 1×2 to the top of the “U” shaped bed platform
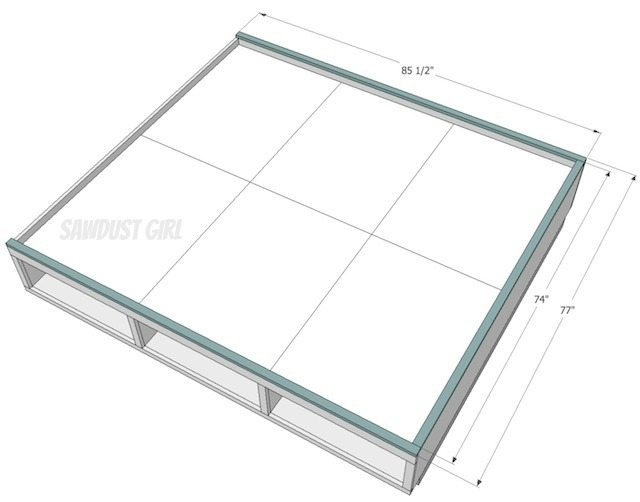
Drawers and Drawer Fronts
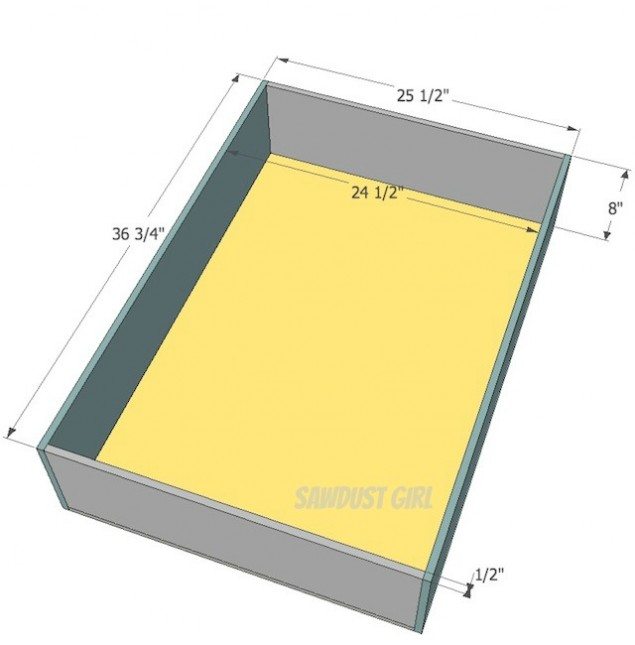
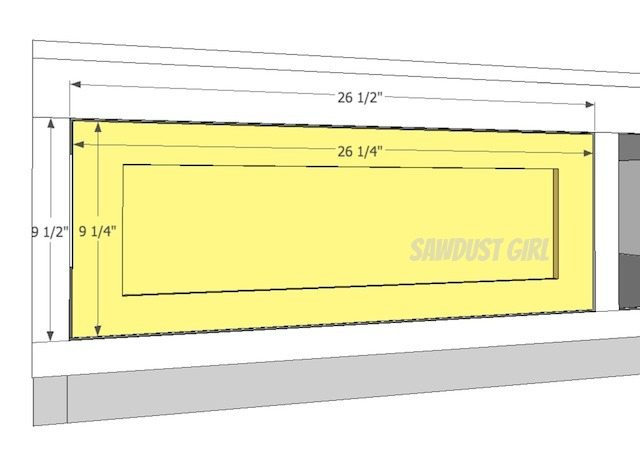
Build and install drawers and drawer fronts using relevant instructional posts. Drawers have to be sized based on the specific drawer glides you are using so I rarely include drawers in plans. I have included sizing for the drawer and drawer front for these storage boxes assuming use of 1/2″ side mount glides. However, it is always a good idea to measure the openings you end up with after building your cabinet boxes to make sure you build drawers that will fit YOUR boxes.
Below are links to tutorials I have on building and installing drawers and drawer fronts.
- How to build simple drawers
- How to install drawers using side mount glides
- How to build drawers using Blum Tandem Glides
- How to build drawer fronts
- How to install drawer fronts
Finish
Finish as desired — options will largely depend on the material you used to build with. If you built your bed out of MDF paint is most likely your best option. Though there are some pretty impressive gel stains that create a wood look. I have tutorials for painting MDF edges and Plywood edges if you have any edges showing. My library of Cabinet Finishing tutorials might also be helpful.
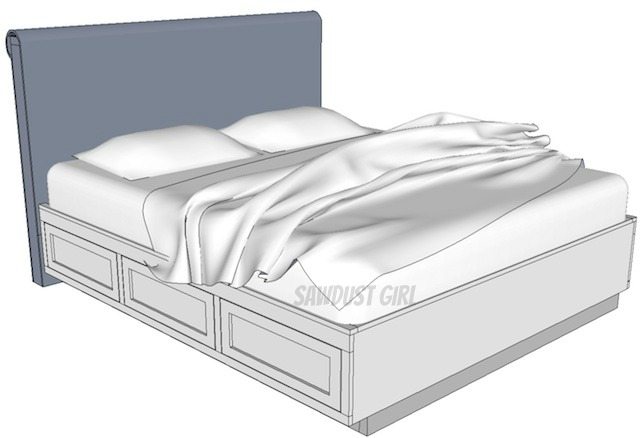
As always, if you build this bed and share it on Facebook or Instagram, tag me @sawdustgirl – I’d love to see!


Working on a CAD model of this in preparation for making on. Question I have is “How to get the drawers out” — seems like there is nothing to “pull on”, other than adding drawer pull. With the drawer face fitting completely within the face frame, what might one “pull on” to open the drawers???
If you aren’t planning on adding a pull, you can make the drawers 1 1/2-2″ shorter or cut out a hand pull. If you are planning to add pulls, painters tape makes a good temporary pull.
These plans are just what I needed!I want to say thanks to you, will send some pictures when I’m done.