• Home
  • About
    • Personal Posts
  • Privacy
  • Shop
    • My Account
    • Checkout
    • Email
    • Facebook
    • Instagram
    • Pinterest
    • Twitter
    • YouTube
Sawdust Girl®

Sawdust Girl®

Renovation, cabinet building and woodworking plans and tutorials. Build like a Girl®

  • My Home
    • Clinton TN House
      • Clinton TN House in Progress
    • Maryville TN House
      • Maryville TN House Tour – Completed Rooms
      • Maryville TN House in Progress
        • Basement
        • Basement Storage Closet
        • Bedroom Office
        • Craft Room
        • Dining Room
        • Entry
        • Garage
        • Guest Bedroom
        • Hallway
        • Jack and Jill Bathroom
        • Kitchen
        • Kitchen Entry
        • Laundry Room
        • Library
        • Living Room
        • Loft
        • Madison’s Room
        • Master Bedroom
        • Master Closet
        • Pantry
        • Porch
        • Powder Room
        • Wes’ Office
    • Illinois House
    • Calderwood Cottage
  • My Workshop
    • Clinton Workshop
  • Build & Breakfast
  • Cabinet Making 101
    • Cabinets
    • Doors
    • Drawers
  • Projects and Plans
    • Countertops
    • Beds
    • Benches
    • Bookshelves
    • Desks
    • Gift Ideas
    • Holiday
      • Christmas
      • Halloween
    • Home Accessories
    • Kids
    • Kitchen Cabinets
    • Lockers
    • Nightstands
    • Organization accessories
    • Recipes
    • Sewing
    • Tables
    • Vanities
    • Wardrobes
    • Woodworking
      • Wood Finishing
    • Workshop
    • Workshop Storage and Organization
  • Remodeling 101
    • Baseboard and Trim
    • crown molding
    • Demolition
    • Door and Window Casings
    • Door Installation
    • Drywall
    • Electrical work
    • Flooring
    • Home Maintenance
    • Painting
    • Plumbing
    • Resources
    • Safety
    • Tile
    • Wall and Ceiling Treatments
  • The Sawdust Diaries
    • Andrea
    • Ava D.
    • Beckie F.
    • Cara C.
    • Courtney B
    • Fawn T.
    • Jenn D.
    • Kelly C.
    • Kristy K.
    • Lara T.
    • Malisa B.
    • Marnie D.
    • Robin C.
    • Val F.
  • Tools
    • Products
    • Tool Reviews & Overviews
    • Inspiration & Ideas

Hidden Entrance to Pantry with Pocket Doors

All Posts, Cabinet Making 101, Door Installation, Doors, Pantry

I think I spent all last week building and installing these two pocket doors for the cabinet that is a hidden entrance to the pantry.  They are over 8′ tall and because of how tall they are, these suckers were really hard to build!  I love that the pantry entrance just looks like a big cabinet!
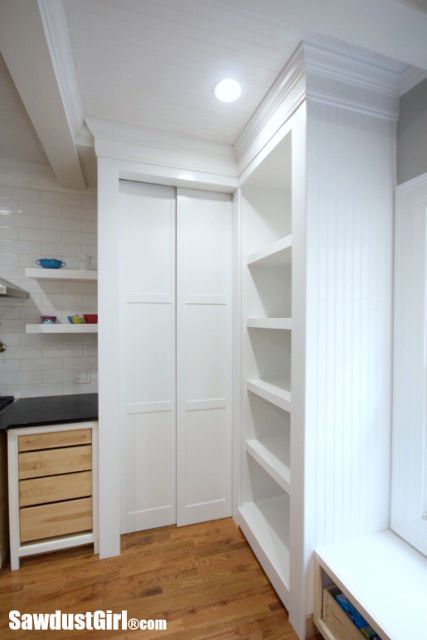
DIY sliding pocket doors for pantry.

But behind those doors is a whole hidden walk in pantry!
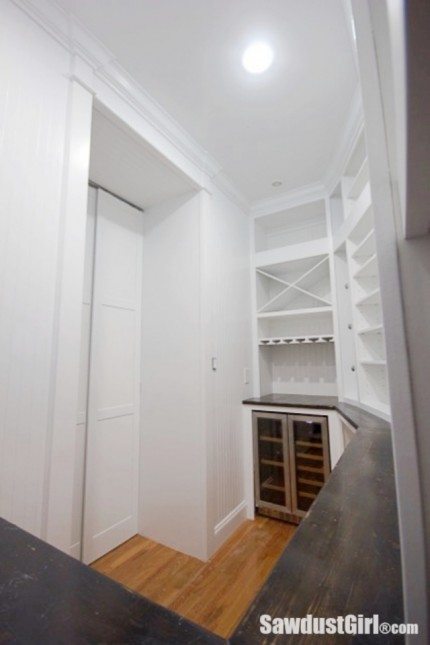
Hidden entrance to walk in pantry

Installing pocket doors

I had to install the door track first so I could properly size the doors.
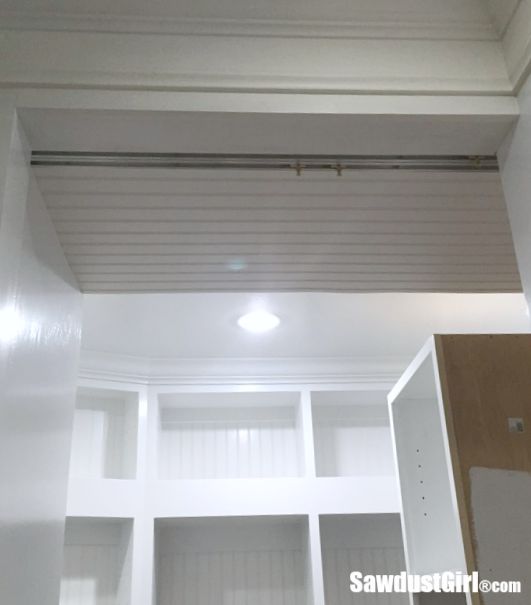
Pantry Pocket Doors

I’m using this bypass track and roller system for 3/4″ doors from Johnson Hardware.  The track and rollers are easy to install.

(I don’t suggest getting lazy and installing a less awesome track because you have it on hand and then decide that you won’t be happy unless you put the actual awesome track that you wanted in the first place in…and then have to rip out out the ceiling that you built up flush to the original less than awesome track and start over!  Just get the better track to begin with.)

Building the doors

Then I build my doors.  My rails and stiles are 1×3 poplar and I’m using 1/4″ MDF for the panels.  I decided to go with simple Shaker style doors for my kitchen.  They are classic…and super easy to build!

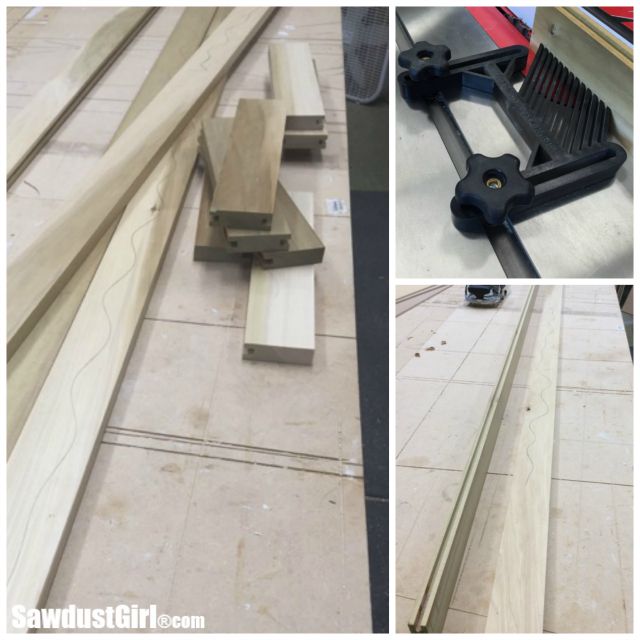
I cut the 1/4″ groove in my rails and stiles on my table saw with a dado set.  I set up a featherboard to hold the 98″ stiles against the fence while I fed them through.  I don’t like building doors this tall.  It’s hard.
Pantry Pocket Doors

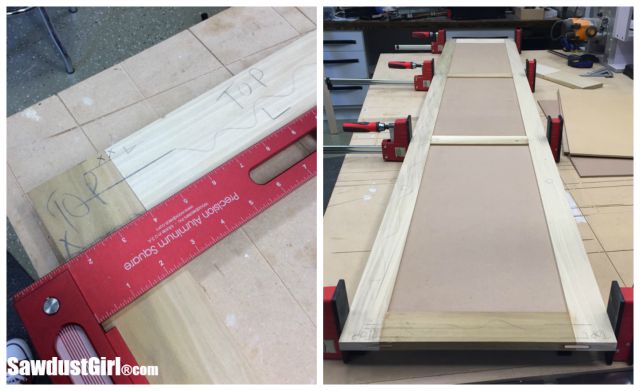
I used loose tenons to join the rails to the stiles.  Aside from the difficulty in lining everything up, running from one end of the table to the other, pushing here, something popping up over there…loose tenons make for super fast and easy joinery!
Pantry Pocket Doors

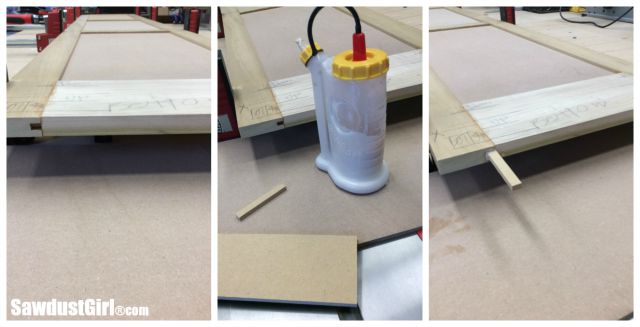
Because I ran these through the table saw to cut the panel groove, and they are so long and hard to manage, I did not try to cut “stop dados” (where you don’t see the groove on the ends of the boards).  I just glued in a plug where I didn’t want a hole.  If I were to use true tenons on my rails, my tenon would fill that groove completely but I going for quick and easy as often as possible.  Loose tenons and plugs.  Boom!
Pantry Pocket Doors

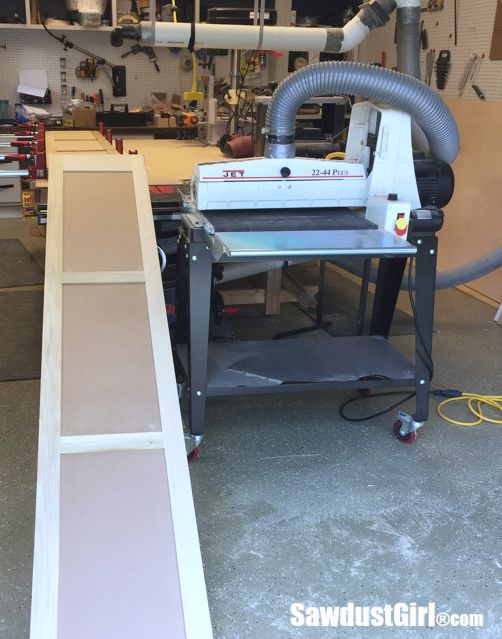
I used my drum sander to do my first two grits of sanding;  80 and 120.  It was difficult to manage the 8′ of infeed and outfeed so I finished up the 220 grit sanding with my orbital sander on my work table.
Pantry Pocket Doors

The drum sander did an awesome job cleaning up and evening out my doors while keeping all surfaces flat and even.
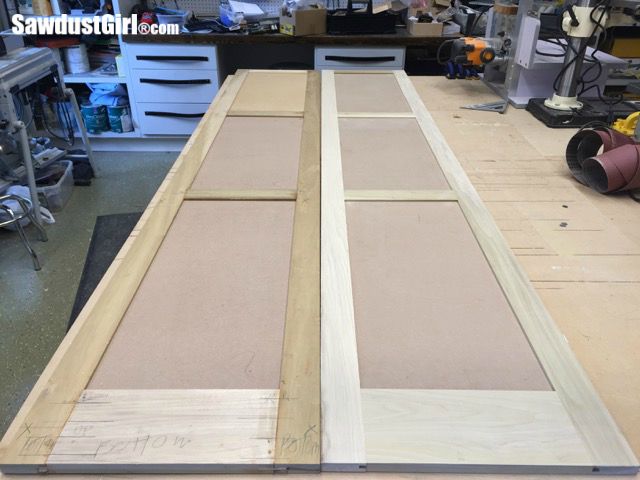
Sliding pocket doors for cabinet -hidden pantry entrance

Then I primed.  I did this with a brush and roller as is my usual routine.
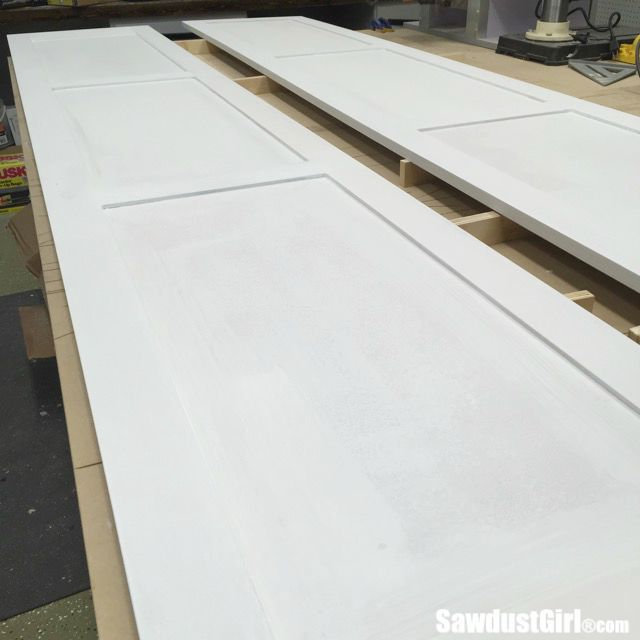
Pantry Pocket Doors

Attach door hangers

When the primer was dry, I hauled my doors up to the kitchen and installed the rollers and catch and hung my doors.
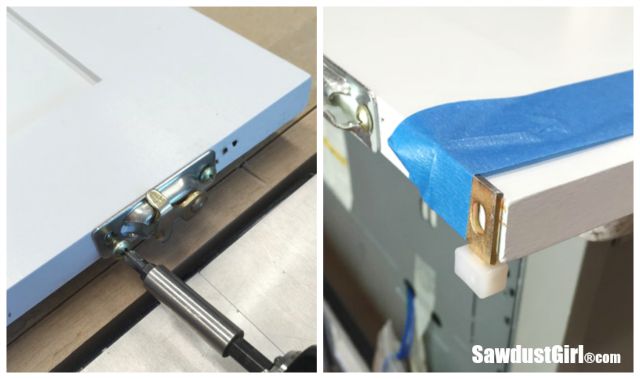
Pantry Pocket Doors

They fit!  Remember that arch I put on the existing cabinet?  Watch that disappear…  But anyway, with the doors installed I was able to mark the location for my floor grooves.
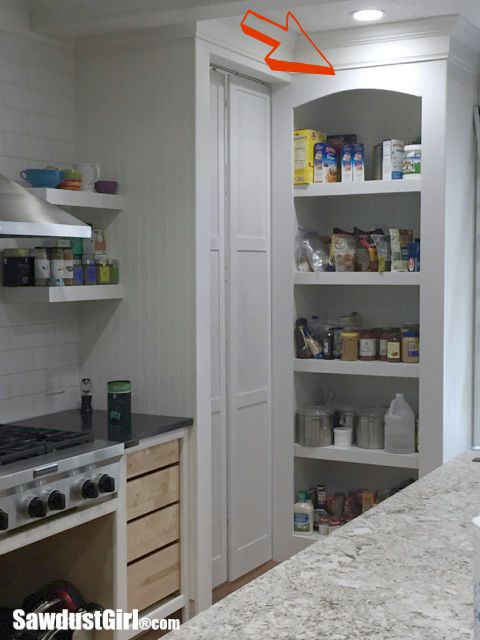
Pantry Pocket Doors

Cut floor grooves

YIKES!  This made me seriously nervous.  Not that I couldn’t patch the floor and start over if I totally screwed up but I -didn’t – want – to – have to.

I used my track saw.  Cut the grooves after I measured and checked like 1500 times.  I didn’t even rehang the doors and check to see if the grooves were good to go.  I just plowed ahead at this point.  I sanded the grooves.  I sanded the edges so they wouldn’t be sharp to my bare feet.  Then Brody helped me match the stain and I stained the grooves to make them finished and intentional.
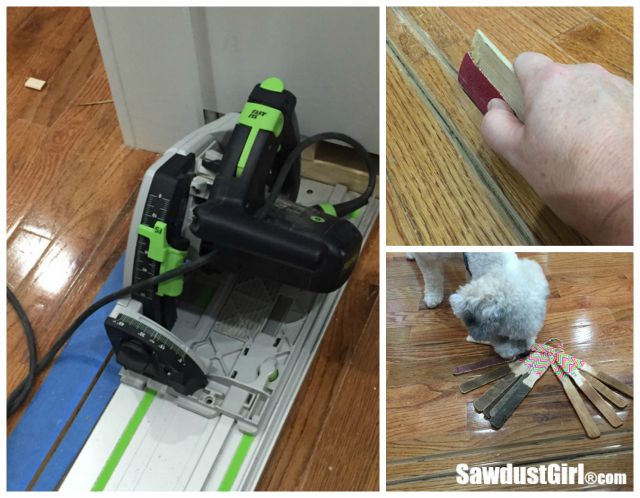
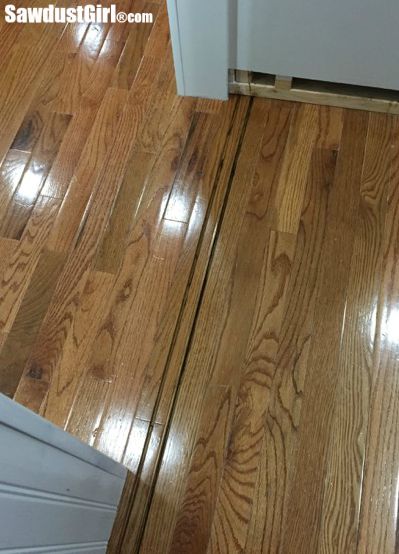
Pantry Pocket Doors


Cutting floor track for hidden pantry doors

Then I cut mortises and installed two loose tenons to fit in my floor grooves.  I wanted this floor track and something sticking out the bottom of the doors into the floor track to keep the doors from swinging into each other or the “pocket” cabinets while being opened or closed.
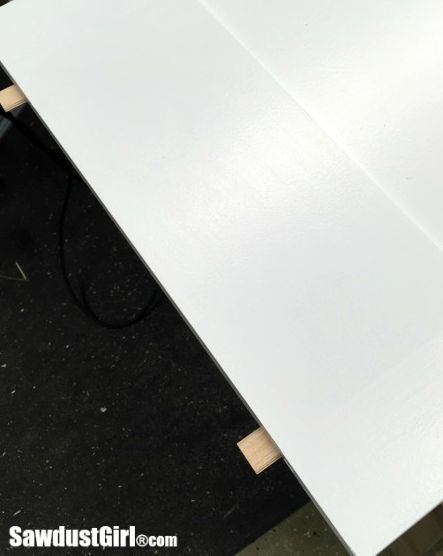
Pantry Pocket Doors

While I was doing all the cutting and sanding and staining of the floor track, I was also painting my doors.  Sand, paint, sand, paint.  Two coats on each side of each door.

Pantry Pocket Doors

At this point, there was nothing else to be done but hold my breath and install, hoping above hope that everything would line up and work out.

Miraculously, it did!

HAPPY DANCING!  Lots of it!  (Ooh yeah, did you notice the arch is gone?)
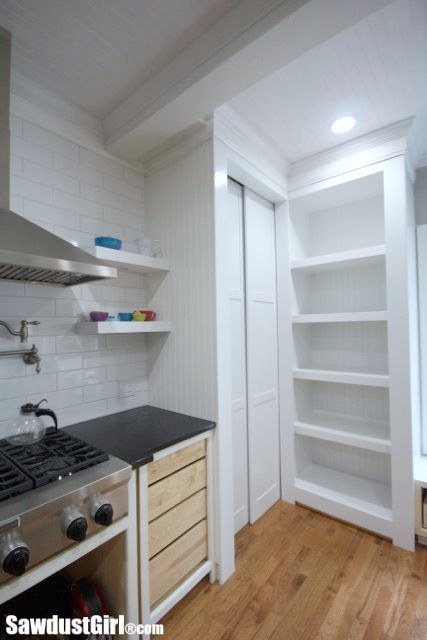
DIY sliding pocket doors for hidden pantry.

Door pull

Then I made a big dust mess routing out for my door pull.
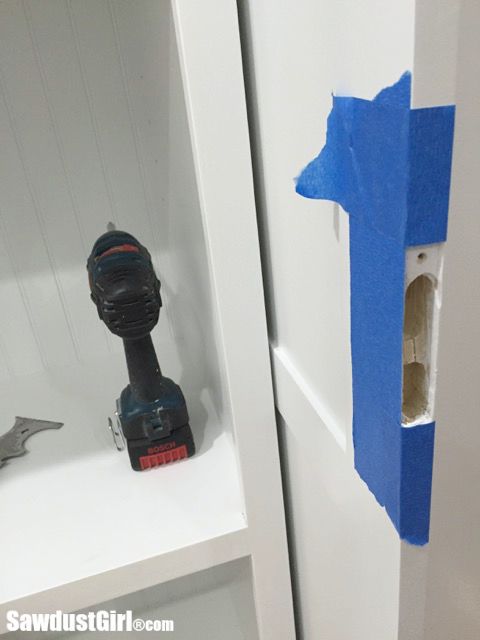
Pantry Pocket Doors

Which worked out beautifully too which is also amazing because the whole time I was shaking my head thinking, “This is going to break.”  But it didn’t!
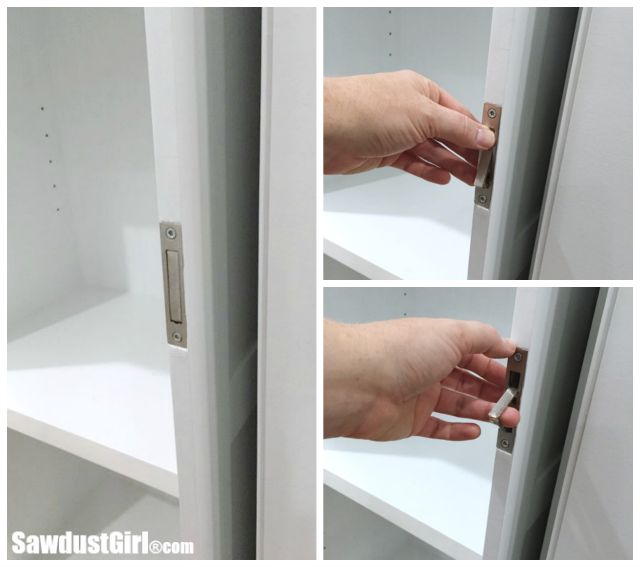
Pantry Pocket Doors Ever feel spastically excited by everything you WANT to get done right this second?  That’s me.  The pantry pocket doors are done!  Now I have 20 other things I want to get done today so woohoo here I go!
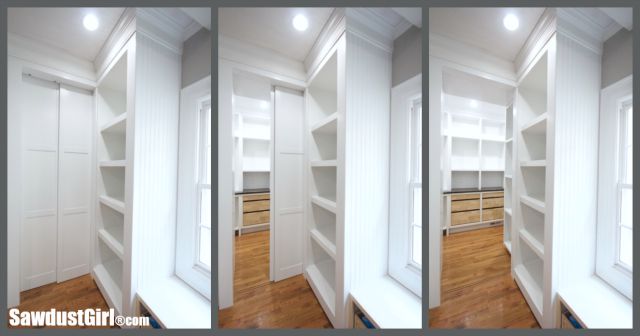
DIY sliding pocket doors for pantry.

So I decided to remove the arch on the side cabinet because it didn’t make sense to my eyes and I wanted the whole corner to look like one piece…kind of like it did before.  I swear I’ve torn out and redone my OWN work too much in this house.  But, when you decide this is YOUR house and not just a house you’re going to live in for a few years, make it look better and then move on, you decide it’s ok to tear out a few things that you made “better” to make them “BETTER”!DIY sliding pocket doors for pantry.

August 31, 2015 · 12 Comments

« Blind Corner Cabinet vs. The Perfectionist
Attaching Faceframe to Adjustable Shelves »

Comments

  1. Kimberly says

    August 31, 2015 at 2:21 pm

    Yay!!! Its so beautiful! And I like it better without the arch too :-)) Great job!

    Reply
    • Sandra says

      September 1, 2015 at 9:54 am

      Thanks Kimberly.

      Reply
  2. Orangeblossom says

    August 31, 2015 at 4:33 pm

    Yeah!!!! Awesome work. Love pocket doors. Great job.

    I like without the arch too

    Reply
  3. Laura says

    August 31, 2015 at 7:03 pm

    IT LOOKS AWESOME.!!! YOU ARE MY HERO!!!

    Reply
    • Sandra says

      September 1, 2015 at 9:54 am

      Thanks!

      Reply
  4. Jake's a Girl says

    August 31, 2015 at 7:37 pm

    I concur to all the above!
    I love how you guys buy a house then almost take it down to the studs *and in some cases do* and rebuild it to Beautiful! After seeing the before pictures of the kitchen…It deserved to be beautiful and special and you are totally making that happen. 🙂

    Reply
    • Sandra says

      September 1, 2015 at 9:55 am

      Thank you. We are definitely falling in love with this house. 🙂

      Reply
  5. Gretel says

    September 1, 2015 at 5:56 am

    I am in total awe. Brava!

    Reply
  6. alli says

    September 1, 2015 at 10:54 am

    You are so awsome! I am a bit handy but no where near this level.
    I am about to undertake making a corner pantry from 2×4’s and drywall, its a SMALL kitchen and I need the space!! I may chicken out and hire a handyman! I bought a 10.00 old door and re-finished it and added a chalkboard paint to one of the panels, I could probably do this job but…

    Reply
  7. Holly Prim says

    September 2, 2015 at 10:46 pm

    Just gorgeous! I know how hard doors are, I’ve been working on one for three weeks, cannot believe you banged that out so fast, you’re amazing!

    Reply
  8. Ronda Batchelor says

    September 3, 2015 at 2:09 pm

    Yup your still my hero!!

    Reply
  9. Vince mccoy says

    December 14, 2017 at 3:31 pm

    Awesome job I really like the look.

    Reply

Leave a Reply Cancel reply

Your email address will not be published. Required fields are marked *

Categories

New Post email notification signup

You Subscribed!

Legal Stuff

Terms of Use

Privacy Policy

Disclosure

Recent Posts

  • White Wash Pine Wood Ceiling
  • Lodge and Life Update
  • How to Choose Which Track Saw to Buy in 2021
  • How to Choose a Paint Sprayer to Buy in 2021
  • How to Install a Smart Door Lock

Disclaimer:

Although it is my intention to provide accurate plans and clear instructions, not all plans have been tried and tested. Using plans or information found on SawdustGirl.com indicates that you agree with the Terms of Use policy and will accept full responsibility for the process and outcome of any project you attempt. All plans are for private use only. Plans and information published on SawdustGirl.com may not be reproduced, republished or distributed in any manner without written permission from Sandra Powell, Sawdust Girl. Actual projects built using Sawdust Girl plans may be published on your own site without instructions or "tutorial" as long as you provide a link to my original post with full post title or "SawdustGirl.com" as link title.

Copyright © 2022 · anchored theme by <a target="_blank"