Maryville House Tour – Master Bathroom
This is the project I saved for last. I didn’t want to do a complete renovation but the master bathroom is the one room in the house that was completely dated. I hadn’t done a single thing to this room and frankly, I didn’t want to do that much work– just to sell it. But the master bathroom is one of the most important rooms in terms of capturing the buyers’ emotions. The rest of the house is pretty and this room was soooo bad. It needed to be done. It had to be done. So Julie and I crushed this reno — in record time! 3 weeks! Which is why I was so happy that we survived the completion of this house!
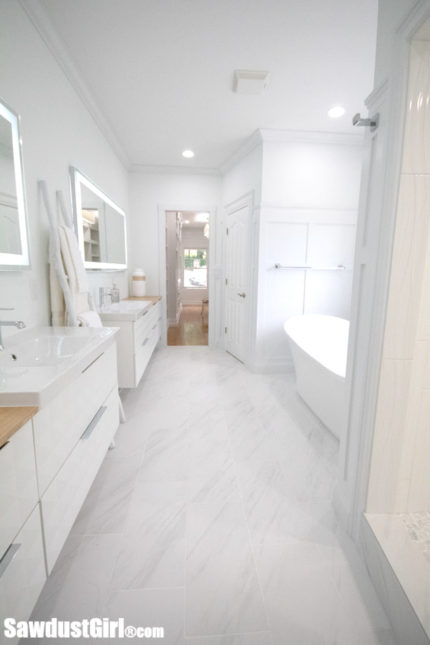
Before and After

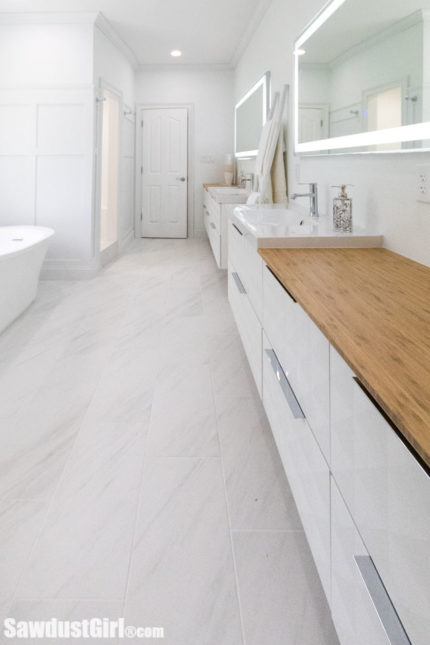
Master Bathroom Renovation
My friends Chantel and Matt helped me remove the bathtub, cabinets and demo the floors while Julie was in San Diego visiting her daughter. The granite countertop weighed like 500 lbs so we had to recruit my neighbors to help get it out. He ended up wanting the cabinets and countertop so that worked out well. I was going to put them on the street with a “free” sign.
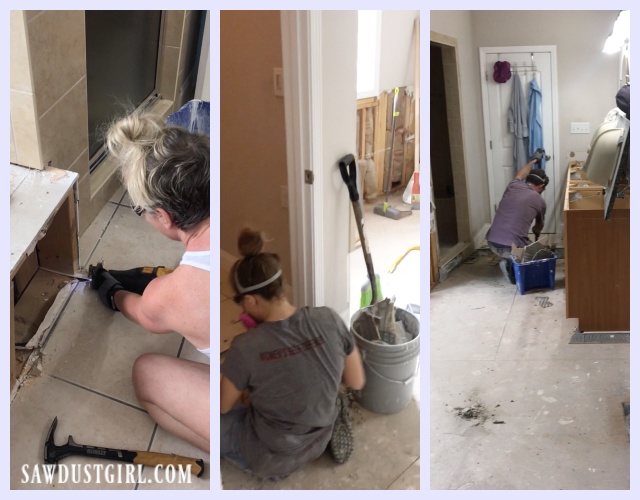
During demo, I tore out part of the wall between the master closet and bathroom. What existed before I tore it out was a door, positioned against the side wall, that opened up into the bathroom. The position of that door/doorway was the reason for a lot of wasted space in the bathroom.
The cabinetry originally spanned only about 2/3 of the room and then left about 5′ of wasted wall space. So we had a double vanity but the sinks were very close together. One of the sinks was located directly in front of the shower door so if Wes was there, brushing his teeth (let’s say), and I swung the shower door open without looking, I’d smack him. That never happened but the location of that sink and wasted wall space always bugged me.
The bathtub that the builder framed into a huge platform that protruded into the already narrow walkway made the bathroom feel crowded. Also, that tile made the house look like it was built in the 80’s. So we tore it all out!
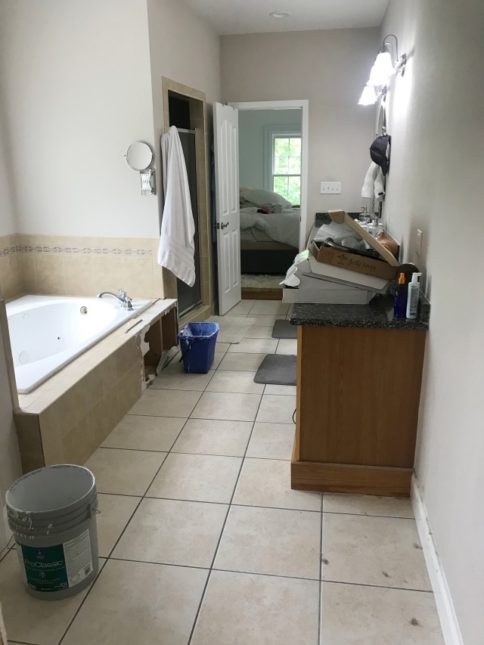
Because we moved the doorway over about 20″, we could utilize the entire wall for cabinetry! Which meant the vanities could be spread apart but to do that, the plumbing had to be relocated. Luckily we have an awesome plumber who works us into his schedule when we need him. He came over on Mothers’ Day (with his wife’s approval) to get the rough-in done for us!

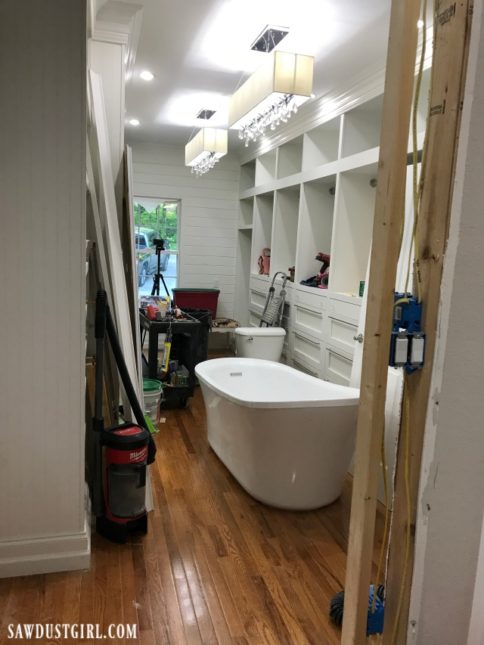
Timing was everything with this renovation. The floor tile had to be done before the tub could be installed. The shower connections had to be made before we closed up that wall. I wanted to install board and baton wainscoting before the tub was installed –or it was going to be super difficult to install and paint. Luckily our plumber is super cool and was supportive of me getting that wainscoting up on the wall before he installed the tub. He did the shower connections and went and did the other tasks we had for him (hooking up the loft sinks) while I installed drywall and got the foundation piece of my wainscoting installed. That made it a ton easier for me. I still had to scrunch myself in to install the rails and stiles. I had primed and painted everything beforehand so I didn’t have too much paint work to do in the tiny spaces.

I bought IKEA cabinets for this bathroom because of the time constraints. Madison drove 3 1/2 hours in both directions –to Atlanta to pick them up for us. The above photo is the bathroom literally days before our scheduled date for photographer to come out to take pics for the listing. We had already pushed it back 2 or 3 times so we just had to get it done!
Chantel put the cabinets together. Julie was tiling the shower, I was installing and painting wainscoting and trim…Madison painted the water closet! That’s big because Madison does not like this kind of work. She was awesome though. Thank goodness her semester had already ended so she had some free time. She drove out (1 hour each way) almost every day for 2 weeks to help us with whatever she could.

And we got it done!
Bathroom Reveal
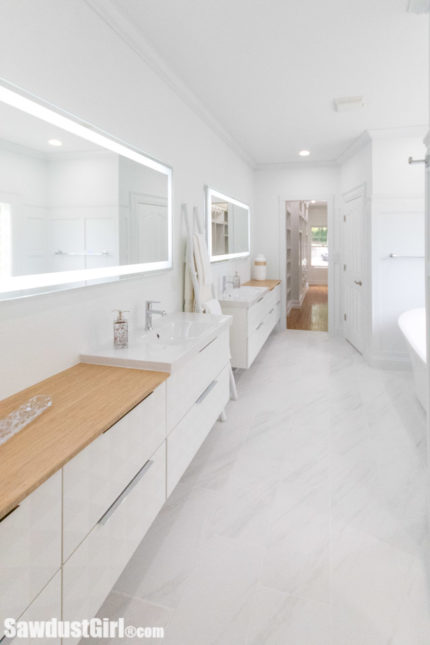
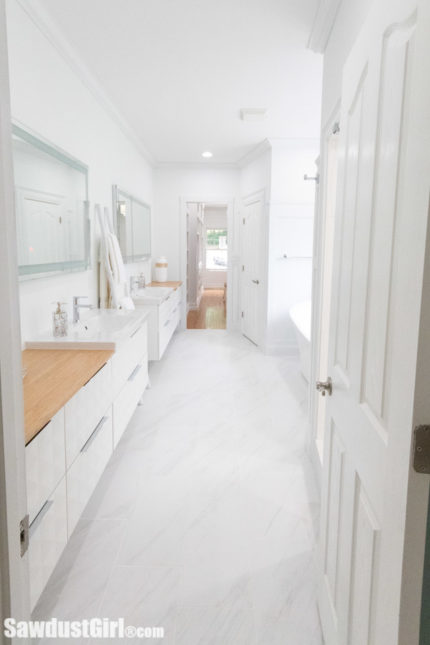
We narrowed the shower entry and raised the threshold so we could make the shower simply a walk-in shower with no door. Because the bathroom is a galley with an entrance on both ends, it’s not great to have a door that opens up into that walkway. Other than the doorway, we didn’t change the footprint of the shower. But we (and by we I mean Julie) completely redid it — and it’s gorgeous! We installed all new fixtures so added a handheld (which we went without for 8 years while living with the old shower).
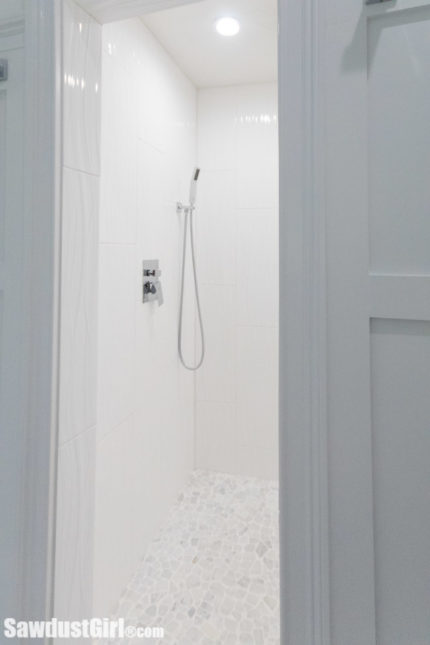
Using a soaking tub in this bathroom instead of the big, decked, jetted tub that stuck out into the pathway by about 5″ — makes the room feel tons more spacious. I stole the soaking tub from my new house. (It won’t get used there since we plan to add on and build a master wing.)
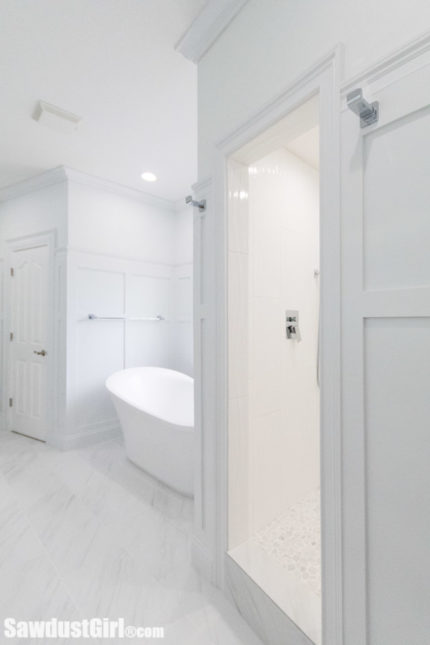
Another thing that created more spacious feel was the IKEA cabinets. They are only 19″ deep, rather than the typical 24″. I chose the drawer fronts in a new (to me anyway) style, Resjön White. The texture is actually there, it’s not just an optical illusion. We used Modern Edge – 12 1/8″ Long Edge Pull in Polished Chrome, supplied by Liberty Hardware.

Liberty Hardware supplied us all our hardware needs for this bathroom renovation. In addition to the drawer pulls, we used Ara robe hooks and the Ara 30″ Single Towel Bar.


We went for bright and open! Because the space is not huge, we had to make it look and feel as large and open as possible. Light paint and a lot of light is key when “bright and open” is what you’re going for. Liberty Hardware sent me two Ara towel rings but we didn’t end up using them because I ended up not building a center tower cabinet as I originally planned. Because of time, we sent Penny and Madison on a shopping excursion to find some kind of decorative storage item that would fit between the two sink cabinets. They found a towel ladder (probably a blanket ladder but it fits perfectly in our spot and is holding towels so it’s a Towel Ladder!)
It’s all in the details, right? Liberty had a flush handle in the Ara collection so I had to get it! We didn’t do anything else in the water closet except paint and install a decorative shelf to hold “supplies”. But, it’s just a water closet.

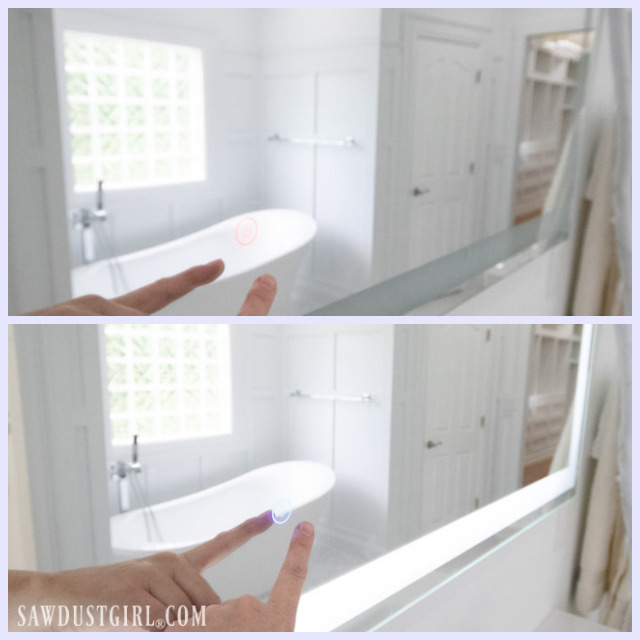
One thing I splurged on was the lighted mirrors. They make you look amazing. I am definitely installing lighted mirrors in all future bathroom renovations!
The bathroom turned out absolutely beautiful. I can’t even believe we did this job in three weeks! We barely made it through that one. Wes and I are both reallllly sad that we have this bathroom while we lived in this house for 8 years! Like many other rooms in this house that didn’t become their best version of themselves until right before we moved out, the bathroom will be enjoyed by someone — just not us. I keep telling Wes that I’ll build him an even better one (of whatever room we’re currently talking about) in the next house. I have a lot of work to do in that regard – the new house is “campy”.
And that concludes the Maryville house tour! Next time I post, I’ll be sharing my new house and/or workshop! Thanks for following along on this Maryville House journey!
Thanks so much. I’m trying to muster enough courage to start tackling the new place. I keep getting overwhelmed, don’t know where to start, so I go shopping for something I “need” instead. LOL It’ll come. I just haven’t had enough of a break yet. ha
What a transformation, it looks absolutely gorgeous! You did an amazing job, and I’m sad you didn’t get to use it and enjoy your astonishing efforts in the master bath reno. One very happy buyer will definitely reap those benefits.
I am so glad I found your website. I am currently living with stud walls and moving boxes in almost every room after 3 years because I have fun re-imagining the spaces and making changes to reveal their full potential. Unfortunately, no one I know seems to understand how this is fun for me. I have to keep explaining over and over that it doesn’t stress me out and the dust is just part of the process.
Following your posts has shown me that I am not the only one who does this. Seeing your “afters”, hearing your excitement, checking the comments for motivation has connected me to an entire community. The support you have is amazing. Thank you for sharing!
Oh Brenna you have no idea! When I started this blog (10 years ago), it was 100% for the community! It has grown into so much more but I completely understand what you are saying and I’m so glad you found your tribe!
Three weeks?! That’s insane! Great work!
Thanks Sarah! I know…it still doesn’t feel like I actually finished!
Beautiful home! You did such an amazing job ! Looking forward to your new home, and new projects!
Aww, thanks Melanie! I can’t wait to share all of my new projects.