• Home
  • About
    • Personal Posts
  • Privacy
  • Shop
    • My Account
    • Checkout
    • Email
    • Facebook
    • Instagram
    • Pinterest
    • Twitter
    • YouTube
Sawdust Girl®

Sawdust Girl®

Renovation, cabinet building and woodworking plans and tutorials. Build like a Girl®

  • My Home
    • Clinton TN House
      • Clinton TN House in Progress
    • Maryville TN House
      • Maryville TN House Tour – Completed Rooms
      • Maryville TN House in Progress
        • Basement
        • Basement Storage Closet
        • Bedroom Office
        • Craft Room
        • Dining Room
        • Entry
        • Garage
        • Guest Bedroom
        • Hallway
        • Jack and Jill Bathroom
        • Kitchen
        • Kitchen Entry
        • Laundry Room
        • Library
        • Living Room
        • Loft
        • Madison’s Room
        • Master Bedroom
        • Master Closet
        • Pantry
        • Porch
        • Powder Room
        • Wes’ Office
    • Illinois House
    • Calderwood Cottage
  • My Workshop
    • Clinton Workshop
  • Build & Breakfast
  • Cabinet Making 101
    • Cabinets
    • Doors
    • Drawers
  • Projects and Plans
    • Countertops
    • Beds
    • Benches
    • Bookshelves
    • Desks
    • Gift Ideas
    • Holiday
      • Christmas
      • Halloween
    • Home Accessories
    • Kids
    • Kitchen Cabinets
    • Lockers
    • Nightstands
    • Organization accessories
    • Recipes
    • Sewing
    • Tables
    • Vanities
    • Wardrobes
    • Woodworking
      • Wood Finishing
    • Workshop
    • Workshop Storage and Organization
  • Remodeling 101
    • Baseboard and Trim
    • crown molding
    • Demolition
    • Door and Window Casings
    • Door Installation
    • Drywall
    • Electrical work
    • Flooring
    • Home Maintenance
    • Painting
    • Plumbing
    • Resources
    • Safety
    • Tile
    • Wall and Ceiling Treatments
  • The Sawdust Diaries
    • Andrea
    • Ava D.
    • Beckie F.
    • Cara C.
    • Courtney B
    • Fawn T.
    • Jenn D.
    • Kelly C.
    • Kristy K.
    • Lara T.
    • Malisa B.
    • Marnie D.
    • Robin C.
    • Val F.
  • Tools
    • Products
    • Tool Reviews & Overviews
    • Inspiration & Ideas

First you clean it, then you tear it up.

All Posts, Dining Room, Living Room

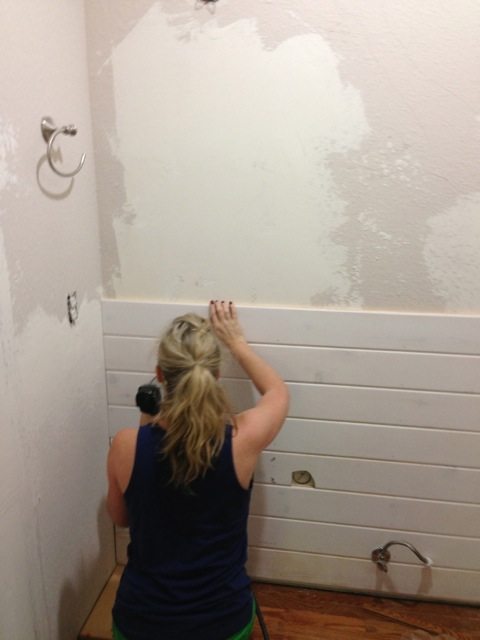
In my last update I walled up one entrance to the dining room and started installing tongue and groove planks to the entry wall.  Lots more has happened since then.

Thursday I finished the wall and ceiling then hauled ALL my tools and supplies down to the garage so we could have a cleanish home for one day and not have any trick or treaters trip all over the garbage that was strewn all over the porch…we didn’t get a single trick-or-treater.  We usually get at least one, but the doorbell isn’t attached so maybe we did get one and didn’t know it.  No matter, now I have a bunch of candy to eat and then be mad at myself for eating.  It’s a fun tradition!

I filled all the knot holes with wood putty, now I still have to spot prime all those areas and then paint.  Lots of work still to do on that.
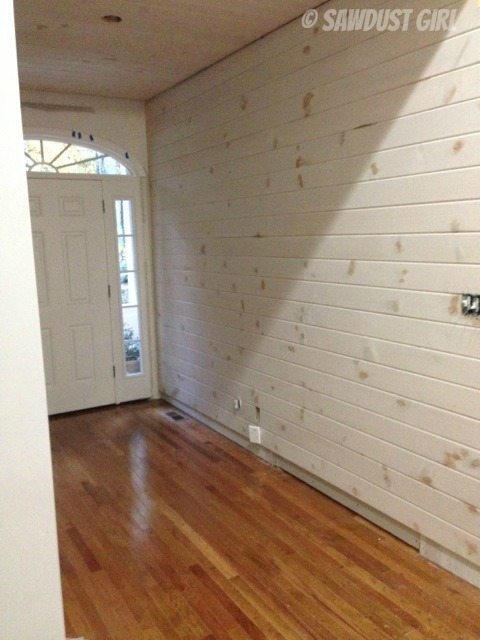
planked-wall-ceiling


I closed up the dining room door on the entrance wall because I want the dining room open to the kitchen and living room but don’t want visitors to be able to see into the entire house from the front door.  For that to happen, this air return is getting moved to a different wall.  That’s getting hired out and while the crew is here I’m having them move three vents that are in locations that don’t work when certain walls are gone.  😉
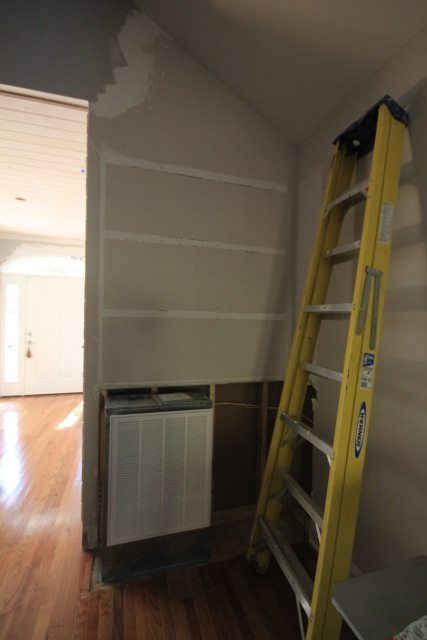
air return


Friday I payed Madison and her friend each $5 and an ice cream to haul all this junk out of the dining room and upstairs into the other “junk storage space”.
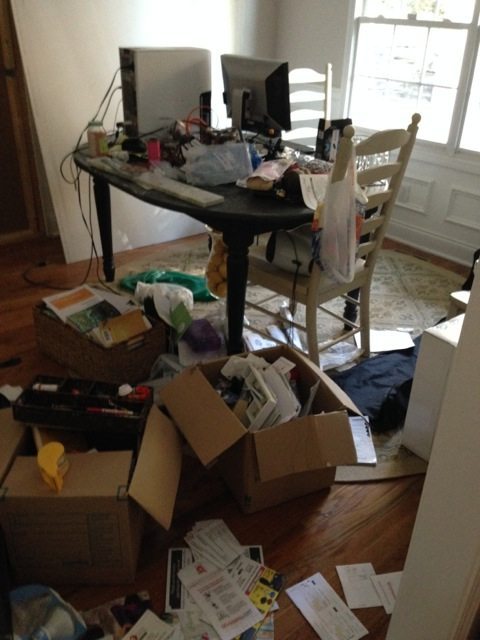
dining-room-junk-room


Wow, it’s kind of pretty all cleaned up!  It was pretty for literally 5 minutes.
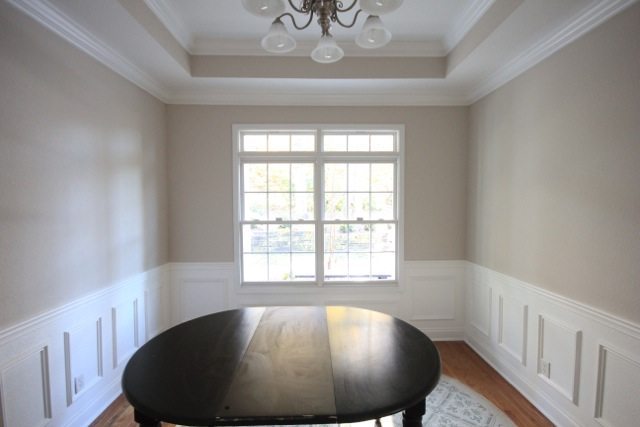
dining-room-before


After 5 minutes I started ripping the faux wainscoting off the walls.  FYI, THIS is what faux wainscoting looks like when you apply moulding over heavily textured walls.  It’s not my cup o’ tea.  Plus this job was installed very very pooooooorly!
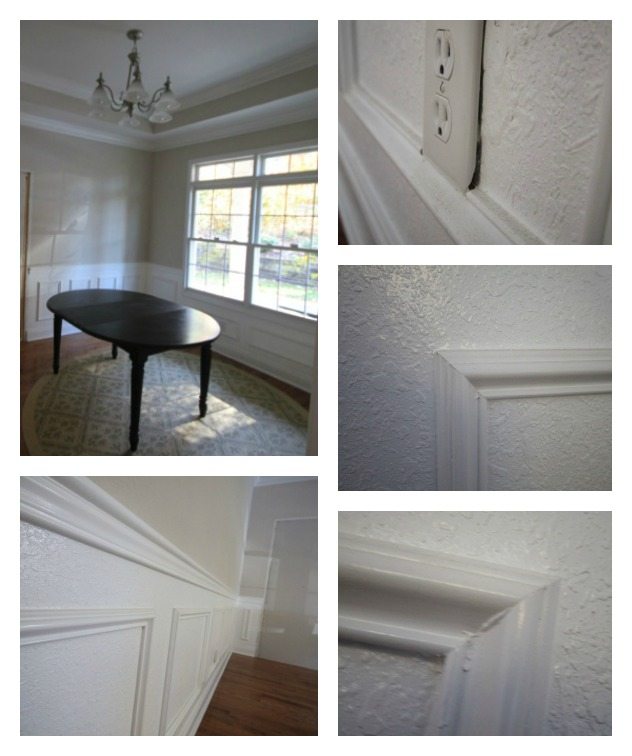
 

faux-wainscot-botched

So I ripped that ALL off and then…

This is the other door to the dining room.  It’s off the kitchen.  Part of my “Big Picture Plan” is to put a door going outside right where that window is so we don’t have to take the garbage out by walking it all the way through the living room and entry (as is our current situation).  So I want to close this dining room entry up too so I can build a “drop station”; somewhere to put bags and keys and mail and dog leashes…  Since I’m waiting for the AC guys to come move stuff and I don’t want to just sit around, I thought I’d go ahead and wall this up now.
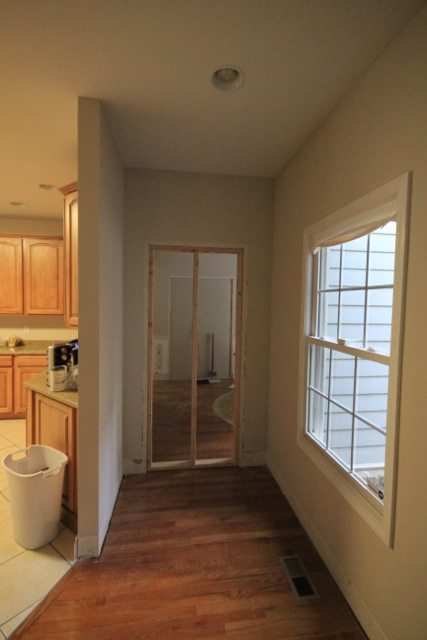
kitchen-entry-progress


But Wes thought the idea of having a room sitting empty with no access was a crazy idea.  And so to ease his mind, I went back to the living room and…

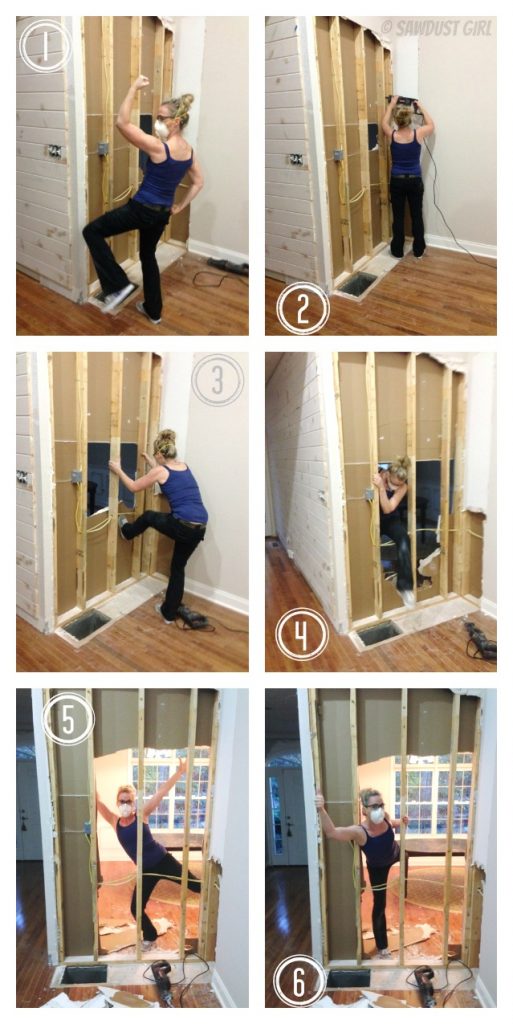
  1. tore off all the living room side drywall and punched a small hole in the dining room side — just big enough for air to circulate and for someone to be able to stick their head in to check for fires!  (who’s the crazy one?)
  2. then decided “what the heck” I’m already this far in
  3. vented a little and made the hole even bigger
  4. decided I was all in at that point
  5. Yeah baby
  6. how’s that for a crazyass plan?!!

removing-dining-room-wall

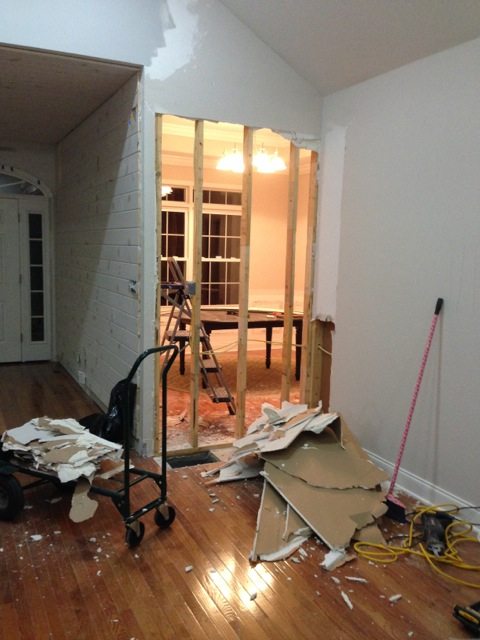
There’s your door!

kitchen-remodel-begins


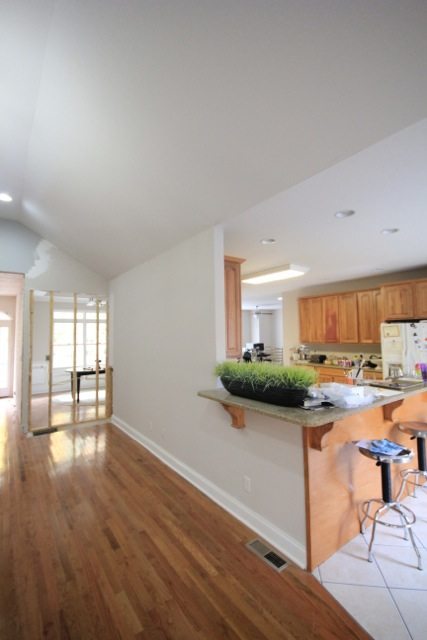
And then I went inside and tore it all down because this is the new entrance to the dining room, after all.
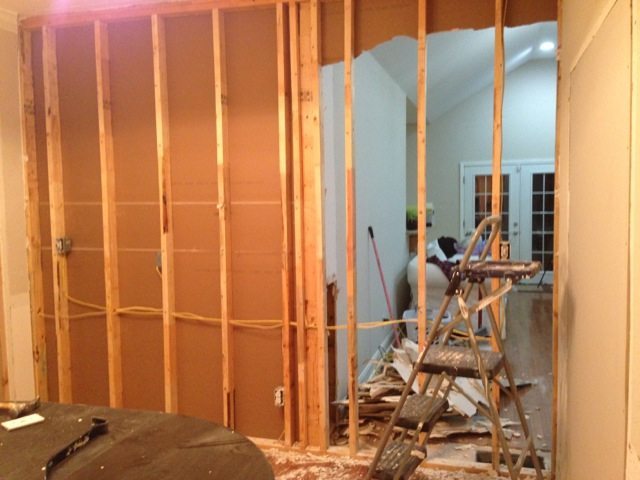
dining-room-wall-demo


I made a HUGE mess but it was thrilling to make BIG progress towards the overall layout that I want this house to have.
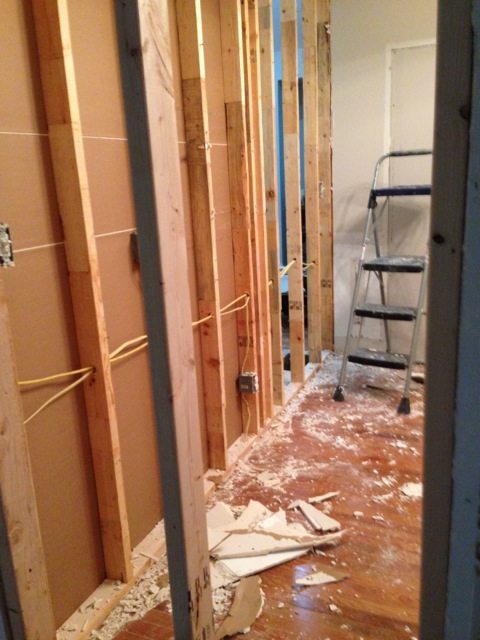
dining-wall-demo


It’s not nearly as scary after the mess is cleaned up…which I made sure to do before Wesley came home from work.  Because I am considerate like that.
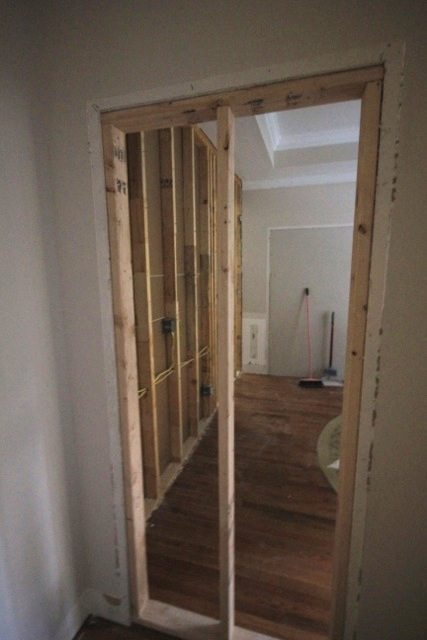
dining-room-destruction


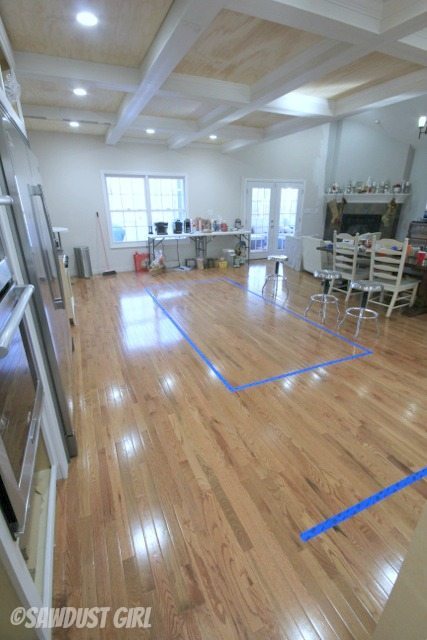
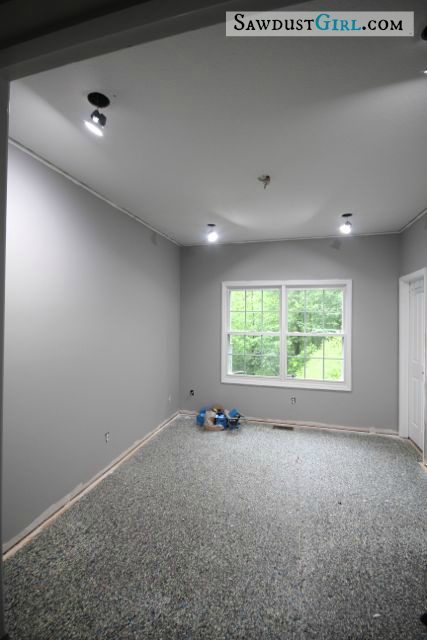
I’m already loving the light from the dining room window and the more open feel IN the living room.
kitchen-dining-before


November 6, 2013 · 17 Comments

« Built-in Entertainment Center and Fireplace
It’s only drywall »

Comments

  1. Madison Powell says

    November 6, 2013 at 1:04 pm

    Yeah, that was pretty crazy…can’t wait for it to be done! <3 You're really awesome mom and know that we support you!

    Reply
  2. Jenn says

    November 6, 2013 at 1:26 pm

    You are my kind of woman!!! When we first moved into this house, my husband had to do 6 weeks of training away from home. He’d come home on the weekends and find that I’d ripped out a ceiling or pulled up a floor or something like that. 😀 I can’t wait to see it when it’s done!

    Reply
  3. Kristi @ Creative Kristi says

    November 6, 2013 at 1:30 pm

    1. I love Madison’s comment. 2. I LOVE it! I have to say I was a bit confused when you ‘walked’ me through your plans during the house tour (but maybe it’s because I was tired?!) but this is awesome!! Makes total sense now that I see it.

    Reply
    • Sandra says

      November 7, 2013 at 10:36 am

      You have to come stay again when it’s all done!

      Reply
  4. Oldbury says

    November 6, 2013 at 2:00 pm

    Great job! Your hard work is really paying off, same here no trick or treaters!!

    Reply
  5. kristin says

    November 6, 2013 at 2:03 pm

    You are so stinkin’ awesome! My husband and I have done our share of DIY and have done the picture moulding. I would never think to do that over textured wall! Yikesy! And it looks like they used a semi-gloss to bring attention to the texture! How do you live with the dust??? We finally had someone come in and float our walls so we can add a board and batten up the stairs and in the entryway–wohoo! However, after one day of sanding (and they tried so hard to contain it and I wore a mask part of the day!) I awoke to a sore throat. Thought the dust. Then I get a horrible earache…hmmm? I can only determine that my ailments (although no true “ear infection”, just extreme pain for four days) stemmed from the dust irritating my nasal passages!!! But hey–now we can DIY on flat walls! Your family’s systems must be immune 🙂

    Reply
    • Sandra says

      November 7, 2013 at 10:38 am

      Oh man, drywall dust is awful but YEAH for flat walls!

      Reply
  6. Ayisha says

    November 6, 2013 at 3:02 pm

    Wow. I thought I was bad. How do you know which walls are partition walls and which ones are load bearing? Also, that wall that you only removed from inside of the dining room, will it be completely open to the kitchen? I can’t wait to see this room reveal.

    Reply
    • Sandra says

      November 7, 2013 at 10:38 am

      I had an engineer come in and tell me! 🙂

      Reply
  7. Kathy S. says

    November 6, 2013 at 7:02 pm

    Loving it! Can’t wait to see what you are planning for the kitchen.

    Reply
  8. kim massa says

    November 6, 2013 at 7:40 pm

    I can’t believe you are doing all this. I want to do what you do!! Can’t wait to see the reveal (and when will that be?).

    Reply
    • Sandra says

      November 7, 2013 at 10:39 am

      LOL Whenever it’s done. This is happening as we speak (which is why I’m really slow with plans but you let me know when you have all your wood planed!) 🙂

      Reply
  9. Feral Turtle says

    November 7, 2013 at 8:07 am

    Looking good Sandra!

    Reply
  10. Dina says

    November 7, 2013 at 10:52 am

    You are incredible!!

    Reply
  11. Lori says

    November 7, 2013 at 12:29 pm

    My husband would have my head for so many unfinished projects! 😉 But the end result in your home is always amazing, so I see how he must trust you and your method.

    Love seeing that I’m not the only who can’t finish one project before inspiration strikes somewhere else!

    Can’t wait to see the finished product! Thanks for sharing.

    Reply
  12. Jay Chandrasekhar says

    November 8, 2013 at 9:57 am

    I agree with Lori. I wish I had your vision. Thanks for sharing.

    Reply
  13. Kathleen says

    November 12, 2013 at 3:55 pm

    You are hilarious! I love that you have a vision and you act on it. I could just see my husband if he came home to find walls torn down!!! LOL. I hope we can work together in the future on my mud room plans.

    Reply

Leave a Reply Cancel reply

Your email address will not be published. Required fields are marked *

Categories

New Post email notification signup

You Subscribed!

Legal Stuff

Terms of Use

Privacy Policy

Disclosure

Recent Posts

  • White Wash Pine Wood Ceiling
  • Lodge and Life Update
  • How to Choose Which Track Saw to Buy in 2021
  • How to Choose a Paint Sprayer to Buy in 2021
  • How to Install a Smart Door Lock

Disclaimer:

Although it is my intention to provide accurate plans and clear instructions, not all plans have been tried and tested. Using plans or information found on SawdustGirl.com indicates that you agree with the Terms of Use policy and will accept full responsibility for the process and outcome of any project you attempt. All plans are for private use only. Plans and information published on SawdustGirl.com may not be reproduced, republished or distributed in any manner without written permission from Sandra Powell, Sawdust Girl. Actual projects built using Sawdust Girl plans may be published on your own site without instructions or "tutorial" as long as you provide a link to my original post with full post title or "SawdustGirl.com" as link title.

Copyright © 2022 · anchored theme by <a target="_blank"