• Home
  • About
    • Personal Posts
  • Privacy
  • Shop
    • My Account
    • Checkout
    • Email
    • Facebook
    • Instagram
    • Pinterest
    • Twitter
    • YouTube
Sawdust Girl®

Sawdust Girl®

Renovation, cabinet building and woodworking plans and tutorials. Build like a Girl®

  • My Home
    • Clinton TN House
      • Clinton TN House in Progress
    • Maryville TN House
      • Maryville TN House Tour – Completed Rooms
      • Maryville TN House in Progress
        • Basement
        • Basement Storage Closet
        • Bedroom Office
        • Craft Room
        • Dining Room
        • Entry
        • Garage
        • Guest Bedroom
        • Hallway
        • Jack and Jill Bathroom
        • Kitchen
        • Kitchen Entry
        • Laundry Room
        • Library
        • Living Room
        • Loft
        • Madison’s Room
        • Master Bedroom
        • Master Closet
        • Pantry
        • Porch
        • Powder Room
        • Wes’ Office
    • Illinois House
    • Calderwood Cottage
  • My Workshop
    • Clinton Workshop
  • Build & Breakfast
  • Cabinet Making 101
    • Cabinets
    • Doors
    • Drawers
  • Projects and Plans
    • Countertops
    • Beds
    • Benches
    • Bookshelves
    • Desks
    • Gift Ideas
    • Holiday
      • Christmas
      • Halloween
    • Home Accessories
    • Kids
    • Kitchen Cabinets
    • Lockers
    • Nightstands
    • Organization accessories
    • Recipes
    • Sewing
    • Tables
    • Vanities
    • Wardrobes
    • Woodworking
      • Wood Finishing
    • Workshop
    • Workshop Storage and Organization
  • Remodeling 101
    • Baseboard and Trim
    • crown molding
    • Demolition
    • Door and Window Casings
    • Door Installation
    • Drywall
    • Electrical work
    • Flooring
    • Home Maintenance
    • Painting
    • Plumbing
    • Resources
    • Safety
    • Tile
    • Wall and Ceiling Treatments
  • Sawdust Squad
  • The Sawdust Diaries
    • Andrea
    • Ava D.
    • Beckie F.
    • Cara C.
    • Courtney B
    • Fawn T.
    • Jenn D.
    • Kelly C.
    • Kristy K.
    • Lara T.
    • Malisa B.
    • Marnie D.
    • Robin C.
    • Val F.
  • Tools
    • Products
    • Tool Reviews & Overviews
    • Inspiration & Ideas

Calderwood Cottage – Round 2 (part 3)

All Posts, Calderwood Cottage

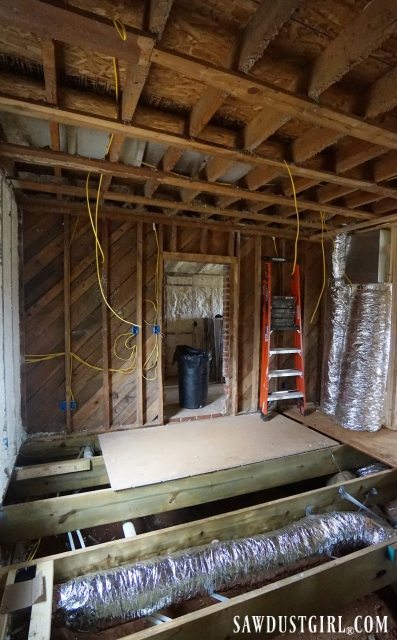
Today I’m showing the progress we’ve made on the back section of Calderwood Cottage.  In part 2 I showed you all the digging we had to do in order to get the HVAC ductwork installed. Today I’m showing you what we’ve done in the back of the house.Calderwood Cottage rebuildBack in October, when we fought Round 1 with this house, we removed the rotted trim from around one of the windows. Not surprisingly, we found the rot wasn’t isolated to the trim. Once again we found we had to demo and rebuild way more than we were planning.
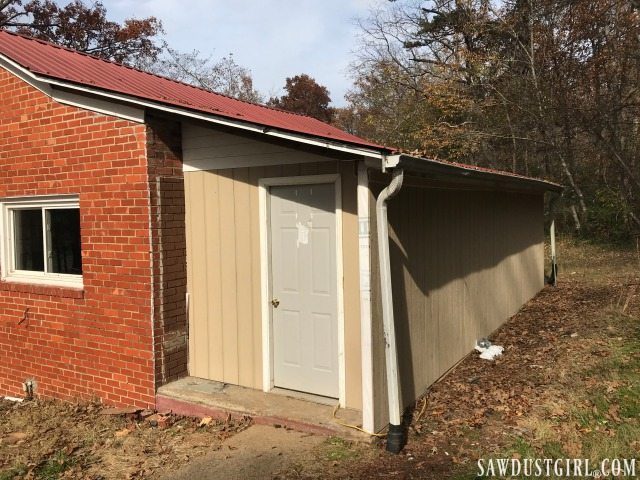
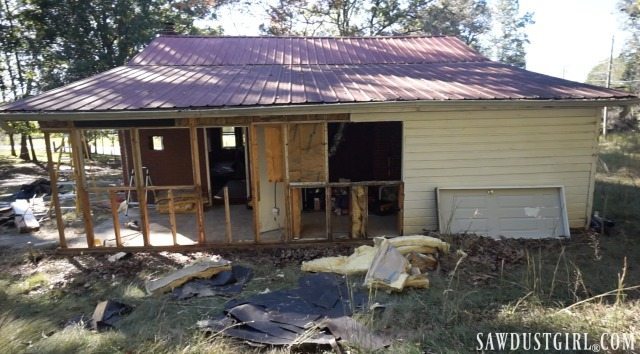
Calderwood Cottage beginning rebuild

We had to deal with the entire back side of the house.  But we’re not ones to waste an opportunity… Calderwood Cottage beginning rebuild
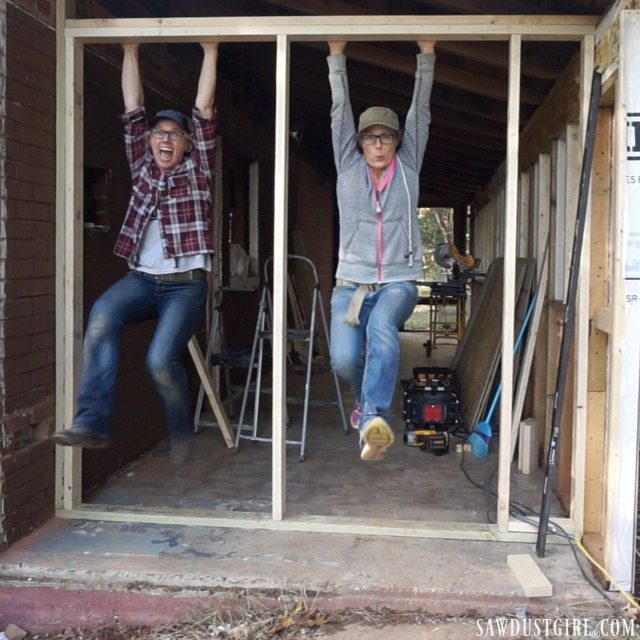
We reframed the entrance wall, moving the door over and the wall back. Having a little roof shelter to stand under as you unlock your door is always nice.Moving the door over gives us space inside to have storage cabinets along the back wall. The original layout was a waste of space. Not sure what purpose was of that little shelf. The window mechanisms were all broken so we didn’t mind losing them. Storage or natural light? In this small house we’re going with storage.Calderwood Cottage beginning rebuild
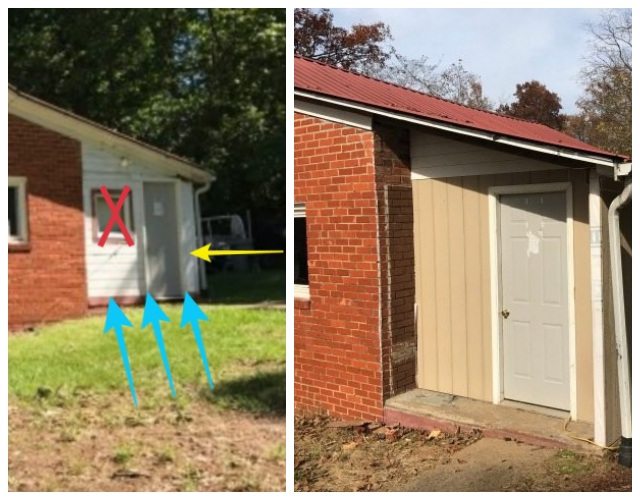
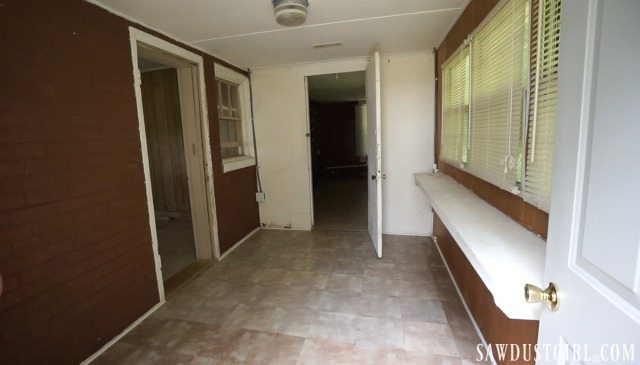
The back half of the “back of the house” was a…laundry room? It was a BIG space with hook ups for a washer and dryer. We are turning it into a master bathroom. This section was an addition to the original house. Under all the paneling was the original brick.Calderwood Cottage beginning rebuild
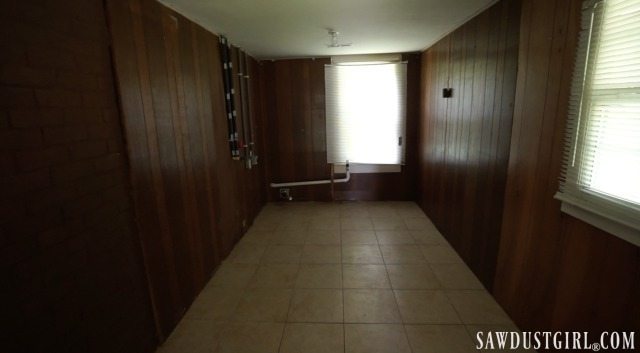
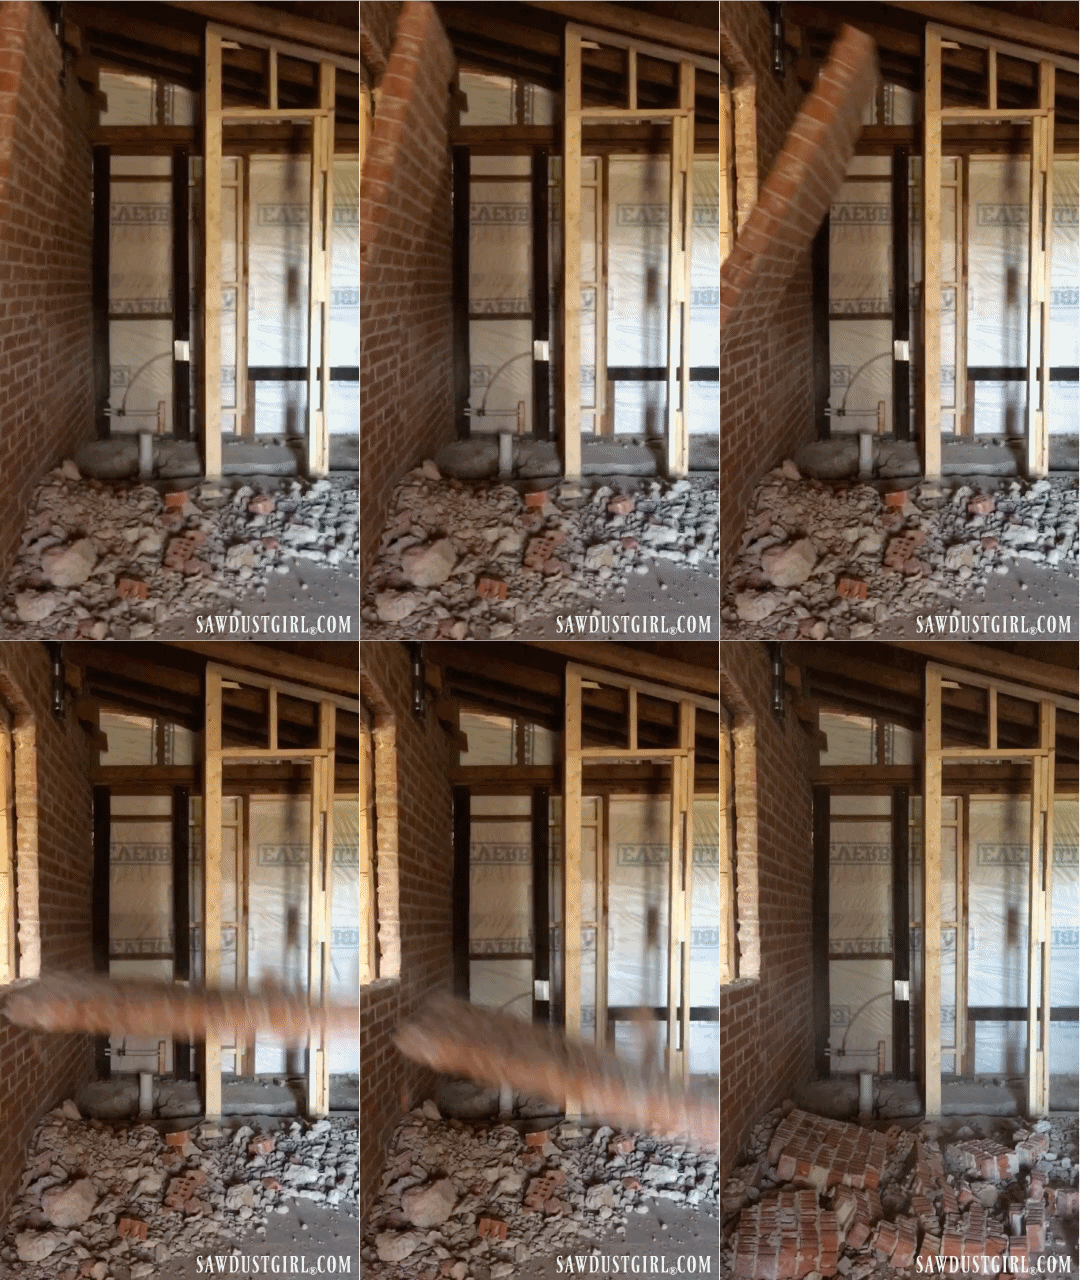
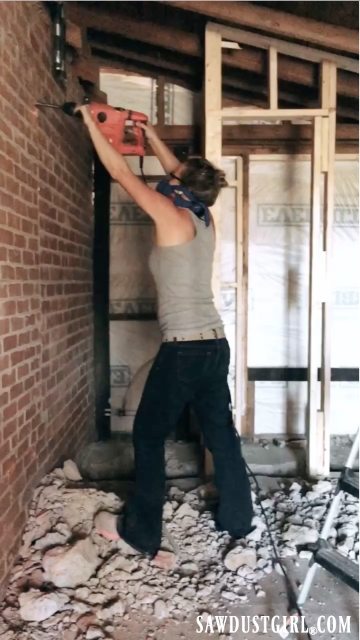
Including an original window that had been bricked over. We just needed to open that window back up…and make it a door. We tried a few sorry options for cutting through the mortar line. Without buying or renting another way too heavy for us tool, we used a rotary hammer with a chisel bit. I did the trick. 
It was surprising how difficult it was to get the wall to fall over, even after all the mortar was cut through. Julie and I took turns whacking it with our little sledge hammer. We don’t have time to run into town for another tool every time we find we need one.
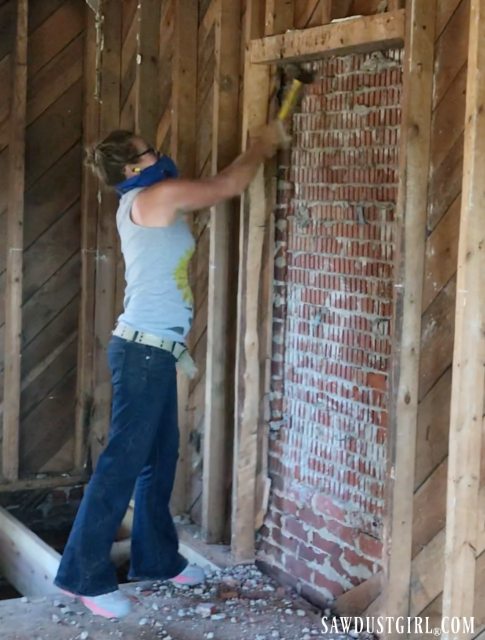
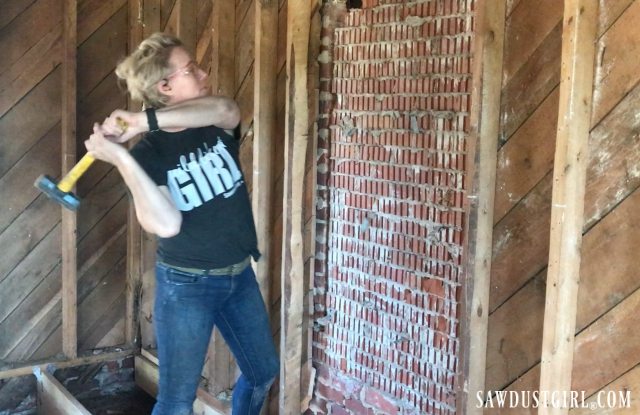
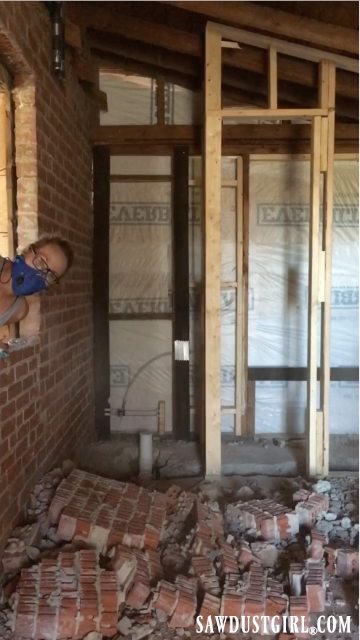
I was filming to catch the big moment as the wall toppled over. This video makes me laugh out loud — do hard!  Julie had a pulled muscle in her butt that she kept forgetting about. She kept kicking the wall which didn’t feel too good. Seriously laugh out loud EVERY single time I watch this.

We got it done. Now we have an entrance to our new master bathroom!
April 2, 2018 · 8 Comments

« Calderwood Cottage – Round 2 (part 2)
Calderwood Cottage – Round 2 (part 4) »

Comments

  1. Barbara H. says

    April 2, 2018 at 8:11 am

    Amazing that it took so much work to get it to fall. Well built?

    Reply
    • Sandra says

      April 4, 2018 at 11:28 am

      Apparently. Every time we have to demo anything, we think it’ll come out easy (because it’s so old). It never does. LOL

      Reply
  2. Deb Malloy says

    April 2, 2018 at 9:36 am

    Love watching the two of you. You work hard, but also seem to have a lot of fun doing it.
    Kudos. If I lived closer, I’d come help you and perhaps learn a thing or two.

    Reply
    • Sandra says

      April 4, 2018 at 11:29 am

      We always welcome help. HAha

      Reply
  3. Amber Bailey says

    April 2, 2018 at 11:38 am

    Fantastic post, I can’t wait to see the finished project!

    Reply
    • Sandra says

      April 4, 2018 at 11:29 am

      Thanks Amber. We’re excited to get to the fun (pretty stuff).

      Reply
  4. Julie @ Houzz Mag says

    April 3, 2018 at 5:32 am

    The best result comes very fast where fun and enjoyment is involved with work. Keep it up…Eagerly waiting for the result!

    Reply
    • Sandra says

      April 4, 2018 at 11:31 am

      True. It’s hard work but we have fun (here and there). LOL

      Reply

Leave a Reply Cancel reply

Your email address will not be published. Required fields are marked *

Categories

New Post email notification signup

You Subscribed!

Legal Stuff

Terms of Use

Privacy Policy

Disclosure

Recent Posts

  • March 2023 Lodge Update- Moved in
  • January 2023 Lodge Update
  • Lodge Update – Floors, Cabinets, Countertops, and Appliances
  • Lodge Kitchen Cabinet Progress
  • Halloween Mad Gab – Halloween Party Ideas

Disclaimer:

Although it is my intention to provide accurate plans and clear instructions, not all plans have been tried and tested. Using plans or information found on SawdustGirl.com indicates that you agree with the Terms of Use policy and will accept full responsibility for the process and outcome of any project you attempt. All plans are for private use only. Plans and information published on SawdustGirl.com may not be reproduced, republished or distributed in any manner without written permission from Sandra Powell, Sawdust Girl. Actual projects built using Sawdust Girl plans may be published on your own site without instructions or "tutorial" as long as you provide a link to my original post with full post title or "SawdustGirl.com" as link title.

Copyright © 2023 · anchored theme by <a target="_blank"