Upper Bookshelf – Cara Collection
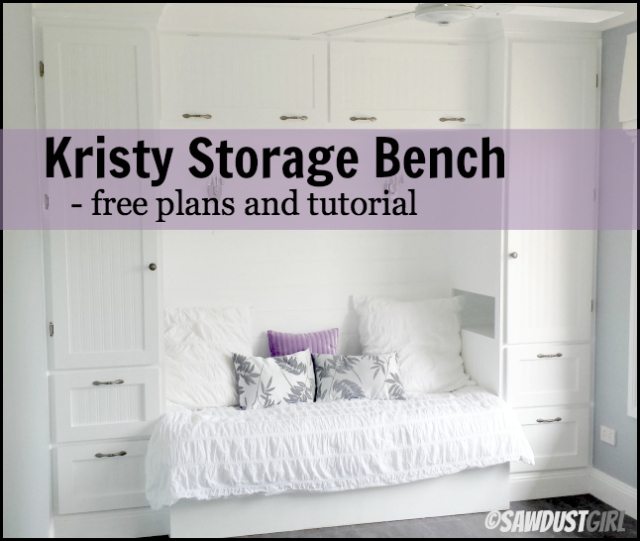
This post includes the plans for the built-in bookshelf that sits on top of the base cabinets in the Cara Collection. You can build this set as a single or double wide bookcase. Actually, you could to wall to wall with this one bookcase plan if you wanted to.
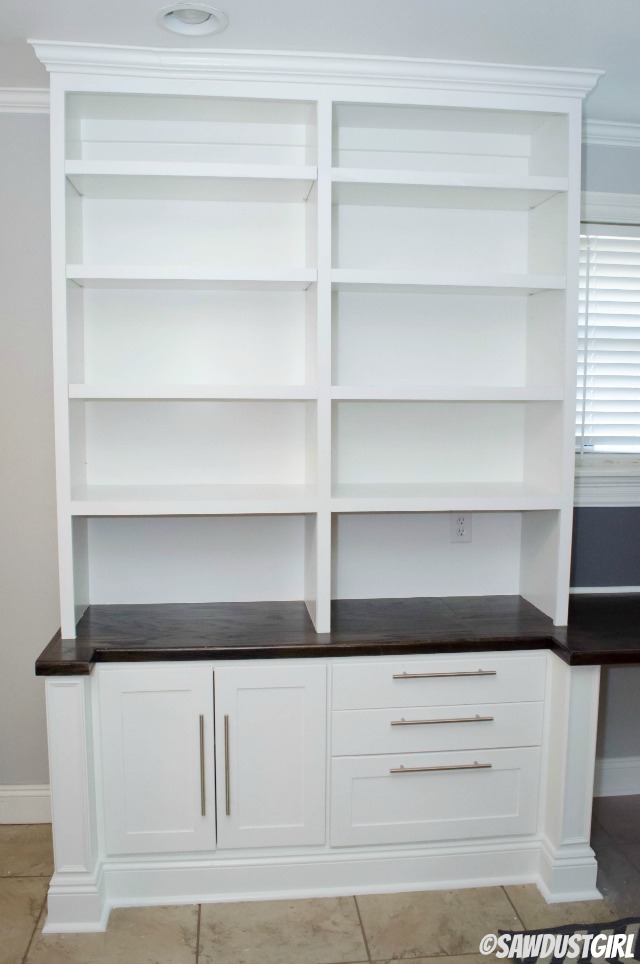
Built-in Bookshelf
Materials:
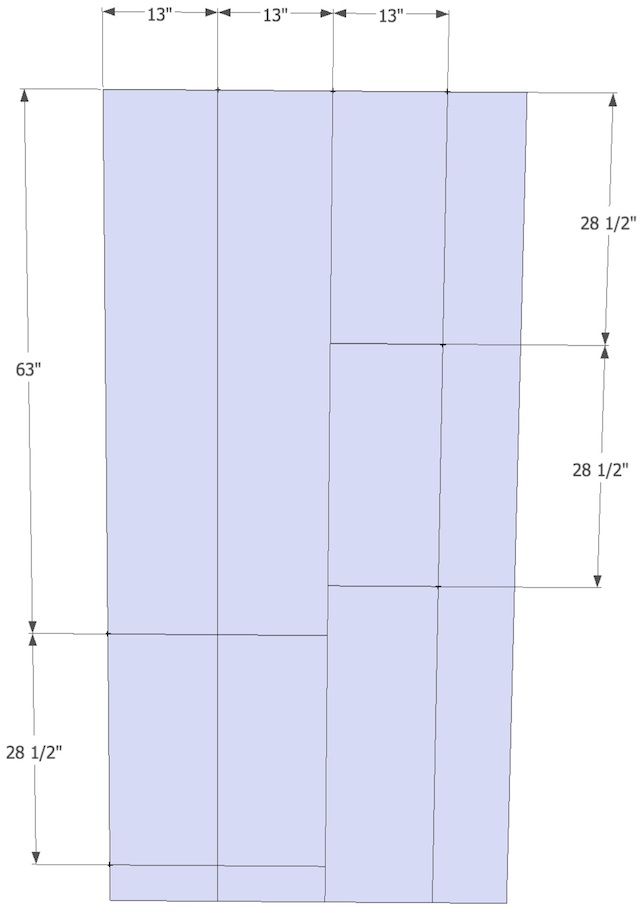
- 2 sheets of 3/4″ cabinet grade plywood cut as shown in the cut-list diagram below.
- 2 sheets of 1/4″ plywood, hardboard or beadboard for backs and sides.
- 1×2 and 1×3 Poplar for faceframe
- 1 3/4″ wood screws
- 1 1/4″ cabinet screws (washer-head)
- 3″ cabinet screws (washer-head)
- 3/4″-1 1/4″ staples or #6 wood screws
- wood glue
- caulk or construction adhesive
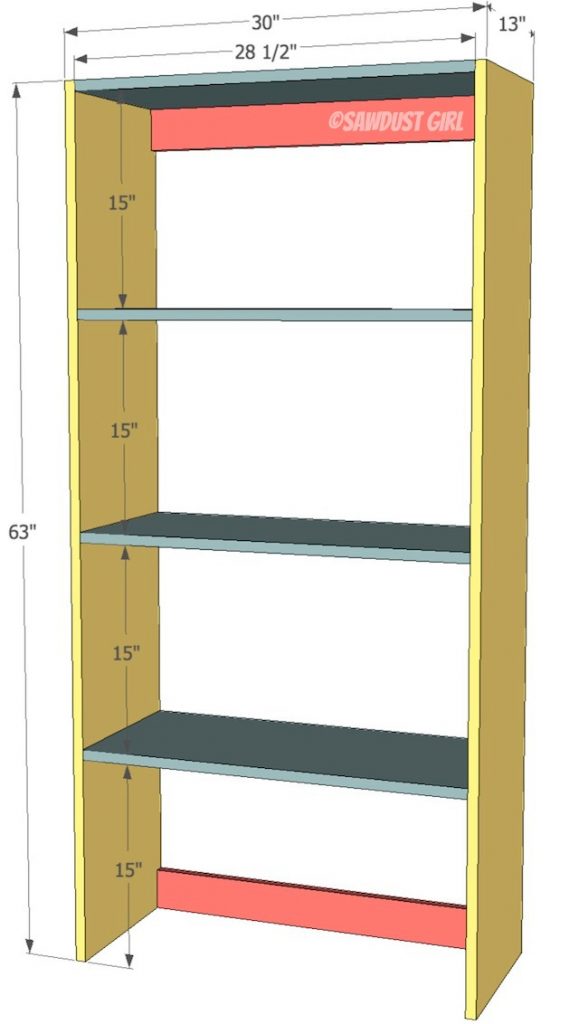
Step 1: Attach top and shelves to sides
- Use wood glue and 1 3/4″ screws to secure shelves to sides as shown in diagram below.
- Make sure to use an assembly square and clamps or corner clamps to hold shelf square to side while you secure it. (see Handy Gadgets for the New Carpenter to see details on those items)
- You are just butting the shelves up to the sides and driving the screws directly in through the side. Don’t worry about the screws. They’ll be hidden. Just make sure they sink just past the surface of the plywood. Predrill and countersink if needed.
Step 2: Attach Cleats
- Cut cleats out of your leftover plywood.
- Cleats should be 3″ x 28 1/2″
- Use wood glue and two 1 3/4″ wood screws per side to attach the cleats
- Cleats should be flush with the back of the bookshelf.
- Top cleat should be directly under the bookshelf top.
- Bottom cleat should be flush with the bottom of the sides.
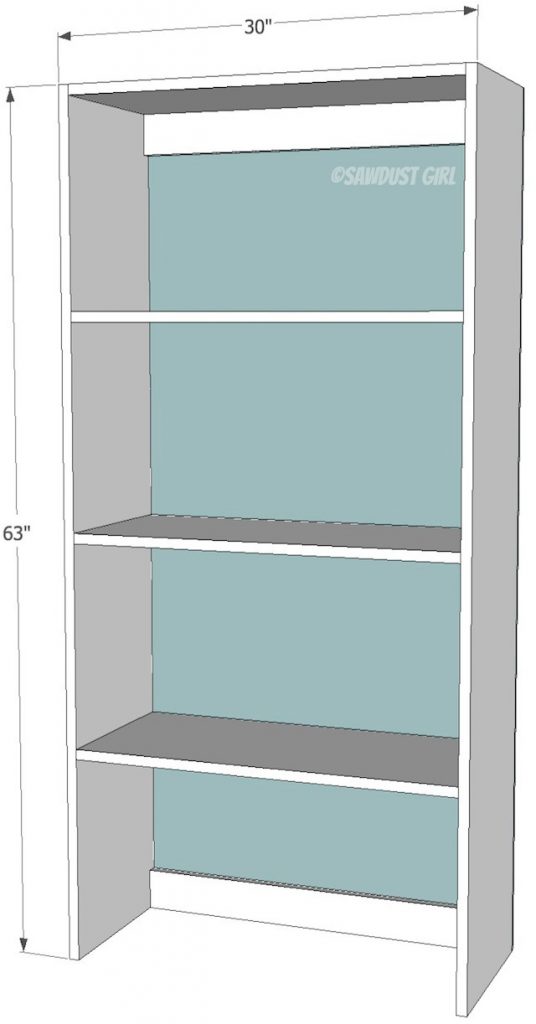
Step 3: Square up
- Measure diagonally from top right to bottom left and visa versa. The measurement should be exactly the same. If it’s not the same manipulate the cabinet until it is square — generally by pushing, pulling or kicking the cabinet to force it to where you want it to be. 🙂
Step 4: Attach back
- Cut two backs out of your 1/4″ material 30″ x 63″
- Secure back onto built-in bookshelf with staples or screws (3/4″ – 1 1/4″ staples or #6 wood screws)
Step 5: Attach two bookshelves together
- Set two bookshelves together and make sure the fronts are flush with each other.
- Use clamps to hold adjacent sides together while you drive 1 1/4″ cabinet screws in the front and back to hold cabinets together as one unit.
Step 6: Build Faceframe
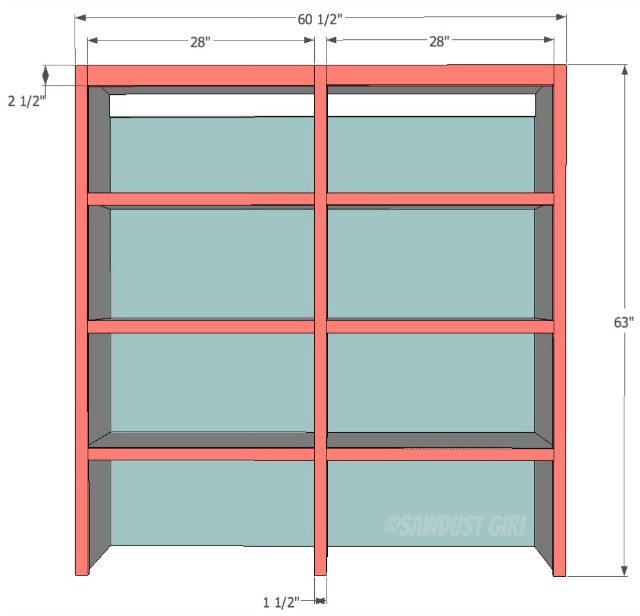
- Use 1×2 and 1×3 poplar and pocket hole screws to build a faceframe as shown. Top rail only should be 1×3
- Actual size for 1×2 is 3/4″ x 1 1/2″
- Actual size for 1×3 is 3/4″ x 2 1/2″
- The faceframe should be 1/2″ wider than the double built-in bookshelf to accommodate side panel
Step 7: Attach Faceframe
- Use wood glue and finish nails or pocket hole screws (make sure you drill the pocket holes on the outsides of sides where side panels will hide the holes.
Step 8: Attach Side Panel
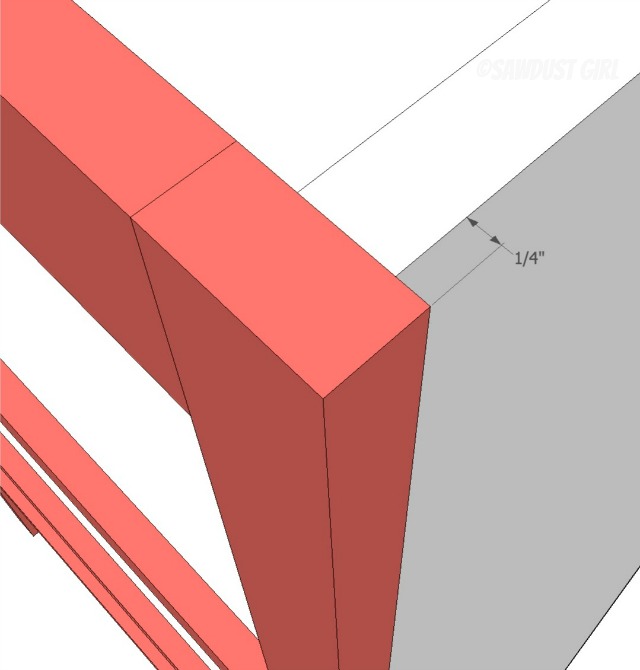
- Faceframe should extend 1/4″ beyond the sides so you can secure a side panel that will hide your screws and back.
- Cut your 1/4″ beadboard, plywood or hardboard to fit behind faceframe and extend all the way to the back of the back panel in order to hide the raw edges of that back panel.
- Side panels should be 63″ x 13 1/4″ but actual size will probably not be EXACTLY that so you should cut the side panels to fit your bookshelf sides exactly. You want to hide your screws and the raw edge of the back panel.
- Attach with caulk or construction adhesive. If you use a strong adhesion caulk it should stick after applying firm pressure for only a few minutes.
- You can also use small gauge finish nails if you like. Make sure they are short enough not to puncture through the bookshelf sides.
- To install bookshelf, set on top of your bookcase base cabinets and screw through your cleats into the studs in your wall that fall behind the bookshelf. Use the 3″ cabinet screws (washer-head screws that will not sink into your cleat).
Check out all of the plans for the Cara Collection and read all of Cara’s project posts.
Hi Sandra,
Thank you for these really clear and detailed instructions. The built ins are beautiful. I am going to build something similar over a set of cabinets and it’s my first time, so this post is very helpful. I also appreciate all the info you have on your website about tools, etc., because since I’m just getting started it’s hard to know what I’ll need. I have a question about Step 5…when you say to drive cabinet screws in front and back to hold the two units together, where exactly do you mean? I think that means to screw the front and back on the top and bottom of where the two cabinets meet, but just want to make sure. Thank you so much! p.s. I hope you are recovering well from your back surgery.
Shana