• Home
  • About
    • Personal Posts
  • Privacy
  • Shop
    • My Account
    • Checkout
    • Email
    • Facebook
    • Instagram
    • Pinterest
    • Twitter
    • YouTube
Sawdust Girl®

Sawdust Girl®

Renovation, cabinet building and woodworking plans and tutorials. Build like a Girl®

  • My Home
    • Clinton TN House
      • Clinton TN House in Progress
    • Maryville TN House
      • Maryville TN House Tour – Completed Rooms
      • Maryville TN House in Progress
        • Basement
        • Basement Storage Closet
        • Bedroom Office
        • Craft Room
        • Dining Room
        • Entry
        • Garage
        • Guest Bedroom
        • Hallway
        • Jack and Jill Bathroom
        • Kitchen
        • Kitchen Entry
        • Laundry Room
        • Library
        • Living Room
        • Loft
        • Madison’s Room
        • Master Bedroom
        • Master Closet
        • Pantry
        • Porch
        • Powder Room
        • Wes’ Office
    • Illinois House
    • Calderwood Cottage
  • My Workshop
    • Clinton Workshop
  • Build & Breakfast
  • Cabinet Making 101
    • Cabinets
    • Doors
    • Drawers
  • Projects and Plans
    • Countertops
    • Beds
    • Benches
    • Bookshelves
    • Desks
    • Gift Ideas
    • Holiday
      • Christmas
      • Halloween
    • Home Accessories
    • Kids
    • Kitchen Cabinets
    • Lockers
    • Nightstands
    • Organization accessories
    • Recipes
    • Sewing
    • Tables
    • Vanities
    • Wardrobes
    • Woodworking
      • Wood Finishing
    • Workshop
    • Workshop Storage and Organization
  • Remodeling 101
    • Baseboard and Trim
    • crown molding
    • Demolition
    • Door and Window Casings
    • Door Installation
    • Drywall
    • Electrical work
    • Flooring
    • Home Maintenance
    • Painting
    • Plumbing
    • Resources
    • Safety
    • Tile
    • Wall and Ceiling Treatments
  • Sawdust Squad
  • The Sawdust Diaries
    • Andrea
    • Ava D.
    • Beckie F.
    • Cara C.
    • Courtney B
    • Fawn T.
    • Jenn D.
    • Kelly C.
    • Kristy K.
    • Lara T.
    • Malisa B.
    • Marnie D.
    • Robin C.
    • Val F.
  • Tools
    • Products
    • Tool Reviews & Overviews
    • Inspiration & Ideas

Framed Twig Jewelry Holder
All Posts, Gift Ideas

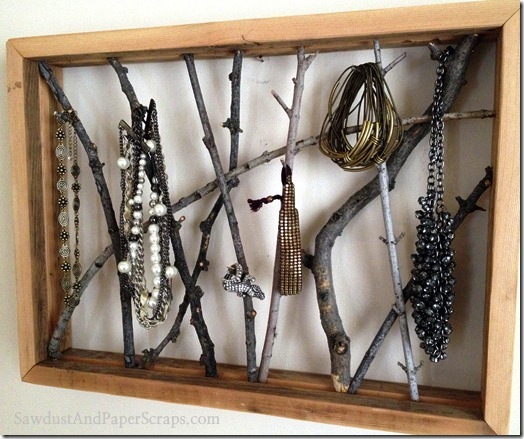
This Framed Twig Jewelry Holder is a cheap and easy project.


This twig frame jewlery holder made from reclaimed scrap wood, twigs and spray paint is an awesome (FRUGAL) gift idea.

Leave it natural or paint it.  It was basically free!!! I used some 1 x 2 reclaimed wood  scraps, twigs, & white spray paint. to create this nifty jewelry holder.


It looks awesome hanging on the wall in my closet. I love that the jewelry looks like art and brings a lot of sparkle to the room. It also organizes and keeps jewelry from getting tangled. Plus, having my jewelry out on display reminds me to throw on something new once in a while. I love it so much I am going to give this one to my daughter and make a bigger one for me.
Framed Twig Jewelry Holder

Materials:

  • Approximately 5 feet 1 X 2 wood
  • Sturdy twigs and small branches
  • Glue gun
  • Small brad nails
  • Wood glue
  • Spray paint
  • hand pruners

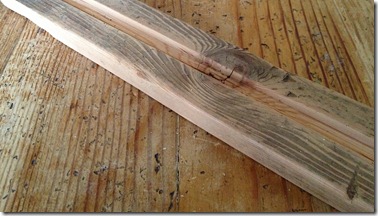
I started by dadoing out a about a 5/8 inch strip in the middle of the wood. I ended up deciding that this is not necessary, but it did

make gluing a little bit easier.

IMG_2148

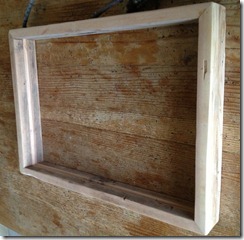
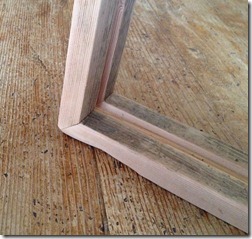
Next I created a rectangular frame by cutting my wood, then gluing and nailing together. I mitered my corners, but again after I was finished decided that it would look just as good with butt end corners.

IMG_2150IMG_2149

If you are going to paint your box this would be a good time to do it.  My original intention was to leave the whole thing natural and show off the beauty of the distressed reclaimed wood and branches. Then when I hung it on the wall I decided it would look better painted. It was a pain to paint it after it was already assembled!

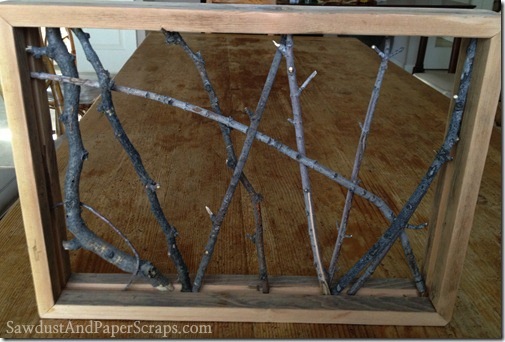
Next I started fitting my twigs into the box. I just played around with them, making sure to try to leave as many crooks, nobs, branchettes, and pokey outy spots as possible, since this is what the jewelry will hang on. Also remember that there will be a front and a back so try to create as much hanging opportunity as possible that will be accessible from the front.
Twig jewelry holder

Next I used my glue gun to glue the branches  in place. You want to make sure to get glue on the tops and bottoms and even peel away a bit of the bark at the tops and bottoms so that you get a really secure attachment. That’s it, you are ready to hang it on a wall and display your jewels.

Twig jewelry holder


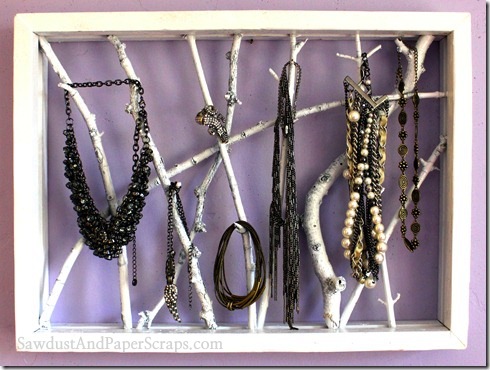
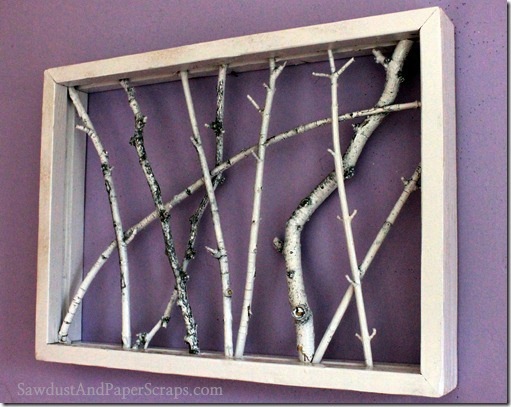
Unfortunately I was not done as I felt like the jewelry just blended into the natural woods and I wanted it to pop a bit more.
Twig jewelry holder


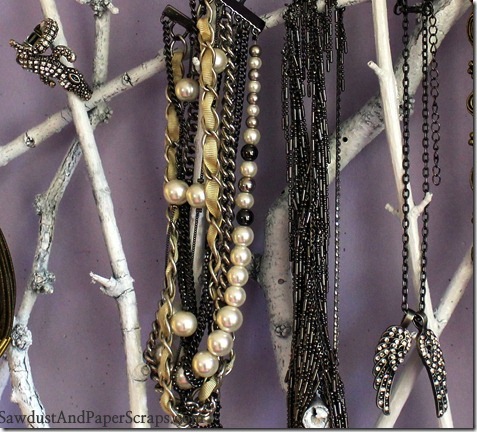
White spray paint to the rescue. I love how the texture of the bark took the paint unevenly giving it a birch like quality.
Twig jewelry holder

I also love how the jewelry is the star of the show.


Twig jewelry holder

For about 2 hours of work and no $$$—love!
December 5, 2012 · 6 Comments

« Wooden Crate Christmas Advent Calendar
Power Tools for the New Carpenter »

Comments

  1. Michele @ The Scrap Shoppe says

    December 5, 2012 at 10:15 am

    Um, hello! This is GORGEOUS, Sandra!! Brilliant idea!!

    Reply
  2. Shannon Ashley says

    December 5, 2012 at 10:50 am

    This is so cute! You could even staple chicken wire to the back for earrings!

    Reply
  3. K @ Shift Ctrl ART says

    December 5, 2012 at 12:00 pm

    That looks spectacular. Looks almost better without the jewelry, just as artwork 🙂

    Reply
  4. kristin marvin says

    December 5, 2012 at 7:19 pm

    A really creative idea! Love it–you definately need a bigger one. If it were me I would need one stick with no nub to hang anything on–I am so sad!!

    Reply
  5. Karen says

    December 5, 2012 at 10:18 pm

    What a great idea. A work of art! Cheers

    Reply
  6. Sandra @Beneath this Roof, Within these Walls says

    December 6, 2012 at 12:17 am

    That is so beautiful, what a great idea!

    Reply

Leave a Reply Cancel reply

Your email address will not be published. Required fields are marked *

Categories

New Post email notification signup

You Subscribed!

Legal Stuff

Terms of Use

Privacy Policy

Disclosure

Recent Posts

  • January 2023 Lodge Update
  • Lodge Update – Floors, Cabinets, Countertops, and Appliances
  • Lodge Kitchen Cabinet Progress
  • Halloween Mad Gab – Halloween Party Ideas
  • Concrete Backsplash or Vertical Wall Treatment

Disclaimer:

Although it is my intention to provide accurate plans and clear instructions, not all plans have been tried and tested. Using plans or information found on SawdustGirl.com indicates that you agree with the Terms of Use policy and will accept full responsibility for the process and outcome of any project you attempt. All plans are for private use only. Plans and information published on SawdustGirl.com may not be reproduced, republished or distributed in any manner without written permission from Sandra Powell, Sawdust Girl. Actual projects built using Sawdust Girl plans may be published on your own site without instructions or "tutorial" as long as you provide a link to my original post with full post title or "SawdustGirl.com" as link title.

Copyright © 2023 · anchored theme by <a target="_blank"