This week I got to the point where I was finally ready to un-crate my new tools! I ordered these tools right after finishing Richwood, and moving into my new shop. I gave away my drill press, band saw, jointer and planer when I moved. The whole reason we moved was so I could have a larger workshop so I could get… more professional tools. I ordered right way because I wanted all the main tools, in hand, before deciding on the layout. Then I discovered the water issue and had to spend a couple weeks dealing with that. I picked up the tools and they’ve been sitting here for 2 weeks.
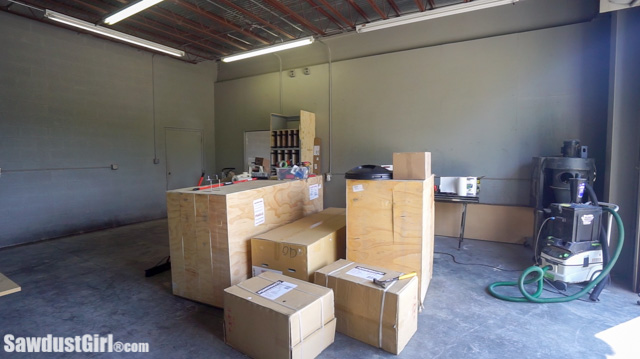
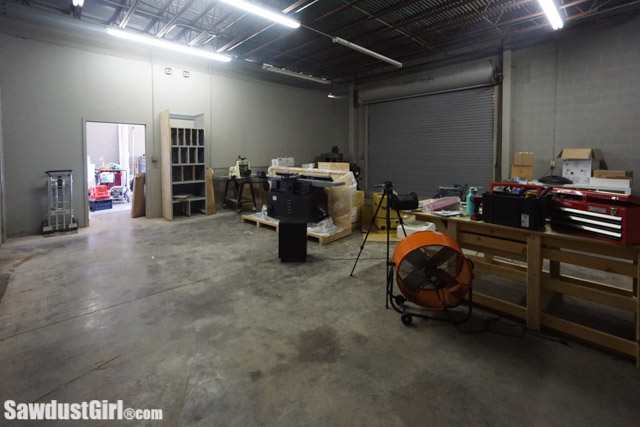
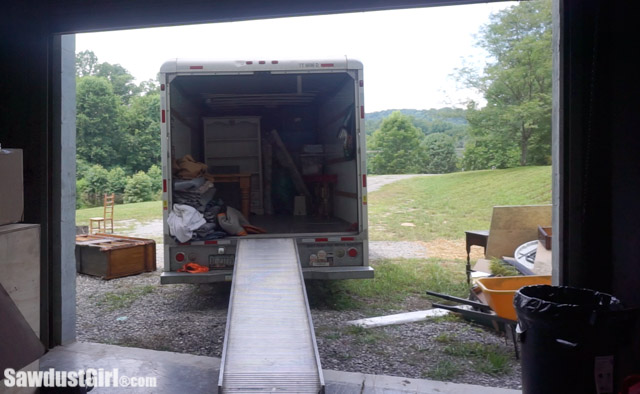
To get the shop ready to actually BE a WORKSHOP. I had to get all the non workshop crap out of there. Last week, we rented a moving truck and relocated all the stuff to a storage facility. Woohoo!
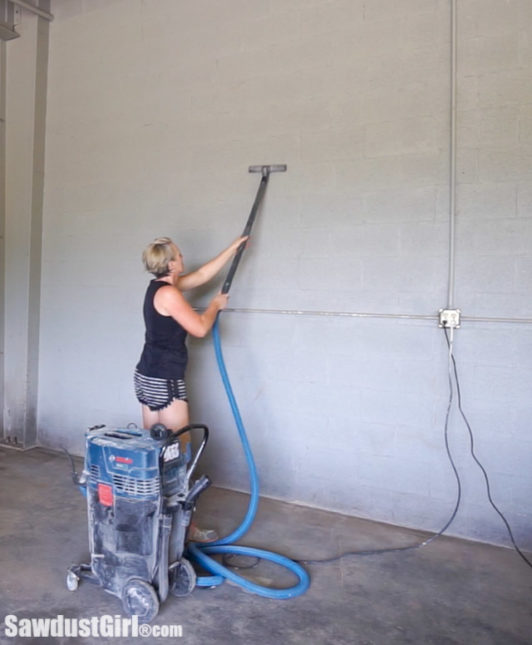
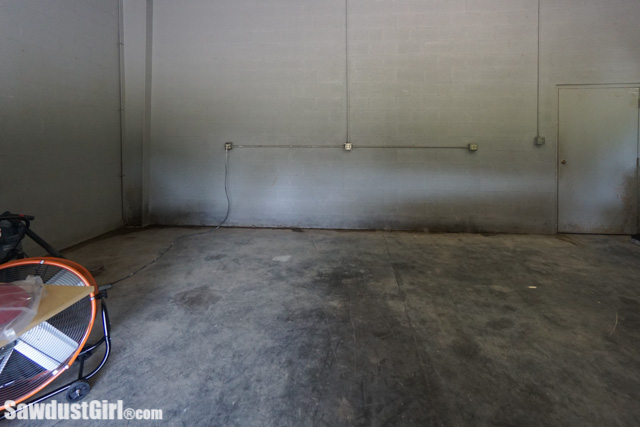
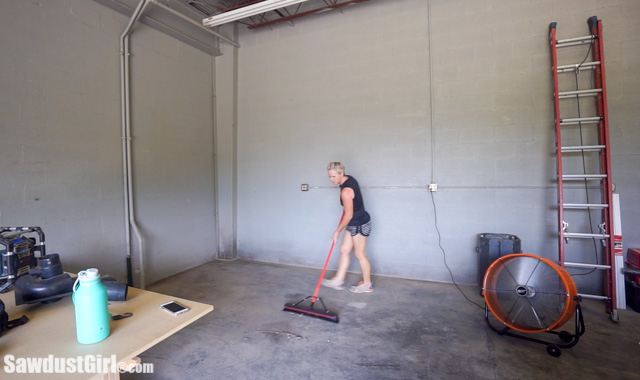
That really opened up the space — which made clear that the space is kinda gross. Even after sweeping the floors and vacuuming all the cobwebs off the walls (that I could reach).
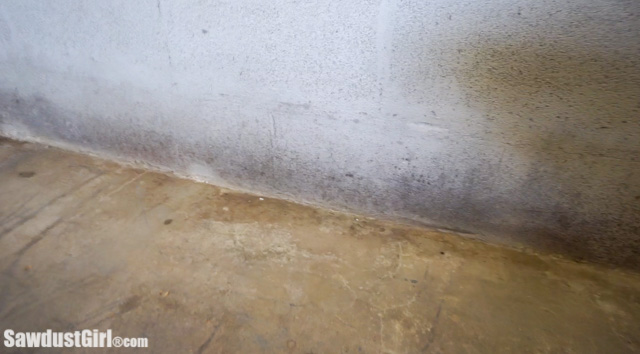
The lower portion of the walls have some mildew/mold. I sprayed them with mold killer/inhibiter but I want to remove the stains. There’s too much surface area to try to clean it with the ZEP, as I mentioned I was going to try. I’m going to paint over it with a stain blocker. But I don’t want to paint the whole room, including the ceiling. So I’m going to go up part way, end it with a crisp line and call it an “intentional design choice”.
Planning a Workshop Layout is Hard
Back to my new tools! Finally getting to uncrate my new tools was super exciting — until it wasn’t. First, I couldn’t get the tools OFF the bottom of the crate. Second, none of these giant tools are mobile so I’m not going to easily move them once I figure out how to get them off the crates so I need to know WHERE I’m putting these tools.
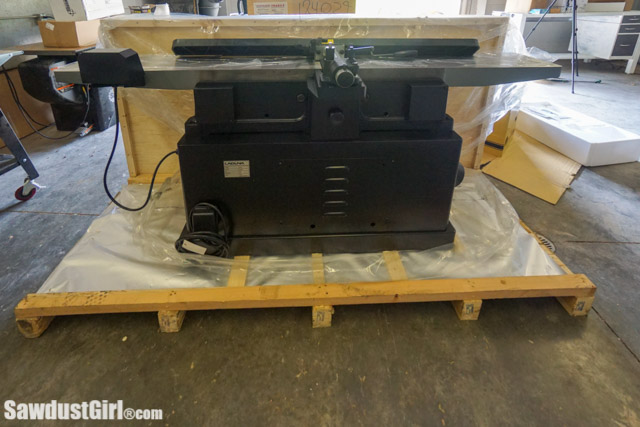
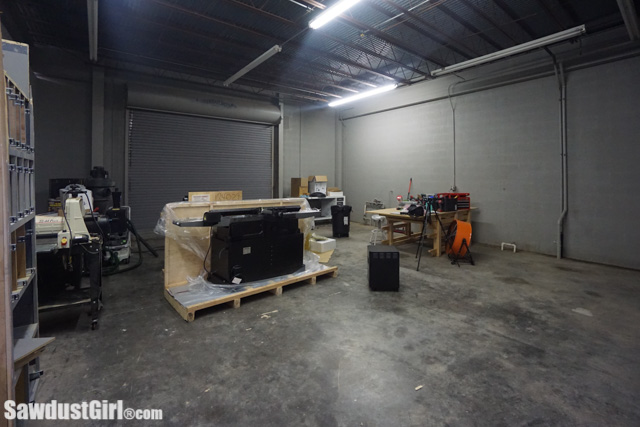
This “bay” is basically 27’x27′. I have plenty of room for all these tools and I don’t expect to love the initial layout forever. But I’d like to not immediately hate it. As in, realize that I grossly miscalculated how much space I need on both sides of my GIANT 12″ jointer. (Or something! Honestly, my last jointer was a little bench-top version.)
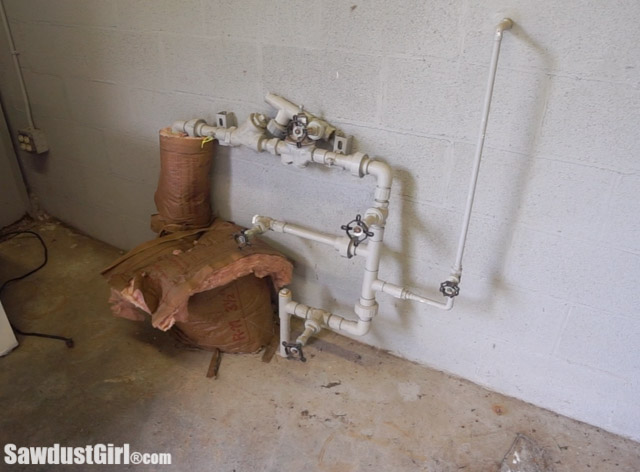
I haven’t had a plumber in to look a the place yet (hopefully this week) but I have access to water in here. Not sure about a drain but…I put a sink in my design anyway.
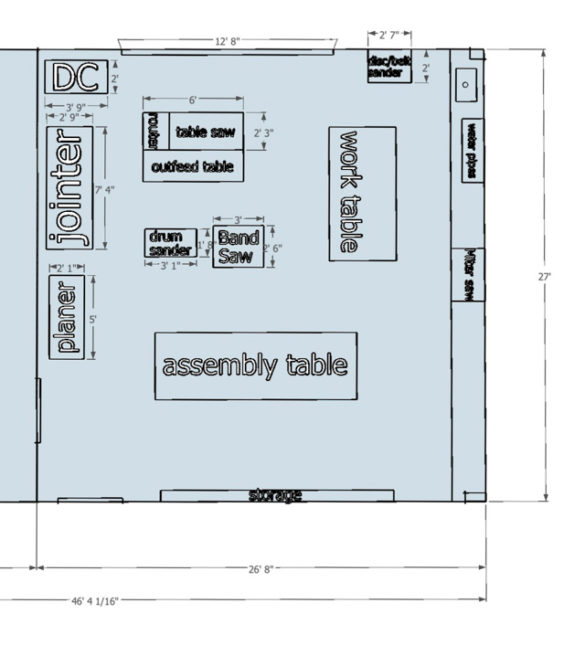
So here is my first draft of my workshop. My blog settings crunch my photos so the dimensions are hard to read. You can see (and download or print) the PDF version of this photo here. https://sawdustgirl.com/wp-content/uploads/2019/08/woodworking-tools-layout.pdf
I have a whole other bay that I originally thought I’d use for a finishing room. But I’m thinking maybe I’ll pull some of that plywood off and see if I could open up that wall to make one really large workshop. I have plenty of rooms in the back that could be designated, dust free, finishing rooms. Here’s the PDF of the below photo https://sawdustgirl.com/wp-content/uploads/2019/08/both-bays-layout.pdf
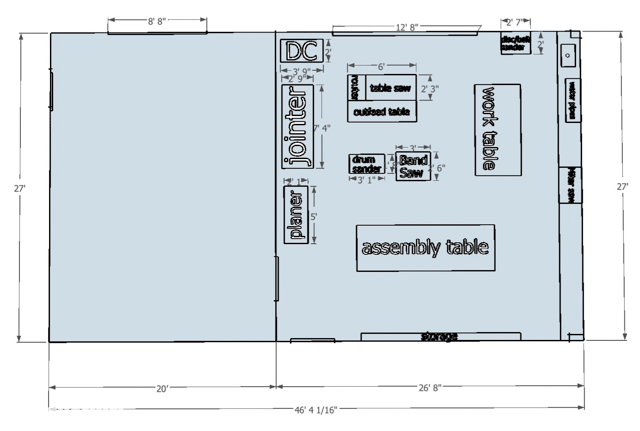
So, before I get any further into this (and while I paint the lower section of the walls, I would LOVE to hear from YOU!. What you see me doing wrong, right? What am I missing, what’s not even on my radar… If you want to sketch up your idea for my best workshop setup, you can share your sketch on my facebook page or email me. Thank you in advance for you HELP! Who knew this would be so daunting? But still exciting.
John Williams says
Windows. Windows. Windows. Natural light is best. Plus cross-light shows errors and rough parts on finished surfaces. Can always hang tools in front of windows which looks cool also.
Stefford J Veltema says
Pay attention to material and work flow through the shop…where do the materials enter the shop, where are they worked on first, where are the last operations done, etc?
Also, identity the equipment that can be located against or along a wall, such as sanders, drill press, lathe
Lena says
It doesn’t appear to me like you do. I wonder what size lumber you may want to end up using and then look at some youtube videos or something to see how others use them to decide if it will work for you. Not sure what types you have, but the ones I think of you feed in one end and it comes out the other end so would need something similar to if you used a table saw.
I think most of the tools would work best in the middle and then non-feed through tools along the sides.
Joshua D Rimmer says
You need about as much space on each end of them as the longest board you will ever run through them. For most folks, that’s eight feet to either side of the cutting head! The jointer, planer, and tablesaw are often placed side-by-side-by-side for that reason, they all need lots of infeed and out feed room.
HK says
For a planer and a jointer, plan on needing the length of the piece of wood you are going to feed through, plus a run out table, or similar, to help catch it.
Good basic advice here: https://www.bobvila.com/articles/2130-the-thickness-planer/
and here https://www.bobvila.com/articles/2129-the-jointer/
Sandy says
Lots of peg board!
Lena says
Do you have enough space to feed long pieces through the planer and jointer?
Sandra says
I don’t know. I haven’t ever used these machines before so I don’t know how much room I’ll need on each side. It’s like I’m designing this shop, blindfolded. LOL
Joshua D Rimmer says
Thanks for the link to the curtains! I worked in a professional wood shop for a while, getting items into and out of the finishing room was always nerve-wracking. Something like these makes that easy, plus you can use the space for other things when finishing isn’t the job of the day!
Maureen says
Sandra,
Agree with just about everything I have read but have one question. If you tear down the wall between work spaces are the doorways large enough for moving items to a back finishing space?
Maureen
Sandra says
Good question! I need to look at that.
Jayne Zabala says
You will really regret it if you don’t take the chance while the room is basically empty to paint the walls, ceiling and epoxy the floor. My only other suggestion is to do one entire wall of peg board so you can hang all of your smaller tools and gadgets.
Sandra says
Practically empty? LOL Everything is IN there, it’s just not put away. But I see what you’re saying and agree. Painting now.
Chantelle L says
You have some great comments, but my biggest concern was regarding clearance. It’s hard to tell from the photo, but I specifically wondered about clearance around the table saw. Can’t wait to see what you come up with.
Also, I echo the comments about painting everything a high gloss white. It’ll brighten that space right up. With no natural lighting, it will make such a big difference.
Sandra says
I planned about 3′ between everything. Might be too much if I don’t want to have to take steps from one machine to another. It’s so difficult to plan this out on paper! 🙂
Kathy Virnig says
Couple of thoughts:
We put everything we could on mobile bases. You can bet you’ll be making changes down the road, whether you get new tools, change your work flow, whatever. Even you work, assembly tables should be on casters. We had a local welding shop make bases we designed and they work great!
You may think you have everything you need now, but you’ll probably buy more tools over time so the more space the better. If you can take out the wall between your spaces, go for it.
We found a sink was useful, but we use it most often when we’re finishing. You might considering locating a sink in or near your finishing area.
It looks like you planr and jointer are a little too close together for outfeed purposes. If they’re not on mobile bases, you might want to space them out a bit more. Same for your table saw. You’ll want enough space around your saw to rip a full sheet and your design looks a bit tight.
THink about using mobile racks for hand tools, drills, clamps, fasteners, etc. Saves time, steps and frustration.
Finally realize even the best layout will evolve over time. ENjoy the process and congrats!
Sandra says
Lots of really great input! Ordered mobile bases. I agree about wanting a sink IN the finishing room. And definitely going to be building some mobile storage for clamps and such!
Casey says
In echoing the advice above, bite the bullet, get scaffolding and paint the whole thing. That intentional design choice of part way up the wall now will feel like a shortcut later on. Also, epoxy the floor. With those done, you’ll have a better sense of your lighting needs so do lighting, electrical, air compressor lines next. For layout, my biggest recommendation would be to set up stations: a cutting station; sanding station; gluing, clamping station. Please, please don’t take down the wall. The biggest advantage I see to that huge space is that you have a dedicated finishing room for your projects. You’ll love that! So excited to see what this evolves into — your ideas are always so personalized and creative.
Sandra says
I did it. Bought scaffolding and am painting. And I definitely want a dedicated finishing room but don’t think I need that whole bay. I’m thinking about just half of it.
Donna M says
My concerns or wish list would include:
1) if there are enough circuit breakers for each individual power tool (planer, saws, etc)
2) If you are having an air compressor and will it run on 220 and be a dedicated circuit?
3) Air hose reels suspended or dropped down from ceiling over work tables/equipment are a great convenience.
4) Outlets on cables that drop from the ceiling are a nice feature so as to keep cords to a minimum in walking zones.
5) Industrial strength castors for heavy equipment if there is even the remotest chance you would want to move it in the future.
6) Some kind of non-skid floor sealer that is not only easy to sweep/clean but also will not allow paints, chemicals, oils, etc., to penetrate or stain the floor.
7) Ceiling heater/blower for those cold winter days and a ceiling fan for the warmer days.
8) Small refrigerator to keep your liquid libations cold.
9) Half bath.
10) Lots and lots of great lighting, preferably LED lights.
Sandra says
Lots of great ideas. I have TONS of power so I can have as many 220s as I will ever want. Already planning drop downs. Need to find an HVAC person because YES, I need AC! Love the idea of a fridge!
Barb harvill says
So not sure about clearance for joiner and planer if you are working long stock and/or large sheet goods.
Corners are typically good places for band saws and drum sanders.
Just my 2cents.
Marvin Horn says
Do what works best for you
Charisse says
I agree about the wheels. Almost everything we have is on locking wheels. Our metal tool storage units came on wheels, and for really big projects we can just push them to the end of the room and out of the way. When it comes time to paint or clean, it is really handy to have mobile units. As far as where to put each of your new tools, I think it comes down to how you use them, making sure that nothing gets in the way of the nearest one, and also that any dust from one will not prevent you from immediately using another one adjacent. A workshop is so personal, kind of like a kitchen. So excited for you though as you begin this new phase of your career.
Sandra says
I bought 4 mobile bases so I’ll be able to adjust my setup as needed. I agree with what everyone is saying, I’ll change it up many times over and over and over… 🙂
Dave Cearley says
I wouldn’t open up the wall, you’ll end up with dust everywhere. The casters or dollies mentioned by Paula are a great idea.
Before doing anything, diagram your work flow from material entering the shop, to finished work going to finishing. Next, look closely at your electrical load when the shop is staffed and running. Between centralized dust collection, air compressors, finishing sprayers and cabinet shop tools, you may need a dedicated 220 panel and a full electrical upgrade. Exactly where you park your joiner may be your least pressing decision.
Sandra says
One of the really well planned out things in this shop is the electrical. This shop was designed for some kind of heavy duty, commercial use so I have plenty of power!
Angie says
I was thinking the same thing as Paula. Locking casters. I can’t offer any help with your layout since I only dabble in woodworking, but I can relate to heavy machinery and trying to figure out an efficient layout. I started a custom window treatment business about a year ago and now have several heavy industrial sewing machines and a very large 12×5 foot table with heavy bolts of decorator fabric stored underneath on a shelf. I have 6″ heavy duty locking casters on the table legs so I can easily move it by myself. Next, I’m going to install casters on all of my machines. I know as I continue to use my workroom, I’ll think of better ways to use the space and I want everything on wheels to make that easy/possible. Good luck and I enjoy reading your posts!
Ben says
For finishing, you might want to look into curtain walls that you can move out of the way when you’re not finishing something. Take a look here: https://www.curtain-and-divider.com/curtain-for-paint-spray-booth/
Love watching your projects!
Sandra says
I think I’m going to cut that bay in half. Keep half for a dedicated finishing room and open the other half up to the other bay. This will give me the most room for woodworking and a dedicated finishing room that is plenty big enough for all my needs.
Susan Gililland says
Oh my gosh – so much space! I don’t build at the same level you do, so don’t have the same size tools and can’t possibly offer any good information for laying those out. But, although my space works well for me, I don’t have space for my table saw jigs. So, be sure to plan for those! hanging or otherwise, just don’t get everything else in place and then go “Oh, darn, there’s just not good space to store these now”! Have fun, and I can’t wait to see all of the magic that will go on in your amazing space!
OrangeBlossom says
Definitely agree with the comment regarding the heavy duty locking casters!
What about cabinets for storage of screws, glue, and such? Designated area for tools that you use all the time, like tape measure, pencils, safety glasses…
Shelf for bluetooth speaker .. gotta be connected to tunes or podcasts. 🙂
Sandra says
I brought over all my cabinets from my last shop so as soon as I can install them I’ll have immediate organization! I can’t wait for that! Currently it takes me an hour to find anything!
Clark Park Neighbors says
I would go into the space and layout some boxes and sheet good to represent your layout. It would good if some this could be the same height as the tables and machines. Then I would walk through some projects that you have done. Do the actual bending, stooping, swinging, etc of materials. Do you notice that your butt will run into something? not allow someone to pass? will that 8′ sheet or plank need support as you guide it through a cut on the band saw? table saw? etc. These might not be the right scenarios for you, but role play the fabrication os a tall cabinet, a side chair, a coffee table, a box, an automata, etc. Move the stage set around until you feel it is right.
just a thought.
Marvin McConoughey says
First recommendation: Paint. Paint every wall and the ceiling. Do it twice. Use high gloss paint. It will dull over time with age and dust but until then will give you maximum working light from each watt of illumination. Second recommendation. Shelves. Lots of shelves. They will never be easier to install than now, you have lots of room to move ladders around and they will be used! My shelves have three coats of gloss latex paint and, contrary to my fears, make for easy sliding of boxes and tools. Third recommendation: Panel at least one wall with plywood. I have half-inch plywood in my shop and 3/4 inch in the attached garage. The 3/4 inch is better. Fourth recommendation: if it gets hot or cold where you live and you plan to work during those times, install an excellent heating and cooling system. I started out with a vented kerosene stove, upgraded to a direct-vent Toyo space heater but now have a far superior mini-split air-conditioning system. It is marvelous in summer and winter, very quiet, and very efficient. Highly recommended and you can do much of the installation yourself. Fifth recommendation: Put on a floor coating. Grey is easily available, so is beige, but if II were doing it again I would apply white instead of grey. Note, I have floor coating only in my two garages. I wasn’t foresightful enough to do the shop area before it became covered with machinery and work benches. Sixth recommendation: Get plenty of 120 and 240 outlets. I also have a few coming down from the ceiling. Seventh recommendation: Read shop design books.. A few: Great Workshops from Fine Woodworking, 2008; The Workshop, Scott Gibson 2003; The Workshop Book, Scott Landis 1981; Great Workshops from Fine Woodworking, 2008; How to Build a Great Home Workshop, Peter J. Stephano, ed. 2007; Best Workshops, Fine Woodworking, 2013; How to design and Build Your Ideal Workshop, 1998 Bill Stankus. Last recommendation: give early thought to eventually having a permanent installed dust collection system. I have a 3 HP Oneida central system in one corner with ducting running to each major machine. If given a second try, I would put the noisy cyclone cleaner outside the shop and avoid much noise plus I wouldn’t need expensive filters.
Sandra says
Painting now. I have a good DC (It’s labeled DC on my layout but I think most people don’t see it). Have plenty of power so I can have a 220 wherever needed. I definitely need to get an AC installed ASAP. It’s SO hot in here. Thanks for the book recommendations, I’m ordering a couple now.
fairyguts says
When my Dad built his dream work shop he made sure each tool got a dust pick up duct (I don’t know the official word), copper pipe all around so there was compressed air hook-ups everywhere, and lots and lots of plug-ins. Since he passed away, I’ve been using it some and my only struggle is that he added a planner which is in a tight spot and doesn’t have enough clearance for long boards and it’s in the way of the 8′ sheet metal break, so you can’t put big pieces all the way in it. So, my take away to share is: more clearance is better! 🙂 Good luck!
To says
What about dust collection? More and better lighting? Air compressor plumbing? The casters are a great idea I’m a senior and couldn’t work without them!
Paula says
When my dad’s health started to decline, he purchased and attached heavy duty locking casters, appropriate to each tool, therefore allowing him to move things around with ease. His giant metal lathe even got its own custom rolling cart built to handle the weight. Every tool cabinet was nested into its own dolly as well. Any of us could unlock the wheels and move things if needed. Even he was able to still move stuff around as he puttered in the shop, just weeks before he died.