• Home
  • About
    • Personal Posts
  • Privacy
  • Shop
    • My Account
    • Checkout
    • Email
    • Facebook
    • Instagram
    • Pinterest
    • Twitter
    • YouTube
Sawdust Girl®

Sawdust Girl®

Renovation, cabinet building and woodworking plans and tutorials. Build like a Girl®

  • My Home
    • Clinton TN House
      • Clinton TN House in Progress
    • Maryville TN House
      • Maryville TN House Tour – Completed Rooms
      • Maryville TN House in Progress
        • Basement
        • Basement Storage Closet
        • Bedroom Office
        • Craft Room
        • Dining Room
        • Entry
        • Garage
        • Guest Bedroom
        • Hallway
        • Jack and Jill Bathroom
        • Kitchen
        • Kitchen Entry
        • Laundry Room
        • Library
        • Living Room
        • Loft
        • Madison’s Room
        • Master Bedroom
        • Master Closet
        • Pantry
        • Porch
        • Powder Room
        • Wes’ Office
    • Illinois House
    • Calderwood Cottage
  • My Workshop
    • Clinton Workshop
  • Build & Breakfast
  • Cabinet Making 101
    • Cabinets
    • Doors
    • Drawers
  • Projects and Plans
    • Countertops
    • Beds
    • Benches
    • Bookshelves
    • Desks
    • Gift Ideas
    • Holiday
      • Christmas
      • Halloween
    • Home Accessories
    • Kids
    • Kitchen Cabinets
    • Lockers
    • Nightstands
    • Organization accessories
    • Recipes
    • Sewing
    • Tables
    • Vanities
    • Wardrobes
    • Woodworking
      • Wood Finishing
    • Workshop
    • Workshop Storage and Organization
  • Remodeling 101
    • Baseboard and Trim
    • crown molding
    • Demolition
    • Door and Window Casings
    • Door Installation
    • Drywall
    • Electrical work
    • Flooring
    • Home Maintenance
    • Painting
    • Plumbing
    • Resources
    • Safety
    • Tile
    • Wall and Ceiling Treatments
  • Sawdust Squad
  • The Sawdust Diaries
    • Andrea
    • Ava D.
    • Beckie F.
    • Cara C.
    • Courtney B
    • Fawn T.
    • Jenn D.
    • Kelly C.
    • Kristy K.
    • Lara T.
    • Malisa B.
    • Marnie D.
    • Robin C.
    • Val F.
  • Tools
    • Products
    • Tool Reviews & Overviews
    • Inspiration & Ideas

How to Winterize Your Home with Window Shrink Film

All Posts, Remodeling 101

After the holidays, I got an amazing opportunity to work with an old Victorian house in the historic district of Knoxville, Tennessee. Being an older house, it needed to be winterized for the colder months. So *FrostKing partnered with us and provided all of the supplies we needed; pipe wrap insulation, door sweep, and window shrink film to make this drafty old house warm and cozy for winter.
How to Winterize Your Home with Window Shrink Film

In order to save these historic home from being condemned, the city of Knoxville took them over and converted them into apartments. This home is separated into 3 apartments. I worked with Karen, the top tenant, and then Karen helped the other tenants winterize their apartment/portion of this historic home.

How to Winterize Your Home with Window Shrink Film

The first project we tackled in Karen’s historic Knoxville home was insulating the windows with the indoor shrink window kit. This kit was incredibly easy and FUN to use!

Step 1

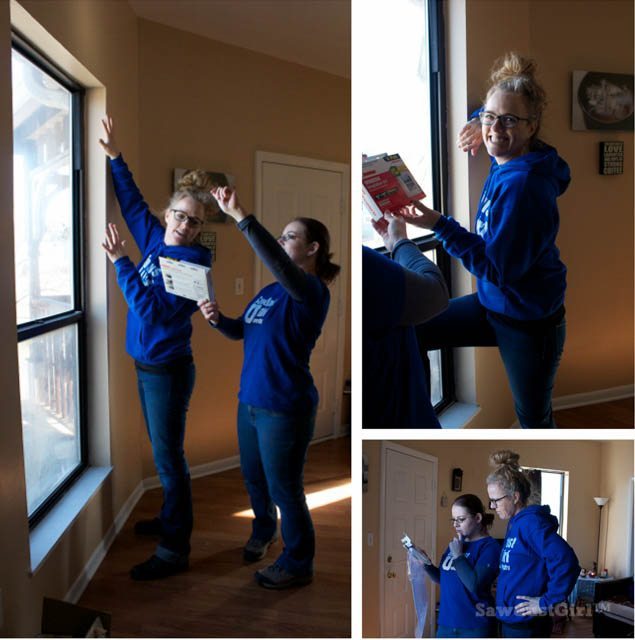
Starting off, like with any project… read the instructions. Then re-read them because you weren’t paying attention the first time. Because you never read instructions.

Or maybe that was just us. I really hate instructions. These weren’t too bad though, once you get into them.
How to Winterize Your Home with Window Shrink Film

Step 2

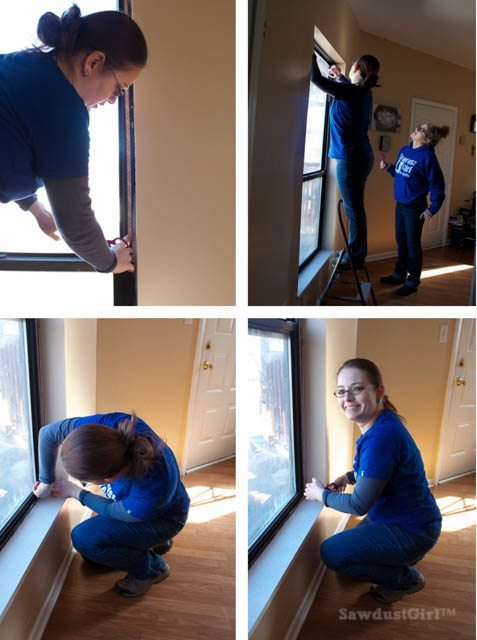
Make sure the windows are free of dust and debris, then apply the provided super sticky, double sided tape to the window frame. Wait 15 minutes.

You totally would have just stuck the window shrink film on right away if you hadn’t read those instructions! Or, I would have!
How to Winterize Your Home with Window Shrink Film

Step 3

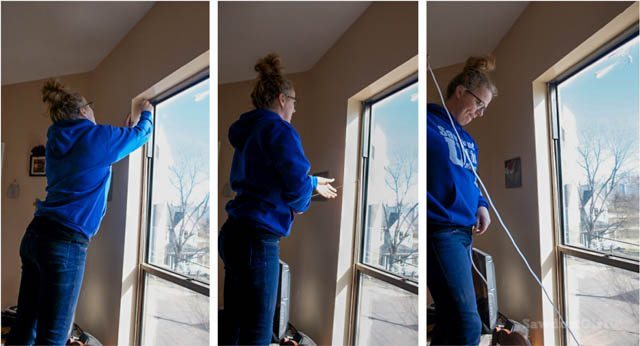
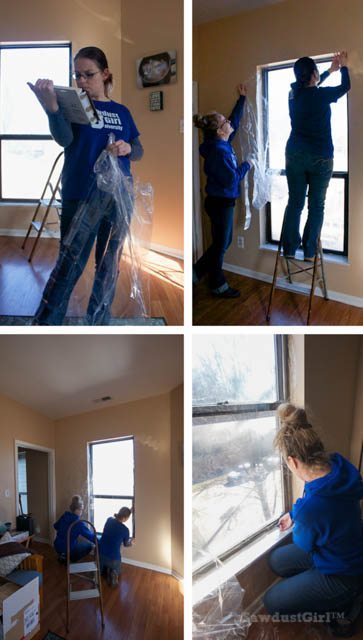
Next, remove the paper backing to the super sticky tape, and apply the window shrink film. Start at the top, then bottom, then sides. Pull the plastic taught to reduce as many wrinkles as possible.
How to Winterize Your Home with Window Shrink Film

Step 4

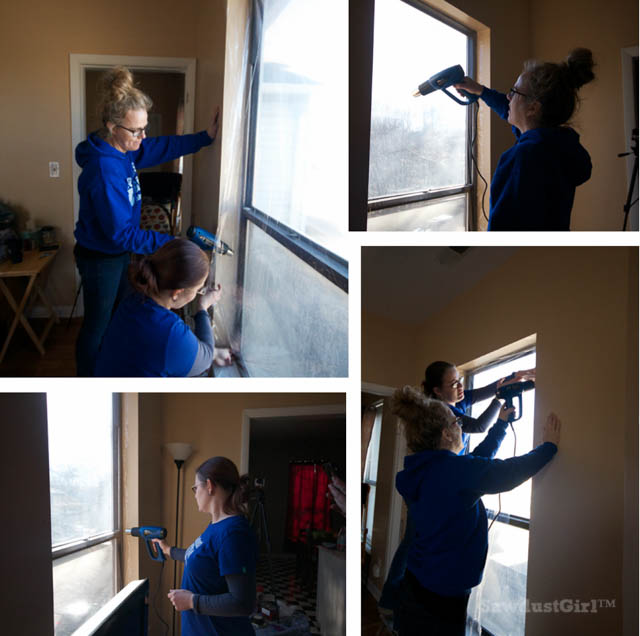
For this next step, you can use a hair dryer. However, I was grabbing tools from my workshop and didn’t want to run upstairs for a hair dryer so I grabbed my HomeRight Heat gun instead, and it worked like a charm!
How to Winterize Your Home with Window Shrink Film

Apply direct heat, approximately 8 – 10 inches away, to the shrink wrap and tape–and, before your very eyes, the wrap will become tight and crystal clear! It was super impressive how clear the wrap became, and it was fun to watch it tighten.

Step 5 (If Necessary)

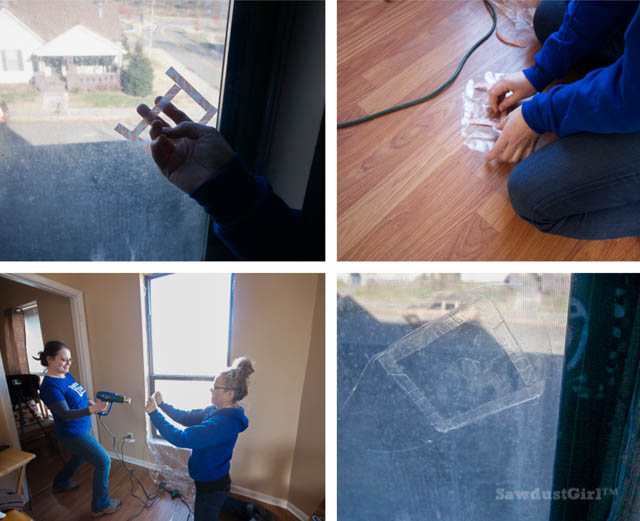
Try not to get distracted while shrinking your film. The wrap can melt. Especially if you touch the gun to the wrap! But, if you do, we found that it can be patched!

I don’t know how long this patch will hold but this is what we did when we accidentally melted our film. I promise, we just looked away from what we were doing for a second!

  • Cut a section of wrap from the excess
  • Apply tape directly to the plastic
  • Activate it with the heat gun
  • Heat the entire patch area to ensure adhesion
How to Winterize Your Home with Window Shrink Film

Again, pay attention while you’re shrinking your window shrink film. Don’t touch it with the heat gun.  It will melt.  You can patch it but the patch kind of ruins the “practically invisibility” factor.

Step 6

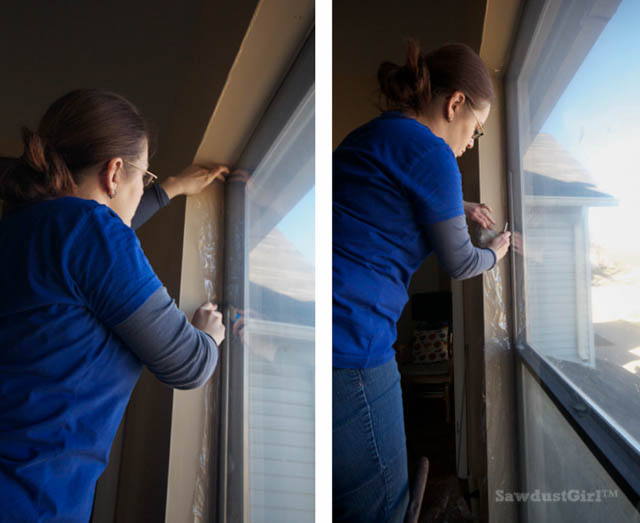
The excess can be removed with a sharp razor blade but, as always, use caution when cutting with a sharp object. Do this carefully and make sure you are “cutting” not tearing the plastic.
How to Winterize Your Home with Window Shrink Film

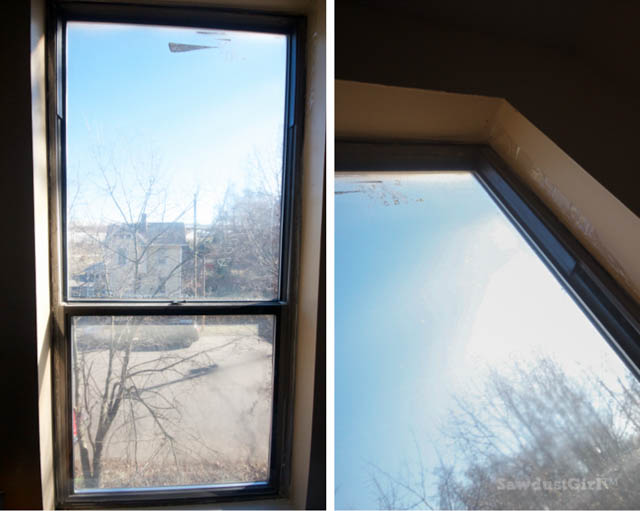
The window shrink makes a world of difference. It also looks way better than the duct-taped plastic my dad used to put over our windows! 

You don’t even see this plastic!

I hope all of you enjoyed this tutorial to winterize your home. I found the window shrink film to be pretty easy to use–as long as you pay attention the whole time–and it seems to work very well! Stay tuned as I will be covering more of the winterizing process soon.
How to Winterize Your Home with Window Shrink Film

Next, we moved onto installing a door sweep on her metal entry door, which was interesting because I didn’t think to brink a drill bit!

*This post is sponsored by FrostKing.  All opinions are my own.
February 2, 2021 · 3 Comments

« How to Build Hanging Storage Boxes
How to Make a DIY Book Holder »

Comments

  1. TwoPlusCute says

    February 2, 2015 at 11:11 am

    Nice job there. Liking a lot the ‘keeping it real’ patch situation. 🙂

    Reply
    • Sandra says

      February 2, 2015 at 3:31 pm

      Haha well you know, always got to keep it real.

      Reply
  2. liz z says

    February 15, 2015 at 9:54 pm

    so glad youre covering this topic! weatherization is one of those things most people dont think about until their energy bills are too expensive. and even with the patch, your shrink-wrapped windows look much better than the ones i did year after year in my rental. ive found a few sites with pdfs now [and i did my own terrible tutorial] on “double paned” shrink-wrapped interior storm windows. maybe something you can do with the other tenants?

    Reply

Leave a Reply Cancel reply

Your email address will not be published. Required fields are marked *

Categories

New Post email notification signup

You Subscribed!

Legal Stuff

Terms of Use

Privacy Policy

Disclosure

Recent Posts

  • January 2023 Lodge Update
  • Lodge Update – Floors, Cabinets, Countertops, and Appliances
  • Lodge Kitchen Cabinet Progress
  • Halloween Mad Gab – Halloween Party Ideas
  • Concrete Backsplash or Vertical Wall Treatment

Disclaimer:

Although it is my intention to provide accurate plans and clear instructions, not all plans have been tried and tested. Using plans or information found on SawdustGirl.com indicates that you agree with the Terms of Use policy and will accept full responsibility for the process and outcome of any project you attempt. All plans are for private use only. Plans and information published on SawdustGirl.com may not be reproduced, republished or distributed in any manner without written permission from Sandra Powell, Sawdust Girl. Actual projects built using Sawdust Girl plans may be published on your own site without instructions or "tutorial" as long as you provide a link to my original post with full post title or "SawdustGirl.com" as link title.

Copyright © 2023 · anchored theme by <a target="_blank"