Upcycle a Daybed for an Oh-So-Pretty Bedroom
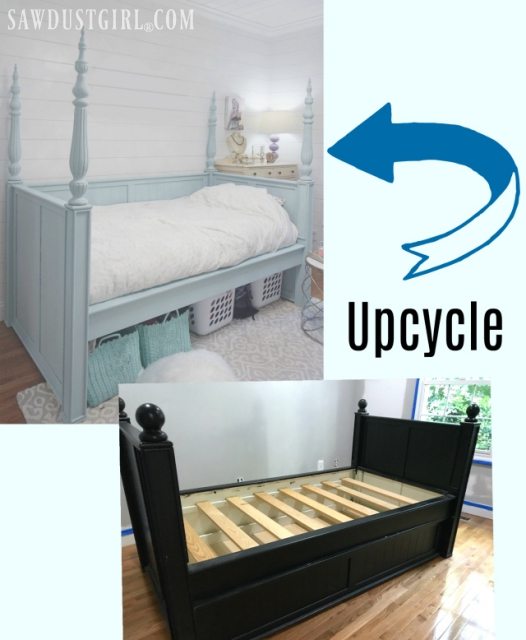
Small bedroom woes? Here is a pretty bedroom upcycle idea: Salvaged table legs and finials to take this daybed from ho-hum to grown up glam. With ample room for storage underneath and a small footprint with lots of wow, its the perfect bed for a small bedroom.
Creating a 4-poster Daybed
We’ve had this Pottery Barn daybed for about 15 years. It started out creme, then we painted it black to work in the World Map Bedroom and it’s worked fine as a child’s bed. Though there are a few things that have bugged me about it. The open back let pillows, books, socks, and anything else that was on the bed slip down and become trapped between the bed and the wall. Also, the trundle bed was rarely used and turned out to be a bit of wasted space for a small bedroom.
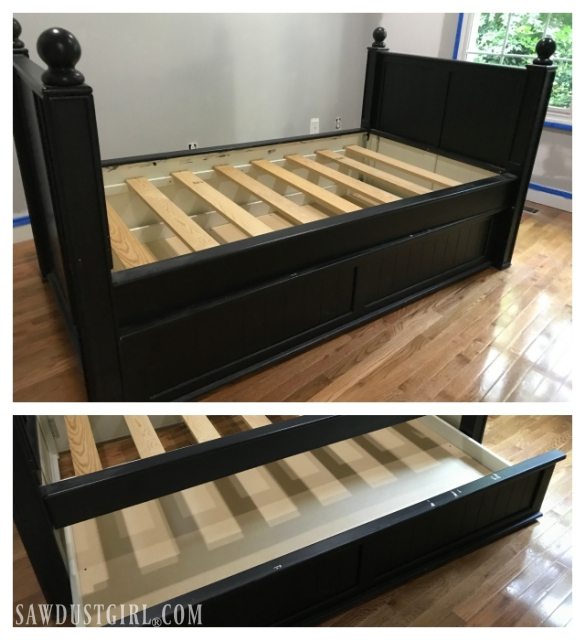
We have certainly got our money’s worth with this bed over the last 15+ years of service. So I was planning on selling it and buying a grown up bed for this pretty bedroom redo. However, when doing the space planning, it just didn’t make sense to try to squeeze a queen size bed into this small bedroom. Why buy a new twin bed frame when this one is still perfectly good? We just needed to zhuzh it up a bit to give it a more grown up glam feel to go with our pretty bedroom design.
Supply List:
- Old daybed
- 4 salvaged table legs
- 4 finials
- wood glue (Thick and Quick worked awesome)
- 3 inch wood screws
- Chalk Paint
- Wax
Step One: Prep
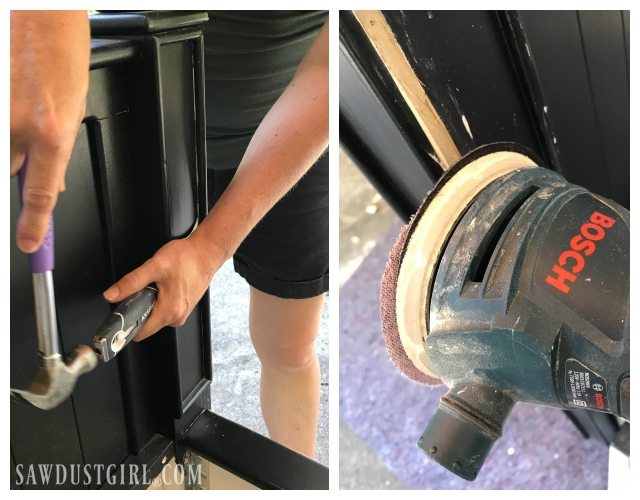
First up, we fixed the open back issue by taking the trundle front panel and using it to create a new back. I popped off the decorative molding and sanded the area smooth. I used L brackets to attach the panel to the bed frame. It’s not pretty on the backside, but since that will always be against the wall, it was a simple quick solution.
Step 2: Paint
Next we painted the bed with Fusion Mineral’s chalk paints, which we loved. It went on really smooth, and the coverage and hide were great, especially considering we were going over black. It dried very flat – no brush stokes, and sanded beautifully. I had just used a different brand of chalk paint on another project that had poor hide and kept resolubilizing when I did a second coat, very frustrating! The Fusion Mineral paint was pure joy by comparison.
We started with Bedford, a pretty gray, for an undercoat and then used Buttermilk Cream for a topcoat. Which was gorgeous until we found the perfect vintage vanity and dresser for in an antique shop. Somehow they were the exact same color. Hellz no to a room full of matchy matchy furniture! We quickly grabbed the Champness blue and repainted to create some lovely contrast. We would have gotten sick of painting except the fusion mineral paint was just so easy to apply and dried really fast.

Step 4: Add Poster Legs
The new color and finish on the bed looked great, but the proportions did not make my heart sing. It just needed something more. Hmmmmmmm, I had some old table legs in my scrap pile that I had salvaged off of an old dining table, I held them up to the bed frame and boom – there was the music I was looking for.
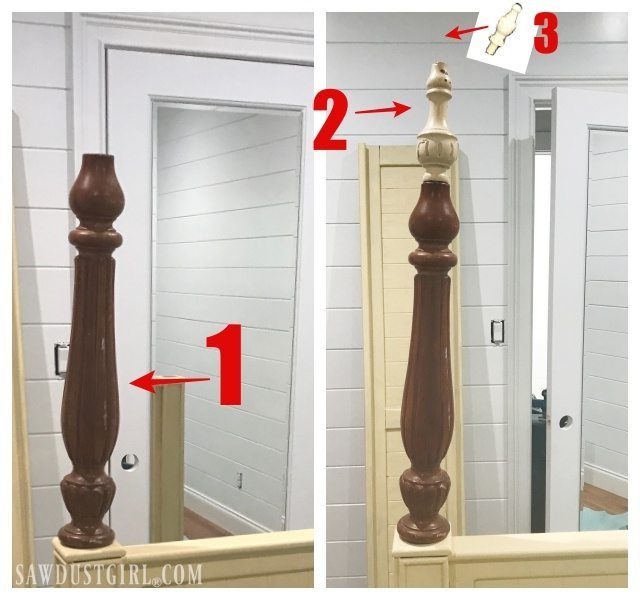
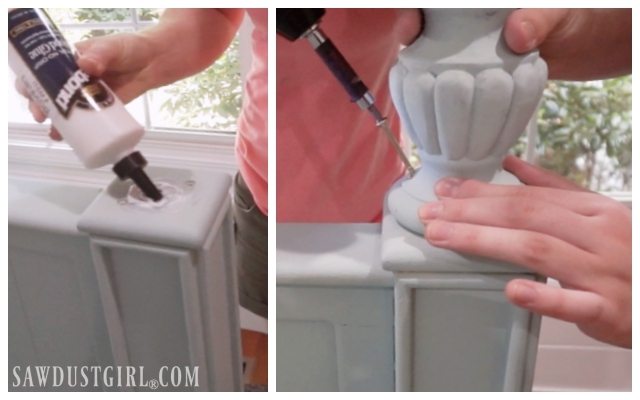
I used wood glue and 3 inch SPAX wood screws to secure the table legs to the bed frame. Then we used the legs off of the vanity and some finials from the craft store to finish the top. We secured them using brad nails and on these I used the Thick and Quick. It bonded so quickly, I probably didn’t even need the nails. I wish I had thought to use it on the table legs as well. As it took some finesse to get them screwed in and straight. This is a great glue for projects where you want a little bit of position time and then a quick strong bond. Then I filled all the holes with putty, sanded smooth, and then touched up with paint.
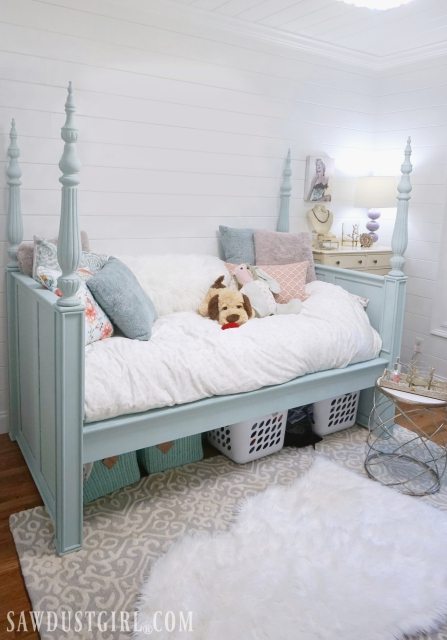
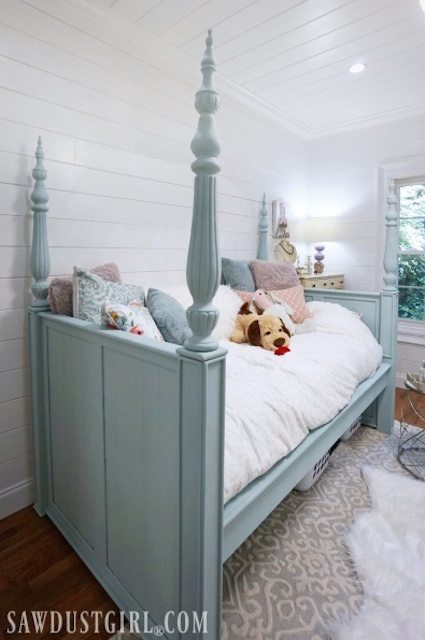
I love how upcycling the bed gave it so much more wow and created extra storage in our small bedroom. With its four posters and soft chalk painted finish, it is the perfect grown up glam bed and a gorgeous focal point for this pretty bedroom. You would never guess that it was upcycled from of salvaged pieces that were almost headed to the junk pile.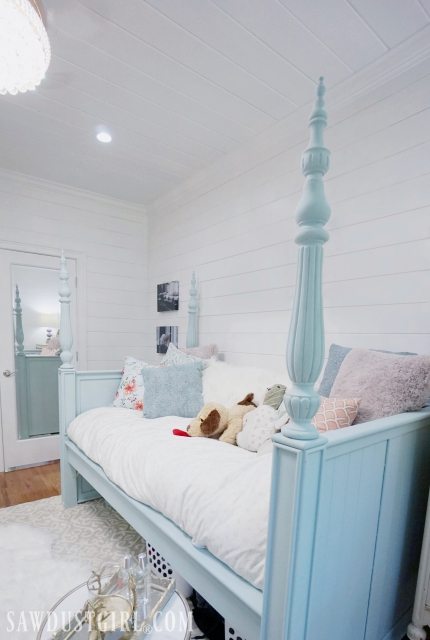

Great job????
This is amazing – great job! I’ve been following for a little while and am always amazed at what you get done. You are fearless.
This is beautiful, I love it!