• Home
  • About
    • Personal Posts
  • Privacy
  • Shop
    • My Account
    • Checkout
    • Email
    • Facebook
    • Instagram
    • Pinterest
    • Twitter
    • YouTube
Sawdust Girl®

Sawdust Girl®

Renovation, cabinet building and woodworking plans and tutorials. Build like a Girl®

  • My Home
    • Clinton TN House
      • Clinton TN House in Progress
    • Maryville TN House
      • Maryville TN House Tour – Completed Rooms
      • Maryville TN House in Progress
        • Basement
        • Basement Storage Closet
        • Bedroom Office
        • Craft Room
        • Dining Room
        • Entry
        • Garage
        • Guest Bedroom
        • Hallway
        • Jack and Jill Bathroom
        • Kitchen
        • Kitchen Entry
        • Laundry Room
        • Library
        • Living Room
        • Loft
        • Madison’s Room
        • Master Bedroom
        • Master Closet
        • Pantry
        • Porch
        • Powder Room
        • Wes’ Office
    • Illinois House
    • Calderwood Cottage
  • My Workshop
    • Clinton Workshop
  • Build & Breakfast
  • Cabinet Making 101
    • Cabinets
    • Doors
    • Drawers
  • Projects and Plans
    • Countertops
    • Beds
    • Benches
    • Bookshelves
    • Desks
    • Gift Ideas
    • Holiday
      • Christmas
      • Halloween
    • Home Accessories
    • Kids
    • Kitchen Cabinets
    • Lockers
    • Nightstands
    • Organization accessories
    • Recipes
    • Sewing
    • Tables
    • Vanities
    • Wardrobes
    • Woodworking
      • Wood Finishing
    • Workshop
    • Workshop Storage and Organization
  • Remodeling 101
    • Baseboard and Trim
    • crown molding
    • Demolition
    • Door and Window Casings
    • Door Installation
    • Drywall
    • Electrical work
    • Flooring
    • Home Maintenance
    • Painting
    • Plumbing
    • Resources
    • Safety
    • Tile
    • Wall and Ceiling Treatments
  • The Sawdust Diaries
    • Andrea
    • Ava D.
    • Beckie F.
    • Cara C.
    • Courtney B
    • Fawn T.
    • Jenn D.
    • Kelly C.
    • Kristy K.
    • Lara T.
    • Malisa B.
    • Marnie D.
    • Robin C.
    • Val F.
  • Tools
    • Products
    • Tool Reviews & Overviews
    • Inspiration & Ideas

Madison’s World Art Bedroom Reveal

All Posts, Madison's Room, Tennessee House Tour

I’m so happy to be done with Madison’s Bedroom.  It was more work than I planned but I love how it turned out!  The World Map Wall was our jumping off point.  
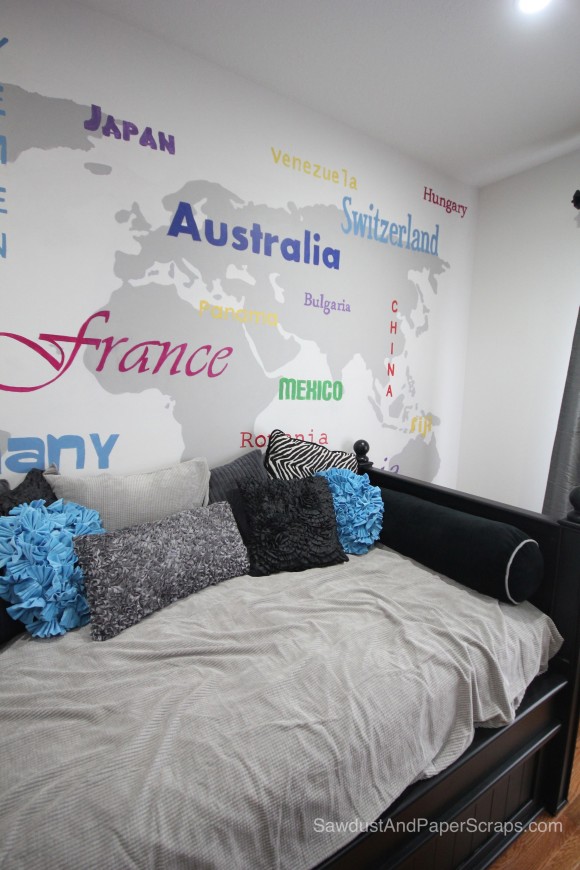
World Art Bedroom Reveal


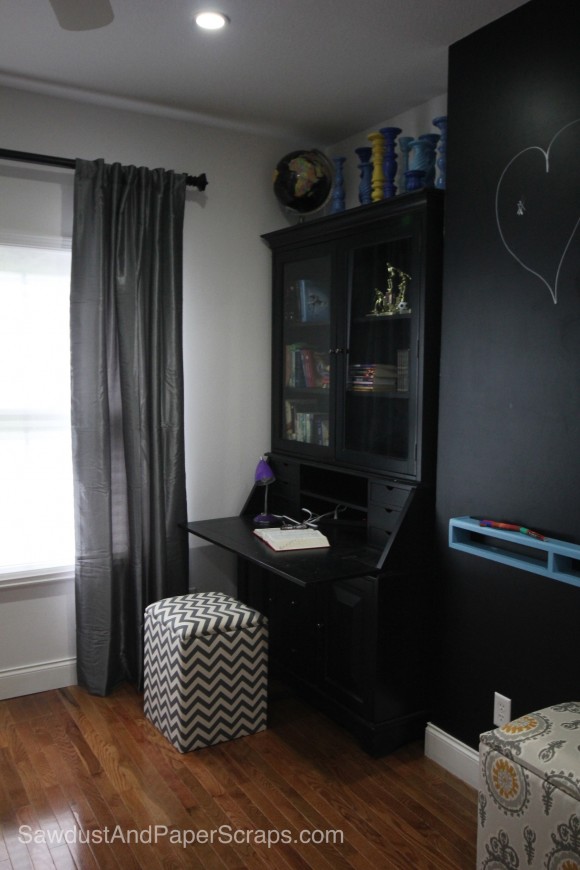
Madison wanted a white board and a chalkboard on the opposite wall. 


Instead of doing both (because I didn’t think I could accomplish that and have it look good), I did a black, wipe off board.  It’s actually black vinyl.
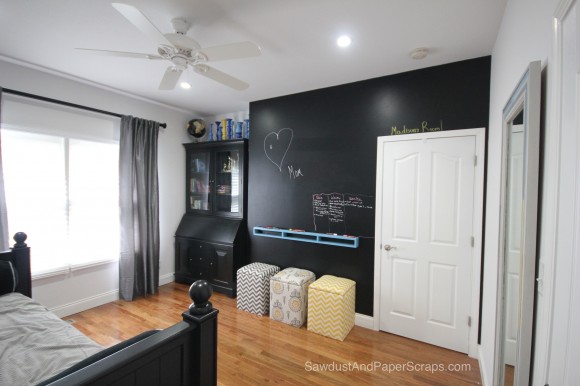
World Art Bedroom Reveal

I ordered rolls of adhesive chalkboard from Amazon– which is was NOT.  At first I was peeved, but it turns out I’m glad it is what it is because we can write on it with chalk markers and it wipes off.  No chalk dust.  She gets to use markers…which is what she wanted.

Everyone is happy.   


I build a narrow shelf where she could store the markers.  It has moulding on the top to keep them from rolling off.
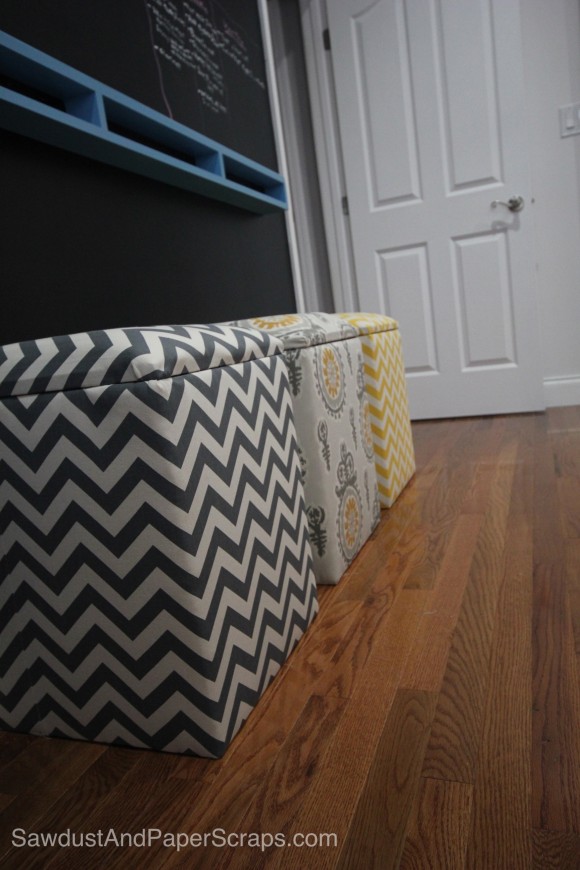
World Art Bedroom Reveal

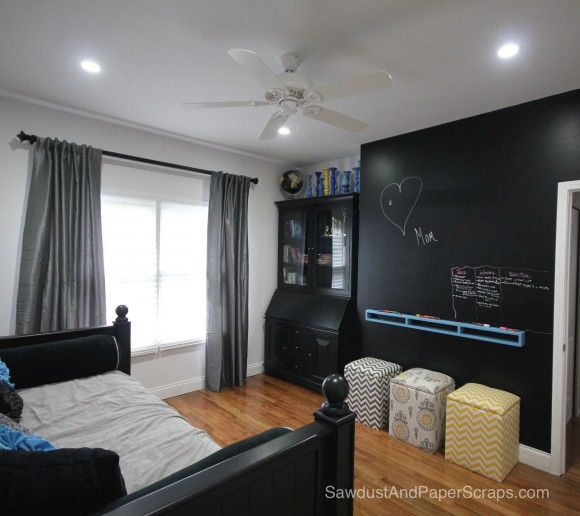
Then I built some benches for seating,  to bring some color to that wall and for storage.  (The lids come off –baby!)
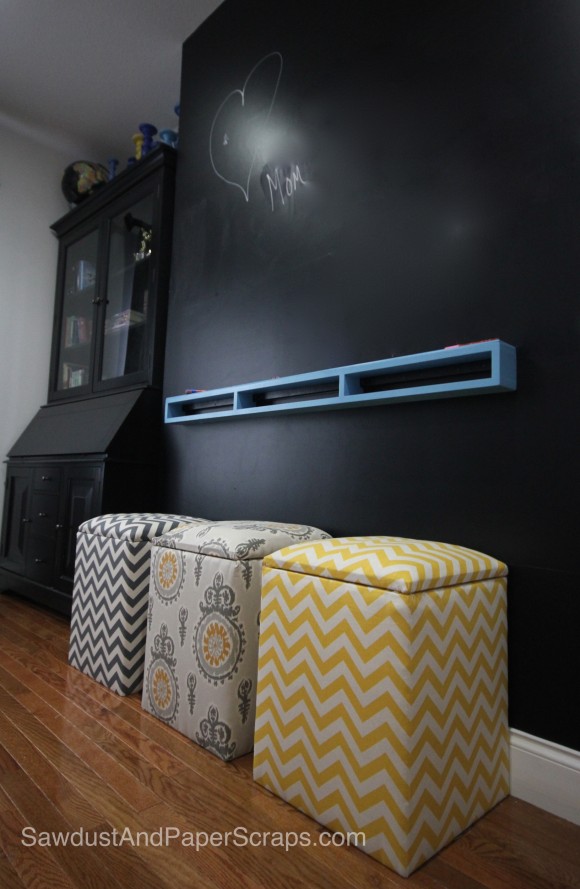
World Art Bedroom


The benches are also normal chair height so when Madison wants to use her hutch for homework (or whatever), she can pull one over and doesn’t have to have a chair constantly seated in front of the hutch — cluttering up the space.  It is a small Bedroom, after all.
World Art Bedroom Reveal


I didn’t want too much color on the bed because there is so much on the wall so I painted the bed black and used shades of black and grey for the bedding and pillows with just a POP of color in a couple pillows.


I also pulled in some color on the opposite wall with some candlesticks that I painted in different shades of blue for on top of the hutch.  Then I threw in a single yellow one…just for fun!
World Art Bedroom Reveal


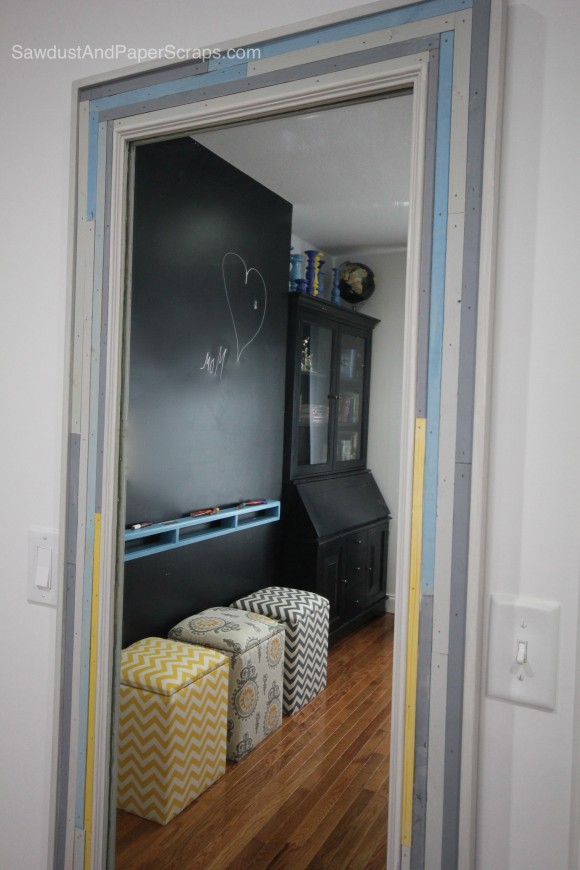
She needed a mirror in here so she didn’t have to keep running into my bedroom to see what her outfit looked like.  I made her this one.
World Art Bedroom Reveal

I’ll get into more detail on each of the individual projects I did in this room later.

World Art Bedroom Reveal

The whole room makeover was pretty inexpensive after installing the floors.  I bought window panels and fabric for the benches but  I used scraps of wood and moulding from my workshop for all of the side projects.

After retexturing the walls, removing the carpet and scraps from my side projects, I had a pretty big pile of garbage for my Bagster Bag.  It’s not quite full yet and I’m hoping I can fit the carpet from the other small bedroom that needs to be updated as well.  I’m going to fit as much as I can in there before I call for pick up.


Chalkboard vinyl from  Amazon:  *I went back and read the comments and some said that if you rub chalk all over it, like you do when priming a regular chalkboard, it actually does work with chalk.

Chalk markers from Amazaon

Thomas Daybed from Pottery Barn outlet … 7 years ago.
September 4, 2012 · 42 Comments

« It’s all in the details
Easy DIY Framed Mirror »

Comments

  1. Natalie says

    September 4, 2012 at 6:12 pm

    Way cute room!! Is the bed in there a daybed? and if so where did you get it?

    Reply
    • Sandra says

      September 6, 2012 at 10:33 pm

      Thanks. Yes, the daybed is from Pottery Barn outlet. We got it 7 years ago when we lived in Texas. I miss that store!

      Reply
  2. Andrea says

    September 4, 2012 at 6:34 pm

    I know I say this ALL the time, but you are awesome. I made curtains for Sy’s room this week (yeah, we’ve lived here 5 years…), but can’t hang them, as I can’t find any of our tools (Ty’s dad is in town and has all our tools at a worksite he’s been working on all summer). Also, they’re not done, because I can’t decide how to embellish them. I am so indecisive. That is why I am always so impressed by the speed at which you finish your projects. It takes me FOR.EV.ER to do every little thing. Anyway, there’s your novel-of-a-comment of the day.

    Reply
    • Sandra says

      September 6, 2012 at 10:37 pm

      Thank you Andrea. You know I think YOU are awesome. I can’t imagine not having access my own tools. You are generous. And I felt like it takes me FOr.Ev.Er to finish anything anymore. I think it just seems like I get it done fast because you just all the sudden get to see it done. LOL Keep plugging away. I love your novelish comments!

      Reply
  3. Jacque says

    September 4, 2012 at 6:47 pm

    This looks incredible! I am sure she is super happy with it, what teenage girl wouldn’t be?

    Reply
    • Sandra says

      September 6, 2012 at 10:38 pm

      Thank you Jacque. She loves everything but the candlesticks. I told her they had to be there for the pictures and then she could do what she wants. She’ll never even think about it again because, really, like she’s gonna notice that detail in the mess her room always ends up being. LOL

      Reply
  4. Tiffany says

    September 4, 2012 at 8:54 pm

    I love it and so does my 13 year old. I think I’ll be copying your ideas in the near future.

    Reply
    • Sandra says

      September 6, 2012 at 10:39 pm

      Thanks Tiffany. Copy away! 🙂

      Reply
  5. jen @ Tatertots & Jello says

    September 4, 2012 at 10:37 pm

    Absolutely fabulous. I bet she is so happy with the room. And I think the concept would be awesome for a boy or a girl. Beautiful!

    xoxo

    Reply
    • Sandra says

      September 6, 2012 at 10:41 pm

      Thank you so much Jen. I think the wall before the words went on was super cool too. That could be a great boy’s room. Madison does love it. I’m just happy she has one space in this house to get away from the construction madness.

      Reply
  6. Brandy Miller says

    September 4, 2012 at 11:04 pm

    AMAZING! Girl you are incredible!

    Reply
    • Sandra says

      September 6, 2012 at 10:45 pm

      Thank you Brandy.

      Reply
  7. Roeshel says

    September 4, 2012 at 11:06 pm

    You are so good with details, Sandra! It’s a gorgeous room with so many fun DIY projects. LOVE your creativity!

    Reply
    • Sandra says

      September 6, 2012 at 10:42 pm

      Thank you Roeshel!

      Reply
  8. Brittany says

    September 4, 2012 at 11:23 pm

    This looks so great Sandra!!! Selfishly, I can’t wait to see the tutorial for the bench cubes! Do they have storage inside?

    Reply
    • Sandra says

      September 6, 2012 at 10:43 pm

      Yes, the lids come off for storage. When she was younger, they would have been full of stuffed friends. Now, I’m not sure what will go in there, if anything, but at least there’s room for stuff if she finds a need. You know I don’t like to waste space. LOL

      Reply
  9. Wendy says

    September 5, 2012 at 12:56 am

    Wow! Love it all; and so impressed with the black! I’m always afraid to use it, but it really looks perfect! Can’t imagine it any other way 🙂

    Reply
    • Sandra says

      September 6, 2012 at 10:44 pm

      Thanks. Madison was worried at first with all the black and grey. I just kept telling her to wait for the details. I promised her she’d love it in the end or I’d change it for her. (THank goodness I don’t have to change it. LOL)

      Reply
  10. Karen says

    September 5, 2012 at 5:40 am

    What an amazing bedroom. You did an awesome job Sandra! I am excited to see posts on all of your projects. Cheers.

    Reply
    • Sandra says

      September 6, 2012 at 10:45 pm

      Thanks Karen. Stay tuned… 🙂

      Reply
  11. angela says

    September 5, 2012 at 6:19 am

    This is brilliant! I adore this room:)

    Reply
    • Sandra says

      September 6, 2012 at 10:15 pm

      Thank you so much Angela.

      Reply
  12. Kristi @ Creative Kristi says

    September 5, 2012 at 7:25 am

    Looks great! Can you share the name or link of the vinyl? I’d love to get rid of chalk dust in the playroom lol

    Reply
    • Sandra says

      September 6, 2012 at 10:15 pm

      Thanks Kristi. The vinyl can be found at Amazon here: http://www.amazon.com/Kittrich-Corporation-06F-C9052-06-Chalkboard-Contact/dp/B000KKMO90/ref=sr_1_1?ie=UTF8&qid=1346848466&sr=8-1&keywords=chalkboard+vinyl

      Reply
  13. liz o says

    September 5, 2012 at 9:08 am

    will you adopt me? 🙂

    Reply
    • Sandra says

      September 6, 2012 at 10:16 pm

      Sure Liz. What do you bring to the table? LOL

      Reply
  14. A. says

    September 5, 2012 at 9:31 am

    this is a room of my dreamz.

    Reply
    • Sandra says

      September 6, 2012 at 10:24 pm

      Thanks so much.

      Reply
  15. Julie says

    September 5, 2012 at 1:11 pm

    Fantabulous as always! Mirror looks great!

    Reply
    • Sandra says

      September 6, 2012 at 10:17 pm

      I wasn’t sure at first…but I do like it after all.

      Reply
  16. Erin @ Two Story Cottage says

    September 5, 2012 at 8:47 pm

    Love it! It turned out great! It looks like Madison. Love, the benches, mirror, and candle sticks. That is a lot of little projects! I’m impressed! Doesn’t it feel nice to have a room that is totally finished?! Lacey’s room is done (but not blogged about yet) and it is nice to check one off the list. Because everything else is semi-done.

    Reply
    • Sandra says

      September 6, 2012 at 10:18 pm

      Soooo nice! This really is the only room that is completely done. I have to get to her bathroom and closet eventually but the bedroom is done. Can’t wait to see Lacy’s room.

      Reply
  17. Kelly @ Eclectically Vintage says

    September 6, 2012 at 12:53 am

    WOW-you are mom of year for this room! The vinyl wall is genius and the map wall is fabulous! Love that mirror too – she must be thrilled! Pinning this!
    Kelly

    Reply
    • Sandra says

      September 6, 2012 at 10:27 pm

      Thank you Kelly. She is really happy with it. She keeps begging me to work on her “teen lounge” upstairs. That’s the room she’s really excited about. But it’s near the bottom of my priority list. I need a functional Kitchen and bathroom and craft room first.
      🙂 At least she has a place to exist that is not in chaos. That was my goal.

      Reply
  18. Marcelena Melton says

    September 6, 2012 at 7:34 pm

    Looks Great! I totally love the “vinyl” wall- where did you get that hutch? its amazing!!

    Reply
    • Sandra says

      September 6, 2012 at 10:29 pm

      Oh, that hutch was another Pottery Barn outlet purchase. It had a big ding in one of the top corners so it was drastically marked down. Of course, that didn’t scare the putty queen! LOL

      Reply
  19. Brenda says

    September 7, 2012 at 2:01 pm

    What an awesome room! You did a fantastic fabulous job! I love it!!

    Reply
  20. Missi at havoc-to-heaven.com says

    September 14, 2012 at 9:12 am

    I have come over from HomeTalk. I can’t get over how cool this room is! You are super talented Girl!

    Reply
    • Sandra says

      September 14, 2012 at 10:00 am

      Thank you Missi.

      Reply
  21. Dacia says

    September 17, 2012 at 1:34 am

    Her room turned out awesome! Love the fabric colors.

    Reply
  22. Jami Lowe says

    July 21, 2013 at 4:53 am

    I love your blog and all your projects. I also enjoyed seeing Madisons bedroom project in my Better Homes and Gardens magazine, August 2013 issue. Great job! So nice to see someone local highlighted in one of my favorite magazines. I live in Maryville, TN. Keep up the good work Sandra.

    Jami Lowe

    Reply
  23. Sophia says

    February 16, 2014 at 10:31 am

    Wonderful Web-site, Continue the good work. Thanks a lot.

    Reply

Leave a Reply Cancel reply

Your email address will not be published. Required fields are marked *

Categories

New Post email notification signup

You Subscribed!

Legal Stuff

Terms of Use

Privacy Policy

Disclosure

Recent Posts

  • Building and Installing a Giant Faux Beam on the Ceiling
  • White Wash Pine Wood Ceiling
  • Lodge and Life Update
  • How to Choose Which Track Saw to Buy in 2021
  • How to Choose a Paint Sprayer to Buy in 2021

Disclaimer:

Although it is my intention to provide accurate plans and clear instructions, not all plans have been tried and tested. Using plans or information found on SawdustGirl.com indicates that you agree with the Terms of Use policy and will accept full responsibility for the process and outcome of any project you attempt. All plans are for private use only. Plans and information published on SawdustGirl.com may not be reproduced, republished or distributed in any manner without written permission from Sandra Powell, Sawdust Girl. Actual projects built using Sawdust Girl plans may be published on your own site without instructions or "tutorial" as long as you provide a link to my original post with full post title or "SawdustGirl.com" as link title.

Copyright © 2022 · anchored theme by <a target="_blank"