Easy DIY wall stencil
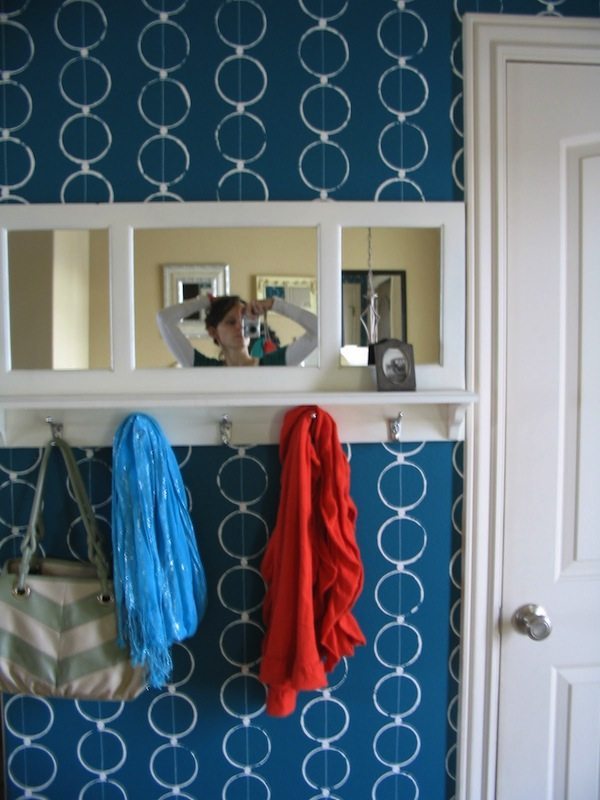 I’m so excited to have my adorable cousin Andrea, of Shumen and Shuwomen guest post today. She’s sharing how she created this easy DIY wall stencil.
————————————————————
Growing up, my family called me ‘Handy Andy.’ This gave me a false sense of usefulness. Come to find out, they only called me that because it rhymed. I am not actually handy. But I like to try.
My motto with creating is, “The Cheaper The Better”. Because I don’t really know what I’m doing, and I’m impatient, projects that I do tend to fall short of my expectations. Every time. If I spend more than $20, I have the do-it-yourselfer’s equivalent of buyer’s remorse (done-it’s remorse?), so I try never to spend more than that. $5 is even better. Because for $5, no matter the outcome, I can find a way to feel good about it and make it do. And sometimes I get lucky and love the finished product. Which is a bonus. And a miracle.
And THAT is what happened with my entry wall.
When I discovered that the only wallpaper I like just happens to be designer, and more expensive than hiring DaVinci himself to do a fresco, I turned to hand painting what I hope LOOKS like wallpaper (I have had several people ask where I bought my wallpaper, so I count it a success).
Here is my artistic process:
1. 1. Notice that Home Depot is clearing out all their little paint sample bottles. Take it as a sign that it’s time to do some painting. Purchase two and have them tinted a shocking, vibrant turquoise ($3). Drive home shaking my head in regret (this is a vital step in all of my painting ventures).
2. 2. Slap the paint up, give it a second coat, and let it sit overnight. Look at it in the morning light (this is starting to sound like a rap). Try really hard not to chicken out because it looks kind of ridiculous. Add a red bow.

Proceed (with the understanding that it’s only paint…)
3. 3. Remember a cool design I saw as a blog banner once, and try to decide how to recreate it.
4. 4. Search for the stinkin’ level (that I can NEVER find when I need), grab two plastic cups (cut one in half) and a white paint pen from the craft box (purchased at Walmart probably).
5. 5. Go for it! Use the level to draw evenly-spaced stripes with the paint pen.
6. 6. Starting at the top of the wall, alternate using the whole cup and half cup dipped in paint. Decide quickly that I like the “imperfect” look, which makes it less stressful.
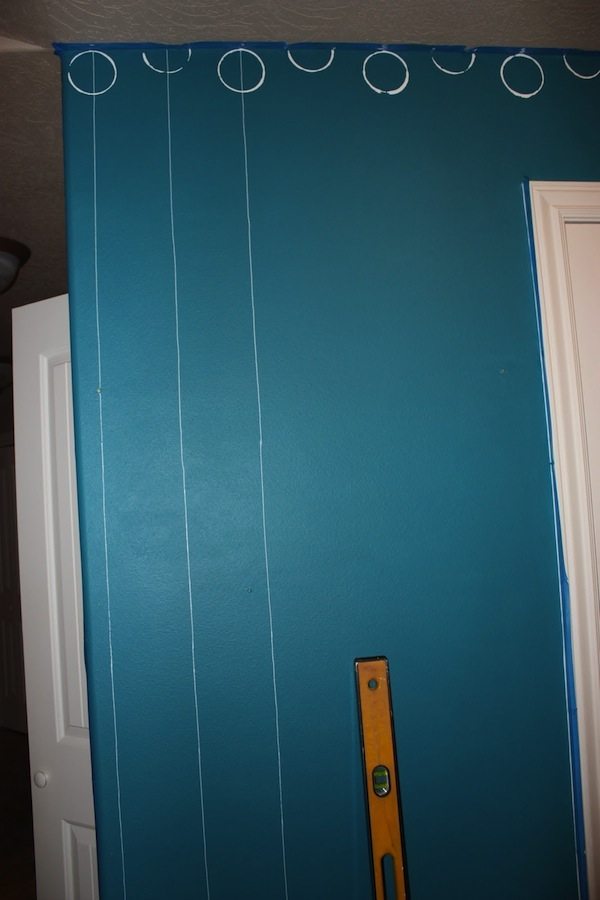
7. 7. Be much too lazy and impatient to search the house for something to use for the small circles, and improvise with the paint pen lid dipped in paint.
8. 8. Cut the half cup smaller and smaller as the pattern dictates (around the door and in the corner).

9. Air dry and re-hang the entry mirror, feeling satisfied in knowing I can repaint the wall in less than an hour if I get sick of it.
P.S. It’s been 10 months, and I like it more every time I hang up my purse.
—————————————————————-
Thank you Andrea. I love your humor…and your beautiful wall!


You seem pretty darn handy to me. Must run in that family of yours. Love the wall and love the color too.
Andy, you're handier than you think. Love the tutorial because 1.) I can totally relate 2.) Love your wall… still and 3.) you're so funny and 4.) You're on Sandra's freaking famous blog!
Love, love, love it! I'm totally copying you. Thanks for the inspiration!
Oh my goodness I sat here laughing as I read your post thinking…who switched my computer screen for a mirror! I'm glad I'm not the only one with "high expectations" (that almost never pan out) and lots of "done-it's remorse"!!Don't you just LOVE when that one project actually turns out more than you expected?! I have a small handful of those! I LOVE LOVE LOVE your wall! I'm currently searching the house for the perfect wall to recreate the same thing! I'm thinking green…?! =)
I love it! So much easier than stenciling or drawing freehand. I wonder if you could do the same thing with and ice cream pail and get that quadrafoil look?