How to Make an Octagon Jig – Building Geometric Shapes
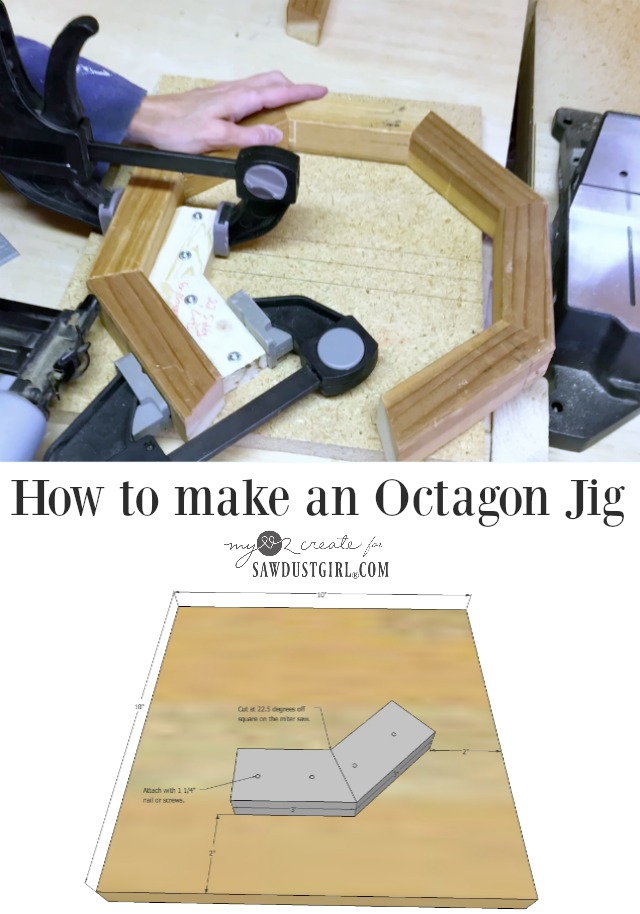
Hi my name is Mindi and I blog over at MyLove2Create. Today I am going to show you how to make an Octagon Jig for creating geometric shaped projects, like frames, mirrors, trays, and shelves.
I can’t tell you how excited I am to be in Sandra’s mentoring group! I have a very distinct memory of watching a YouTube video of her dance in her newly built…amazingly awesome, closet. And, I’m pretty sure I watched it multiple times, in a row…in complete awe of course, she is sooo talented!
Needless to say, I have admired her from afar for a long long time, so this opportunity is like a dream come true!
So why do you need a jig for geometric shapes? Well, the truth of the matter is, you don’t have to have a jig for making geometric shapes like octagons or hexagons, but I wanted one for a couple of reasons.
- I have a terrible memory when it comes to anything numbers, and since I enjoy making geometric projects, having a jig for a certain shape, with the angle I need to cut at actually written on the jig, is very useful plus it saves me from having to google the angle yet again.
- A jig can also be a big help in the building process, facilitating in tighter and more accurate joints, so you can create a better project with ease.
Luckily for you, this post is packed with mistakes, that I generously made, so that you can learn from them and not make them yourself. You are very welcome. 😉
I eventually got my brain working to a point where I figured out a great system for using a jig to help create awesome geometric projects. Let’s get started!
How to make an Octagon Jig
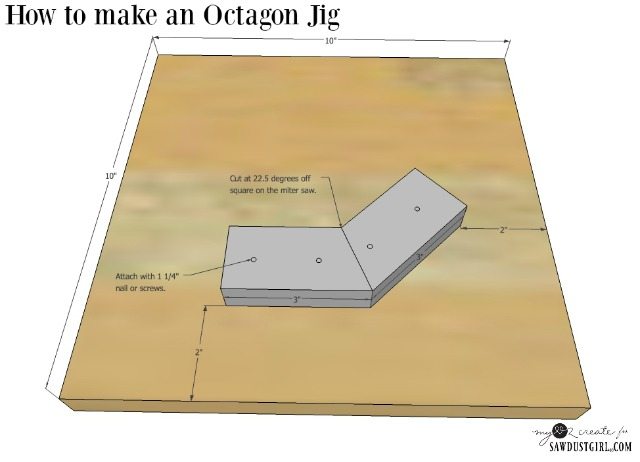
- scrap plywood or other 3/4” thick wood, size can vary, around 10” to 12” square…doesn’t really matter
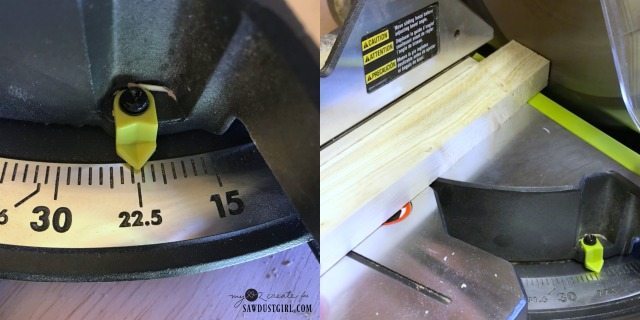
- 2 -1/2’s cut with one end at 22.5 degrees off square, 3” long from long point to end
- nail gun with 1 1/4” finish nails or 1 1/4” screws and drill bit
- drill/driver
- Miter saw
- bar or C-clamps
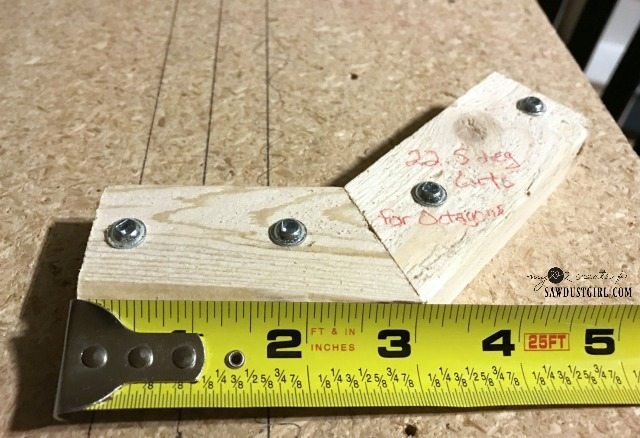
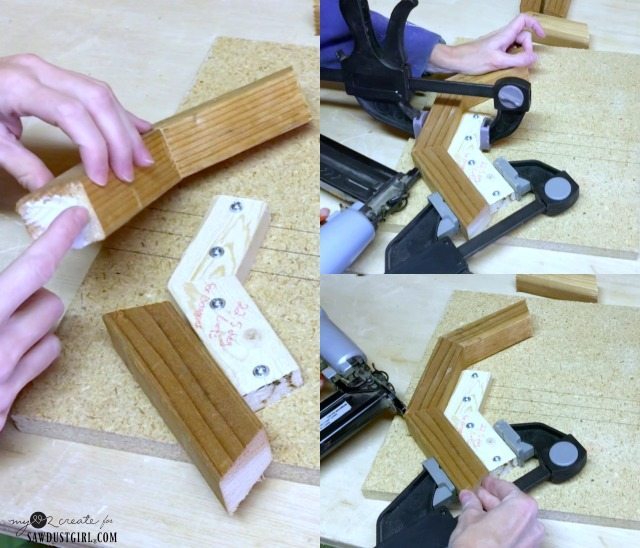
Step 2: Arrange your jig pieces and attach them to your scrap board.
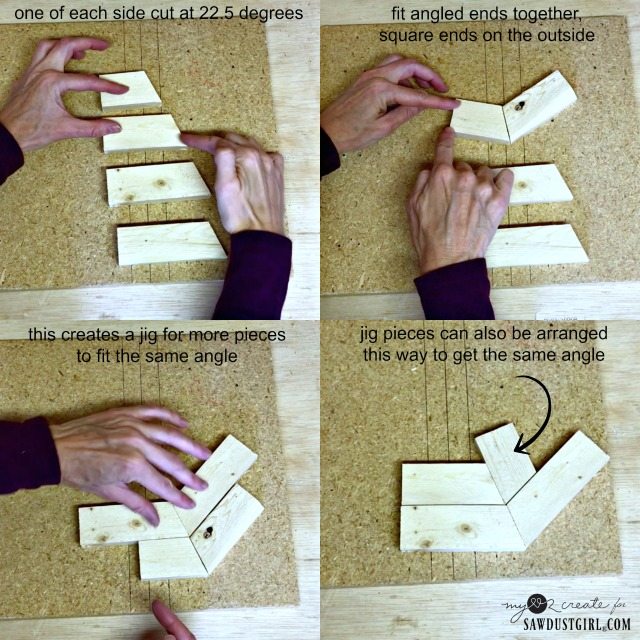
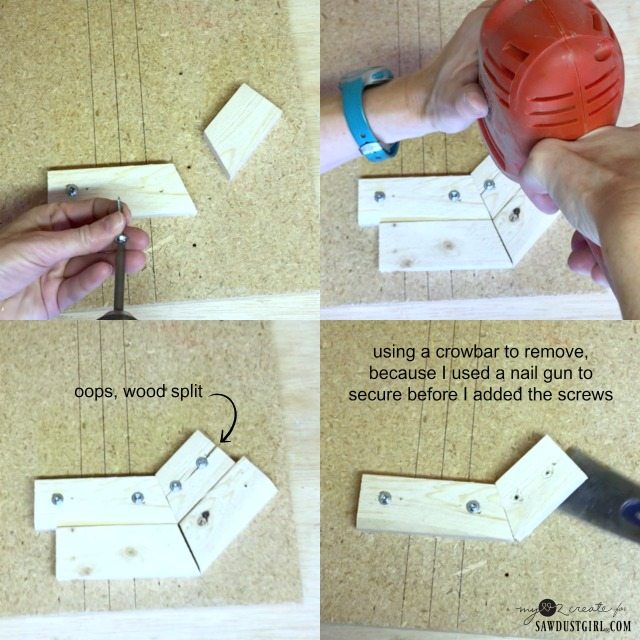
*Note: I found it was easier to shoot a couple of nails into the pieces to secure them to the board before I added my screws, so they wouldn’t slide around. Of course, you could clamp them and have the same results…or even just nail them in and avoid the screws all together.
And….when using cheap furring strips, don’t trust that your self tapping screws won’t split the wood.
I removed the split piece, and because I had put in a few nails to secure it before I added the screws, I needed to use a crowbar to pry it off.
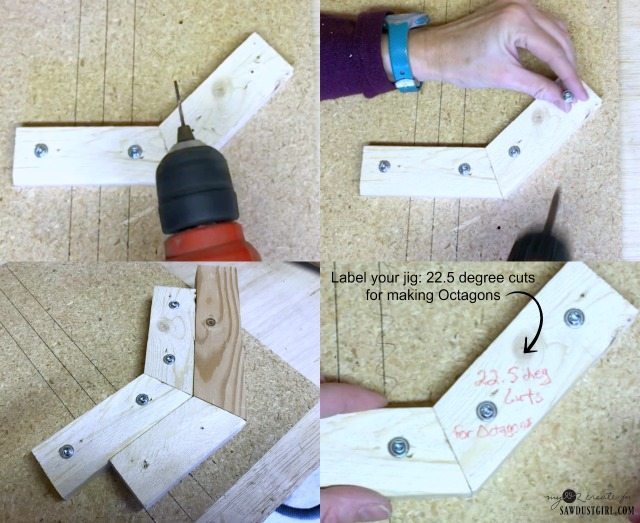
Trial and Error with an Octagon Jig
Step 3: Use your octagon jig to build your project…be sure to clamp!
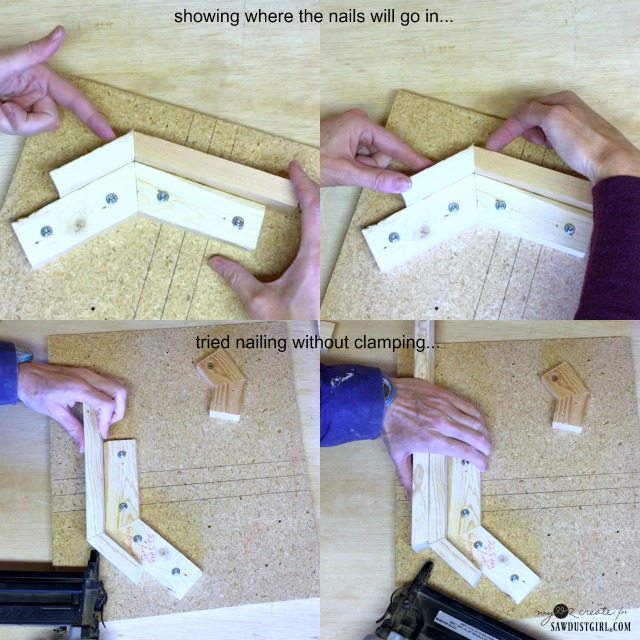
Use wood glue and finish nails to secure both sides of the joint. I got so excited to use the jig that I think my brain forgot some important steps. In the bottom left photo I tried nailing the boards together, but the pieces kept slipping.
So I grabbed an extra board (bottom right photo) to secure one of the boards and tried nailing them again…
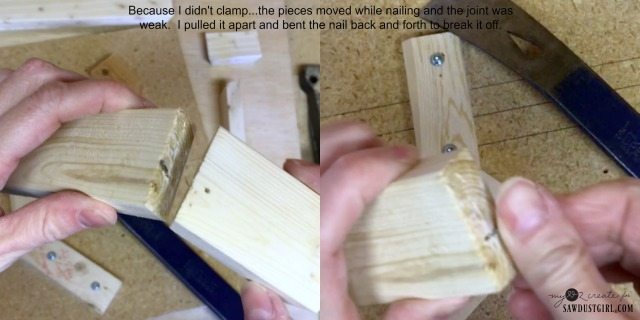
*The best way to remove nails sticking out of your project is to bend them back and forth until they break off.
I was a little frustrated at this point because I had made a jig for my Hexagon Planters, and I didn’t remember having any trouble…
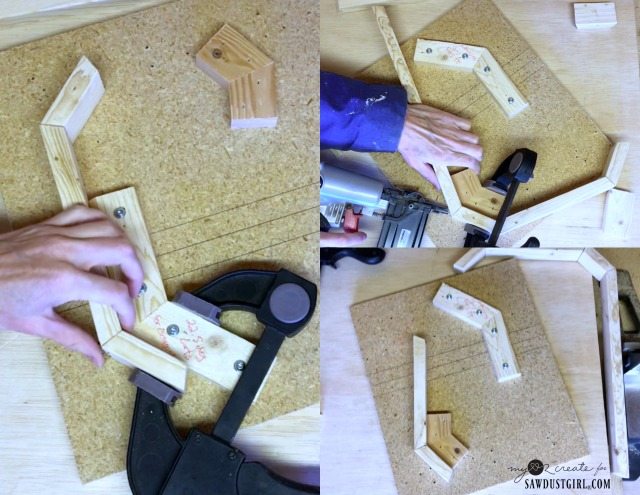
So of course, I still had the same problem with the other piece slipping. I suppose it had been a pretty stressful week with life and kid stuff so am going to chalk it up to me being…um, distracted?!?! Who knows what I was thinking…but I kept plugging along.
I also had this brilliant idea that I could have a really short jig on the other side of the scrap board just in case I needed to make a small project…BUT that idea ended up not working…because the jig on the opposite side was in the way as I worked around my shape…so ya.
Nothing seemed to be going my way. I set my original project to the side, took a short break (chocolate may or may not have been involved) and then came back with a scrap 2×2 board and a resolve to get this figured out, because I know it shouldn’t be so hard!
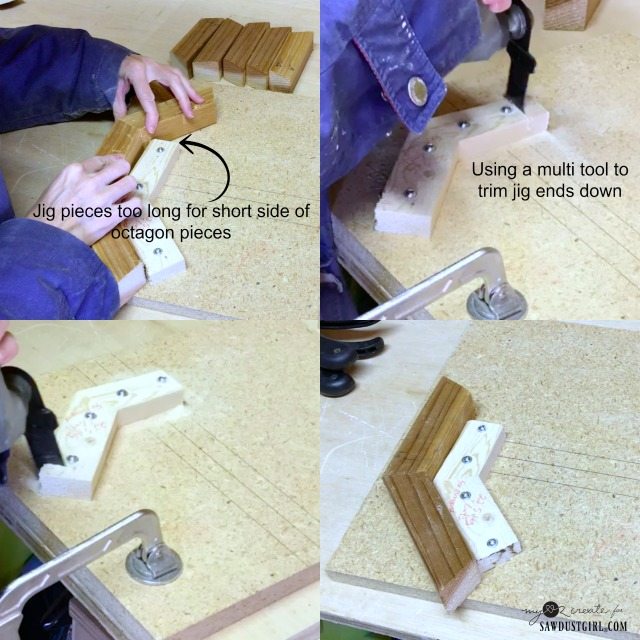
I hadn’t cut my jig pieces short enough. Ugh! I got out my multi tool and cut the ends down to 3”.
Ironically, as I type this, I am now realizing that I could have just removed my longer octagon jig and kept my brilliant idea in place. But that would have been WAY too easy! Ha!
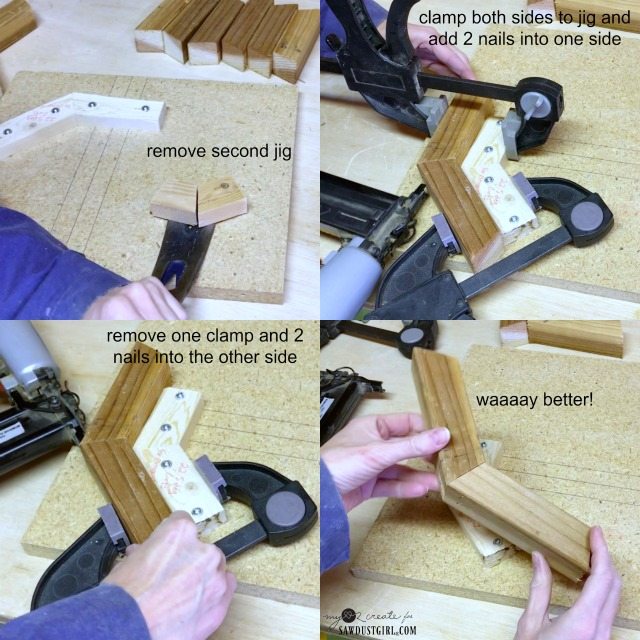
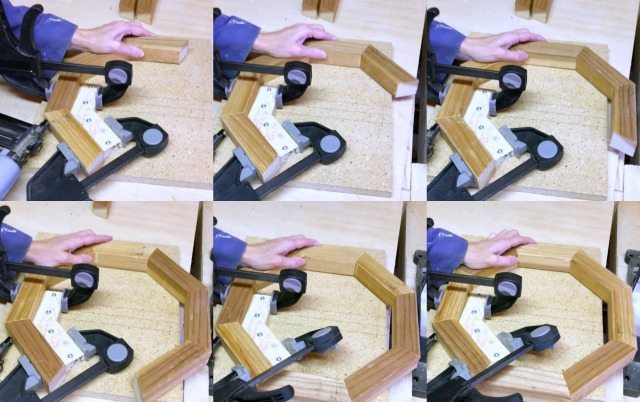
Then I started building the SMART way. I clamped both sides!! What?! Who knew it could be so easy? ahem…cough.
The process I followed was: glue the ends, line the pieces up on the jig and clamp both of them in place. I nailed two nails into one side (top right). To secure the other side I removed one clamp (bottom left) and added one to two nails from that direction. Perfectly strong joint!!
Phew!
Well, for you it will be in no time at all because you are going to avoid making my mistakes! Right? Right.
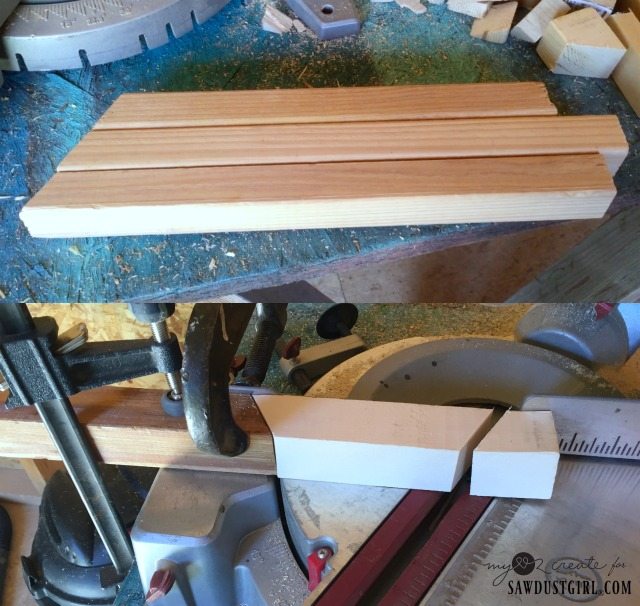
*Tip: If you are cutting a bunch of pieces at the same length you can create a stop on your miter saw. When I made my Hexagon Platers I did this…I cut all my scrap pieces on one side at the correct angle first (top photo), then I used a scrap piece cut at the correct angle and clamped it to my saw fence so I could quickly and accurately cut a bunch of pieces to the exact size I wanted! This worked great and only took a few minutes to set up!
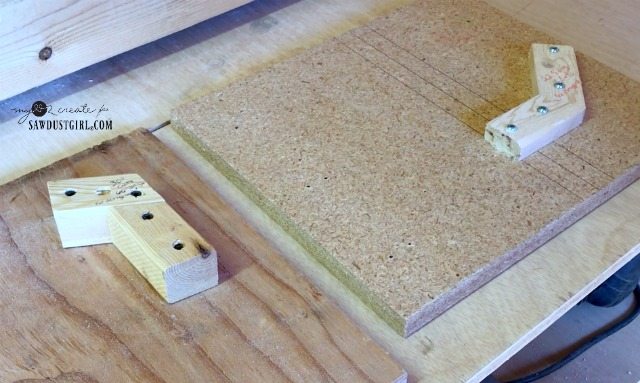
And that my friends is how you make an Octagon Jig! I now have two jigs, one for making octagons and one for making hexagon shapes. I am sure I will get great use out of them.
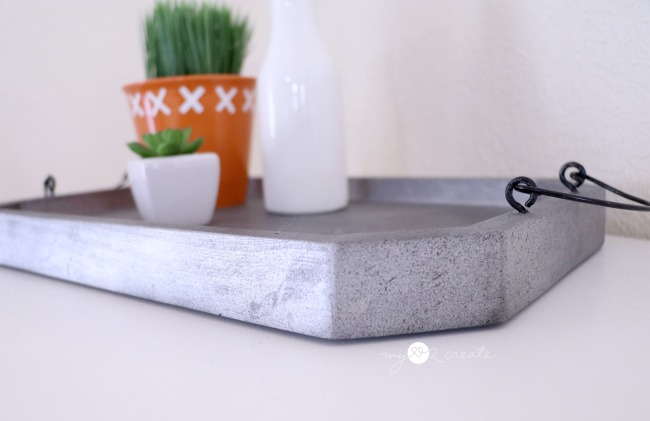
So do you remember the first project I started above?
Well, it does have a happy ending, you can see my Long Octagon Tray and how I finished it on my blog!
Hugs!
Mindi
LOL I believe we can learn more (or at least as much) from others’ failures, mistakes and work-throughs as we can from their successful projects. I always want to keep it real!
I was so excited that I typed then instead of the than. Please forgive me😉
You are a breath of fresh air! Thank you so, so, so much for detailing all the trials and tribulations you went through during this project! I was just speaking to a friend the other day about how fake the Internet is. It makes the rest of us feel incompetent Or less then. You have done quite the opposite. You’ve earned yourself a fan for life!
Thanks for letting me know. I’ve fixed those links.
hi there, i’m working on some planters and needed a hug and found your site {awesome!!!} but when i click on any of the links you’ve included i get an error. have these moved to a diff rent url?