How to install a window sill and trim
I just love windows. I love the light they let in and the view they provide. What I don’t like is a plain window, which was every window in my house when I moved in. I like trimmed out windows, it gives great detail to a room and frames the view so beautifully. Unfortunately most builders just sheet-rock around the window to save time and money.
But there is hope if you, like me, want more dressed up windows. You can dress them up depending on your taste. Here are some of my dressed up windows.
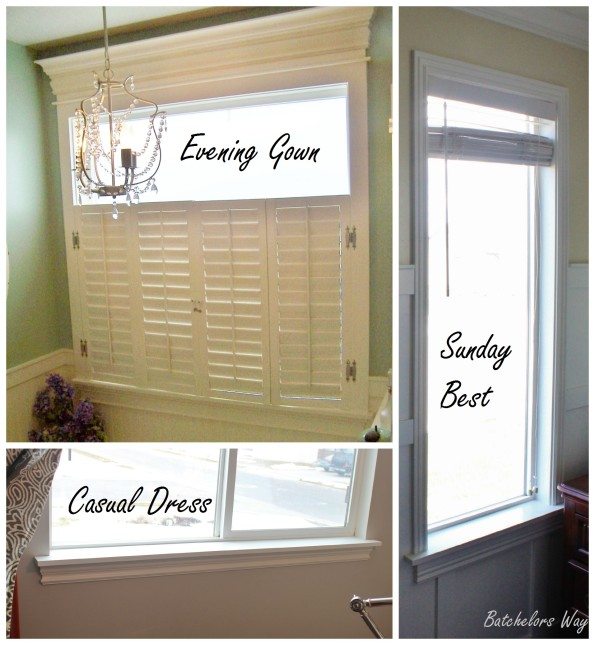
Get how they are “dressed” up? lol
OK, I know I’m corny!!
But you can add just a casual look by adding a new window sill/stool. Or get on your Sunday best and some casing around the rest of the window. Or go for the evening gown look and add a cap and crown. It’s all matter of taste. Once you have decided on your final look here are the steps to transform your windows.
There are lots of ways to accomplish the same goal, this is my way.
Step 1. Remove Drywall.
Many people skip this step and just lay the new stool on top of the drywall. I think it looks better in the end to take the time to get rid of the drywall layer. Start by scoring the drywall in the corners and along the window with a sharp utility knife.
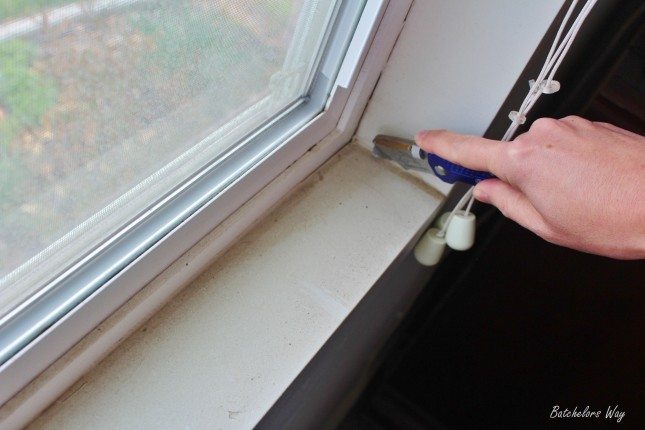
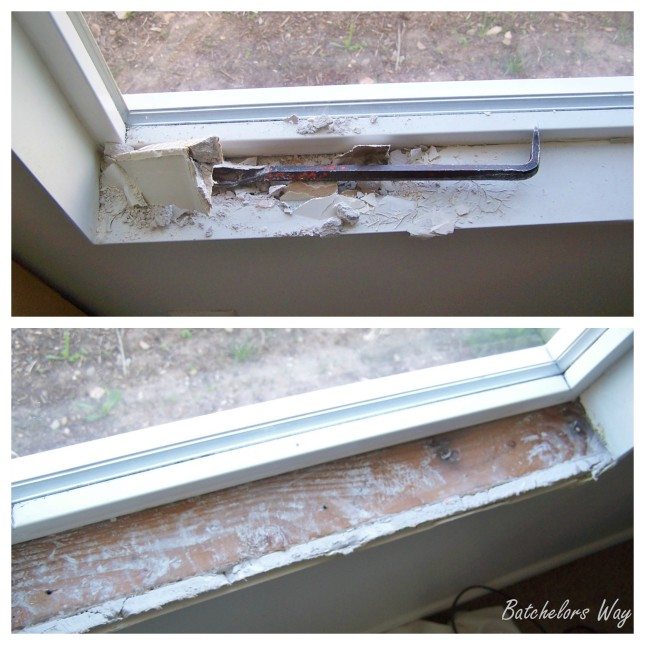
You want the surrounding drywall on the sides intact so be careful as you dig it out with a crow bar. Once you get a hole you can pull it out in bigger chunks. Then remove all the nails and corner bead. That’s the metal strip along the edge.
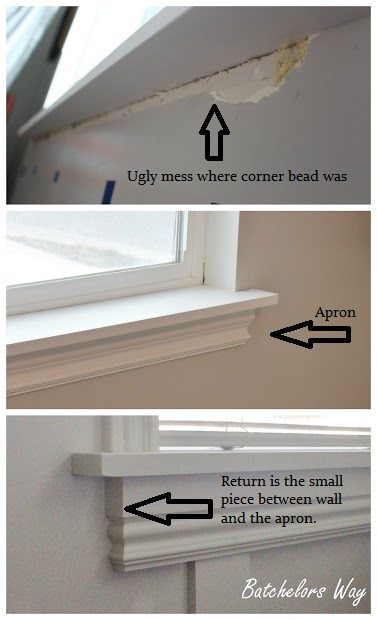
You will have a ugly section under the stool where the corner bead was, don’t worry you will cover that up latter. Then sweep and vacuum up the rest of the debris.
Step 2. Make a template.
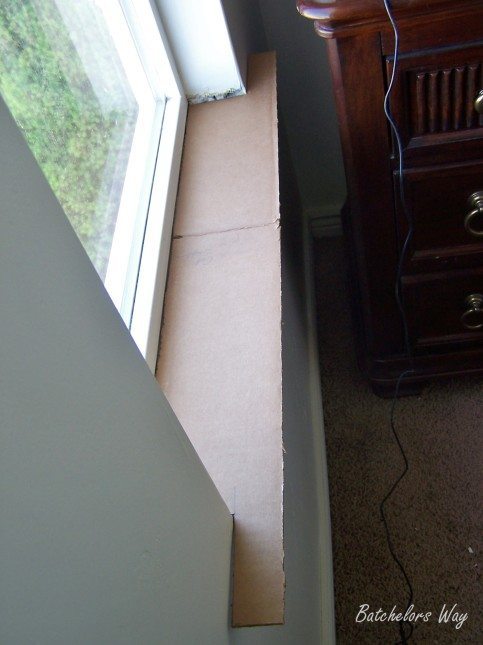
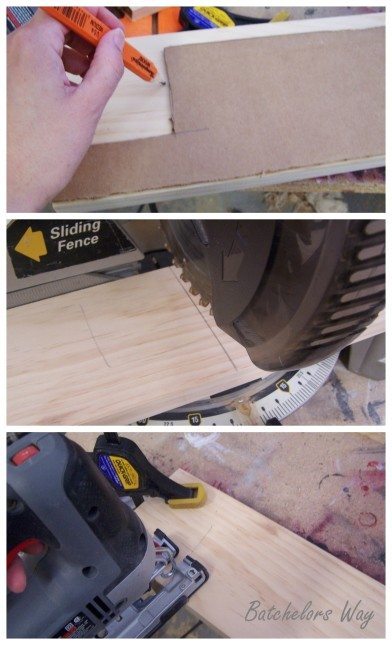
You can try to just measure and cut your stool/sill out but I find I get a much better fit if I make a template. You can make it out of just about anything. I like to use corrugated cardboard because it’s thick enough to give me a good fit and easy to trim to size. Paper is to flimsy and a wood template is too much work to cut. Making a template allows you to get a good fit to unsquare walls. Use your template to determined how deep you want the sill.
Step 3. Cut out stool and install it.
I have seen people use MDF, but I do not recommend this. I prefer wood because it can take a little more abuse. Save the MDF for the rest of the window trim that won’t get so much abuse. If you have a window in a bathroom or gets left open during rainstorms may be exposed to water often, I found a Cellular Vinyl PVC molding works great. I found my at Lowe’s, but I’m sure you can find it other places. Trace your template right onto your wood and cut it out. Test fit it and them sand the rough edges. If you use the PVC I just glue the sill in place with construction adhesive. If using wood I glue and nail it.
Step 4. Make and install apron.
Now we cover that ugly spot where the corner bead was. The apron is the molding that is under the stool. You can make this out many different kinds of molding, what ever looks good to you. I often use base board trim turned upside down. I cut it with a 45 degree angle and then make a return. That finishes off the end the best way.
Step 5. Finish Work
Fill the nail holes, sand, and paint. If you wish you can add molding all the way around the window, the sky is the limit on how fancy you get.
Then stand back and look out your beautiful window!!
If you want to see more window treatment ideas and tutorials, here are two post on specific windows we did. Master Bath Window, Finished Master Bath, Pirate Room Window, Finished Pirate Room Window.
About the contributor:



Thank you, girl!!! I can’t tell how many tutorials I looked through that either didn’t tell you how to remove the drywall and just started from the step on OR just had you put the sill over the existing frame!! I appreciate you and this post so much! ❤️✌🏽
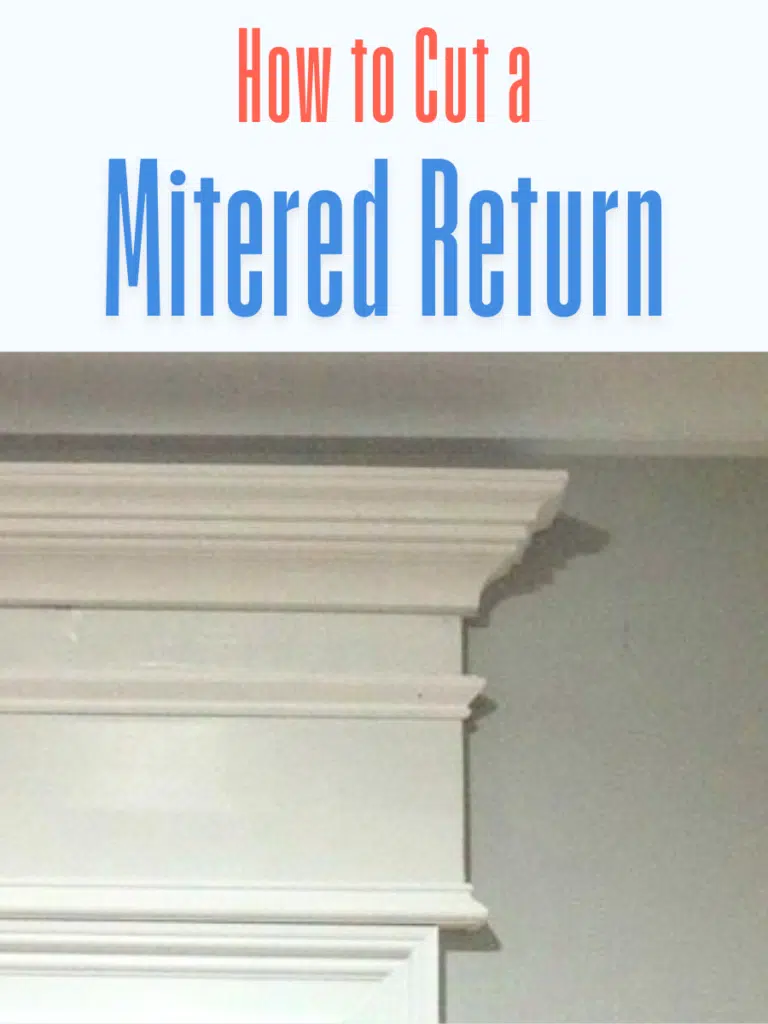
Can you please explain more about the 45 degree angle and the term “return.” I have a cross-cut miter chop saw and I’m dying to do this – you’ve made it look so easy!
A return is when you terminate a moulding by cutting a piece of itself at an opposing 45. It’s difficult to explain with words. Have I not done a post with pictures? I know I’ve taken pictures for this purpose…I’ll look into it.
I was looking at this, whilst it may be handy. I really do prefer the look of a nice clean untouched window rather than all that fake Victorian era “edging” you replaced it with…. =(
I think everyones tastes are different and we should all have our homes look beautiful to us reguardless of what other may think is trendy or beautiful. Thanks for sharing !
To each his own. If you don’t like it don’t do it. 🙂