DIY Curved Cedar Bathtub Caddy
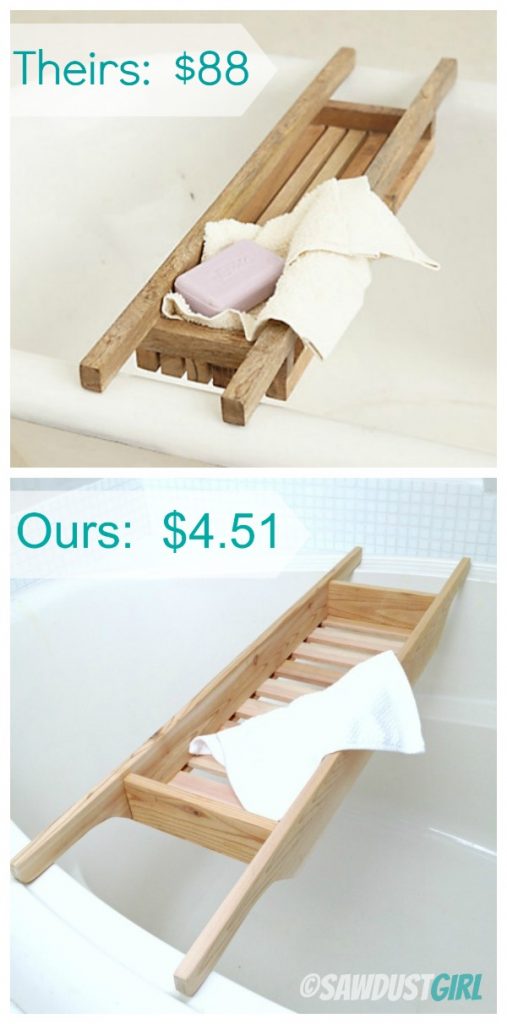
Looking for something more exciting than bath salts or candles as a gift idea for a bathing enthusiast? If you have an hour and $5, you can create a Cedar Bath Caddy that looks like you went all out. We used Antrhopologie’s (no longer available) Bay Crate Caddy to compare to ours.
How to build a Cedar Bathtub Caddy:
Materials:
- 2 Untreated Dog eared Cedar Fence Pickets 5 1/2″ x 5′ ($1.88 ea. at Home Depot) = $3.76 (If your bath caddy will be less than 28 inches you only need one fence picket)
- 2 Cedar Lattice strips 1 1/2″ x 4′ ($0.25 ea. at Home Depot) = $0.50
- Waterproof Wood Glue (I estimated that I used about 25 cents worth) = $0.25
TOTAL = $4.51
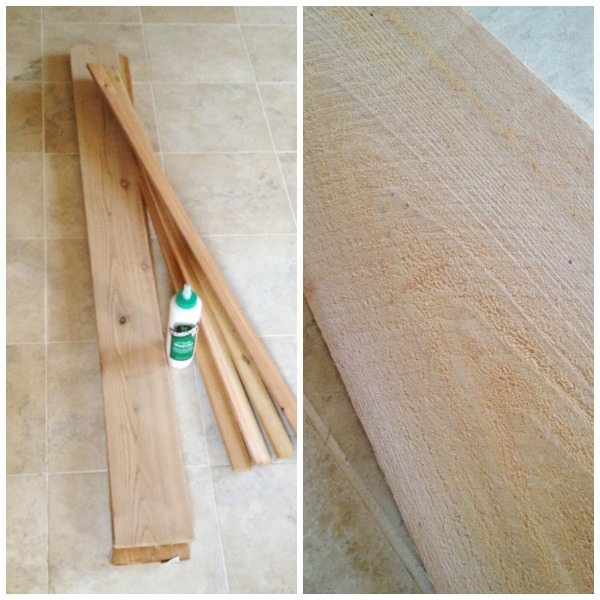
Since this is fencing, the lumber is pretty rough. Pick through the stack to find boards that are straight and as smooth as possible. Avoid boards that have loose knots, are warped, splitting, etc. You can use Cedar planking which has been planed and sanded on one side, it’s quite a bit more expensive and since only one side is sanded, it made more sense to me to save the extra money and just use the fencing.
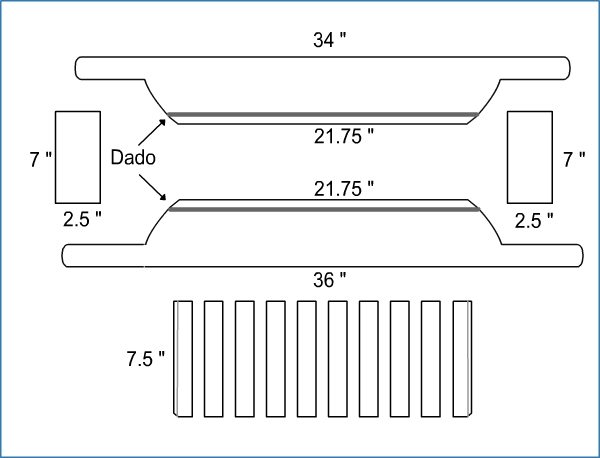
These are the pieces that you will need for assembly. Dimensions and number of slats will change if the overall size of the caddy is modified.
Measure the tub that the caddy is for and determine the overall width that you want. The tub that I made my caddy for has a strong oval shape, so I needed one side to be 2 inches longer than the other side.
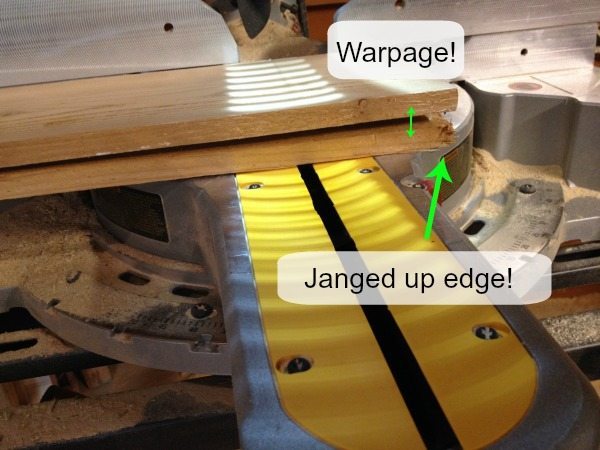
Chop the Cedar pickets to your desired length (tub width), then rip the pickets to 3 1/4 inches (or desired depth of the caddy). This is removing quite a bit of material, so this is an opportunity to get rid of any parts of the wood that are less desirable. Also, make sure to cut all sides of the wood to give yourself clean edges. Some of this excess wood will be used for the ends, so save it for later.
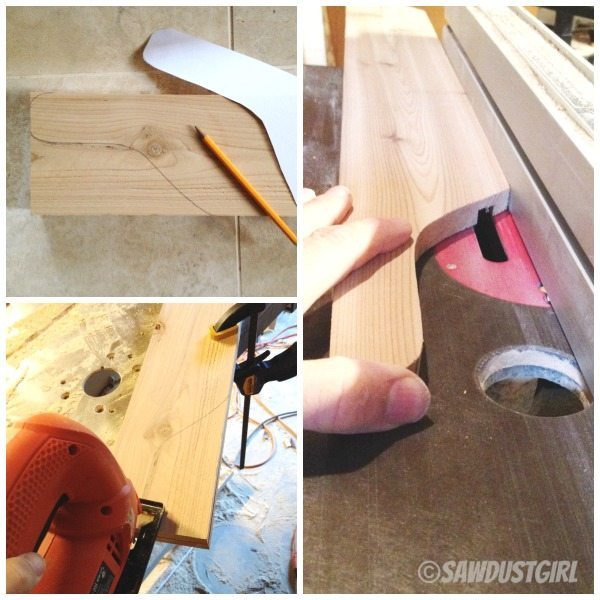
Print and cut out the handles template then transfer the shape to the ends of the pickets. Cut out the handles using a jigsaw or band saw. If one side is longer than the other (like mine) put the difference in the arms, so that the body remains even.
Similar to building a drawer, cut a dado a half inch from the bottom on both sides. The dado needs to be 3/8 inch wide and 1/4 inch deep. You can read more details on how to cut a dado here and here.
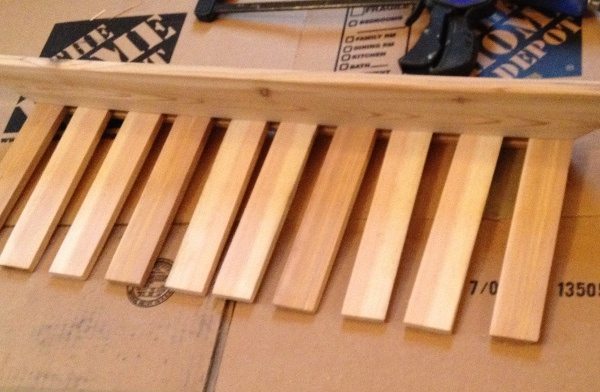
Chop the lattice pieces to your desired width, mine are 7 and 1/2 inches, for an overall caddy width of 8 inches. I used 10 pieces spaced 3/4 of an inch apart (this worked out nicely as I was able to use 3/4 MDF scraps for spacers).
Dry fit both ends of each lattice into the dado. Sand the edges of any that don’t fit until all of the pieces will fit into the dado. Note: assembly is easier if all the pieces fit snugly so don’t over-sand.
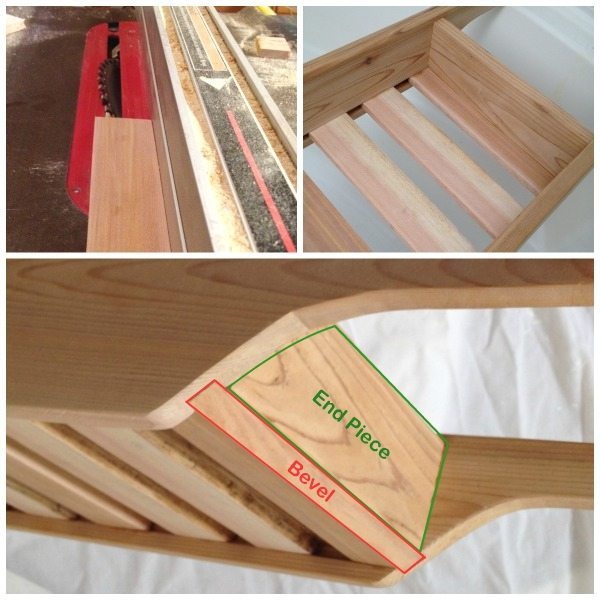
Use the table saw with the blade set to a 30 degree angle to bevel one edge of two lattice slats. These will be the outside ends of the caddy, the bevel fills the end of the dado flush and creates a more finished look than if the edges were left square. Next cut the end pieces from the scraps you saved earlier. These go on top of the outside slats. Mine are 7 inches wide by 2 1/2 inches tall, but adjust to your sizing.
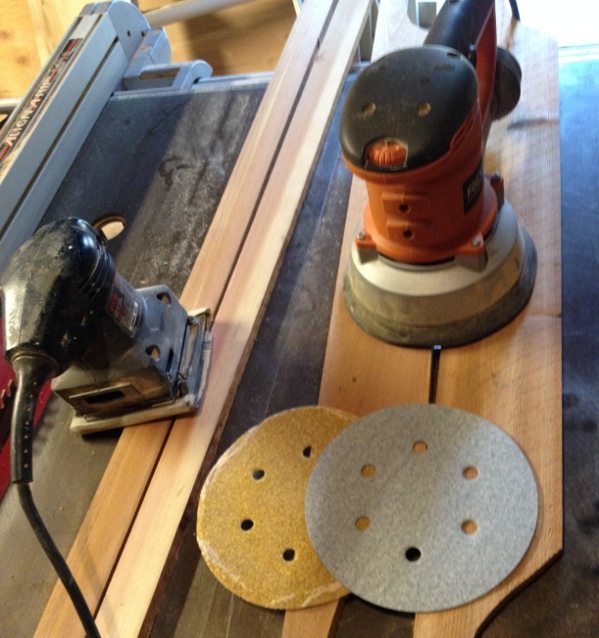
Now sand, sand, sand! Because the cedar is so rough I started with 36 grit paper on the circular sander. This took off the scurf marks and really rough stuff. Then I just graduated up through the grits until it was nice and smooth. (Tip: I did the major sanding on the lattice strips before I cut them as they are harder to sand when they are smaller strips. Then just touched them where needed after they were cut.) Use Sandra’s tip on achieving symmetrical arches to get the handles uniform. Take your time and get everything nice and smooth– Nobody wants to get a sliver in the bathtub!
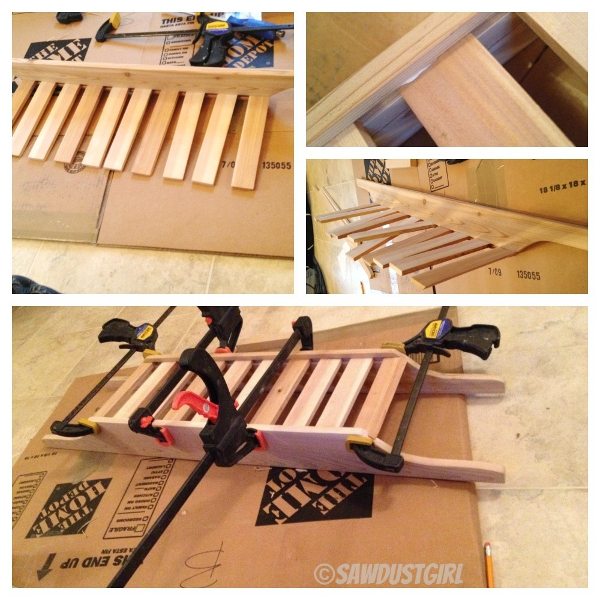
To assemble, put wood glue one end of each slat and insert into the dado groove on one side. Don’t worry about spacing too much at this point, just get them in. Once all of the slats are in, turn the piece onto it’s side so that the slats are pointing up. Apply glue to the free side of each slat and slide the other caddy side down onto the slats so that the slats go into the dado. This can be a bit tricky and it helps to have a second pair of hands. Once the slats are in both dados, adjust the slats so that they are evenly spaced and the two beveled edges on the ends line up smoothly with the outside edge. Place one or two clamps in the middle to hold it all in place. Put glue on the sides of the two end pieces and then slide them down onto the beveled edge of the outside slats. Check for evenness and square, then clamp the ends together. Wipe away any excess glue with a damp cloth and let the caddy dry according to glue directions.
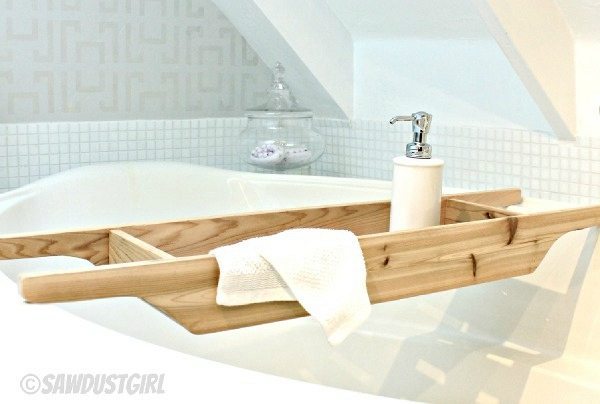
Remove the clamps and lightly sand any clamp marks or glue residue and your caddy is ready to go! No need to seal cedar as the natural oils act as preservatives, making the wood extremely long lasting and resistant to moisture.
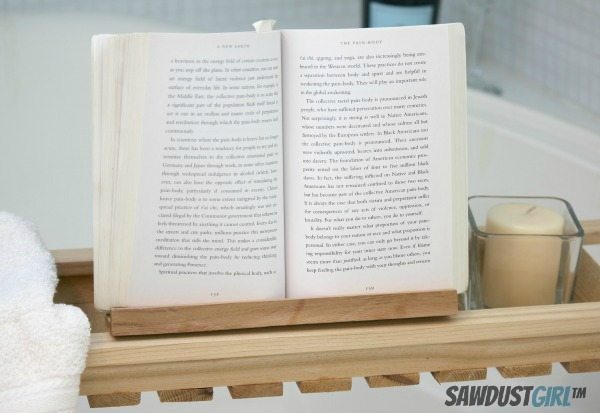
Add A Book Holder
Now if you want to pump up the relaxation value, we have a super easy cedar book holder tutorial.
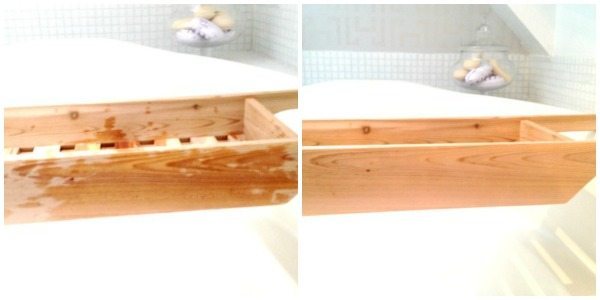
Well so far nothing! I cannot tell a difference at all—no color change, no roughness, pretty much the same as the day it was made. So based on 4 months of use I am going to say that you do not need to seal or oil the caddies. Even with aggressive splashing and occasional submersion, it should be fine.



I can find the cedar fence picket but can’t find the cedar lattice strips at my Home Depot, all the lattice I find is pine 🙁 Can you tell me where they are in the store or if they’re called something else? Love this and really want to make one!!
Sorry you are having trouble finding the lattice strips, I found them in the fencing area close to the pickets. If your local Home Depot doesn’t have them, try a lumber yard that carries fencing. I called a couple local lumber yards here in Boise and they both had them. Good luck!
So fun for little kids! If its going to get splashed a lot it might be a good idea to swipe on some teak or linseed oil to prevent water stains and keep the grain more smooth.
Here is a link with an easy how to for sealing cedar with oil.
http://homeguides.sfgate.com/protect-cedar-furniture-oil-25380.html
This is a great idea! I’m thinking of making one of these because my little boys would love to have a bridge for their toys during bath time. Do you recommend I apply a finish to protect it from all of the water I forsee being spilled all over this?