Decorative Legs- Cara Collection – Free Plans
This is the fourth installment of the Cara Collection built-in office furniture. I’ve already posted plans for the Base Cabinets, Upper Bookshelf and the Printer Storage Cabinets. This post includes plans to build and install the decorative legs on those built-ins.
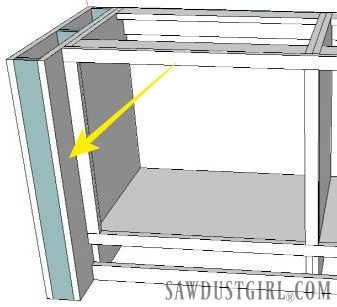
Decorative Legs Base Cabinets
Materials:
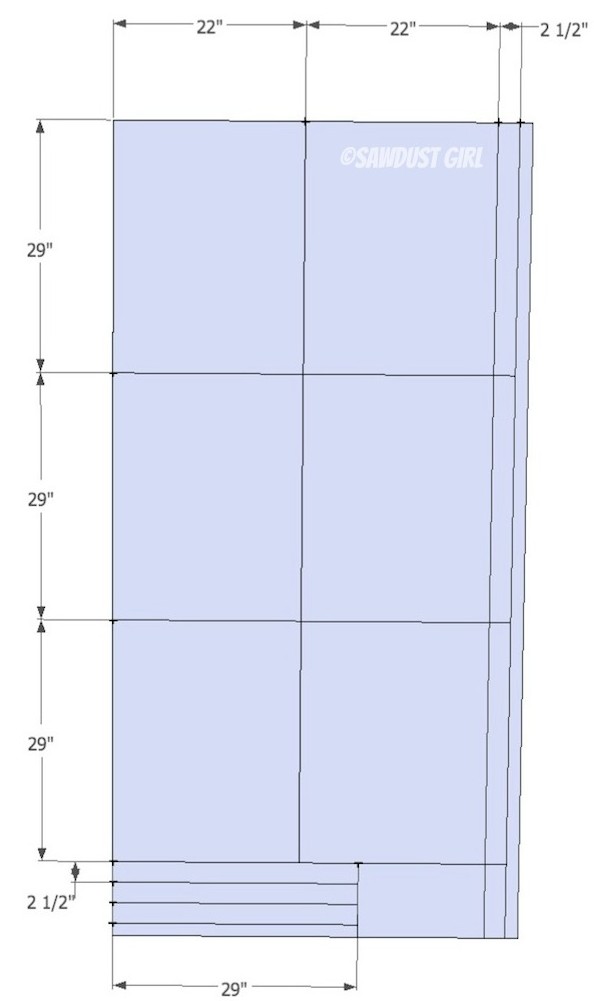
- 1 sheet of 3/4 MDF cut as shown will make 3 decorative legs
- If you build 2 outer bookshelves with bases and the center section you will need 6 legs
- finish nails
- wood glue
- 1 3/4″ wood screws
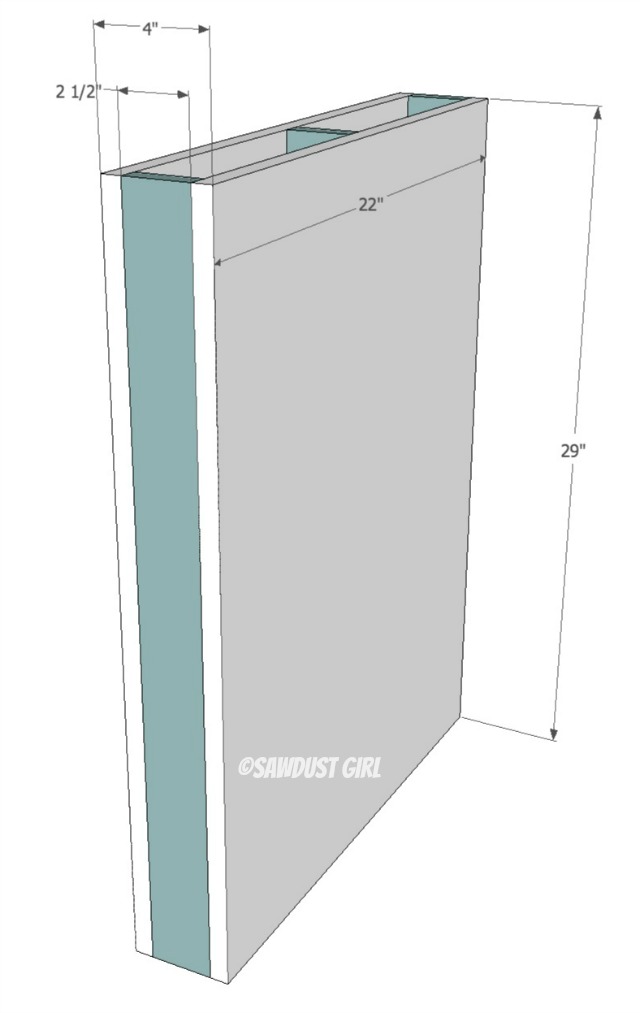
1. Build each leg by gluing and nailing three 2 1/2″ MDF cleats to two sides.
- Make sure one cleat is flush with the front of the two sides.
2. Sand, Sand, Sand!
- Sand the MDF smooth on the front edges. Make sure you sand out ANY AND ALL texture like saw marks. Paint will NOT hide imperfections. It will make them stand out.
- Prime with a water or oil based primer (Either one will likely raise the wood particles in the MDF edges”
- fill any cracks in the seams with wood filler
- lightly sand again
- prime again if needed to get an even coat.
3. Attach legs to cabinets
- Snug the legs up to the cabinets making sure the legs are flush with back of cabinet so as to hide the raw edge of the backing.
- Use 1 3/4″ screws to secure the leg to cabinet driving screws in from inside the cabinet. You can use cabinet screws that have a washer head and won’t countersink so you can remove legs in the future if you want to move the unit. OR, you can use wood screws that have a tapered head and sink the screw below the surface of the cabinet then fill and paint so you don’t see the screws.
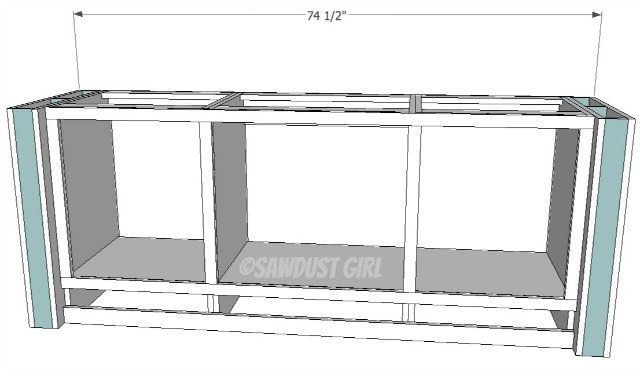
This is the approximate width of the Center Printer Storage Cabinets with legs attached.
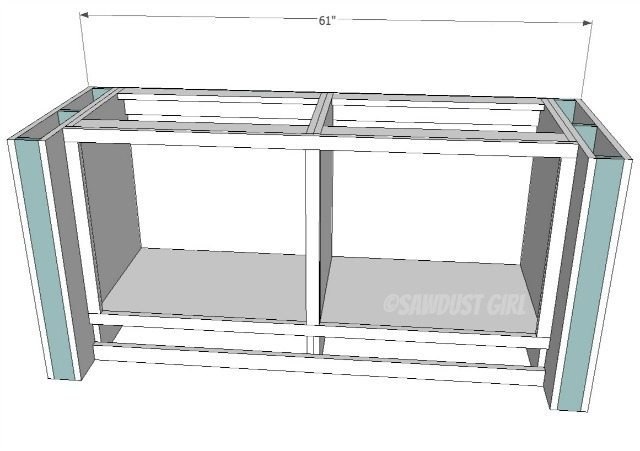
This is the approximate width of the Bookshelf Base Cabinets with legs attached.
4. Paint and add optional decorative trim
- After the MDF is sanded really well, once you paint you will most likely not be able to see any seams. You can leave the legs like this. OR
- You can nail on a decorative trim. Small finish nails work great because it won’t split the wood and you can fill the holes easily.
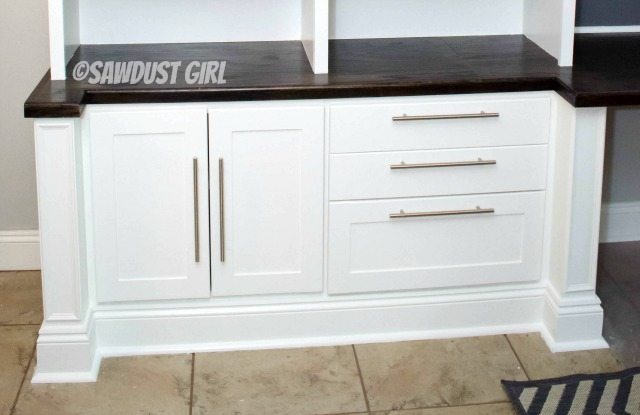
This is what Cara’s finished Built-ins look like with the decorative legs attached and painted.
Bookshelf base
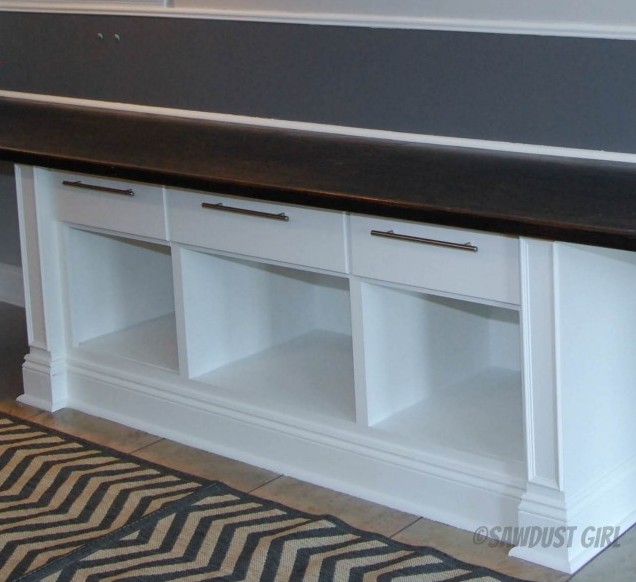
Center Printer Storage Cabinets
GO check out the rest of the Cara Collection office furniture plans and see how Cara built her Oak Countertops.
