Cabinet and Built-in Building Basics
There are certain techniques and standard practices I use in cabinet making whether I’m building built-ins, stand alone furniture or household cabinets. Instead of repeating this information frequently in future posts, I’ll be referring and linking to this post in my plans. I have a whole separate post on Building Materials, so I won’t cover that here. This post is specifically on building the cabinet or built-in.
Cabinet and Built-in Building Basics
1. Standard Kitchen Cabinet Dimensions
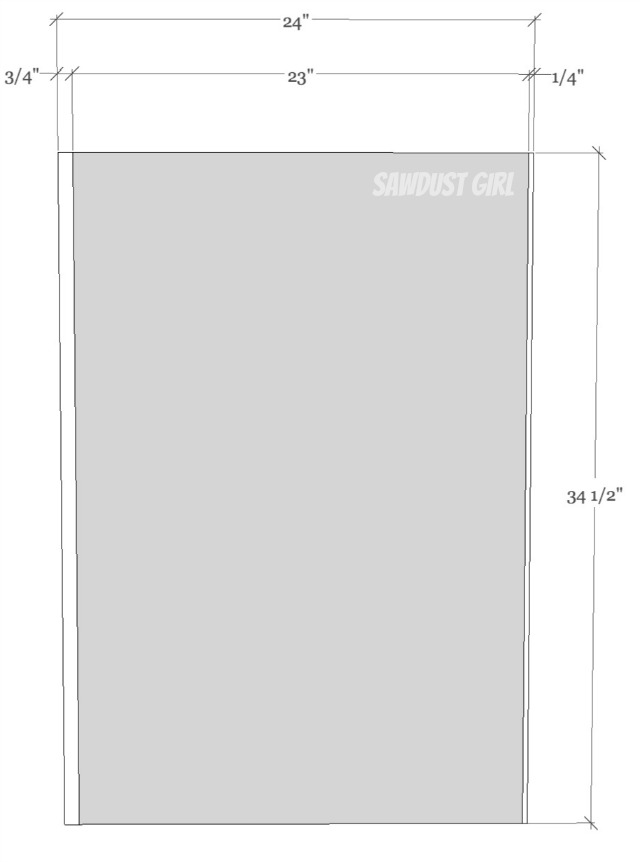
- Height is generally 34 1/2″. (Standard kitchen countertop height is 36″)
- Depth is generally 24″ including the faceframe and back.
- If I’m building a cabinet with butt joints, a face frame and a back attached directly onto the back of the cabinet (not set into dados), I cut my sides and shelves at 23″ deep. That way once the 1/4″ back and the 3/4″ face frame are attached, the cabinet is exactly 24″ deep.
- I almost always build cabinets and built-ins out of 3/4″ plywood (or MDF).
- Faceframe width is generally 1 1/2″, thickness is generally 3/4″, these dimensions are what the ACTUAL size of a 1×2 is.
2. Maximum width of Cabinets and Shelves
The maximum length that a suspended “board” can be before it will start to bow (or bend) varies based on a few variables. The “board” can be a fixed bottom, top or shelf of a cabinet or built-in OR an adjustable shelf.
- the kind of material
- the thickness of the material
- the depth of the board
- if it’s supported by a front face
- if it’s supported by a back cleat
I’m sure you can Google and find a list of materials, thicknesses and weight load limits if you’re interested. It’s a lot of info and I don’t try to retain all the information. Just what applies to the building that I do.
And this is the information that GENERALLY applies to what I do.
- I generally build out of plywood or MDF. (FYI, there are lots of different types of plywoods)
- Building materials is generally always 3/4″ thick.
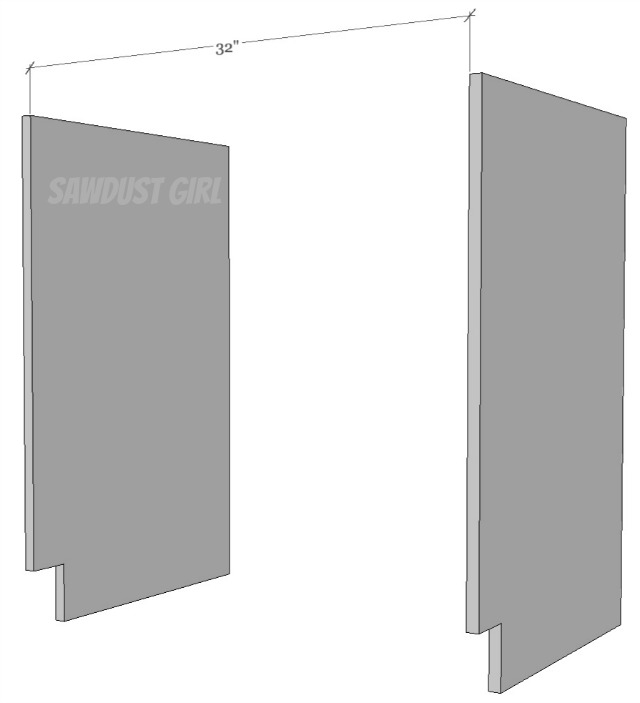
- I generally never build a cabinet or built-in wider than 32″ and that is with a face frame which provides a little extra strength to the span of the board length.
Although both plywood and MDF will most likely bow eventually at that length if they are loaded down with a ton of books or heavy items, they should hold up under normal use.
3. Toe Kick
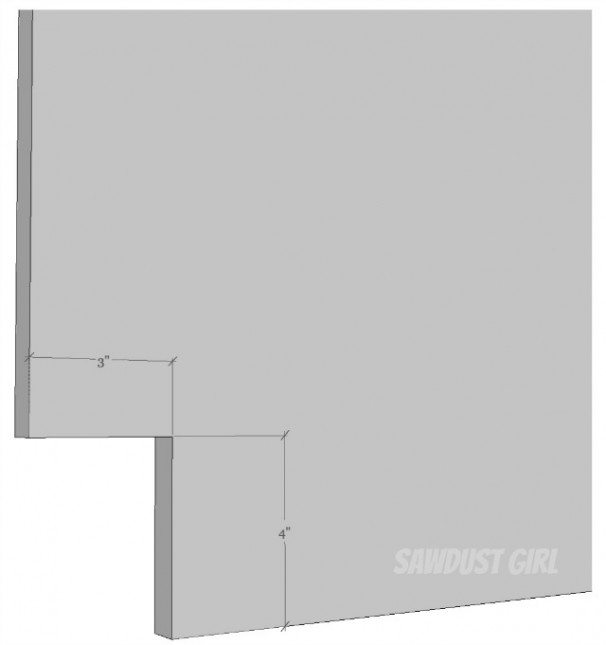
I generally always put a toe kick in cabinets that make up “work areas” because I usually rest against those cabinets or lean into them and reach and it’s nice not to stub your toe. I didn’t put toe kicks in my last island and was constantly kicking it. So now my rule is: work That said, toe kicks can be created in different ways and you can change up the dimensions of your toe kick as well. I generally go 3″ deep and 3″ – 4″ high.
- You can cut the toe kick out of the sides of the cabinets before assembly. I mark it with a square and cut it out with a jigsaw.
- You can build a base for your cabinet that creates your toe kick.
- I build both ways depending on the cut list. If I can get 6 sides per sheet of lumber instead of 4, I’ll build separate bases to save money.
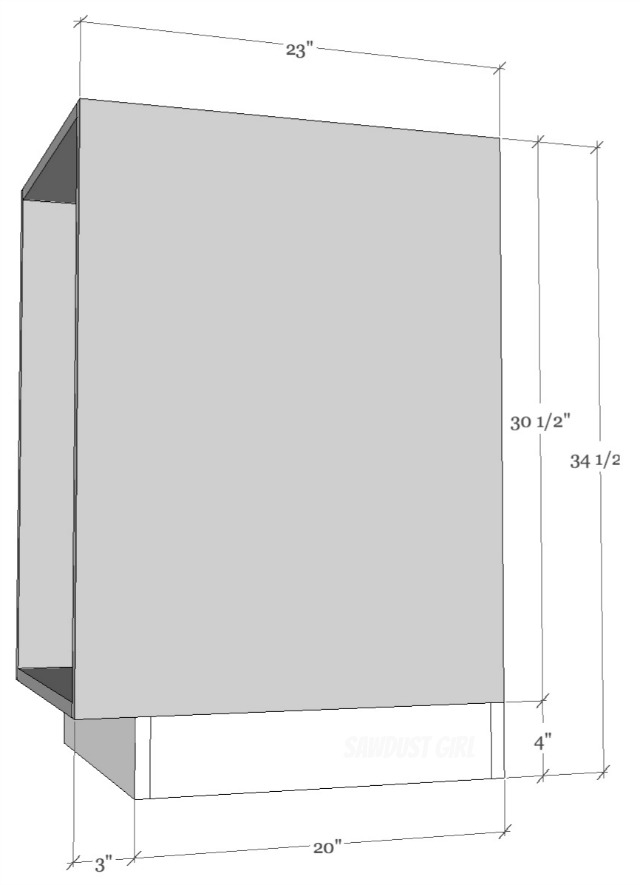
4. Cabinet Bases
As I said in point #3, sometimes I build a separate base for a cabinet to achieve the desired height I want while maximizing materials.
- I only do a separate base if the cabinet side is going to be hidden in the end whether it’s going to have applied breadboard or its going to have another cabinet nested up against it or some other situation that will hide the sides of the cabinet.
I generally always have scraps of material that I can cut and use for bases and it’s pretty easy to attach. I screw two cleats across the width of the base and drive screws up through the base cleat into the bottom of the cabinet. *Make sure not to drill THROUGH the bottom. When using 3/4″ material for the base and the cabinet bottom, I use 1 1/4″ SPAX cabinet screws.
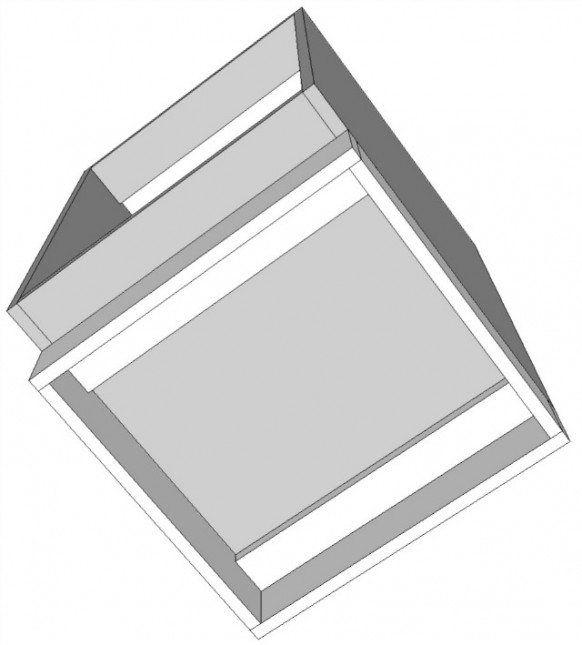
5. Fasteners (Screws and Nails)
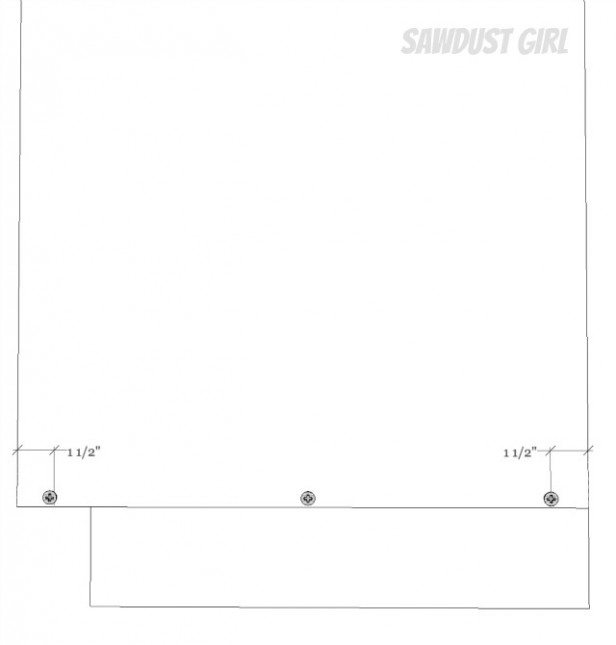
- I generally drive wood screws no closer than 1 1/2″ from the edge of a piece of wood
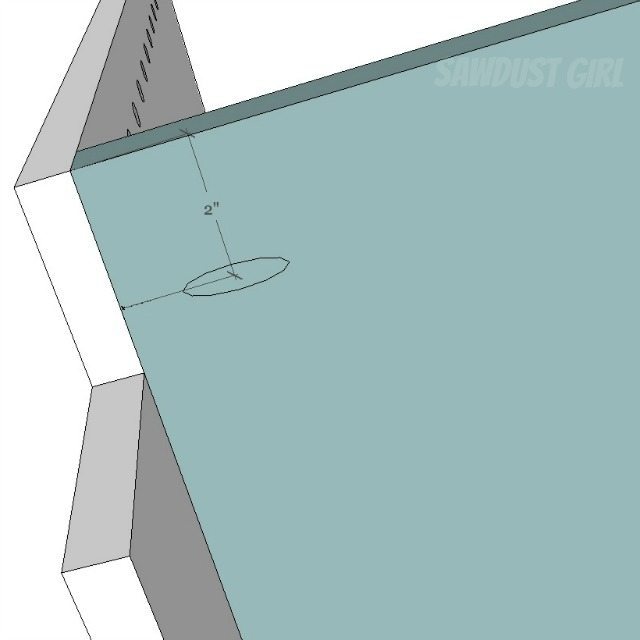
- I generally drill pocket holes no closer than 2″ from the edge of a piece of wood
- Most general purpose wood screws require you to pre drill (and if you want the head of the screw to sink below the surface of the material you need to countersink too.)
- SPAX screws do all that (almost always without splitting any wood) as you drive them so it’s only one step which is why I almost always refer to SPAX screws in my tutorials.
- SPAX is all I use any more unless I’m using KREG pocket hole screws which you have to pre drill because they go in at an angle and that is nearly impossible to do without pre drilling. I use both types of screws depending on the application.
6. Shelf Pin Holes
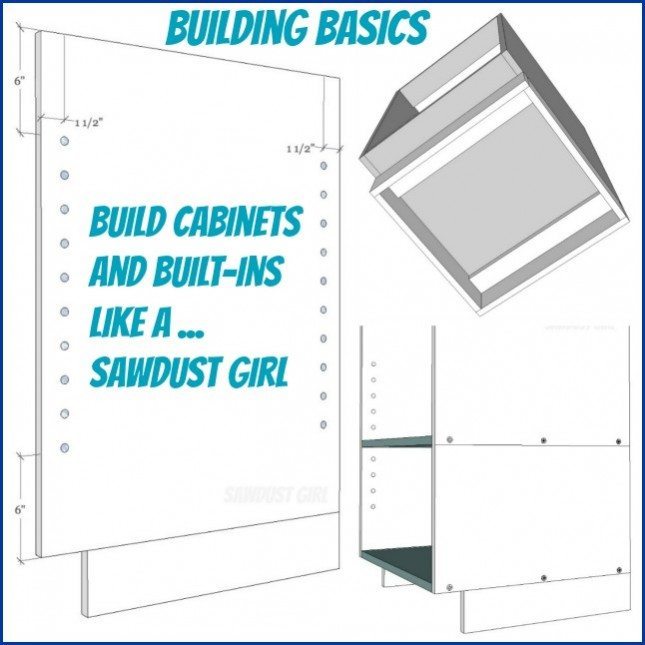
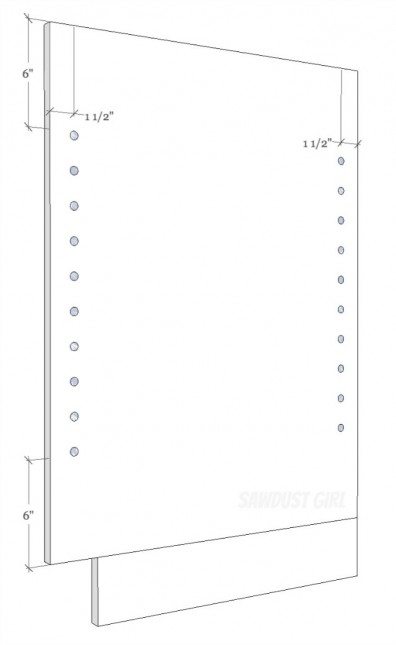
You would want to drill shelf pin holes anywhere you want to have adjustable shelves. I have a separate post talking about using a template and a stop block to drill shelf pin holes. Here is a little more guidance on standard placement for shelf pin holes. p.s. It’s generally easier to drill the holes before you assemble the cabinet.
- There is no need to drill holes all the way up or down your cabinet sides.
- 6-8″ from the top of the cabinet and the above the placement of the bottom shelf is sufficient.
- 1 1/2 – 2″ in from each end is a good place for the holes to line up.
- Make sure you drill the holes in exactly the same placement on both sides of the cabinet so your shelves don’t rock.
7. Marking your Material
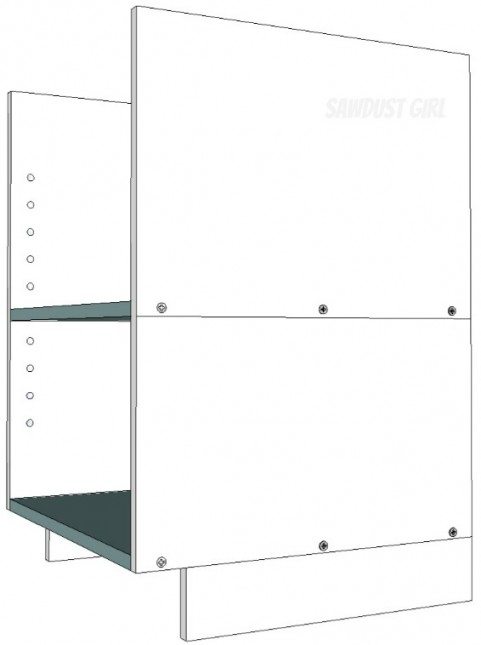
- I like to draw a line (with a pencil) ON BOTH SIDES of the sides of a cabinet to mark the BOTTOM of a fixed shelf. (You can mark the top or bottom — your choice — just choose one and stick to it so you don’t ever mix it up)
- That way I know exactly where to line up the shelf on one side and exactly where to drive my fasteners on the other side.
- Then I don’t accidentally “miss” when shooting a nail or driving a screw and have to pull it out and try again after having made a boo-boo in my beautiful new cabinet.
I have TONS of free cabinet building tutorials and free woodworking plans.
I also have a Cabinet Building 101 eBook for sale. You can download it and keep it on hand!
$9.99Add to cart

Thanks for all of the great information! I like to build with birch plywood over MDF because of the dust and the weight. Poplar seems to be a good wood for face frames that will be painted. Once I tried to substitute with some aspen because the lumber store didn’t have enough of the poplar that I needed. That was a big mistake – it gets very ‘fuzzy’ when painted, no matter how many times you coat and sand. And it is just too soft for durability. Building a separate base is very helpful if you will need to do a lot of leveling. You can set and level the base and then install the cabinets on top. Your series on building cabinets is going to be a great reference tool!
Thank you so much for this. You give me more confidence than I already have that I can build an entire kitchen worth of cabinets, and bathroom vanities, and built-ins in my master. Thank you so much. I’m visual too, so your plans are fantastic.
I have no idea. I’m visual and my brain didn’t understand any of your question. LOL
If you bash Plywood or MDF really hard on the end or corner it doesn’t hold up well. If you use a hardwood face that protects the front edge and corners. If you use the right screws and glue with MDF you get a strong joint. I haven’t had other issues with it besides the sag. It’s a great surface for painted pieces. It makes TONS more sawdust when cutting but you can sand it down until it’s gone if you want and you still have the same smooth surface, unlike plywood where yo have very little “good” surface that can be sanded. MDF has it’s place for sure. I am using it less and less though just because it is SOOOO Stinking heavy and has very little strength over a horizontal surface.
Kim I love you supportive you are! You always comment and are super encouraging. Thanks you!