The Robin Collection – Storage Bench
In Robin’s playroom, this bench is built-in between two bookcases but you could definitely build this plan as a stand alone storage bench. Robin’s bench sat over an air vent so they had to direct the air flow out through the toe kick.
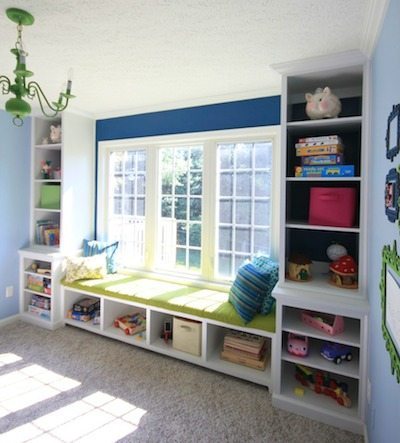
This is the first of three built-in project plans in the Robin Collection.
Built-in Window Seat Bench

Materials:
- 1/4″ backer material (beadboard, plywood or hardboard)
- 1 3/4″ wood screws
- wood glue
- Kreg jig and 1 1/4″ pocket hole screws
- 1×2 and 1×3 poplar for faceframe
- 2 sheets 3/4″ plywood cut as shown below
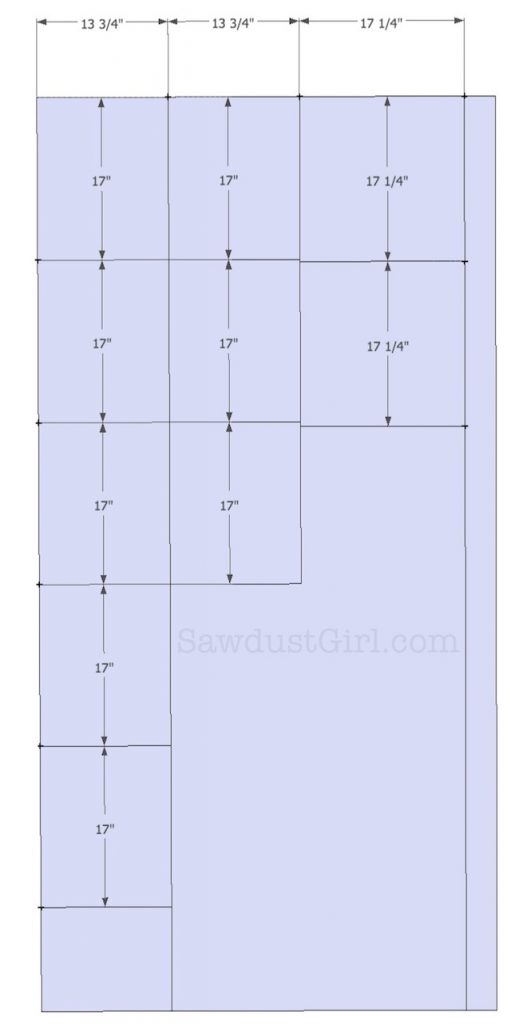
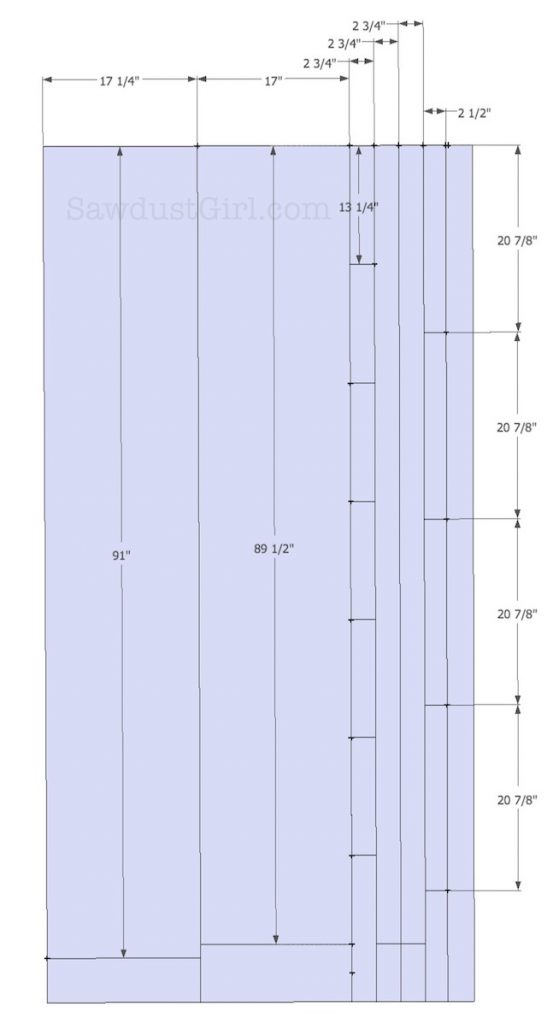
Step1: Attach Sides and Dividers
Drive wood screws up through bottom into sides and dividers. Make sure they countersink – you don’t want them protruding.

Step2: Attach Top
Sides of top should extend 3/4″ on sides and 1/4″ on back.
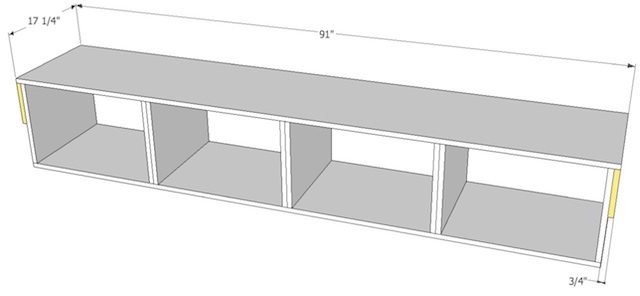
Step 3: Attach Back Cleats
Use pocket hole screws to attach flush with back of sides and dividers
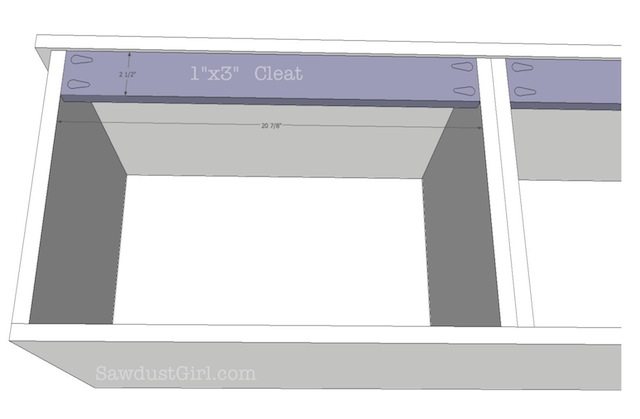
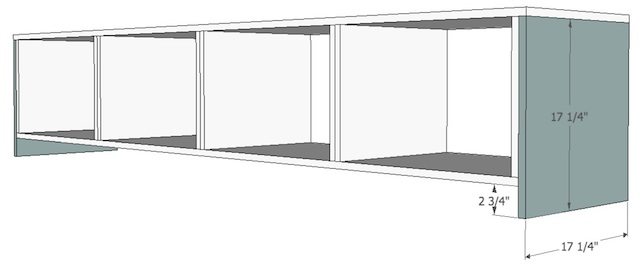
Step 4: Attach Sides
- Sides should be flush on front to dividers and extend 1/4″ on back.
- Use wood glue and brad nails to secure.
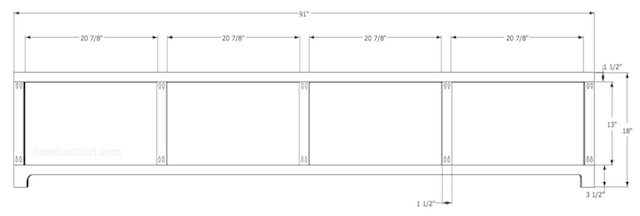
Step 5: Build and Attach Faceframe
- Faceframe is built of 1×2 except for the bottom plate which is 1×4 so you can create the shaped element in the toekick.
- Refer to Faceframe tutorial for help with this step
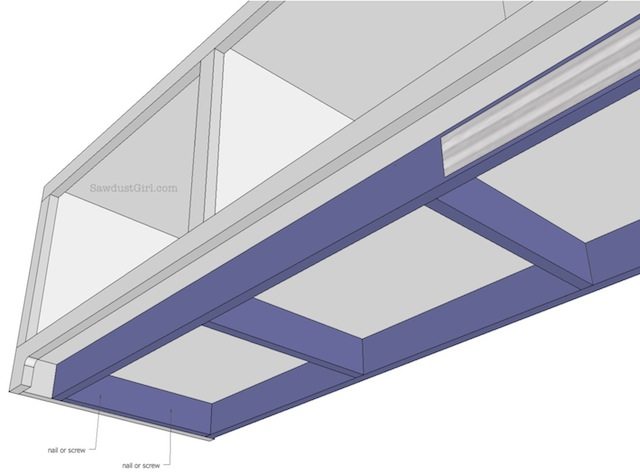
Step 6: Build and Attach Base
- Build base out of 3/4″ plywood strips.
- Use scrap of wood to space all dividers evenly.
- Attach to bench by driving screws through sides of base into sides of bench

Step 7: Attach Back
- Back should sit into recess created by sides and top.
- Secure with nails or staples

Step 8: Finish and enjoy!

Get the other plans in the “Robin Collection” and read Robin’s Sawdust Diaries



I”m not sure what you mean. The faceframe is attached to the front of the cabinet.
Hi! I’m very excited to make this for my living room and adding storage for our family.
I have read and studied the notes. My one question is how did you cut the groove out for the bottom of the face frame ?
Would you be able yo be more specific about the type of wood screw, where i can find them, and how may you used.
Also how much wood glue did you use and could you tell me where i could order that as well.
Thank you. 🙂