Building Angled Cabinets
I’m building angled cabinets for the top of my island, despite my excitement to explore new ideas for the HVAC closet. I reigned myself in to focus on the already “in progress” projects going on. The closet surprise will have to wait. 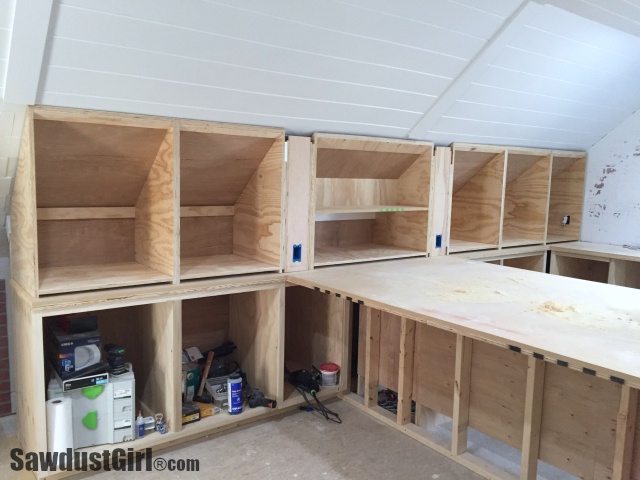
Building Angled Cabinets Video
I’m building these cabinets 23″ wide. The ceiling is 14″ tall at the back of the cabinet and 33″ at the tallest point. I cut a piece of plywood at 23″ wide. Then I measured up 14″ on one side and 33″ on the other side. Then I drew a line from one point to the other and cut it.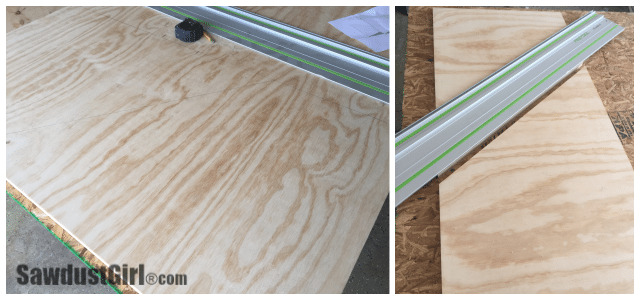 A happy circumstance was that opposite side was almost exactly the same length. I just had to cut about 1/2″ off the bottom of the “off cut” piece and I had a matching pair.
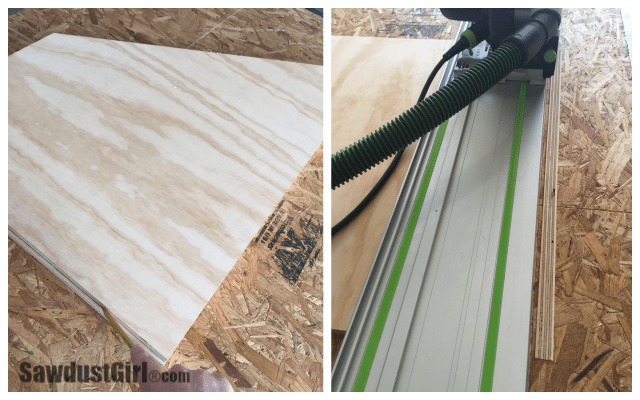 I did a test fit before I started building cabinets. I made a small adjustment to the height after my first cut because I’d given myself about 1″ of clearance and it wasn’t needed. This gave me the freedom to cut the two halves of my 23″ x48″ plywood strip directly in half so I didn’t have to trim one side.
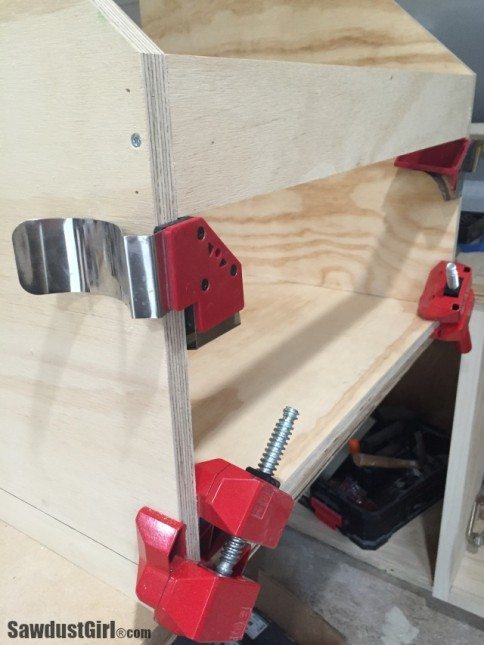
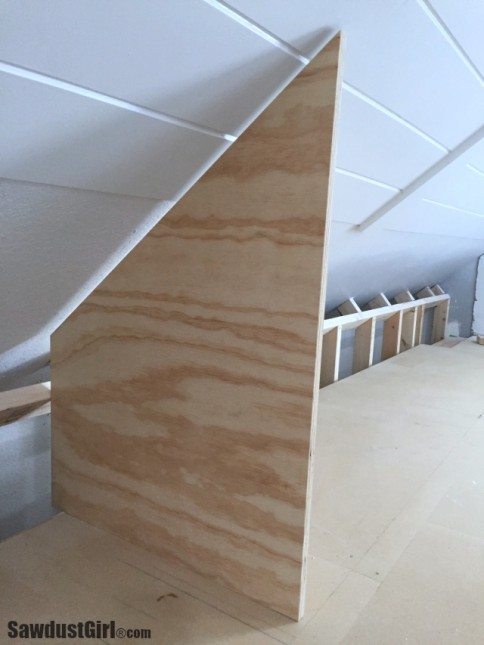 Building angled cabinets is done in the same way as building any other cabinet. The top of the cabinet is just angled instead of flat. I built these the quick and easy way: with butt joints, glue, nails and screws. I use Bessey angle clamps to keep pieces square to each and some clip on clamps to hold my cleats in place while I secure them.
One of my cabinets houses an outlet. I marked and cut out access for the junction box before assembly.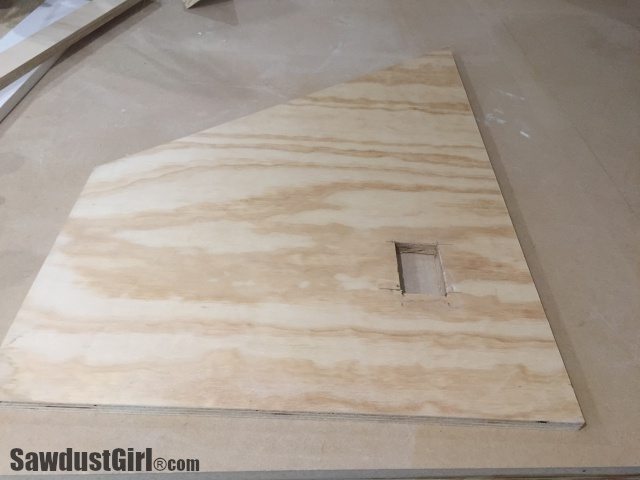
I installed two cleats on each cabinet, one at the top of the slanted “top” and one at the top of the flat “back”. I’ll screw through these cleats to secure the cabinets to the studs in the wall/ceiling.
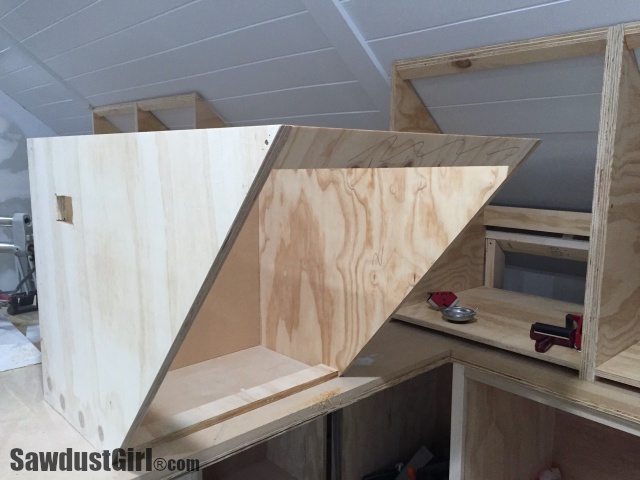
The cabinet parts are all 3/4″ plywood with the exception of the back and top which are 1/4″ plywood.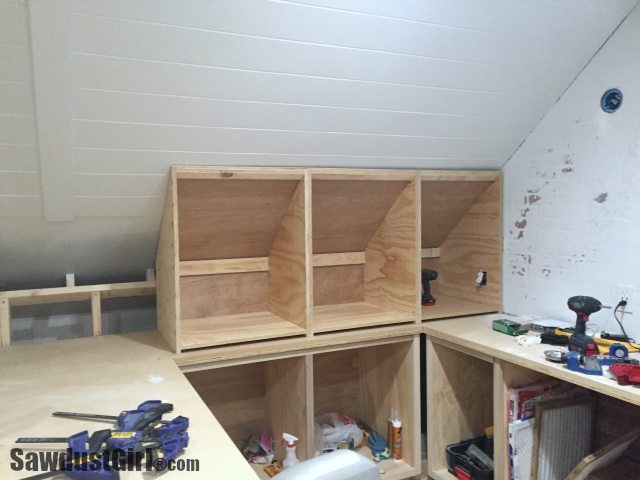
I beveled the top cleat so it would be flush with the front of the cabinet. I could have simply used a straight cut and moved the cleat back a little instead of mitering it but it seemed this was the cleaner approach so I rolled with my decision. It wouldn’t have made a difference visually (once the top/back was on) or structurally – in case you’re wondering.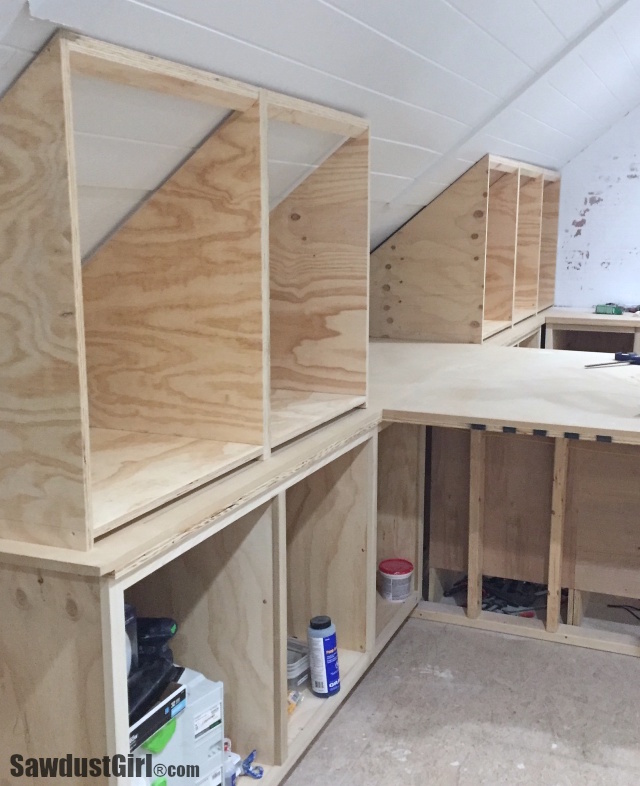
I’m installing outlets near the island so I can plug in my embossing gun…or anything else that I might need to plug in. I haven’t crafted in so many years I can’t even remember what tools I have or what I may need to plug in so I’m leaning toward over planning rather than the opposite. I’m sure I’ll appreciate myself for it later.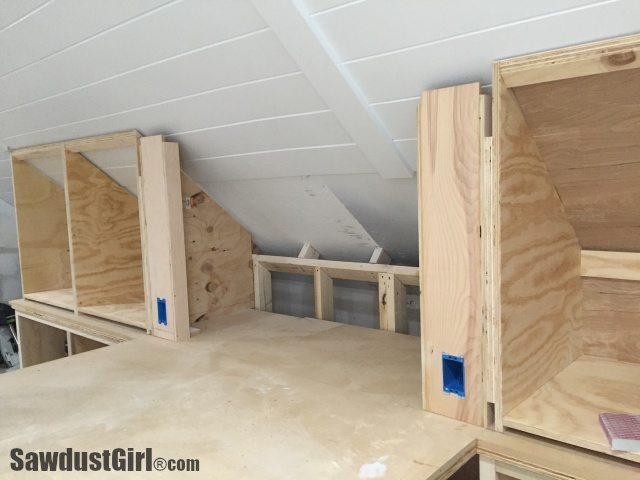
The center cabinet was an obstacle for my creative brain. I had 20 ideas for amazingly cool features I could put in there but when I sat down with my thinking cap on and REALLY THOUGHT about which of those features I would actually use, appreciate or be annoyed by…I went with the most simple solution possible. The other angled cabinets will have drawers but this center one will remain open so I added a shelf. I left the bottom portion deep at 23″ but I blocked out the back on the upper portion at 10″ deep. The top angled down to a teeny, tiny space and I didn’t like it visually. I’m not sure I love it visually now either but It’s hard to judge at this point before it’s all painted. I want the deep bottom shelf for storage but I’ll most likely put some decorations on the top shelf so I wanted to leave it tall for now. I may add another small shelf later if I decide I need a space to hold little ribbon rolls or something. It’s difficult to plan storage space for items I haven’t used for over 5 years.
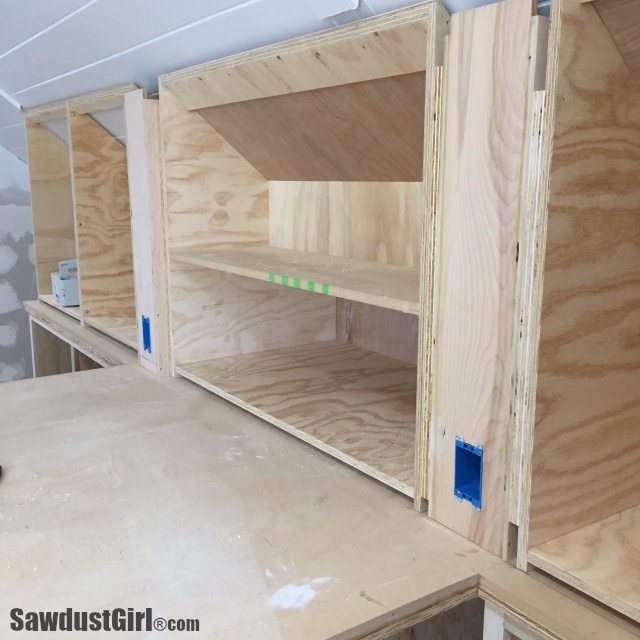
I wasn’t sure if I wanted to bump out the columns or leave them flush with the cabinets. Visually, bump outs are interesting but they make installing crown moulding a bit more of a pain. That is not the reason I decided to go with flush. I swear! I got some helpful feedback on Instagram and Facebook that swayed my decision. If anything is plugged into the outlets, having the columns pushed forward could cause the plugs to be in the way. I thought it was a good point …AND I didn’t want to deal with crown moulding being even more of a pain that it will already be with this angled ceiling.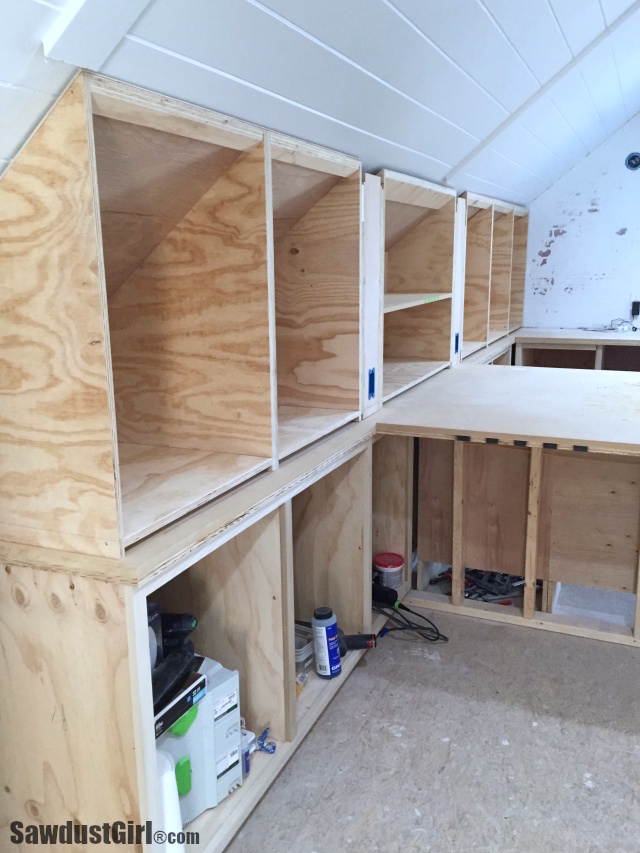
I have to install the faceframes before I have to worry about crown moulding though so I have another day or two to feel anxious about those wonky angles and how I’m going to deal with them. I won’t let this task intimidate me like building angled cabinets did. I procrastinated that task for weeks because I thought it was going to be a PAIN to figure out. It wasn’t. I think the crown IS going to be a pain but I’m going to get in there and get it done without putting it off for weeks. Or I may scrap crown and just slap up a straight board, add some kind of moulding, paint it, caulk it and move on. 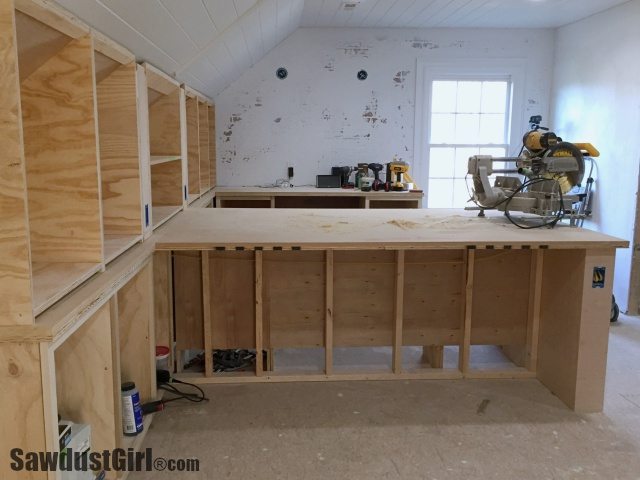
Moving on is the key phrase there. I just want to move on to the other things I have planned and get this room finished so I can use it and love it…or move on to the 1003 other projects I need to do in this house which is more likely than actually sitting down in the craft room and screen printing T-Shirts or something fun like that. Building the space IS fun so I’m not complaining. Once in a while I feel a tiny bit overwhelmed but I put this all on myself so I can’t sit in a puddle of despair for too long. Just a minute or three ever so often. Then I get back to work. 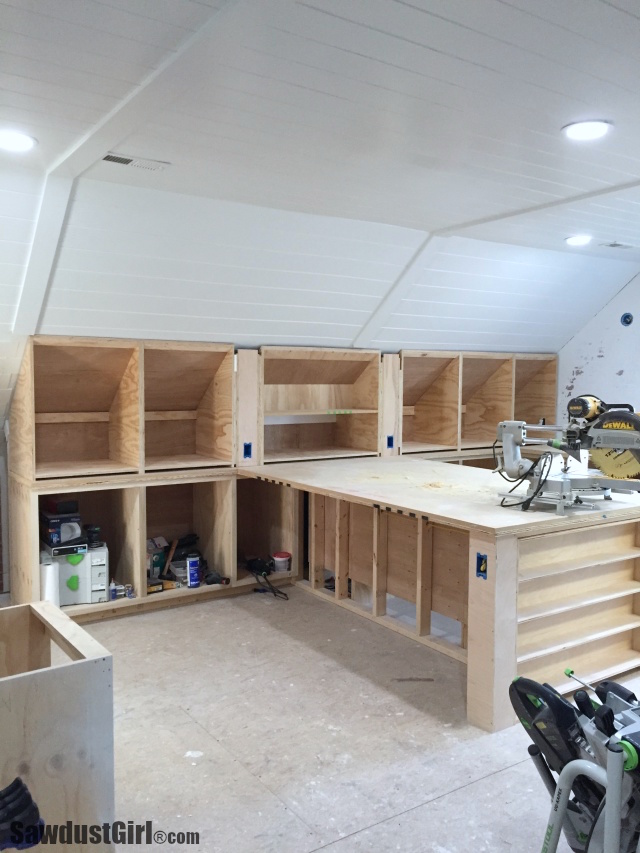
Get my Cabinet Building 101 eBook if you want all my cabinet building tips in one easy to find place!
Hi Sandra. I’m taking on a similar project, building out a custom closet for my wife in an angled-ceiling bonus room. I’ve learned a lot from your post and video that will help me but have one question. When researching around the internet for tutorials on how to build out closets, I’ve seen some folks that attach the back of the “box” straight to the wall, then attach the sides straight to the top and bottom. But here, you built the entire box (save the open face) and set it in place (attached with screws). Are there advantages to building the entire box as opposed to just attaching the panels piece by piece? Does this make it easier to get a good fit in the space where the existing walls may not be 100% square? Thanks!
I don’t think I am correctly visualizing the alternative way you are seeing cabinets built.
I build a cabinet, square it up, and attach the back. (The back being the piece that keeps the cabinet square.) Making sure the cabinets are square is especially important when adding drawers.
Walls and ceilings/wall joints are almost never square. So I build my cabinets square and then use shims during the installation process to place the square cabinets in the not-square space.
Thanks so much for the reply! That makes sense and helps assure me it’s the right method for my project as well. Thanks again!
If you are building cabinets with drawers is it necessary to put the 1/4″ plywood on the top and back, or could I just use the cleats to keep the shape of the cabinet? Won’t the drawers cover it so you couldn’t see that part, anyway? Thanks!
The cleats won’t keep the cabinets from racking which is why the backing is needed. Cabinets with no backs can be pushed out of square, even with the cleats in place.
Hi… love your work! Question lol do you happen to have a video of the framing b4 the angle cabinets? meaning the starting process with the 2×4? Thank you…. Diana
Looks fantastic so far! Is there any way the receptacle column on the right could have aligned with the batten in the ceiling? And an additional (faux) batten to align with the column on the left. Just a thought.
https://a1webistepro.com this is a test