DIY Beaded Chandelier Tutorial
I’m excited to share a crazy inventive tutorial for a diy beaded chandelier from Britt over at A Penny Saved. She created this amazing diy beaded chandelier out of a hanging fruit basket, a ton of beads, and a simple light socket kit.
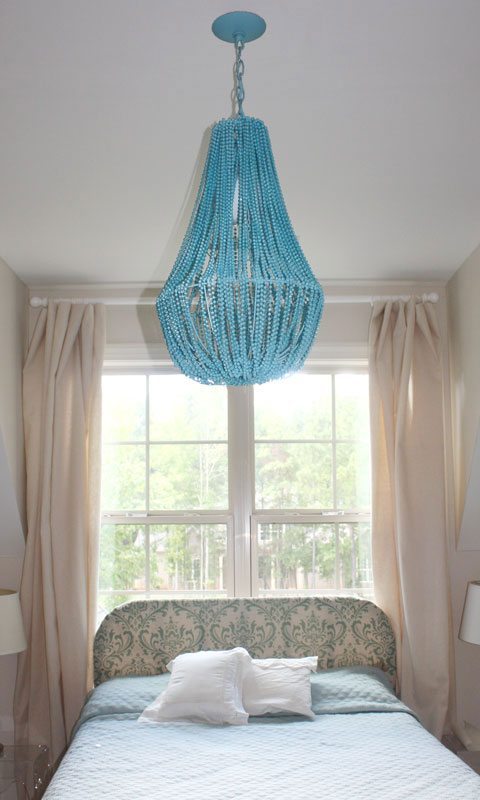
Gather your materials:
LOTS of beaded necklaces, cut into long strands (the Mardi Gras kind)
Metal hanging garden basket
A spool of thin-gauge wire
Wire cutters
Wire clothes hanger
Pendant light kit (cord & socket)
Metal chain to hang the fixture
Light fixture mounting bracket, bolt & loop
Light fixture ceiling cap
Start with a hanging garden basket.
Go ahead and paint it to blend with your beads (or the finished color of your chandelier if you plan to paint your beads). I used a ladder to suspend the chandelier while I worked on it.
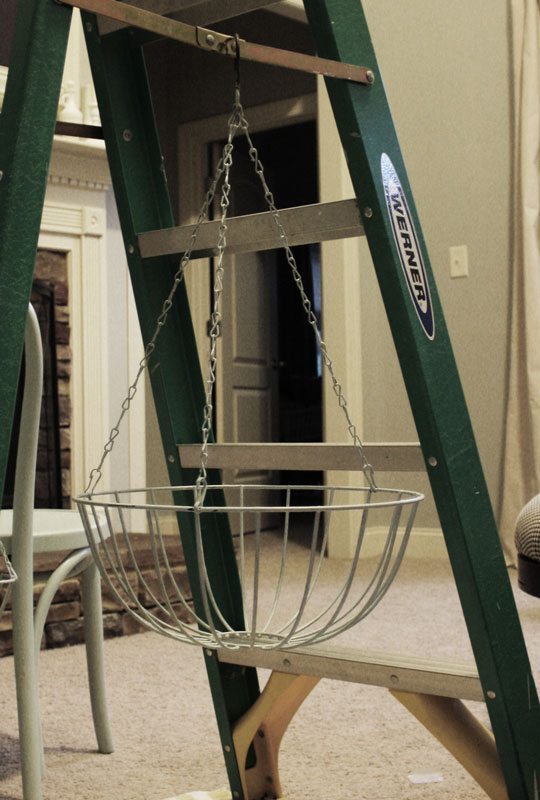
Top it off. Because I wanted to wire this fixture, the metal hook on the basket wasn’t going to cut it. I needed to be able to add a pedant light cord and a chain somehow. I ended up wiring a light fixture ceiling bracket to a ring made from a bent clothes hanger. The loop on top screws onto a hollow bolt that screws into the bracket, which later allowed me to attach a chain.
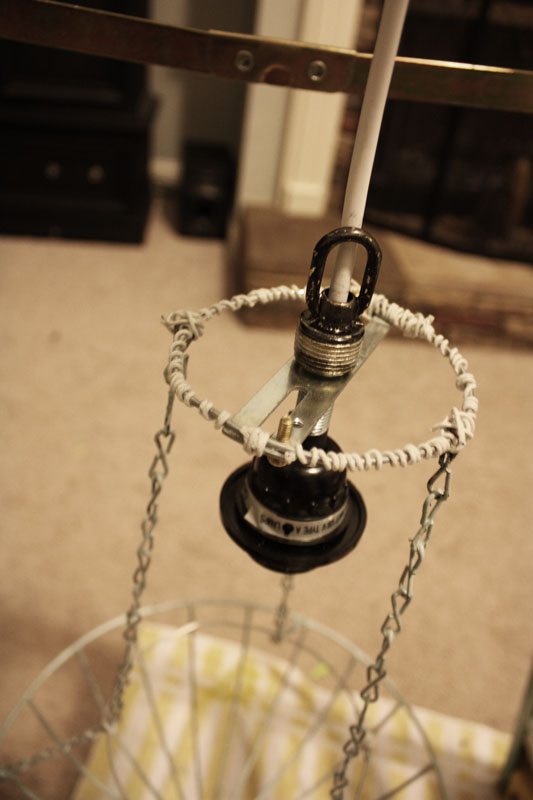
Add a little structure. I wired on a ring (again, made from a bent hanger) about half way between the top of the chandelier and the lower ring for a little more shape. This allowed the beaded strands to swag a little without the metal chains showing.

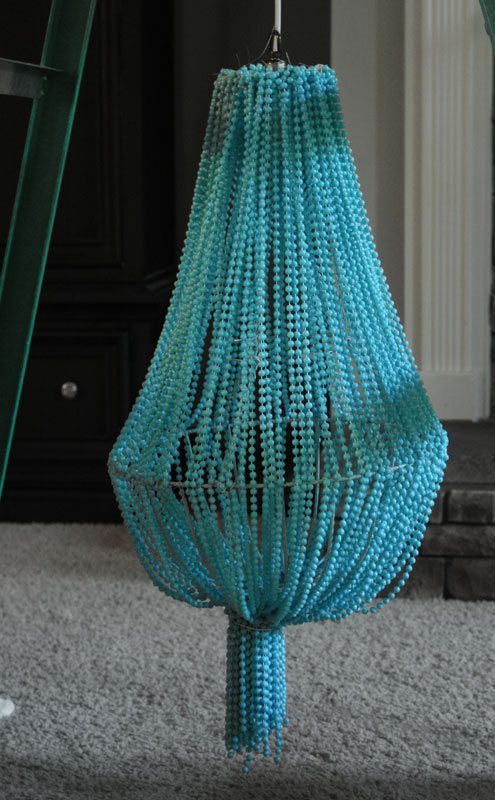
Start beading! After figuring out that my beaded strands were just a tad longer than I needed to go from the top to the bottom of the fixture with a little swag in the middle, I started attaching them around the top ring by looping wire around the top bead of each strand and the metal ring.
My chandelier looked a little crooked at this point, but straightened up once we attached the chain and hung it.
Trim away the excess. If your strands are a little longer than you need, just cut off the extra after attaching at the bottom of the fixture. Aaaaand bead some more. This is definitely the most time-consuming part. Just make sure that you have good coverage all the way around. I attached all my strands at the top first, then at the middle (the top part of the basket — so they would swag a little), then at the bottom. In the photo above I had attached the beads at the top and middle and was trying to make sure there weren’t any bare spots before attaching them at the bottom.
Add a chain and ceiling cap.
Paint it up. Give the whole thing a coat or two of paint if you want. I decided to do this because I found that it made the wires and chains blend in better with the beads.
Hang it and admire.


wow… amazing. i really love it and thanks for sharing.
This is crazily good!
So clever and cute!:-)
Thanks so much for sharing. This is a great project!
Oh wow, that's GORGEOUS! What a fabulous project, thanks so much to both of you for the post. I'll be linking.