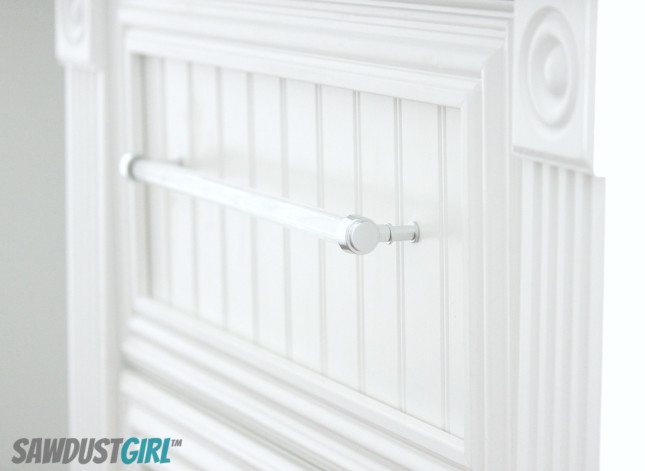
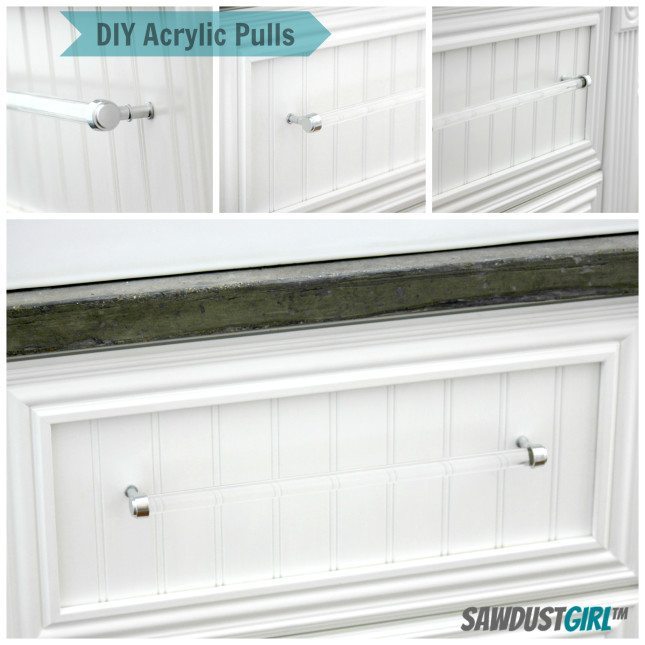
Hi Sawdust fans! Julie here with an awesome DIY acrylic drawer pull tutorial that could save you hundreds of dollars (or thousands depending on the quantity of drawer pulls you need). If you are dead set on having acrylic hardware but don’t want to spend over $300 PER pull (AS IF), good news– you can make your own.
I wanted to add some sparkle and old Hollywood glam to the hers side of our master bath, and acrylic drawer pulls seemed like the perfect way to do that. However, when I started shopping for them I realized that they can be expensive!
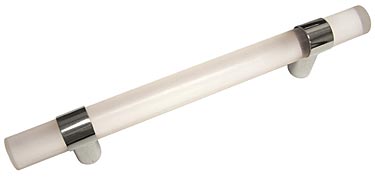
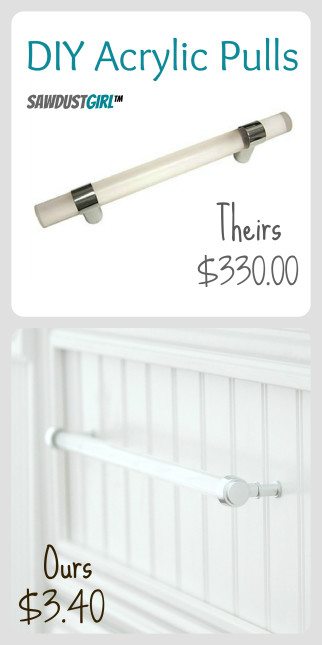
This is my favorite pull that I found while shopping, but even on sale at $264.00 down from $330.00, it’s a little more than what I want to spend. So to keep my hubby happy (he had major sad face when I showed him the pull), and save a few $$$, I decided to DIY my own drawer pulls.
Materials:
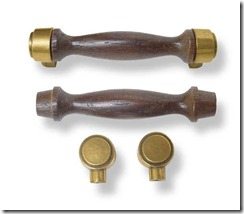
3 Piece Dark Solid Oak Pull from D. Lawless
$1.00 (there are bulk discounts so I got mine for $0.80)
5/8 inch acrylic rod, I got mine from Interstate Plastics which has a store locally, but most plastic stores carry them. They come in 72” standard lengths which has to ship freight,so if you need to have them shipped, call the shop you order from to see if they will cut to your length and it will save you a lot on shipping.
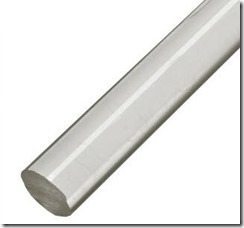
$6.46 for 72” divide by 5 (I need 14 inch pulls) so $1.30.
Washer, 1 1/2” knob screw, & spacer from local hardware store.
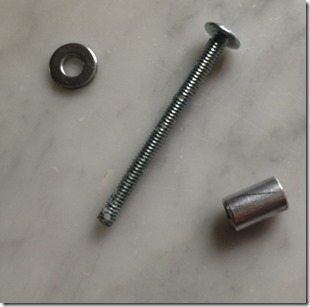
$0.05, $0.03, $0.95 = $1.03
Glue and spray paint of your choice. I used E600, and Krylon Chrome.
Step 1: Cut your acrylic to length.
Sometimes the acrylic rods come with a protective film on them, if so, don’t remove this until the end as it will help protect your rod from getting scratched and dulled. Mine did not have this film so I wrapped my rods in blue painter’s tape. The rods can be polished if they do get scratched for a little extra shine, but better to protect them and create as little polishing work as possible
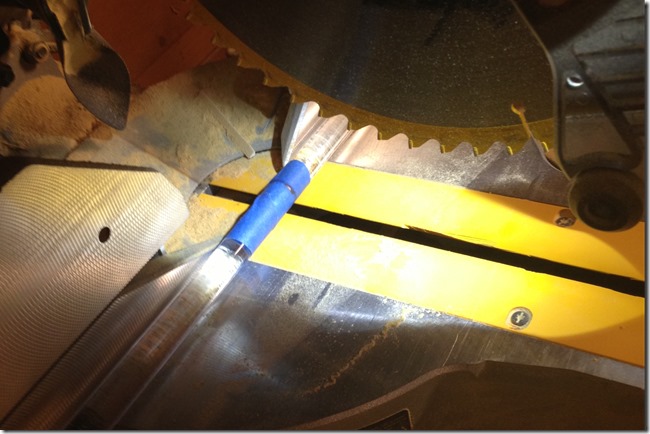
Measure and cut the rod with normal wood working tools, being careful not to scrape or scratch the rod.
Step 2: Taper the ends of your rod to fit into the mounting brackets.
Remove tape or film to expose 3/8” of the rod, then use sandpaper to tool the rod to the desired taper. Don’t worry about perfection, just get the rod so that it will fit into the mounting bracket.
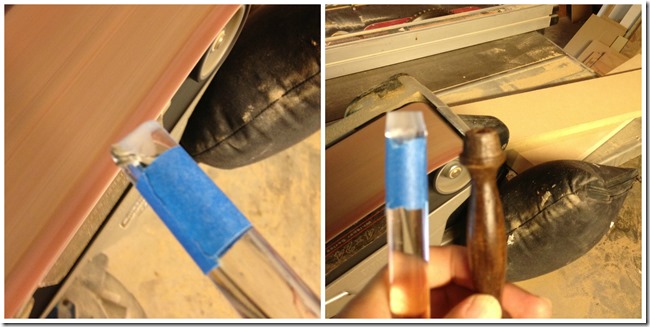
I used a belt sander turned upside down which worked great. The acrylic sort of melts/sands and removes fast, so it is a good idea to experiment with a scrap to get the hang of it.
Step 3: Glue the mounting brackets to the acrylic rod.
Prep the mounting brackets by sanding the inside of the stem where the rod will be glued into place. Cut a 3/4 inch scrap of wood to use as a template that is a couple inches longer than the total length of the pull. Holding the mounting brackets tightly onto the ends of the rod, mark the center of the holes onto the wood (this works better with an extra set of hands to hold while you mark). Drill on the marks and test fit to see if the screws fit into the mounting brackets with the pull assembled.
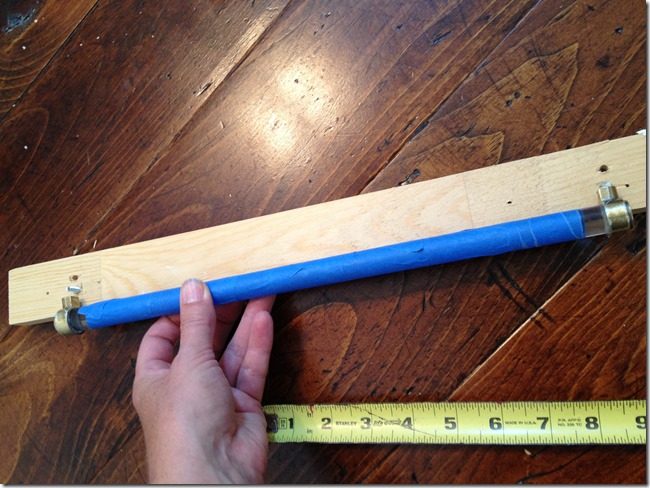
Next squeeze a small amount of glue into the mounting bracket and wipe some onto the tapered end of the rod. (I made the mistake of doing this after I had sprayed my brackets and discovered that E600 melts fresh spray paint, maybe if the paint had fully cured it would have been OK, but I don’t have 72 hours to wait around for paint to cure. So I cleaned off the brackets and glued to the bare bracket).
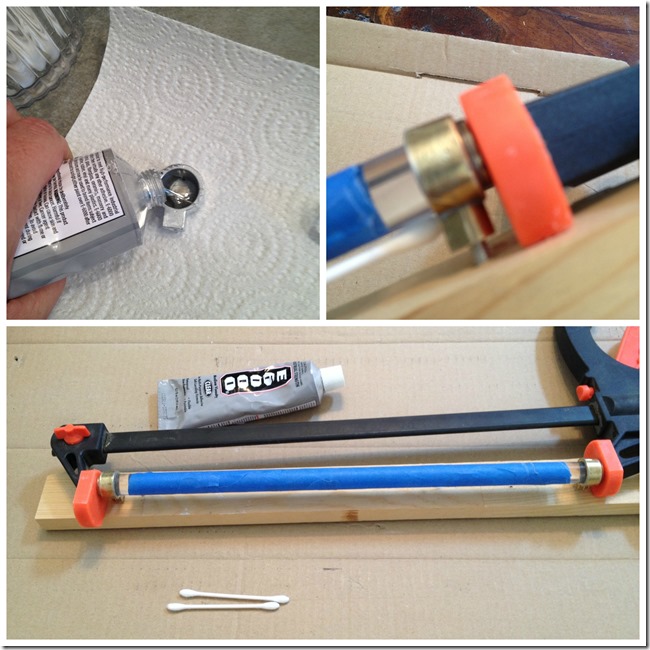
Wait a few minutes for the glue to begin to tack up and then insert rod into bracket, repeat with the other end. Next screw the pull to the wood template that you made earlier. This will ensure that the brackets are even and square. Use a clamp to push the rod securely into the mounting brackets. Using a q-tip and acetone wipe off all excess glue leaving a clean smooth seam between the brackets and rod. Leave to dry according to glue directions.
Step 4: Paint.
Tape off any exposed rod with painter’s tape, and spay paint brackets, washers, and spacers your desired color. I chose chrome for the sparkle and to match my fixtures, but I think they would be cute in bright colors as well as traditional metallics.
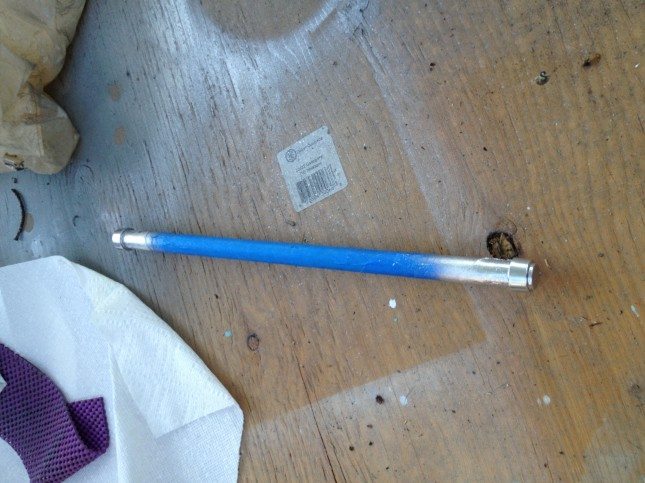
Step 5: Let paint dry, remove tape, and install.
Use the assembly template to mark holes for the pulls. Before you drill the holes double check for level and centeredness. I like to use a nail or sharp screw point to create a divot at the center of the mark. This makes it easy to get the drill bit into just the perfect spot. Install pulls using the washer, spacer, and longer screws.
Finished!
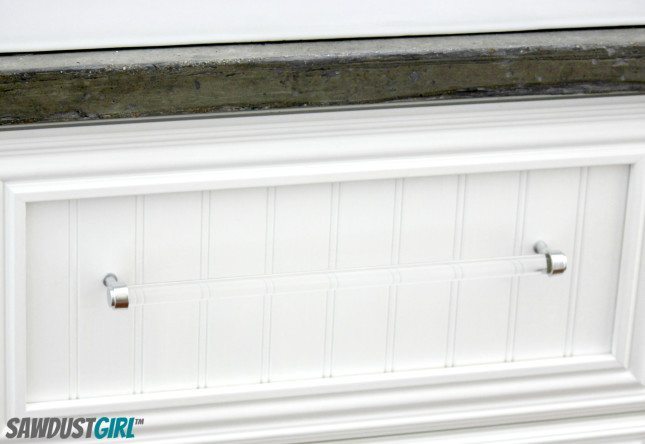
I am so in love with these pulls! I love how they add sparkle and glitz to the drawers. I can’t wait to install the other 32 in my closet (just as soon as I finish the drawers they will go on, but that’s another story).
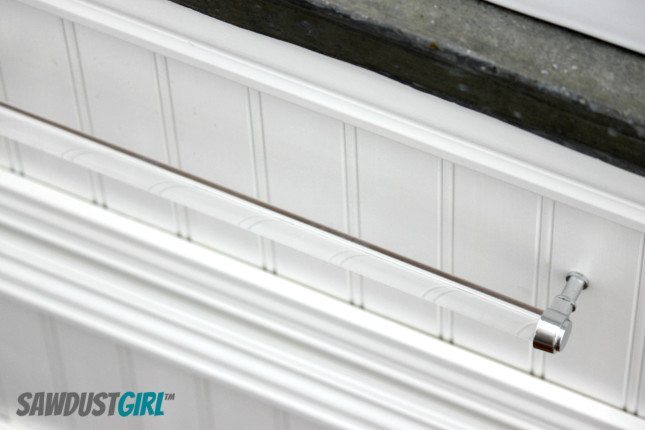
In addition to the materials cost I ended up using 2 cans of spray paint and about a 1/4 tube of the glue. So my grand total per pull = $3.40, Total cost for 34 pulls = $115.60. Less than half of the price for one of my shopped for pulls, which would have cost $8,976 for 34 pulls.
Total savings = a whopping $8,860.40!
Not that I would have spent that much on pulls, sheesh!!!
MarieRoxanne says
What a good job! I am sure your hubby was happy about that too! Saved so much money!
A question: why didn’t you paint the brackets etc…. “before” installing the rod?
MarieRoxanne says
you could have added the tape before using the clamp to protect the paint job…
julie says
Thanks, it was a fun project. I did paint them before installing the rod the first time and the glue melted the paint–it was a huge mess! You could try it that way, but make sure to give your paint some time to cure, and/or use a glue that is more paint friendly.
Jennifer @ Decorated Chaos says
This is AMAZING! I just replaced my bathroom knobs with silver drawer pulls b/c I the acrylic were out of the budget. I am going to try to make these! Thanks for sharing the tutorial. Yours turned out great!
Frankie says
WOW! Your pulls are beautiful and I can’t believe how little they cost you to make them. Of course, I can’t believe anyone would actually spend $300+ on a single drawer pull. Yikes! Thanks for sharing your secret to making these — I’m going to have to give it a go.
Steph says
These are beautiful. Definitely one for the files. 🙂
Ronda Batchelor says
They look great.
kristin says
Pure genius! That is AMAZING!!! I had to laugh when you said you couldn’t wait to install the other 32! Install–fun, making them…I may go bonkers! Unbelievable work and the biggest savings on a project I think I have ever seen!
julie says
OK, let me just shuffle a couple of steps back, I’m excited about being done and enjoying the fab space, not so much excited about the boatload of work that still needs to be done. Still little victories like how much I love these pulls keeps me plugging away.
Kristi @ Creative Kristi says
This. Is. Brilliant. LOVE!!!
Dina says
Wow…beautiful! Genius!
Rhonda says
These came out great! I love these pulls. You can spend a fortune on hardware!!!
karen@somewhatquirky says
This is a kick-ass project! Now I need to find a place to put some acrylic pulls so I can be as cool as you.
Leigh says
Wow, great idea! What type of spray paint did you use? I have a project needing chrome and would love a recommendation.
Thanks!
julie says
I used Krylon chrome and am pretty happy with it, mainly because the part you touch on this project is the acrylic rod so the chrome stays fingetprint free. There are issues with chrome spray paints keeping their shine, and dulling with use (touching) and they dull if you top coat them as well. I have been doing lots of research and testing and I think I have a workaround. I’ll post about it in a couple of days if it holds up.
Diana W. says
D A N G! You go girl! Gotta love saving 8k, even if you really weren’t going to spend that! Same look too, and a great tutorial! (Just came to the realization that I type with way to many exclamation points, but I really am excited!!!) hehehe. Will be pinning for some future fabulessness.
julie says
I write with too many !!! so we are twins !! ha ha
Tina says
This project is fantastic. I love the look of acrylic and silver. And what a savings! Great job. I’ll definitely file this one away for future use. Thankis
Nancy Williams says
This post is a keeper! What a great idea!
Do you have a blog or website as well?
julie says
Thanks Nancy! No I do not have a blog yet, but am working on getting one started in the next few weeks.
Cheryl says
I have to say that your pulls look even better than the ‘high end’ ones!
Diane says
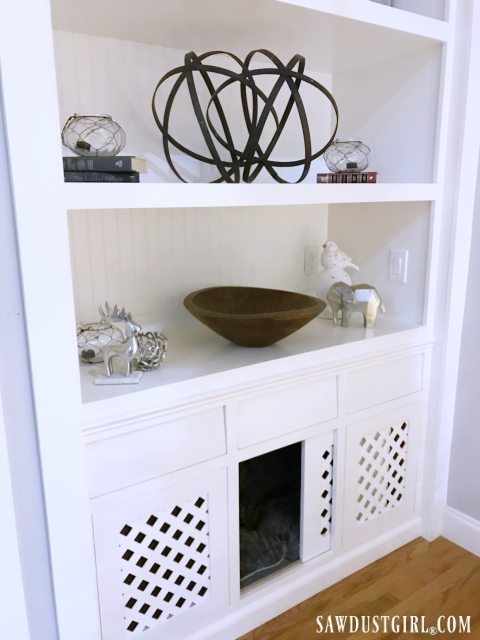
I love looking at your website for inspiration and love, love, love this idea!!! But… where did you get your wood floors I see in “Step 3?” They are exactly what I’ve been looking for!
julie says
Thanks so much Diane! The flooring is the 5 in plank New England White Pine flooring from Lumber Liquidators, I got it on the annual flooring sale for $0.80/sq ft, I think its usually around $1/sq ft. Finished with 4 coats of tongue oil. The first coat was mixed with 1 part stain to 3 parts tongue oil. I am going to write up a tutorial for SawdustGirl, soonish. Feel free to email me if you want more information.
Sue Kopp says
well duh!!! You are sooo smart. Would have never thought of his. Cannot wait to try it. And so practical and frugal! Thanks
Marty says
You are brilliant! These are awesome!
Jessi @ Practically Functional says
Wow, these are awesome! I love how they turned out, and personally I like them better than the store-bought options!
Mimi says
Awesome project!
A Vie Renouvele says
These are Fabulous! I’m working on some mirrored nightstands and I think you just made my decision for the drawer pulls! Thank You! Linda
Cara says
I think yours looks much nicer than the expensive one! Fabulous project
Feral Turtle says
That’s what I call a savings! Way to go Sandra. I love the look. Very clean and glamorous!
Jenna says
Amazing!!! This is why I love DIY blogs.
Vel says
You are a genius!!!!! So pretty! Saw you over at Centsational girl BOTB!
Brynne@TheGatheredHome says
These are amazing! They look completely high end – I can’t believe you DIYed them! I’m so impressed! 🙂
Kaycee says
Beautiful! I don’t have anywhere to put these, but now I definitely want to make them. And quite frankly, I think they look WAY better than the expensive version. Way to go! Fabulous!
Karen says
I also quite frankly agree that they look much better than the expensive version. Beautiful!
Can you tell my why you need a longer screw? Can’t you just use the screws that came with the pull?
Thanks.
Julie says
I found that the pull was a bit closer to the drawer front than I liked. The spacer extends the handle a little farther away from the drawer front but you could test it out to see how you like with the mounting brackets and no spacer. If you don’t use a spacer then the original screw should work fine. Sort of a personal preference I suppose, and how skinny your fingers are 😉
Karen says
Oh, I see. I must have missed the part where you put a spacer in. That explains it. Beautiful work!
Robin says
That’sa great savings My kind of girl Good Job !!
Alena says
I love the drawer pulls!!! I want to make them for my kitchen. What would/did you use for the cabinet doors? Also, on the acrylic rod, did you use the acrylic clear cast or the acrylic extruded? The web link takes me straight to acrylic tubing not the rods.
Julie says
So pretty for a kitchen! I made my drawer fronts by rabitting a decorative casing molding and then gluing them together like picture frames and inserting beadboard in the center similar to Sandra’s drawer front tutorial (http://sawdustgirl.com/2012/01/06/how-to-build-drawer-fronts/) but picture framed instead of rail and stile. I used the extruded rods as that is what they had in stock at the Plastic store. I understand that the cast rods are shinier, but I am really happy with the shine from the extruded and without comparing them side by side I don’t think you could ever know the difference. I have to say the only thing that I am not happy with is the poor durability of the chrome spray paint. It turns to more of a stainless look when you touch it or clean it–hello its a bathroom those babies have to be cleaned periodically! So I am looking in to having the mounting brackets chrome plated–not sure on the price yet. I’ll keep you posted.
Katherine says
Any ideas of where I could get the mounting brackets today? Can’t seem to find them anywhere online
Alex says
Hi! I love how you did this and it looks great! I’m wondering where you got the mounting brackets? I can’t seem to find it on your post or anywhere I’ve looked in stores!
Rick smith says
Where do you find the mounting brackets.
Sandra says
The 3 piece pulls I used were purchased from D. Lawless hardware. Unfortunately, they sold out.