I’m painting and installing CabinetNow doors in the jack and jill bathroom. I always get questions about paint and my airless sprayer so I’m going to share some painting FAQs today too. Y’all, this post is an organic advertisement. CabinetNow.com provided these doors for me to use in my Jack and Jill bathroom. Thank you for your support!Way back when, before Julie’s first visit or any sewer issues occurred…I measured ALL the cabinets in both bedroom closets and the bathroom. There’s 39 in total!
Measuring for Inset Doors
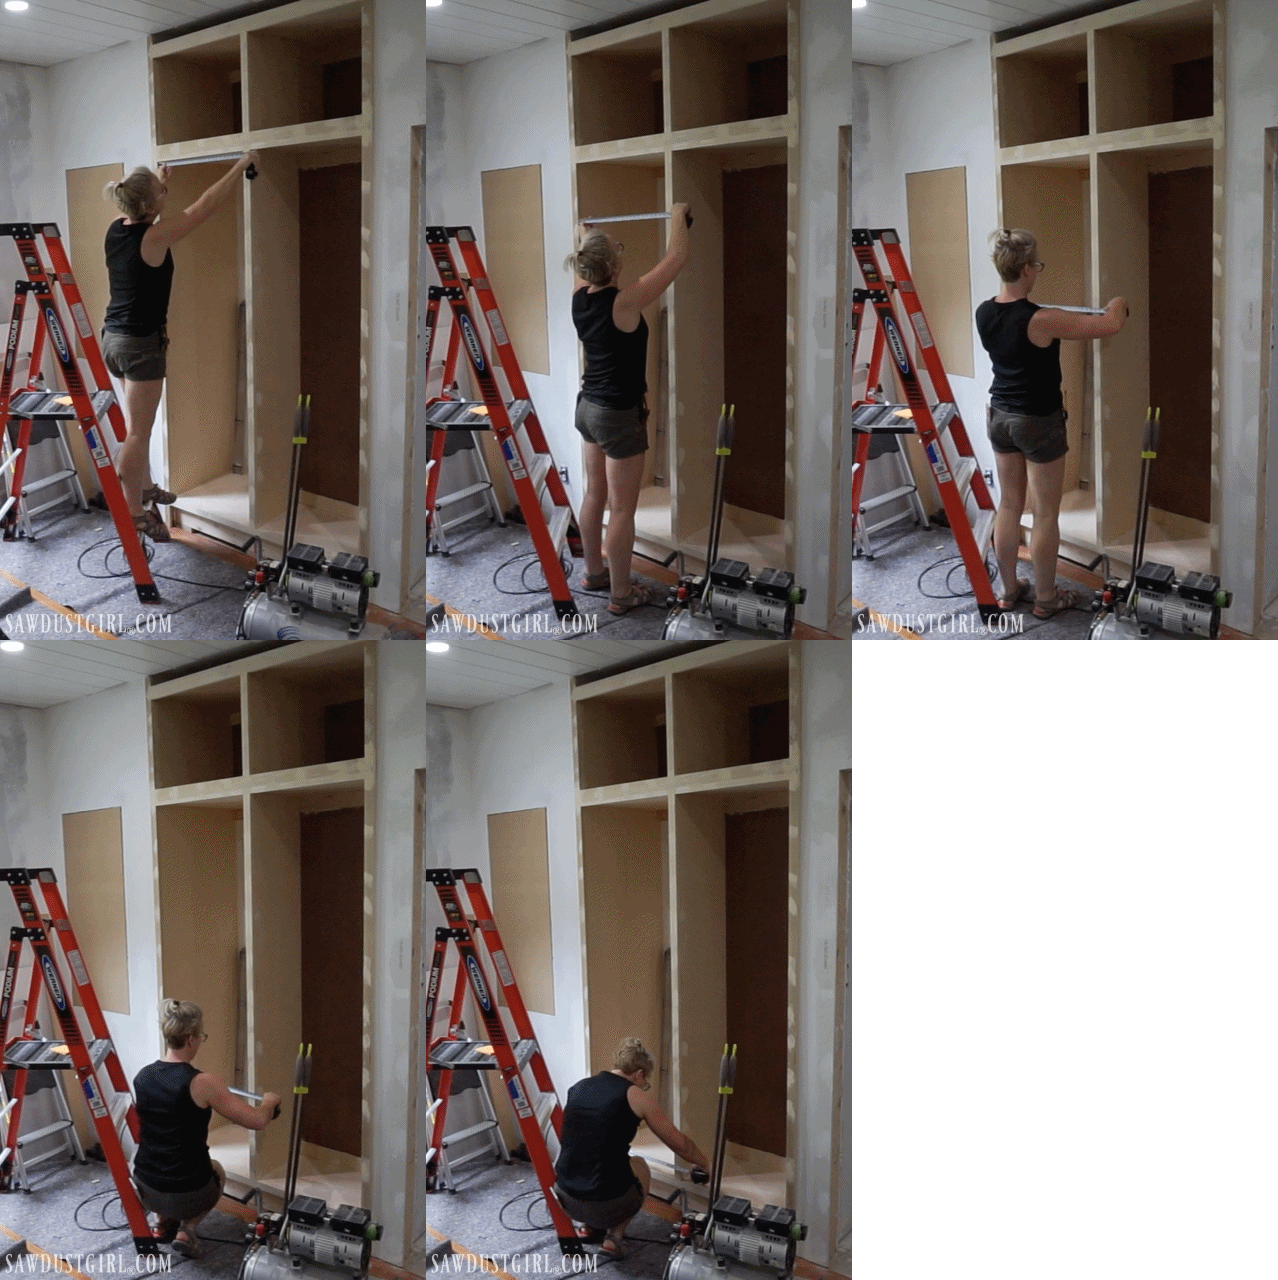
I’m doing inset doors, which have to be sized perfectly. Inset doors are much more difficult than overlay doors in that regard. When measuring for inset doors, I measure the entire cabinet opening;
- top to bottom for width
- right to left for the height.
If there is any discrepancy in measurement across the span of either the width or the height, I use the smallest measurement. With inset doors, 1/16″ matters.
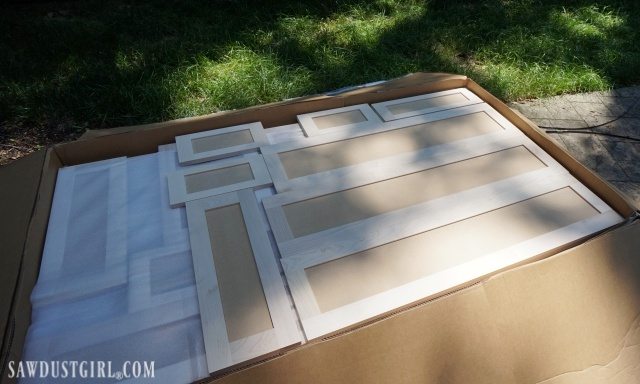
I emailed all my measurements to CabinetNow.com and they got started building my doors! CabinetNow has all kinds of options for door styles and different wood selections. I’m using simple Shaker doors with Maple frames and MDF panels, which is great for painting. They were delivered to my doorstep, packaged with super duper care. They arrived finish sanded and ready to paint! Gorgeous!
Air and Light
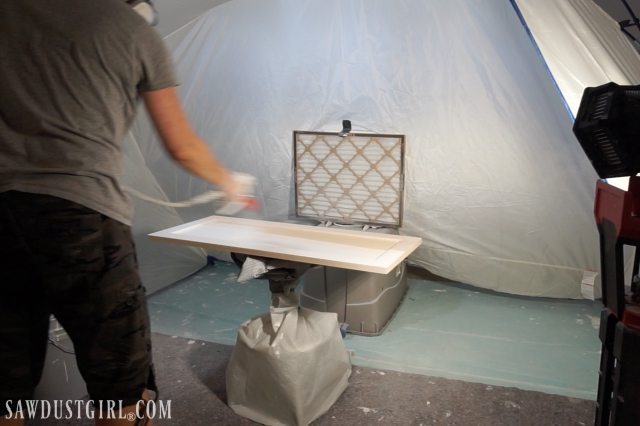
I started painting in Wes’ garage. I set up my modified HomeRight spray booth. When using an airless sprayer, it’s important to have airflow pulling the overspray away from the project. That’s important with any kind of paint spraying, airless, HVLP or cans of spray paint. Otherwise the “overspray” (extra tiny particles of paint that are all over in the air), settle down onto your project. The overspray particles are dry before they fall into your project paint, which is thicker so it dries slower. Little dried overspray particles that fall onto the project make that project feel rough and bumpy; NOT glassy smooth which is what you want and the reason you are spraying your paint!
I have a box fan pulling air out of the spray booth. There is a cheap air filter over the front of the fan to catch the overspray so I don’t end up with paint all over the garage floor behind the tent. The fan air keeps the filter in place but I used a bit of duct tape to keep it from falling over when the fan is not in use.
Light is another important aspect of getting a good paint finish. Light illuminating the project surface at an angle let’s you see everything!
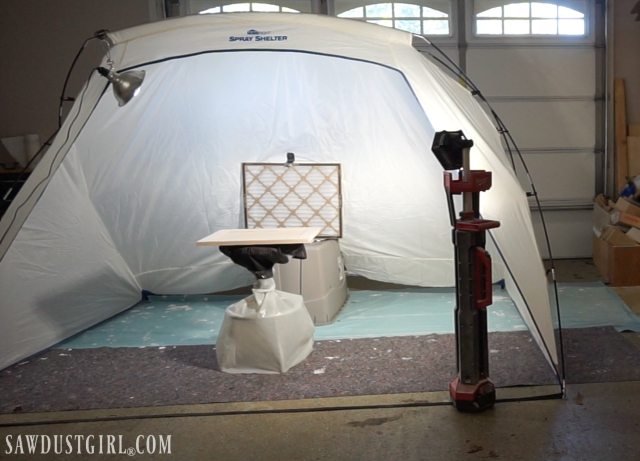
Prep the Airless Sprayer and Paint
I’ve been using my Graco Nova 390 for several years now and have had amazing results with it. It requires some prep and clean up every time but the finish results are worth it. I store the airless sprayer with Pump Armour so the first step before using it again is to clean all that out.
- Pull half a bucket of soapy water through the suction hose and out through the drain hose and the spray hose.
- (Dawn dishwashing liquid)
- Run half a bucket of clean water through
- Thoroughly mix primer
- Pull Primer through the suction hose and clear out drain hose until the primer starts to run out. Then clear out the spray hose until primer starts to run out.
- NOW I put the tip guard with tip onto the gun.
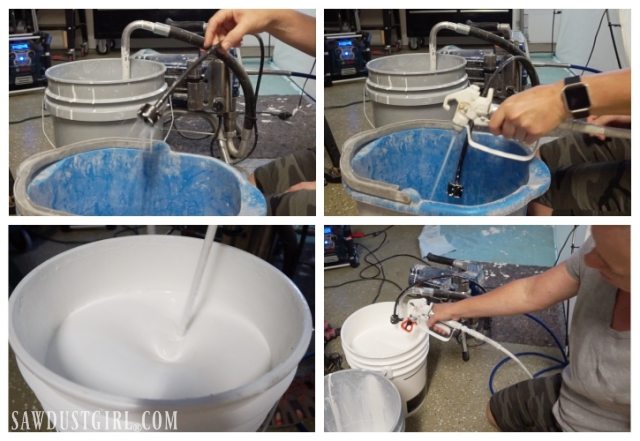
I’m using a bucket of leftover KILZ primer I bought for the plywood plank walls . I normally use Sherwin Williams all purpose primer. The KILZ works great and levels out nicely. It is quite thick and requires a larger tip orifice than I normally use. Let me just say that airless sprayer tips are confusing! The fist number on the tip is the size of the spray pattern multiplied by 2. WHAT? So a 315 tip has a (3×2=6) 6″ spray pattern.
Additionally, it is somewhat difficult to get exactly what you need. The KILZ primer I used requires a 17-21 orifice. I could only find that size orifice with a very large spray pattern. I want no larger than 6″ spray pattern so I need a 317 -321 tip. THOSE ARE IMPOSSIBLE to find.
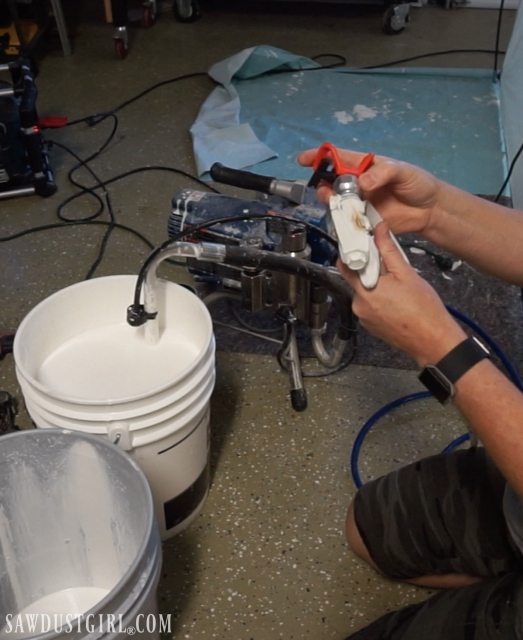
A 315 was the best I could find and I had to use high pressure up on the Graco to get it to spray well. SO I had a TON of overspray and wasted a lot of primer. That size tip works in the orange tip guard which is usually what comes on the spray gun when you purchase your sprayer.The finish you get with primer isn’t as important as the paint so I didn’t worry too much about not having exactly the right tip. Also, primer isn’t as expensive as paint so I didn’t cry over wasting so much of it. I DID wear a respirator in addition to my fan filtering the overspray out of the air.
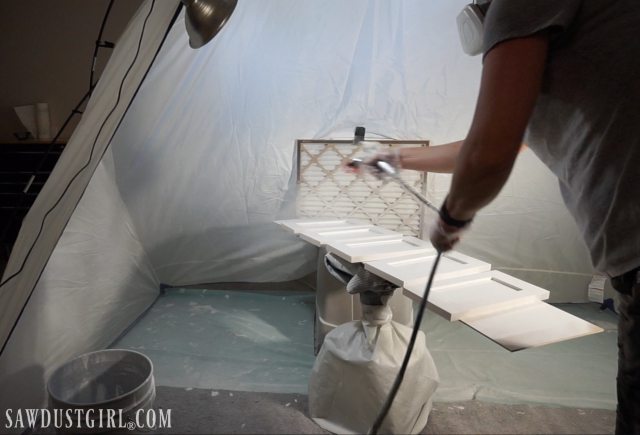
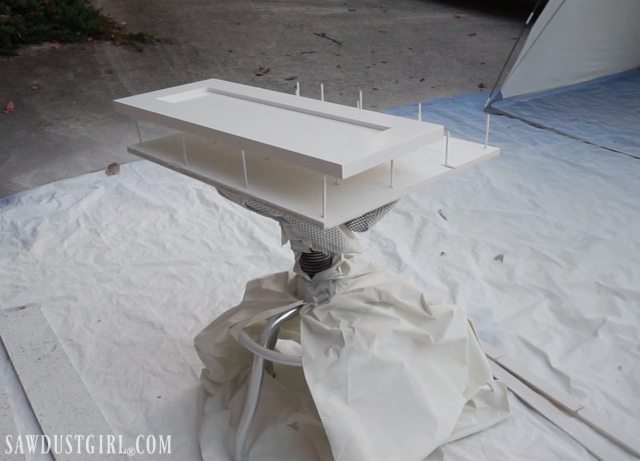
I’m spraying drawer fronts in addition to doors. Most of them are small enough for me to put on a scrap board and paint 4 or 5 at a time.
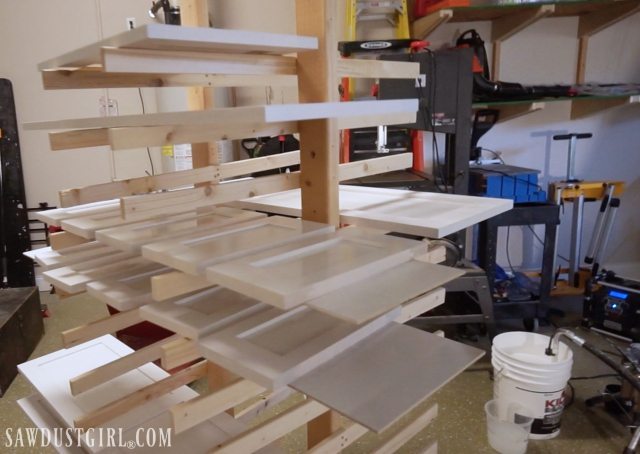
I painted each door (or group of doors/drawer fronts) and put them on the drying rack to dry.
I started getting painty footprints all over Wes’ garage floor because I didn’t have enough drop cloths to make a path from the paint booth to the drying rack. Also, the garage was feeling just way to cramped so I moved my work station outside. Thankfully I had two consecutive, beautiful days.
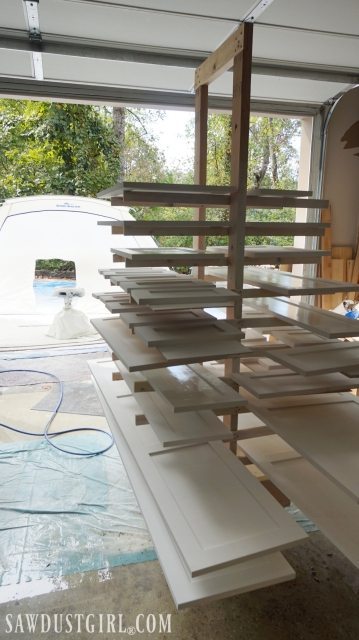
I made a couple other adjustments to my “work station”.
- I moved the box fan IN the garage blowing air toward the spray booth to push air away from the project.
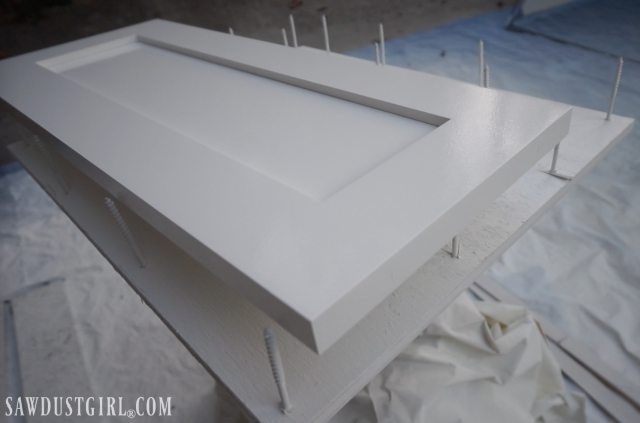
- I made a better spray stand.
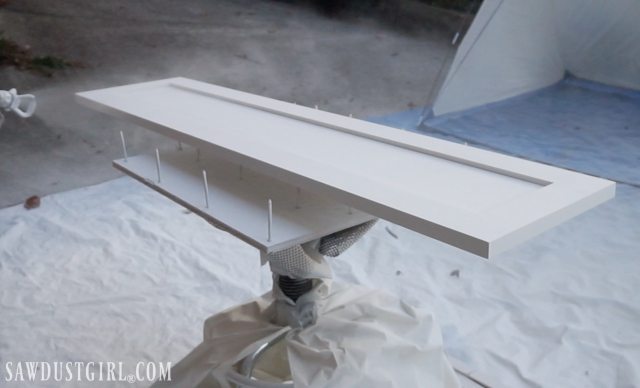
- I got a scrap of wood
- drove a bunch of 3″ screws up through it
- hammered the top of those screws to dull the points
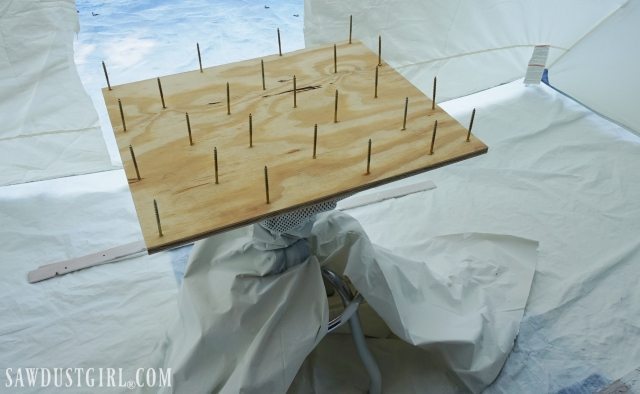
That nifty “screw board” was placed on top of my already awesome makeshift swivel stand. That’s a shop stool covered with plastic and topped with a no-slip shelf liner.
I made a failed attempt to keep it paint free. It became uncovered at some point and I didn’t notice. Oh well.
Painting with an Airless Sprayer
After priming both sides of my cabinet doors, I moved on to painting. I get asked all the time so here it is:
- Sherwin Williams Pro Classic
- Semi Gloss
- Decorator White
For paint, I use fine finish tips which are used in the BLUE tip guard. With this paint I used the RAC X 314 tip.
When painting horizontal surfaces, you can lay the paint down a little heavier than you would on a vertical surface. Since there is no gravity to deal with, you don’t have to worry about drips or sags.
When using an airless sprayer, you want to keep the gun perpendicular to the project surface. Don’t tilt your wrist. Think of the spray gun back as an extension of your arm. Move your arm/gun back and forth, starting the paint flow before it makes contact with the project and ending it after you have moved beyond the project. Pull the trigger and start the spray flow in front of the work piece, as you’re moving your arm towards it.
I hit the sides first, including the lip where the panel recesses. Then I hit the top. I made a short video to demonstrate what I’m talking about.
If I were painting fewer doors, I could hang them all and paint all sides at once. Although when I only have a few doors to paint at one time I generally brush and roll them because it’s not worth it to prep and clean up the airless sprayer for a little job.
It took a total of three days to prime and paint all 39 doors. Not the entire day of three days. There was a lof of waiting for paint to dry in there. Prime one side. Let that dry. Prime the other side. Dry. Paint one side…
Now I have to install them all which includes boring for the hinges. That is a service that CabinetNow offers but I hadn’t selected hinges at the time of my door order so I skipped that service. I am regretting that now because I don’t have the right jig for my hinges so, after drilling completely THROUGH a door (TWICE) I am pausing to wait for a $300 jig that I ordered. I hope that jig makes all my dreams come true!
Athena Karos says
Hello. I have a question. I have seen your video on how to float walls and then sand them to get smooth walls. I purchased a Festool sander to do the job. Yet, when I purchased it, the person behind the counter told me that my home, built in 1951, most likely has lead paint. She told me not to sand the walls. I need to get professionals in to take out all the walls with lead paint. How do I approach this?
Thank you,
Athena Karos
Sandra says
You can purchase little swabby things that check paint for lead. That way you’d know what you’re dealing with. I definitely wouldn’t sand it you have lead paint though.
Sherry says
I’m joining Team —“sherwin williams decorator white”— i-need-to-know. 🙂
Your work is beautiful, inspiring, and freaky good. I will never be that skilled but if I can use the exact paint and color, maybe I can play like it looks as great as yours. Anxiously awaiting the color specifics for Sherwin Williams. Thanks!
Deanne says
We are now doing your tongue and groove approach vertically on the walls and it is a an excellent approach! I looked around online and no one else, that I can find, is talking about this approach so hats off to you for sharing this! The SKU # for the plywood at Home Depot is now #165-891 at least in my area.
We are using our bigger trim gun, an 18 gauge, and it’s working out fine. We have only done a small area so far and working out the bugs before we move onto other areas. Just ordered some feather fingers that might help with getting the diagonal cuts more precise on the table saw since at times there can be small gaps to try to fill with paint or spackle. I am not so sure if caulking is the answer either. The caulk around my windows eventually cracks. So shooting for a better fit instead. I love the idea that we don’t have to remove window and door trim to install this tongue and groove look ; )
We realized our hand painting and rolling wasn’t providing a finish we were hoping for on the tongue and groove. I really didn’t want to go down that paint sprayer isle but relented and began researching this whole paint sprayer thing. O M G ! You are so right this sector and you were not exaggerating. They ARE making things much more complicated than it needs to be. There are so many brands and models it feels a bit like a nut shell game the way they deliberately make this much more confusing than it needs to be. You take two steps forward and one step back with all this. If I am having a hard time ferreting this out I can just image how others are dealing with it or not dealing with it. It is also making me a bit peeved and wanting to adjust my expectations lower and not be led around by these companies. It was touch and go whether I was willing to play their game on all this.
Since you bought your sprayer . . . I was thinking there had to be a newer, better, cheaper model that can do both oil and water based paints. Well so far the Greco 390 is still the best one from what I can tell for the money, but the price has not improved. I feel these things are over priced for DIYers. I could spend less for one that just does water based paints but the reality is I know we will want to use oil with stains on fences or decks or oil paints on furniture and cabinets. There was this adapter for 85.00 you could use oil with water based Greco sprayers but the reviews for it was one star on Amazon which was not convincing.
I really think DIYers are not specialists and these units need to be able to handle both types of paints. I totally agree once you buy one of these sprayers hopefully you won’t have to buy another one and spend a lot of time dealing with the way these things are marketed. I give them a one star or F for the way they market these. I can see why some just give up or buy the wrong sprayer and this can’t be great for business but then again I think many folks end up going cheap and buying up as they learn they can’t do much with the cheaper models. So maybe it is in their best interest to confuse consumers? I do think there is a reason they do this maybe the strategy is to lure them in with cheaper models and then paint them into the corner with how limited or inadequate it is to get them to buy another one.
I have room to store just one sprayer, so it has to be a multi-tasker. Plus it seems like a headache having to learn how to use these units with certain settings and paints. Learning how to use one machine seems like less of a mind bender for this multi-tasking DIYer. For me as a DYers we end up being a jack/jill of all trades and a master of none. Having to learn all the quirks of one sprayer and paint brand is about as much as I want to sink into this whole paint sprayer thing.
I think it comes down to making more money with selling many models rather than making one good model that does it all for a reasonable price for DIY consumers. I would never buy a faucet that only had a cold water handle why would I buy a water based paint sprayer only?
I looked at other brands but it seems like Greco is the leader in this sector for now but if someone really decided to break from the pack on this and had a better approach I think it would sell well. We plan to use it a lot for remodeling and needed one that would hold up. We are older and and creaky and the thought of rolling all that paint out is something that will take us forever to do. I did wince when I clicked Submit Order since I really hated spending so much for just a paint sprayer for DIYer. I tried Sherwin Williams but they were charging 779.99 with sale starting March 1 but found a better deal with Portland Compressor online versus their Ebay venue and was able to buy the 390 for 699.00 plus tax. Amazon wanted 850.00! So I would say shop around before you buy since the markups on these things can be significant. The 390 seems to be the entry level model into their professional line of offerings but seems to hold us better than the lower priced Greco versions.
Right now I have a love hate feeling about this sprayer but maybe as we figure it out there will be more love down the road. I do think these sprayers get a significant amount of negative reviews and after reading so many you wonder if this is really a good idea. Many seem to not be able to figure out what they are doing wrong with them and I have to partly blame the companies for creating all the confusion and anxiety with the way they market them.
We appreciated watching you spray your cabinet door with this sprayer on the post. You made it look easy and doable and I can envision being able to effortlessly spray our cabinet doors down the road with practice and experimenting : )
Amy calliss says
Hi
Just wondering if you sand between coats for a smooth finish or if you find this unnecessary? Also how many coats of primer and paint do you do?
Thanks
Amy
Lisa says
Hi, i love your work! I was at sherwin williams and asked for decorator white. He said they didn’t have that color, they had “decor white” but it looked more yellowish than white?
Sandra says
Oh great! The store manager here is the one that suggested it to me. Maybe it’s HIS “Decorator White”. I’ll get the formula!
Lisa says
Thanks Sandra!
shuchi says
I would love to know as well. Benjamin Moore makes a decorator’s white. I wonder if he used that color as a base? But, I’m a sherwin Williams fan as well so would love to know the secret formula…thanks so much! I love your site!
David says
sawdust girl… great work. currently remolding trim/woodwork in our house and also have question about the white. local sw only carries extra white stock in sg pro classic acrylic latex… very close to bm decorator but slightly less grey. did you match the bm or just use the extra? really like the look of the white you have. thx for any info you can provide.
Anna says
Thank you for sharing this, it helped me a lot…..and your work is awesome!!
Sandra says
Glad to hear it. Thanks Anna.
John says
It looked like you were twisting your wrist when you did the top, rather than keeping the gun parallel to the surface. You got great results, regardless.
Sandra says
Did it? Could you see my wrist? I definitely do veer off coarse periodically so it’s entirely possible. LOL
Katherine says
My husband paints cars at an auto body repair shop and I’ve watched him paint many cars from the safety of the other side of the glass doors of his booth. I must say, he’s got nothing on you! Those cabinet doors are looking mighty spiffy! Thanks for sharing!
Sandra says
Oh my. I’m sure I got nothing on him. Detailing cars is a whole other animal — I’m sure!