Shop Made Jig for Mortising
Mortise and tenon, one of the oldest and strongest carpentry joints, with an added haunch that makes this wood joint even stronger and perfect for gate construction.
Hi I’m Sandra’s sister, Julie. If you have been following the progress on Calderwood Cottage you have seen me doing some demolition and other shenanigans with Sandra. When I’m not in Tennessee working on our flip house, I live on a little ranch in San Diego with my amazing NOT into sawdust husband and gorgeous animal loving teen daughter. I have no idea how I got so lucky, but I pinch myself every day because I am having so much FUN, and yes it is stressful, and hairbrained, and all the messy stuff that life is, but mainly really really fun! I mean who wouldn’t give their left thumb to work with Sandra every other month?
One of my big pet peeves here on the ranch, are sagging, broken down gates that don’t open or close properly. I am in the process of making/remaking several gates and want my gate construction to be strong, sturdy, and sagproof! For my first gate I wanted a tongue and groove lower panel with a lattice top.
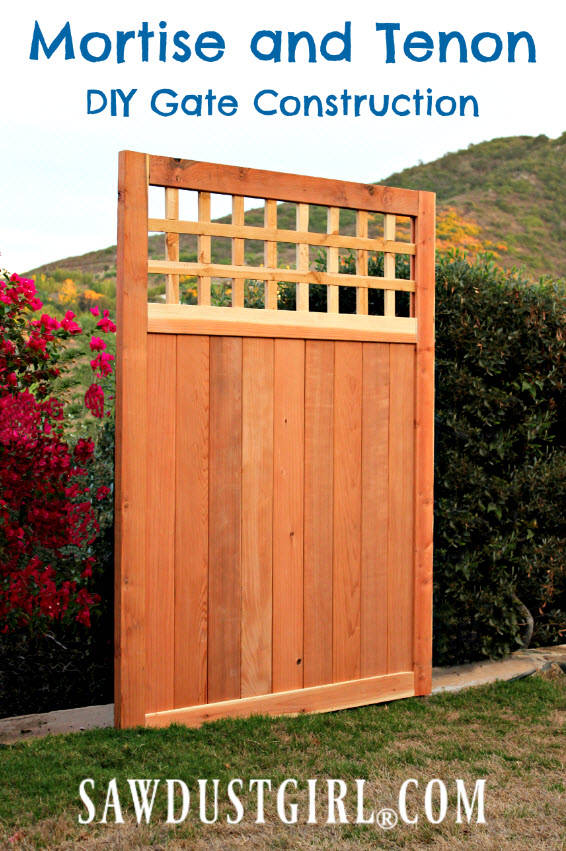
Mortise and Tenon Gate Construction
I decided that a haunched mortise and tenon joint would be a strong construction method for this gate. Mortise and tenon is one of the oldest and strongest carpentry joints, and adding a haunch or hip to the tenon makes it even stronger. The haunch increases the stiffness and improves resistance to racking and it is especially useful when used with grooves or dadoes for panels.
Materials:
- 5 Redwood 2x4s
- 9 redwood 6′ tongue and groove 1/2″ panels
- 6 cedar lattice strips
- Rapid Fuse wood glue
- scrap wood for router jigs
- plunge router
- 1/2″ x 1/2″ router bit
- 2″ x 1/2″ router bit
- Lots of clamps
Step 1: Cut Mortises and Dadoes
My biggest challenge on this project is that my table saw, which is also my router table, is in storage. So I had to devise a way to make my wood joints with my available tools–hello plunge router. I also wanted to use dimensional lumber to keep the cost down. The problem with routering a 2×4 is that it has a narrow surface area with rounded edges. It can be a challenge to keep the router flat and get precise even cuts. Also, the dado and mortises have to be placed precisely, in my case centered, so that the tenons and panels will fit.
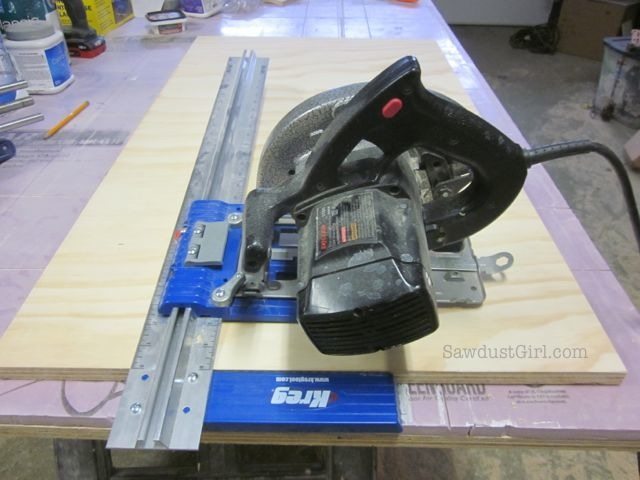
My solution was to create an edge guide jig that held the router centered and created additional stability as I moved the router along the lumber. Of course you can purchase similar jigs, but where is the fun in that?
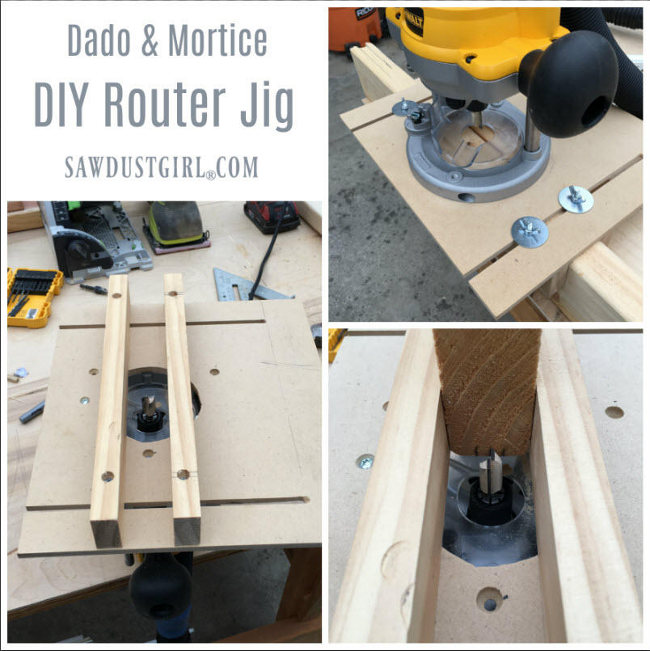
Once I had the jig ready I routered a dado in a test scrap to practice my technique and ensure that the dado was perfectly centered. Then I cut the dado in all of the rails and stiles. Next I cut the rails and stiles to length, making sure to include 2 inches on the rails for the tenons. Starting and ending the dado was a little tricky and cutting to length after routering let me cut away the imperfections on the ends.
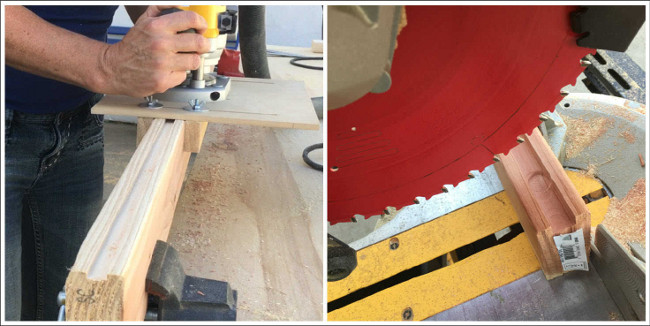
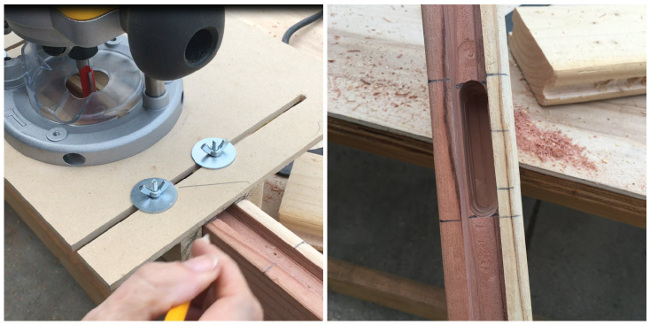
To cut the mortises, I carefully marked their locations, then used the router bit to locate the beginning and end of each mortise and marked where the edge guide was at these locations. Then I just routered 1/2 by 2″ deep between each line which gave me very precise mortises.
Step 2: Cut Tenons
The next thing I needed to do for this wood joint, was to cut tenons. This is where I really wished I had my table saw or router table, grrrrr! I created another jig that allowed me to router the tenons, not perfectly, but close enough to create nice tight joints. I secured a scrap of wood with a nice straight edge onto 1/4 inch MDF then used the router to cut a straight line a bit wider than my 2 x 4s and used the edge guide to make a perfectly straight line with the router. Then just use the jig to cut away 1/2″ of wood on both sided to form a 2″ long tenon.
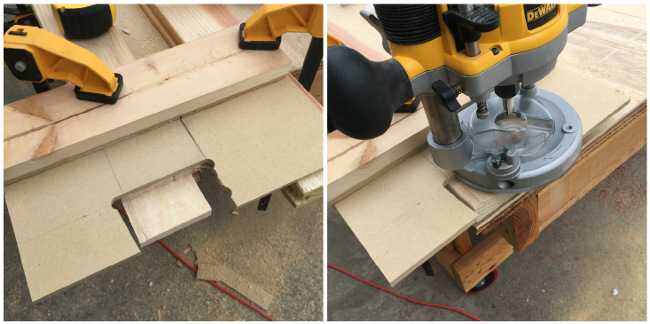
At first I tried it with just the straight edge guide, but it was really challenging to keep the router flat at the top of the tenon. The sides helped to keep the router stable and create a more uniform tenon. The 1/4′ MDF did flex a bit which created a tapered start to the tenon. It would probably be more effective with 1/2″ material. I did nick the edges of the jig quite a few times, creating a really ugly jig. I mean it got really ugly–I’m not even going to show you pics! However this did not impact the effectiveness of the jig, as the sides are just there for support.

Once the tenons are cut, I marked and cut the haunches into the tenons. Since the mortises are cut with a router they are rounded. I used a sharp chisel to round the corners of the tenons so that they would fit into the mortises.
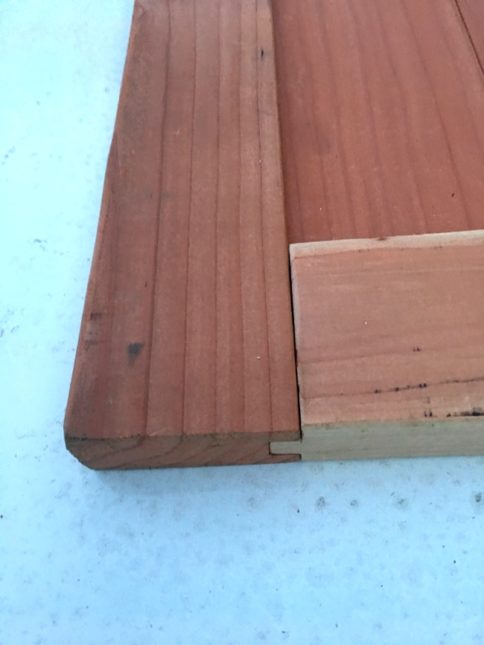
I removed material slowly and test fit frequently, ensuring that each tenon was perfectly sized for its accompanying mortise. Each carpentry joint should be nice and tight. I also rounded the edges of the rails to match the sides of the stiles. Otherwise the blunt edge of the rail would butt up to a rounded edge of the stile. This way both edges are rounded creating a more decorative groove.
Step 3: Assembly
Wahoo, on to assembly. I glued all three rails into one stile, making sure to keep everything square and plumb. I used Dap’s Rapid Fuse Wood Glue which worked awesome! Long re-position time, but fast (30 min) cure time. So I glued, clamped, and spent 30 minutes prepping my lattice while the glue cure. I was able to install the panels in 1/2hr, rather than waiting overnight, which is what I would have done with regular wood glue.

I slid the panels into place, tapping with a scrap piece of T&G when necessary. I ended up putting a clamp across the two rails to keep everything square as I tapped the T&G into place as it was quite snug. Next I created and installed the lattice by routering half lap wood joints into the lattice strips. I did a final dry fit of the last stile and almost had a heart attack, as it seemed like my center rail was a bit proud. It turned out to just be the lattice which was easy to tap over, whew! Glued and clamped the whole thing together, 30 minutes for the glue to cure and, boom–done!
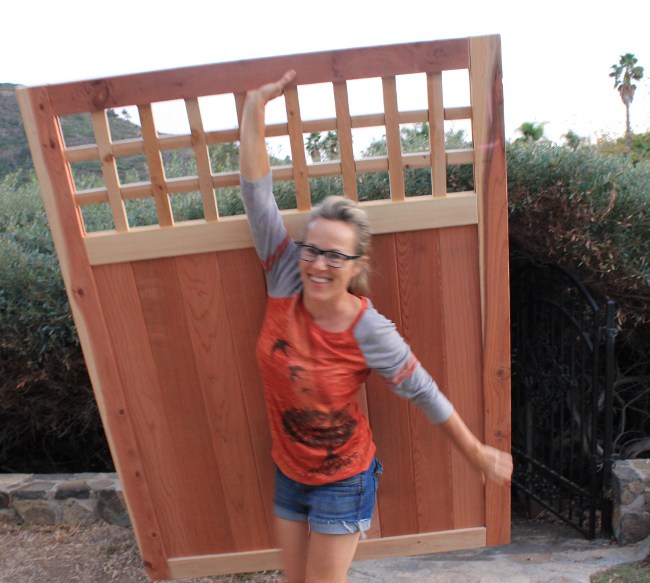
How strong is it? Only time will tell, but I did haul it around the property by just the top rail and it didn’t seem to mind. So at least it’s off to a good start. Now just three more gates, 18 panels, a grain feeder, animal shelter, chicken coop, automatic waterers, compost bins……..
I’m going to go have a cup of coffee and stare at my pretty gate for a few minutes before I get overwhelmed with my never ending to do list.

I love how this site is turning into a sister site. 1 amazing person is great, 2 together is awesomeness.
I love that you are showing us some of your life. Thank you.