Mitered Edge Wood Joint with DIY 90 Degree Clamps
Hey everyone! I’m Shara from the DIY/Woodworking/Furniture Building blog, Woodshop Diaries and I’m so excited to have the opportunity to join a VERY talented group of DIY bloggers in Sandra’s mentorship squad! This month, we were challenged to step out of our comfort zone and attempt some wood joint styles we had never done before and we are sharing our tutorials and experiences with you. Today, I will be showing you how to do mitered edge wood joints with homemade 90 degree clamps.
Mitered edge wood joints can be done in different ways and used in many different applications. I mainly focus on furniture builds and used mitered joints to build a Mid Century Dresser.
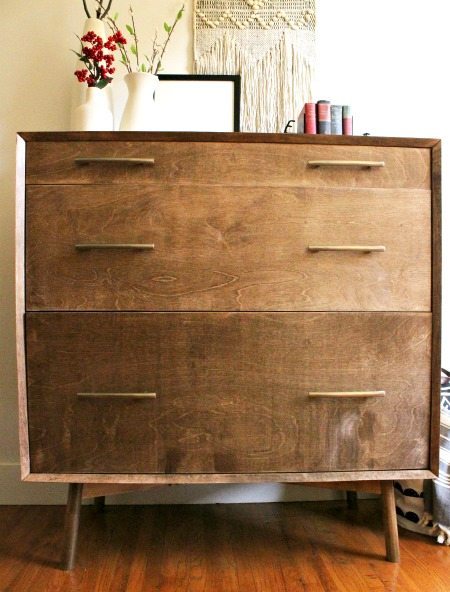
After discussion with Sandra, I became aware that glue alone may not be strong enough for a piece of furniture this large. I will show you how I joined the sides with just glue, but if you attempt this, you may want to also add splines or dowels to the joints to add more strength. While my cabinet is holding fine for now, adding dowels or splines may help it last longer and prevent these joints from failing over time.
Materials:
- Plywood for cabinet sides (size will depend on your application)
- Scrap 1x pieces (1×6 works great)
- Drill
- 1 1/4″ or larger hole saw
- Clamps (both small and large)
- Speed Square
- Wood Glue
- Miter Saw
Step 1: Cut Your Mitered Edge
First, you need to cut your cabinet sides. Since you will be doing mitered corners, make sure you miter them when you cut. This means you will need to adjust the saw blade to 45 degrees on your circular saw or table saw to make the cuts.
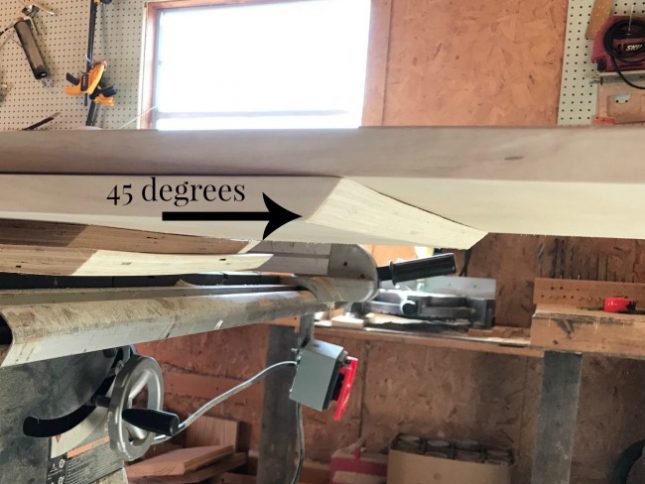
Make sure both ends of each cabinet side are mitered 45 degrees and the miters should not be parallel to each other. Also, be sure to check your angle on your blade with a speed square or digital miter gauge. Being off just a little can really throw you off later on.
Step 2: Make Homemade 90 Degree Clamps
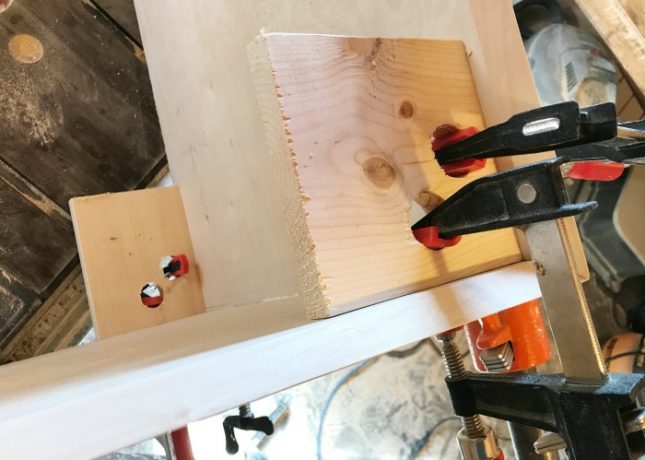
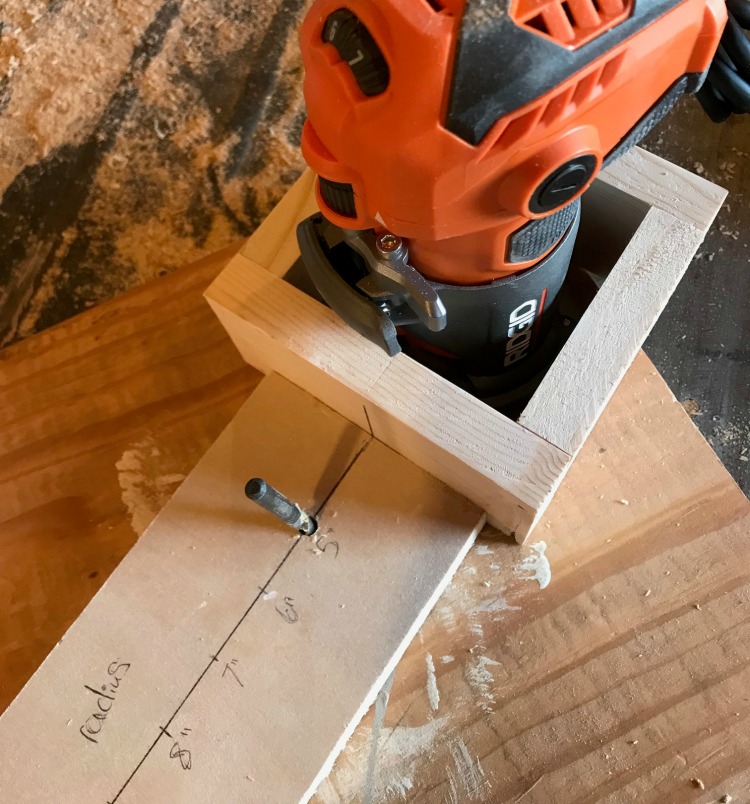
If you have some fancy clamps, that’s great. But, if you are like me and just have basic clamps, you can make some homemade 90 degree clamps that work really well. When you glue up the sides, you want to make sure you clamp them square while the glue dries. For this, you can grab some scrap 1x6s (or larger) and use a 1 1/4″ or larger hole saw to drill holes in the pieces like shown. Make sure your clamps will fit into the holes.
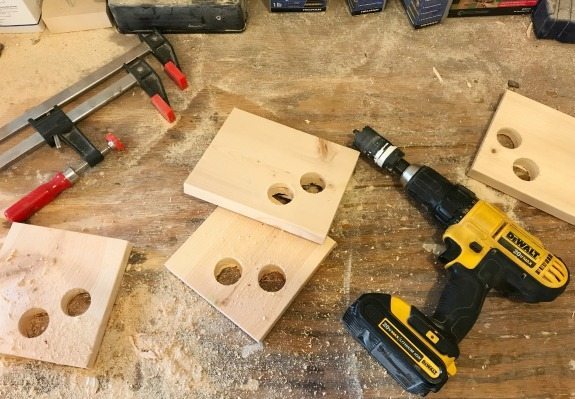
You can make several of these depending on how many sides you glue up at once.
Step 3: Glue Up the First Mitered Edge Wood Joint
Add some wood glue on one mitered edge of one of the cabinet sides. Place the adjacent cabinet side onto the glued edge and use your homemade 90 degree clamps to hold everything square like shown.
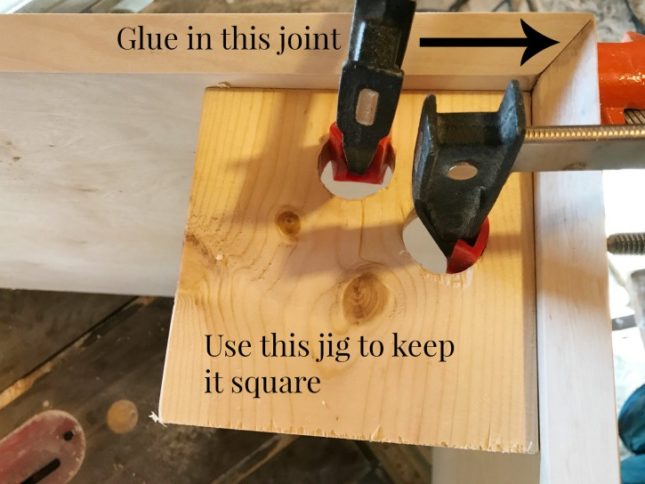
Once you have one in place, add another on the other end of the joint so that you have one on the top and one on the bottom (or back and front…whichever way you want to look at it).

Step 4: Add the Third Side
Then, move to another adjacent side and add some glue in the mitered edge joint and use two more clamping jigs to hold this side square.
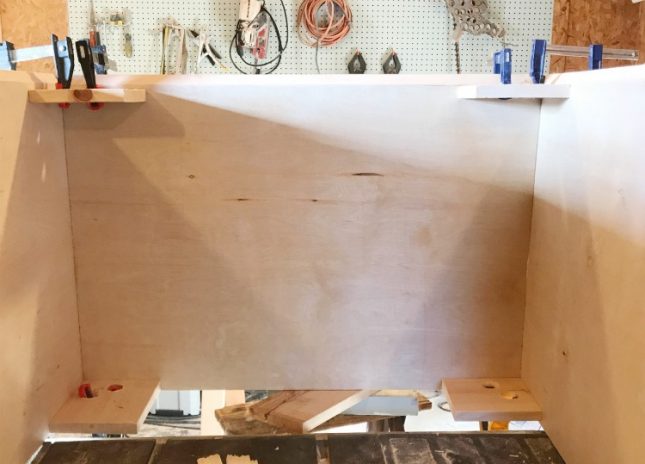
Step 5: Adjust the Corners as Needed
Because sometimes you have slightly warped plywood pieces or because sometimes your cuts may be slightly off, your corners may not line up perfectly. You should have your backs and fronts lined up pretty well with the corner clamping jigs, but what if your middles are a little bowed??
You can use large clamps like these pipe clamps to help line up the middles if they are a little out of line. I think a couple of my plywood sides had a slight bow to them.
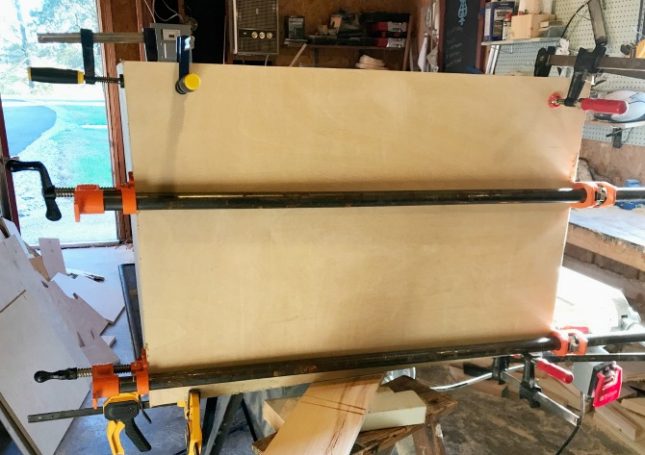
Don’t worry if there are still some small gaps, you can use some putty to fill in later, but the clamps will help take care of most of your problem (if you have one…like I did).
Because of this, it’s helpful to glue up three sides like this and add the fourth one after the glue has dried.
Step 6: Add the Final Side
Once the glue is dry, remove the clamps and the clamping jigs and shift to the other side of the cabinet. Apply glue to the mitered edges of the last side and clamp everything square to the two dresser sides using the clamping jigs.
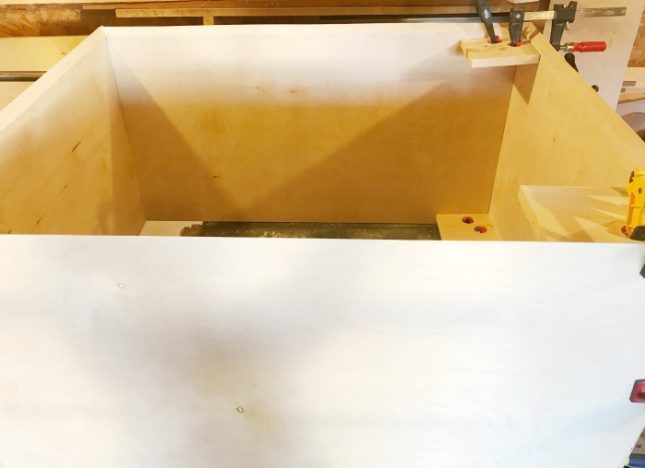
Use large clamps again as needed if the middles don’t line up perfectly.
Once the glue is dry, apply wood filler or putty to the corners and sand smooth.
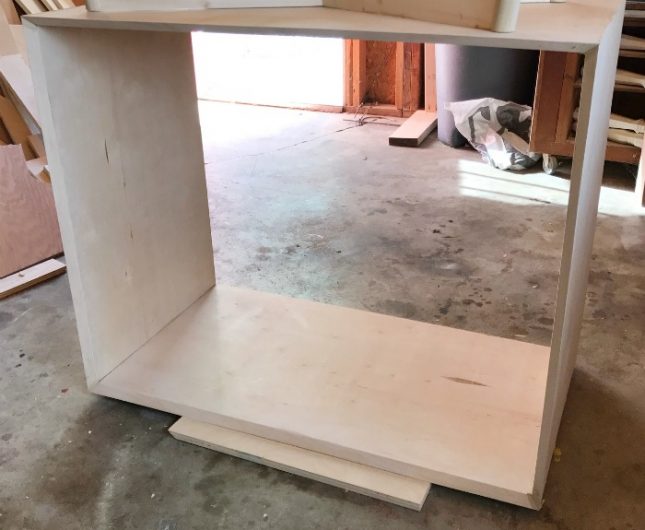
Now you have a nice square miter jointed dresser carcass ready for legs, drawers, doors, whatever you want to add to it.
I love mid century style furniture and many of these types of pieces use mitered corners. They are a little more challenging than simply butt joining the cabinet carcasses, but make sure a really fun, clean look. Click over here to check out how I gave this simple mitered corner cabinet carcass a fun, retro, mid century look with some round legs and large drawers.

And stay tuned all month to see the rest of the squad share their wood joining tutorials!
Hi girl – I am going to make some corner braces tomorrow for my cedar chests. Mine will be different than yours but go with what works. I have been fighting bar clamps that slip, slip, slip when I place them on the outside corners and try to square the box.
Perfect for an in-the-wall cabinet project I’ve been wondering how to glue and clamp!
So clever! I only have a couple of square clamps so I’m going to keep this tip on file. Love the bevel detail as well.