Madison Avenue Collection – Bookshelf
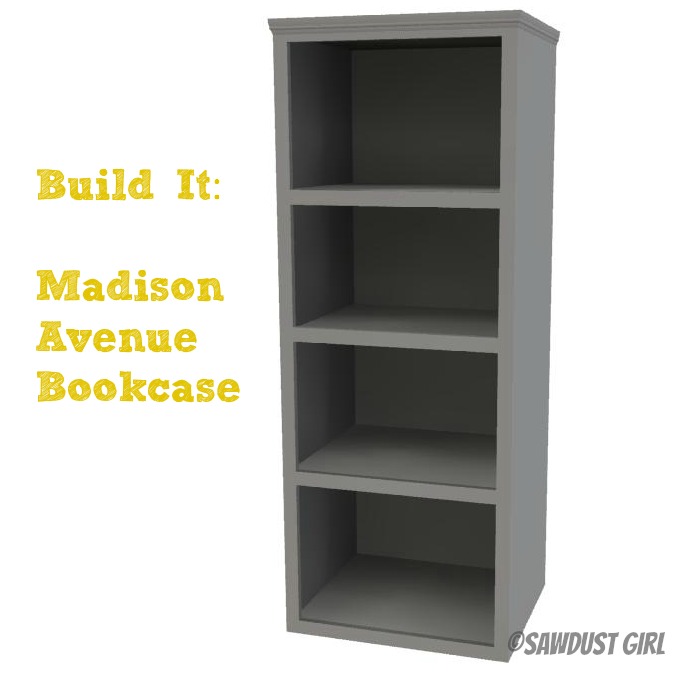
This super easy DIY bookcase with adjustable shelves is the next installment of the Madison Avenue Collection of plans. This super simple bookcase could sit on the floor alone, or it can set on top of the Madison Avenue Large Desk Cabinet. This tutorial shows you How to build a bookshelf
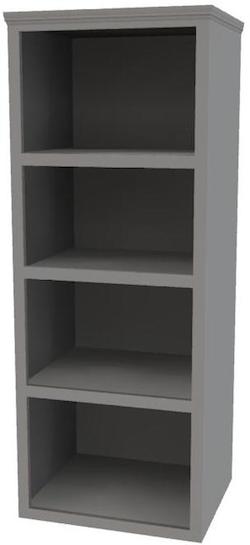
Materials:
- 3/4″ plywood for cabinet
- 1/2″ plywood for back panel
- pocket hole jig
- Wood Glue
- 1 1/4″ pocket hole screws for 3/4″ material
- 1″ pocket hole screws for 1/2″ material
- 1×2 Poplar for faceframe
- shelf pins
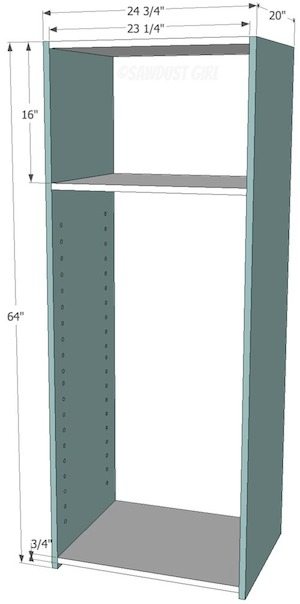
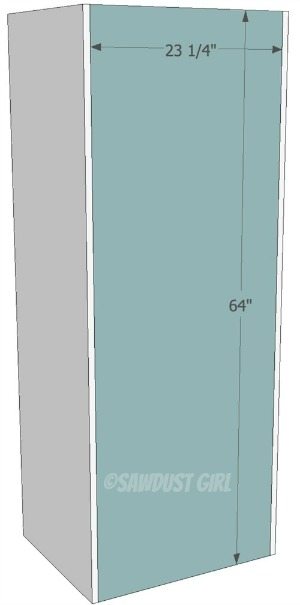
1. Build Carcass – 3/4″ Plywood
- Drill shelf pin holes in your sides if you want adjustable shelves. Refer to Basic Cabinet Building tutorial for more details.
- Assemble sides to top and bottom using wood glue and 1 1/4″ pocket hole screws
- All shelves are adjustable and 1/2″ shallower than the rest of the cabinet to allow for the back panel.
- Bookshelf will fit 3 adjustable shelves if they are spaced about 16″ apart.
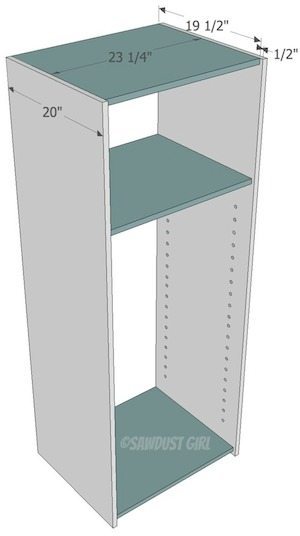
2. Attach Back – 1/2″ Plywood
- Use wood glue and 1″ pocket screws or finish nails to secure the back panel inside the recess created by inset top and bottom piece.
- Secure back panel to sides and top and bottom pieces.
3. Build and Attach Faceframe
- Use pocket screws to build the face frame (Tutorial)
- Attach with wood glue and finish nails
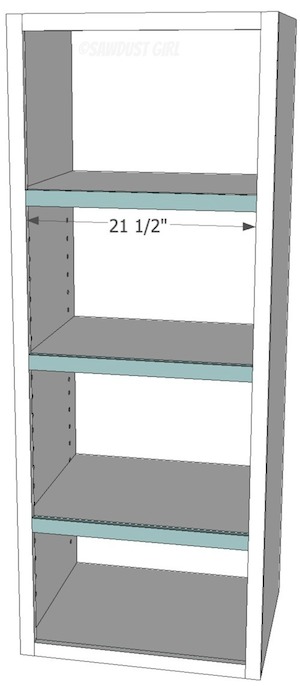
4. Add Shelves
- Cut adjustable shelves about 1/8 -1/4″ more narrow than the width of the inside of the bookcase so they can be put in without scratching the sides.
- Optional: Set each shelf on shelf pins and then add a face frame piece to the front of each shelf. Make sure their is a 1/8″ gap on each side of the shelf face frame and the bookcase face frame to allow the shelf to be moved to a different location in the bookcase later on.
5. Crown Molding -Optional
- If you plan on using this bookcase alone, add crown molding to the front and sides. If you plan on building multiple bookcases and putting them together, it will look more custom if you add the molding after they are all built and secured together.
You may be interested in my many crown molding tutorials, including one for adding crown molding to cabinets. See all plans in the Madison Avenue Collection.

How can I print the plans for this bookshelf? It’s beautiful and would like for my husband to build me one….
You can have a big box store cut them for you but they most likely won’t be super precise cuts. (That said, I relied on this method for years.) It’s good to cut them yourself if you have the tools.
How do you get the size boards that you need? Do you cut them yourself, or do you order the specific dimensions at a store (example Lowes, etc.)?
My wife has asked for a fairly large combination of cabinets and bookshelves for our living room. My question is this, what is your view of doweled joints in mdf. An old unit I have dismantled and it was chipboard with glued doweled joints which have stood for over thirty years. The chipboard used was 1″ thick.
Very helpfull keep up the good post cheers