Double Vanity with Center Drawers
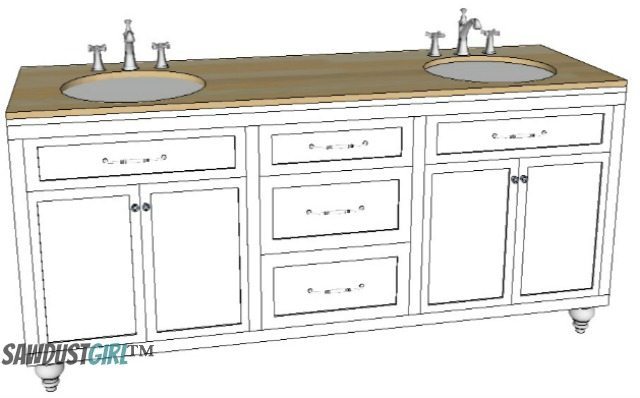
I’m always drawing up plans and have folders full of them. Today I’m sharing plans for a DIY Vanity. A Double Vanity to be specific! This vanity is 32″ wide with center drawers.
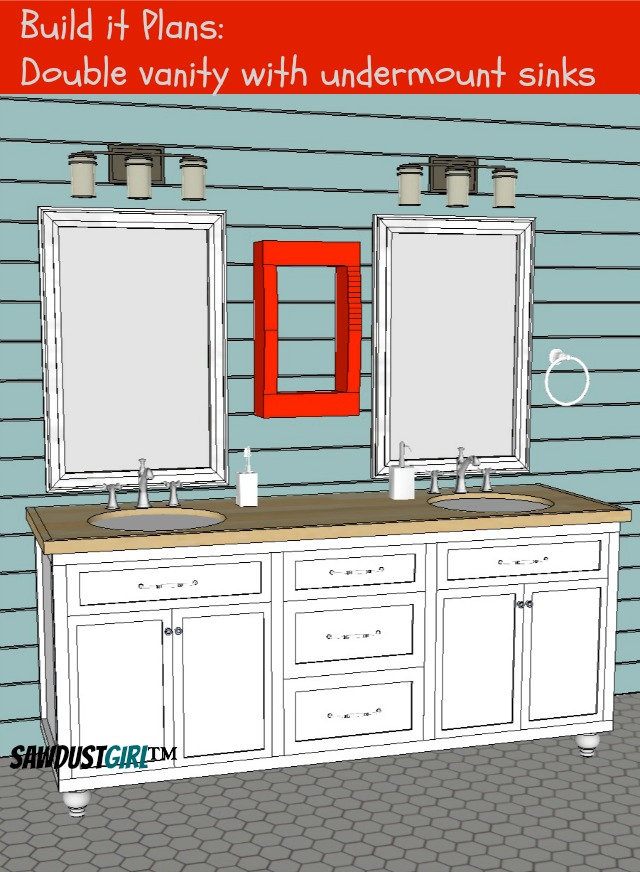
Double Vanity with Center Drawers
This plan can be built as a 32″ tall DIY vanity with undermount sinks OR can be used with vessel sinks for a taller vanity. Double duty!
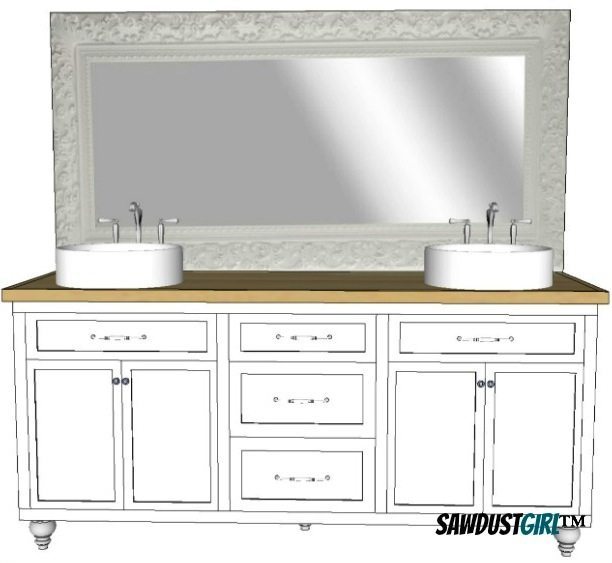
DIY Vanity
Materials:
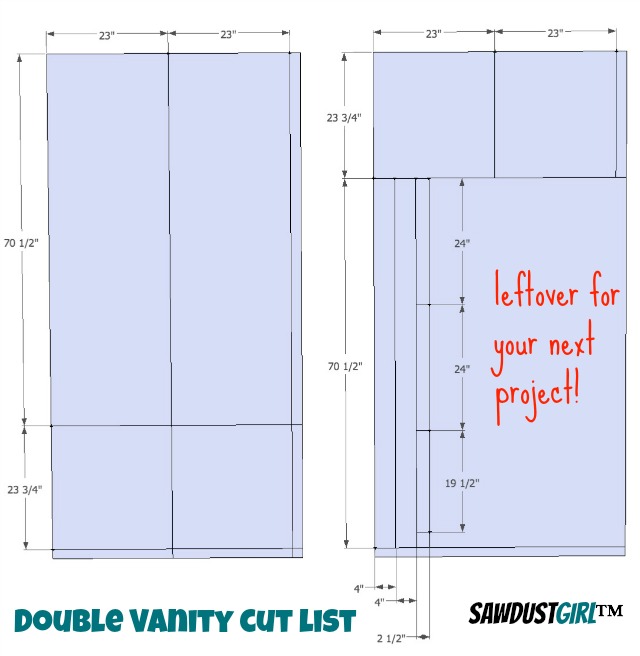
- 2 -sheets of 3/4″ Cabinet grade plywood cut as shown below.
- 5 -8′ 1×2 poplar for faceframe
- 1- sheet of 1/2″ plywood for drawers
- 1- sheet of 1/4″ plywood or backerboard (smooth)
- door and drawer front material (3/4″ solid wood with applied moulding is the easiest door to make or you can follow my door building tutorial and make rail and style doors)
Tools:
- Drill/driver
- Pocket hole jig
- miter saw for faceframe
Supplies:
- 1 3/4″ wood screws
- 1 1/4″ pocket hole screws
- wood glue
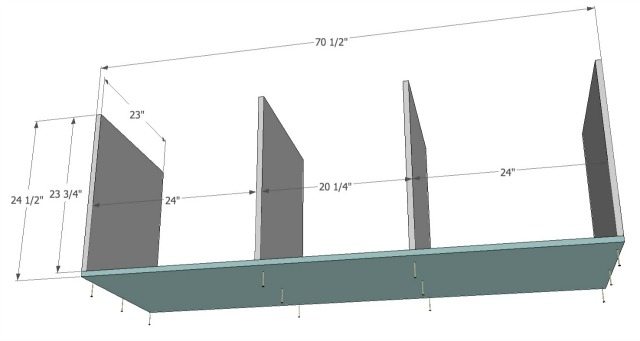
Step 1
– Secure dividers and sides to bottom with 1 3/4″ wood screws.
Step 2
– attach long cleats to top. Drive two screws into each divider.
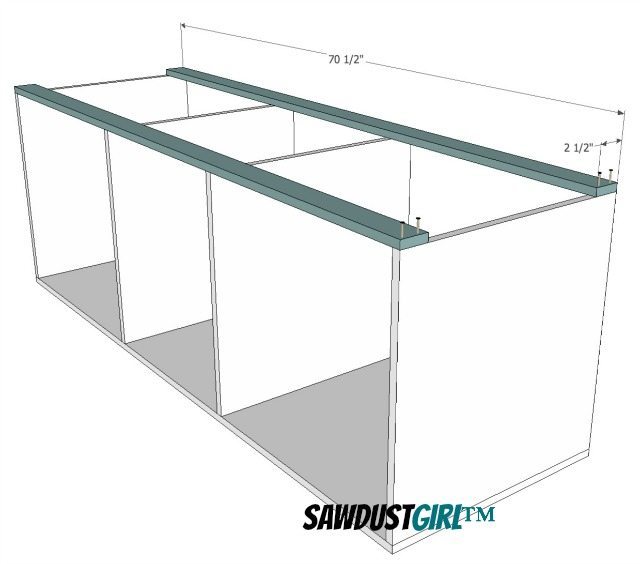
Step 3
-attach back cleats using pocket hole screws.
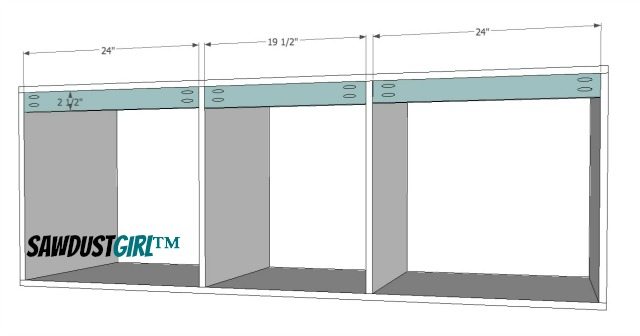
Step 4
– secure bottom. This second bottom is going to make this big vanity heavy but will add stability and help distribute the weight of the entire piece onto the bun feet.
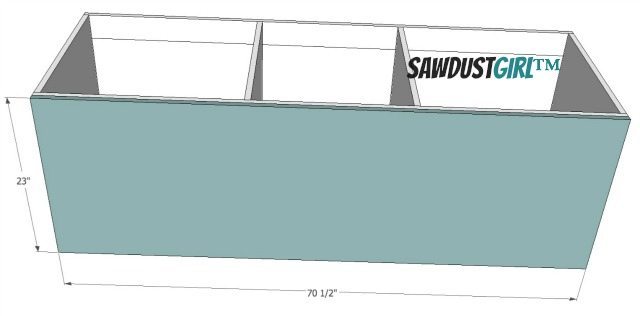
Step 5
-square up by checking the diagonal measurement from top left to bottom right and visa versa. The measurement should be exactly the same. Doesn’t matter what the number is – just make sure it’s the same.
– secure the back with 3/4″ – 1 1/4″ staples or screws.
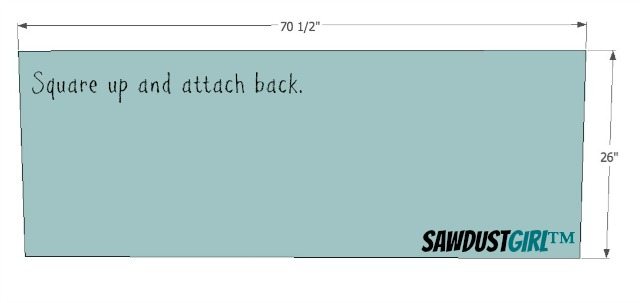
Step 6
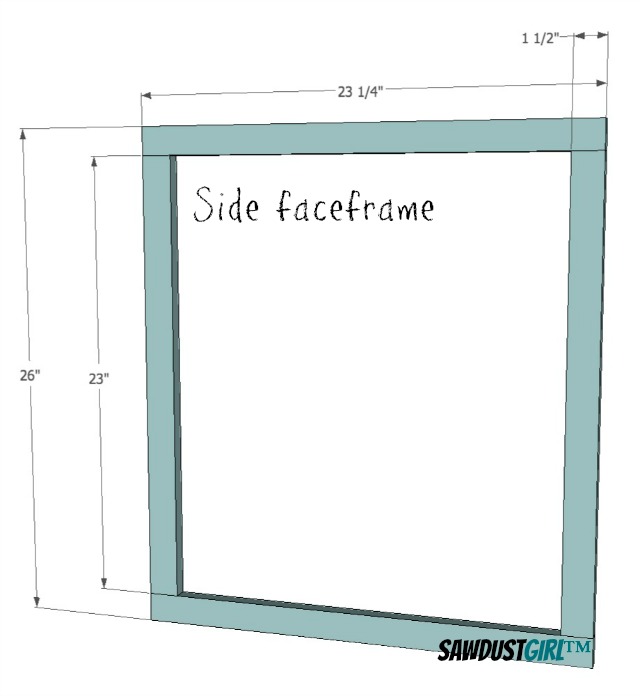
-Build side face frames our of 1×2 poplar (which is really 3/4″ x 1 1/2″) with 1 1/4″ pocket hole screws. Make sure to adjust size to fit the side of your vanity specifically. It should be flush with the front and back (covering the exposed side of back you just attached).
Step 7
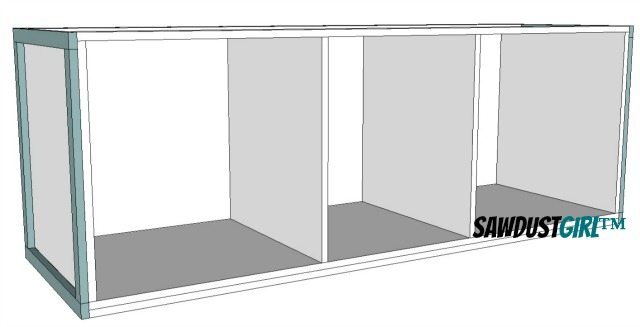
-attach side face frames with glue and small brad nails.
Step 8
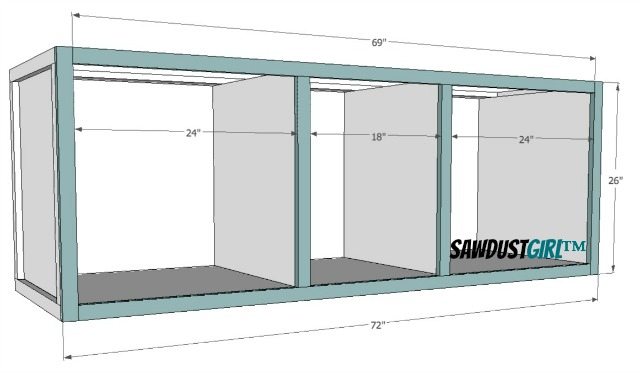
-Build front face frame, making sure the placement of the styles (vertical pieces) are in the correct place for YOUR DIY vanity. Things don’t always turn out exactly like you planned them, even with the best planning so double check your specific dimensions before building your face frame.
Step 9
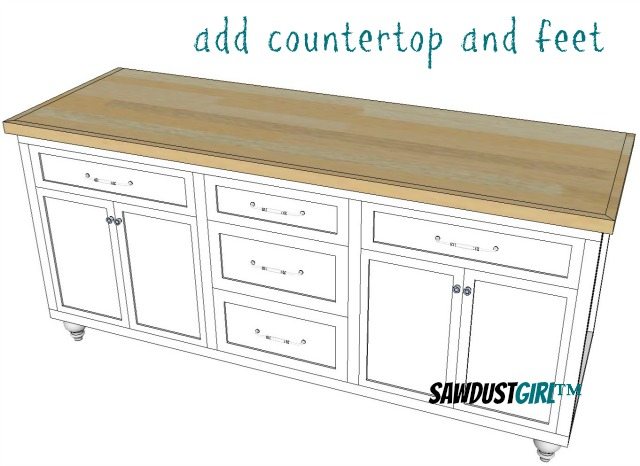
-Add countertop and feet. Build your own countertop or buy granite or tile or do concrete… the possibilities are endless.
Step 10
– Build drawers
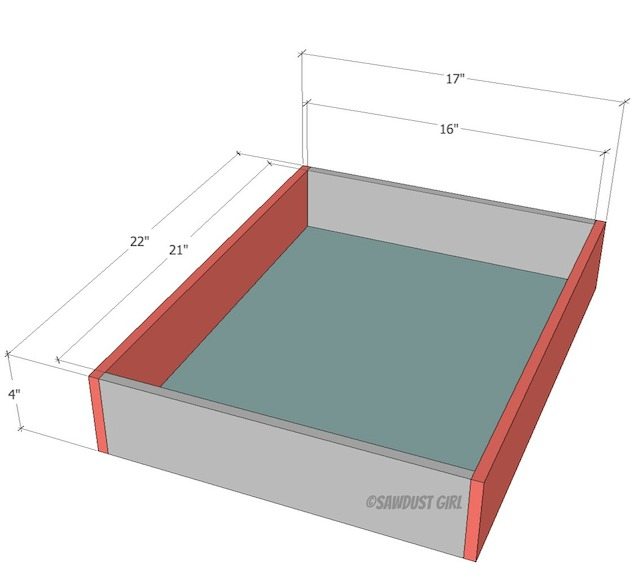
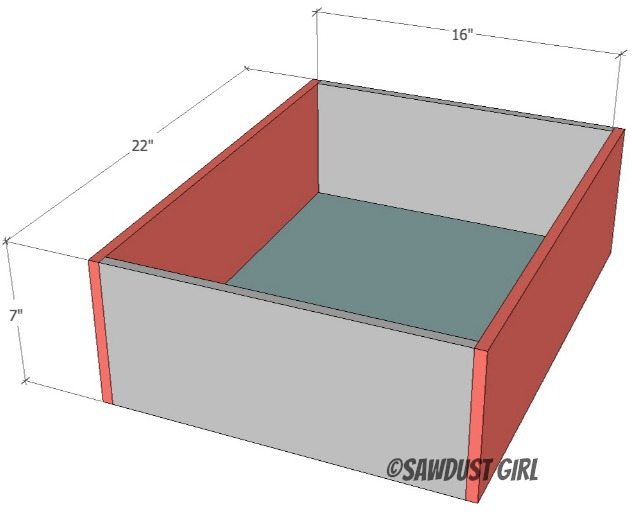
There are many ways to build a drawer box depending on the tools you have and your level of experience. Build your drawers paying attention to the outside dimensions. This will leave 1/2″ clearance for 22″ drawer glides.
If you don’t have a router table or table saw to cut a dado, you can simply cut the drawer bottom to fit exactly inside the box and glue and screw it together or you can follow my tutorial for building a cabinet drawer with a dado for drawer bottom.
Center top drawer dimensions (build 1)
Center bottom 2 drawer dimensions (build 2)
Step 11
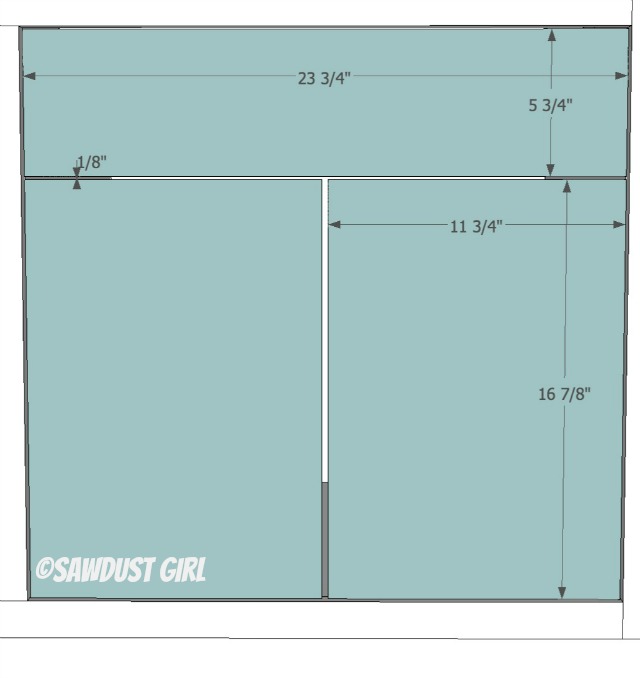
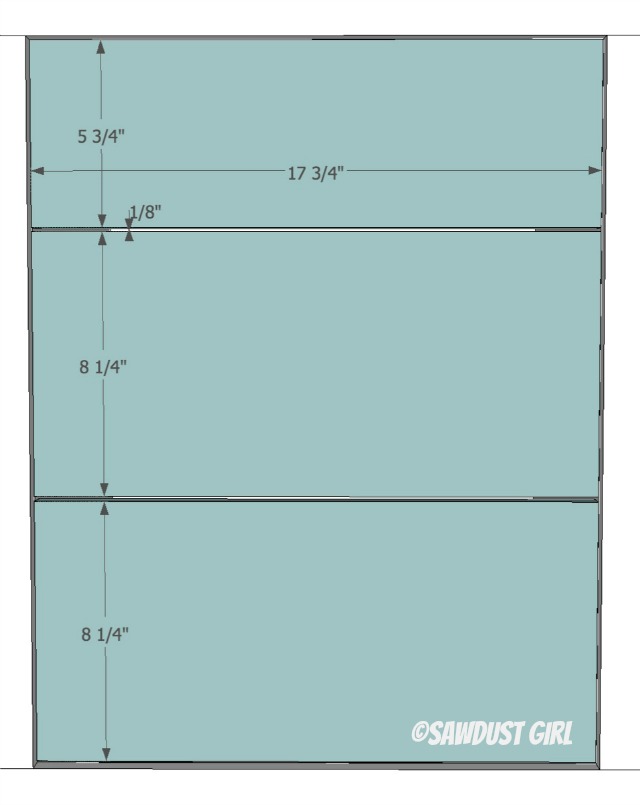
-Build doors and drawer fronts for your double vanity
-(3/4″ solid wood with applied moulding is the easiest door to make or you can follow my door building tutorial and make rail and style doors)
Dimensions for false fronts and doors for sides.
Dimensions for center drawer fronts
It should be all ready to paint up, add hardware and use! Let me know if you build this plan and how it works out for you. I want to see! In fact, share your build pictures with the whole wide world on TheSawdustDiaries!
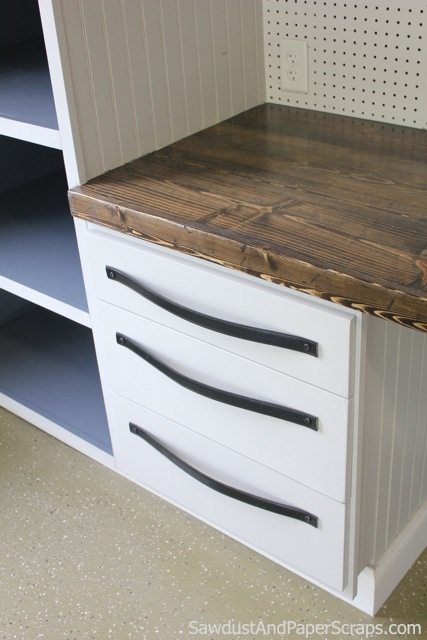
Step 10 talks about drawers and why I don’t have instructions for building them. There are many ways to build drawers — based on the tools you have to use. There’s a link in the post but here’s one to all my tutorials on building and installing drawers. https://sawdustgirl.com/category/projects-and-plans/cabinet-making/drawers/