Toy and Shoe Locker Storage
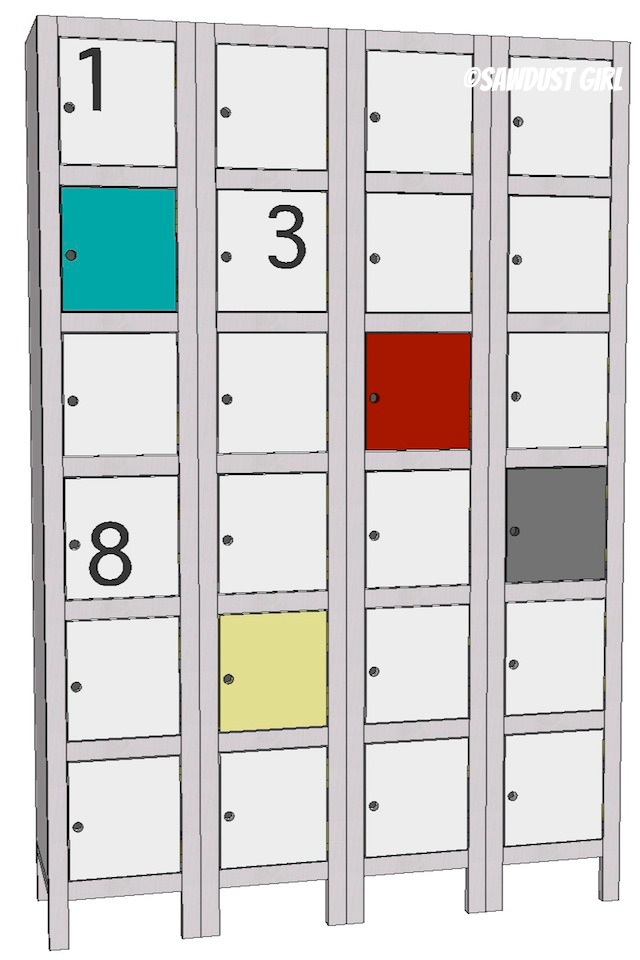
Today I’m sharing free woodworking plans for these cute storage lockers that would be the perfect place to organize shoes or toys. Great for a playroom, mudroom or even an entryway. Make sure to secure lockers to the wall with an anti tip kit so they don’t tip over.
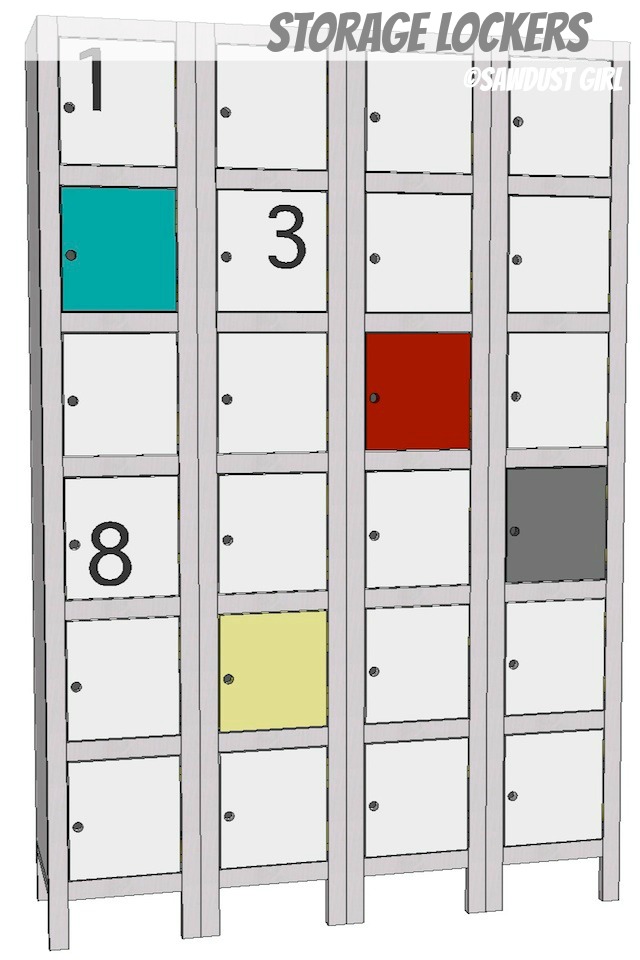
Storage Locker Woodworking Plans
- Plan and cut list is to build a single locker tower.
- Build as many as you like and secure them together with 3/4″ cabinet screws.
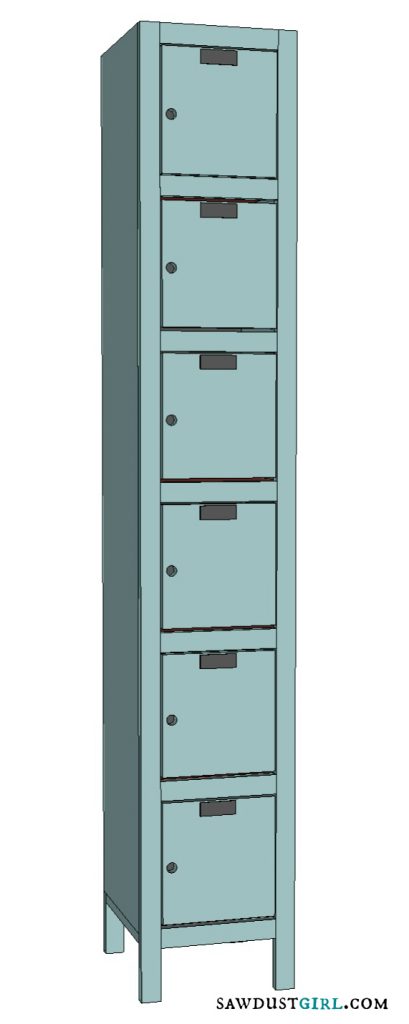
Materials:
- 1 1/2″ wood screws
- Wood Glue
- pocket hole jig and
- 1″ and 1 1/4″ pocket hole screws
- 1×2 Poplar for faceframe
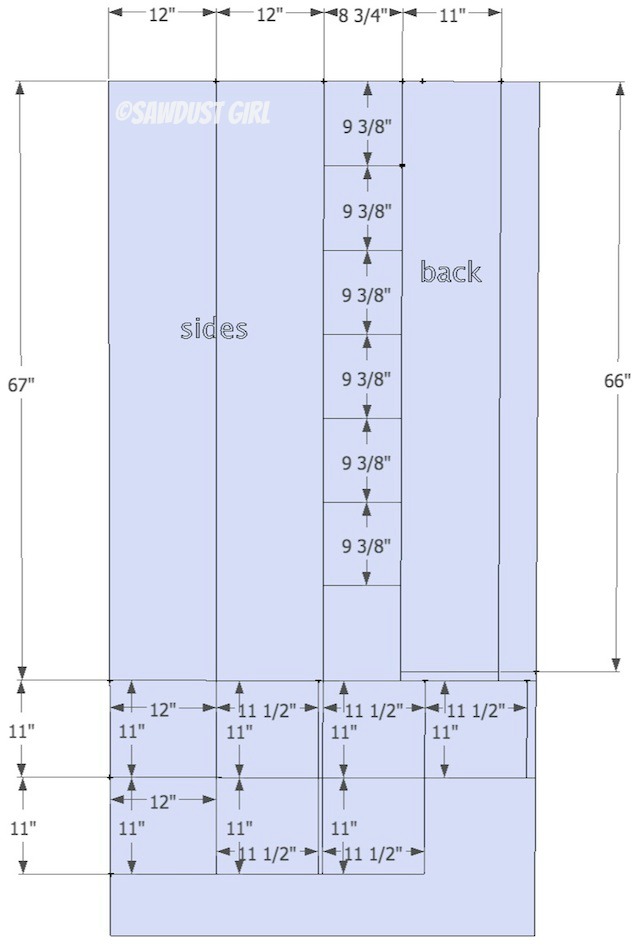
- 1 sheet of 1/2″ MDF cut as shown below
Step 1:
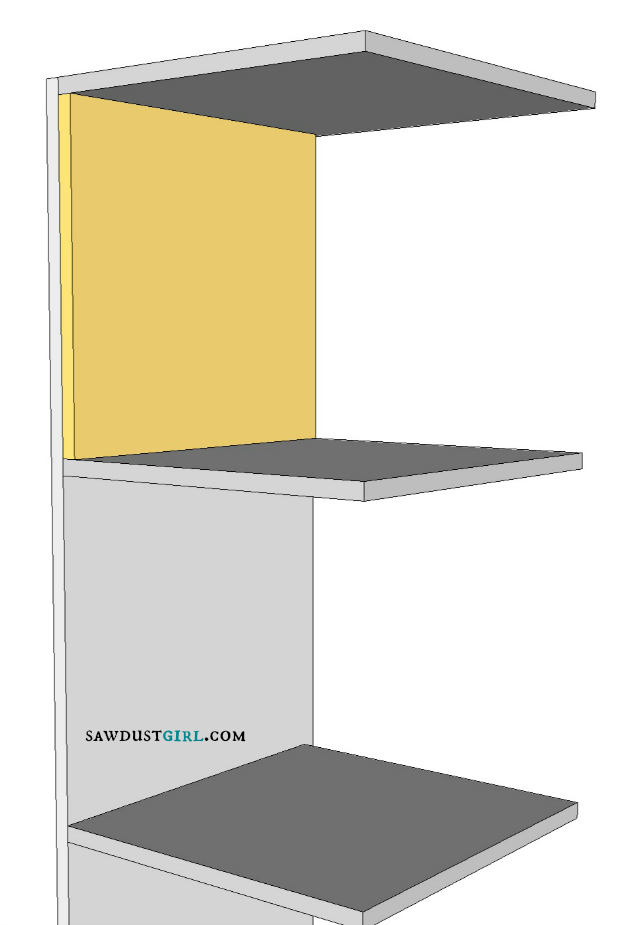
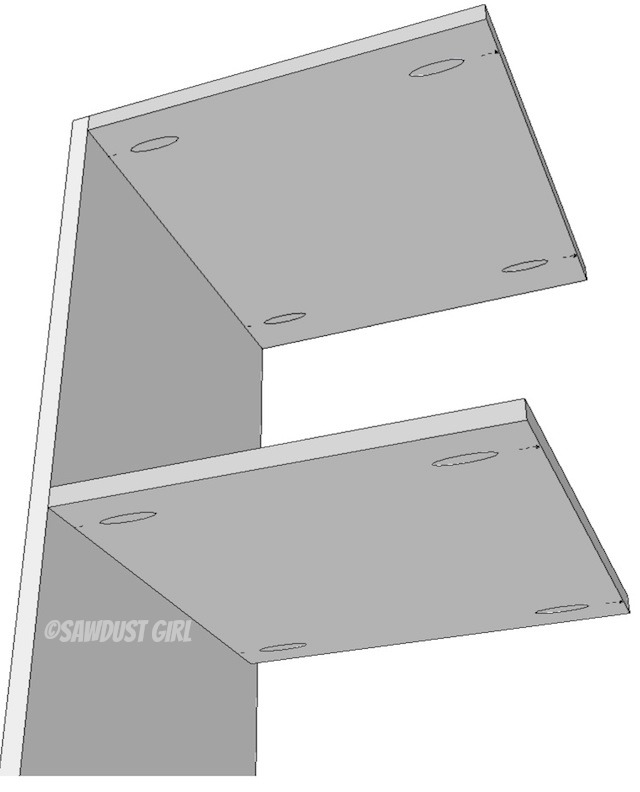
- Attach shelves to side 1 using wood glue and 1″ pocket hole screws.
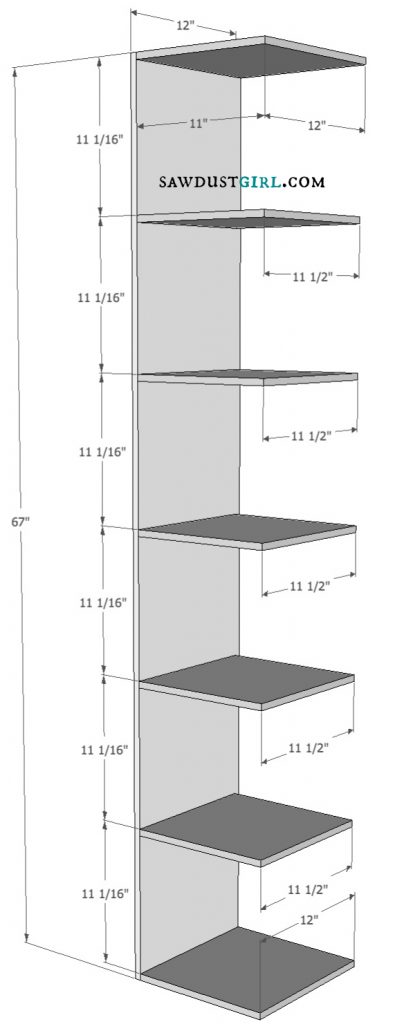
- Top and bottom shelf are 11 x 12, inside shelves are 11 x 11 1/2.
Tip: use a spacer
- The easiest way to get all the shelves placed exactly the same distance apart is to cut a scrap of wood to use as a spacer.
- Your spacer should be 10 9/16′ tall
Step 2: Attach Second Side
- If building only one locker tower, try to use pocket hole screws to attach both sides. It may require a very small drill/driver.
- If building several towers, you can use #6 wood screws directly through the side into the shelves on the sides that will be butted up against other towers as you won’t see the screws.
- Make sure you use pocket hole screws on the sides that will be visible after construction or you will have a lot of filling to do. 🙂
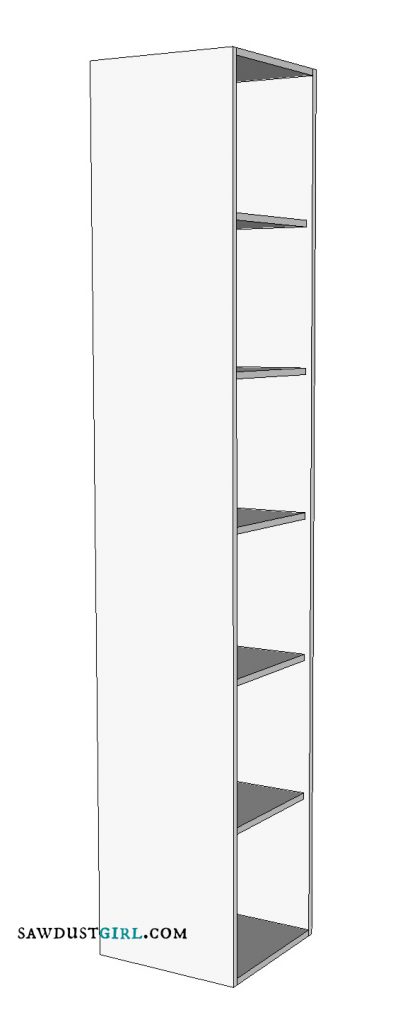
Step 3: Attach back
- back should fit into recess created by 1/2″ shorter inside shelves
- use wood glue and 1 1/2″ wood screws

Step 4: Build Faceframe
- Use 1×2 poplar cut and assembled as shown below
- Assemble with wood glue and 1 1/4″ pocket hole screws

Step 5: Build and Attach Legs
- Use 1×2 poplar cut and assembled as shown below
- Assemble with wood glue and 1 1/4″ pocket hole screws
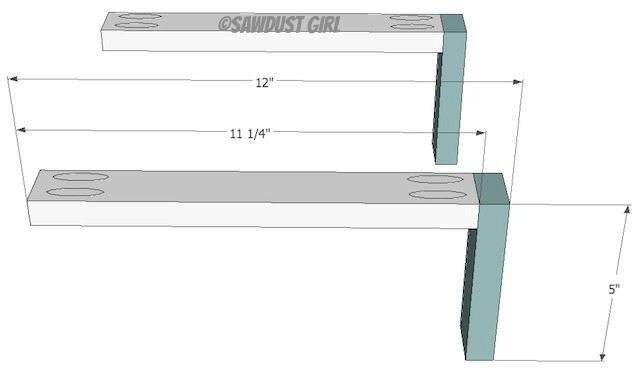
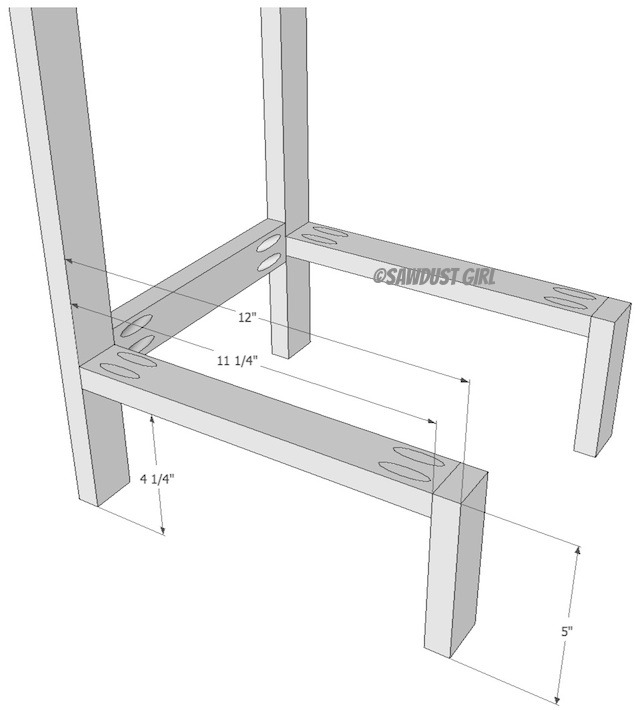
Step 6: Attach Faceframe and Legs to Locker Tower
- Apply wood glue to face frame and legs
- Set locker tower on top of legs and snug up against faceframe
- Use finish nails to secure (Use clamps if you have them to secure until glue dries)
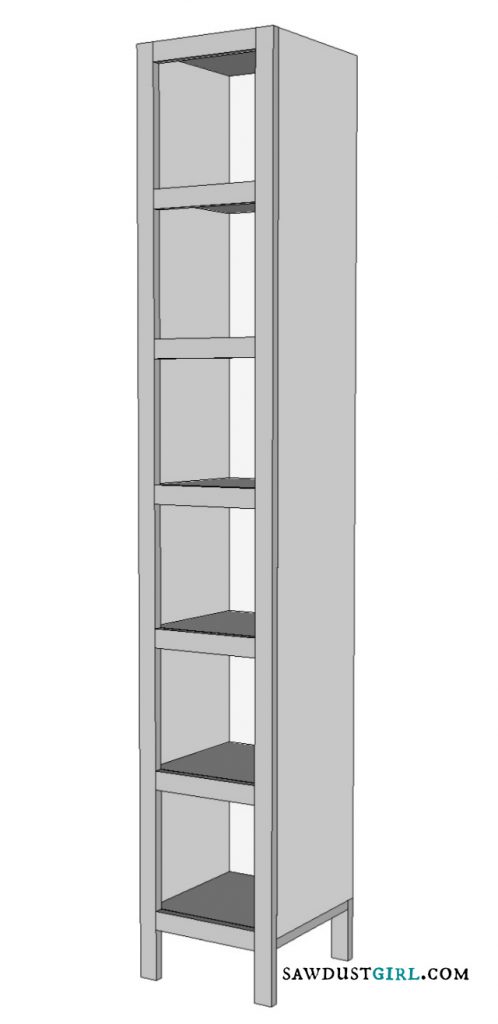
Step 7: Attach Locker Doors
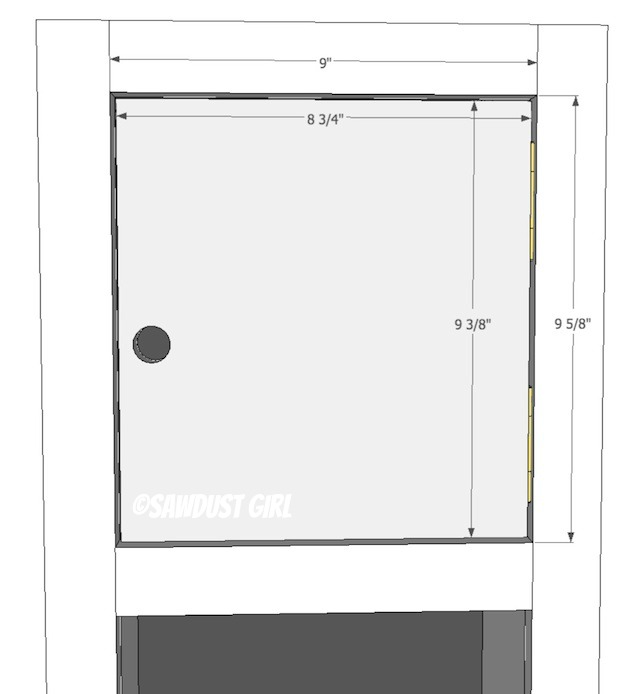
- Choose a hinge and install leaving 1/8″ on all sides of each door.
- Use a magnetic catch to keep door closed.
*If building Multiple Locker Towers:
- Attach joining locker towers with 3/4″ wood screws.
- Clamp first towers together then drive screws into front and back of top, middle and bottom lockers.
- Then Clamp and screw together additional towers to the first two.
- Make sure to secure lockers to the wall with an anti tip kit so they don’t tip over.
