Easy Hanging Shoe Storage
I feel like my back door entry has grown a shoe mountain with all of the boots and shoes we now need for the snow, rain, mud, and everything in between. I swear it takes an extra 5-10 minutes to get out the door in the mornings between playing the shoe pile scramble, and then navigating the resulting shoe obstacle course. This weekend I had had enough! I built some easy hanging shoe storage with some boards and shaker pegs. I finally achieved shoe organization!
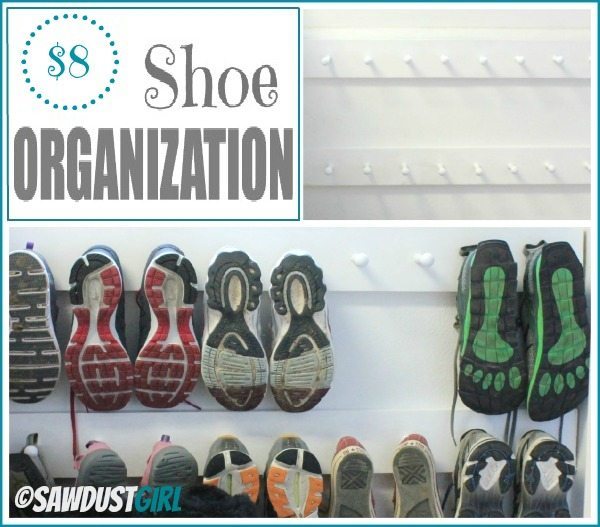
In need of shoe storage
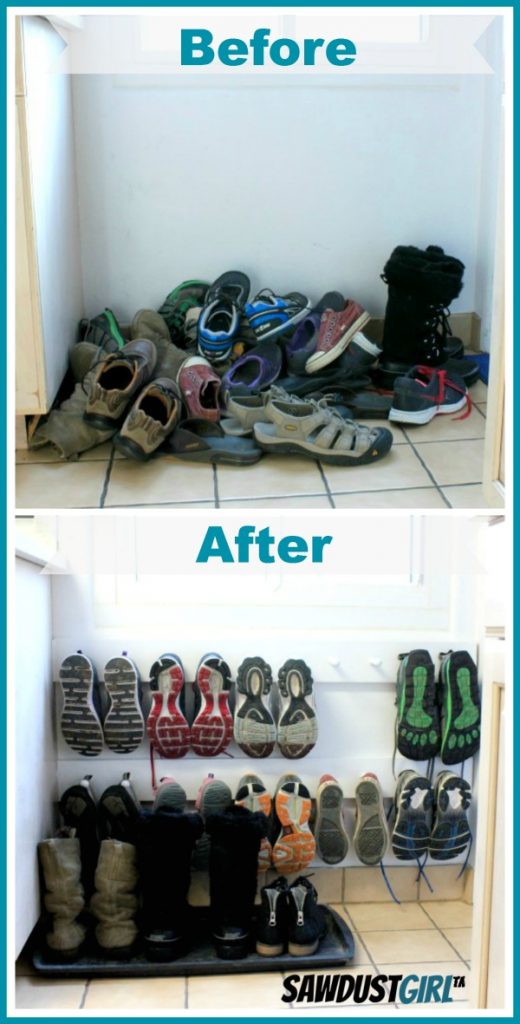
This is what my back entry used to look like:
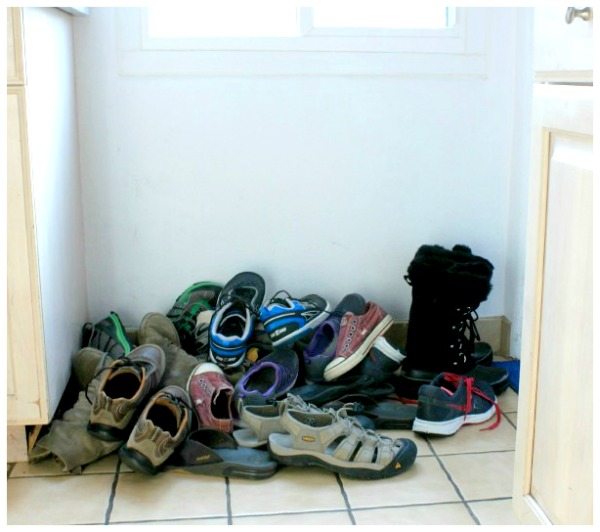
This is actually pretty good as I had kicked all of the shoes into one pile in order to take a pic. The shoes are usually spread out all over the place creating tripping hazards and a major mess. You can’t see it for the shoes, but there is actually a boot tray in the corner, but it does us no good as we can never get to it, to put muddy or snowy boots on.
And here is my awesome shoe organization solution!
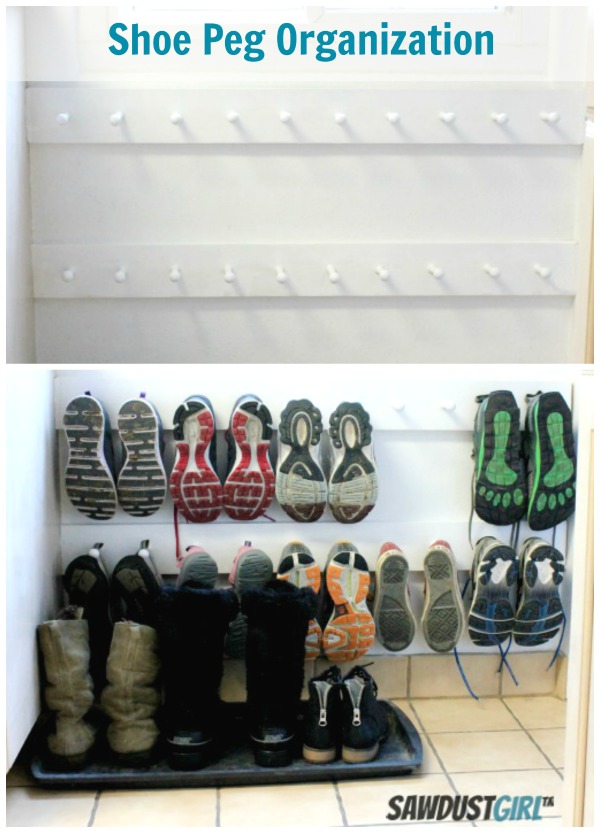
That’s right, simple, easy to make peg boards hung low so that all of the shoes will be contained close to the wall. No more tripping, skipping, or climbing over a pile of shoes! Now with all of the shoes on the wall, we will be able to use the boot tray for boots-YAY!
How to create this easy shoe organization project:

Materials
- Shaker Pegs, $3.77 for package of 10 from woodcraft. I used 20 pegs for hanging 10 pairs of shoes.
- Boards, I just used some left over 1 x 4 pine that I had in my shop, but they can just as easily be MDF or plywood. You just want to make sure that your wood is thicker than the inset portion of your peg. Half inch material is ok, but 3/4 or one inch is better.
- Glue, I like to use Gorilla glue on pegboards, but you can use wood glue or an epoxy of your choice.
- Tools: 1/2 inch drill bit (or bit that is sized for your pegs) and drill. level, stud finder.
1. Prep
Start by sanding the wood and pegs. I prefer to prime and paint the wood prior to drilling the holes, but didn’t for this project because it is so cold outside I wanted to do all of the shop work at one time and not have to go back and forth too much.
2. Drill the holes.
For shoes, it worked well to space the pegs 4” apart with the pegs centered down the middle of the board. You can adjust this distance a little closer depending upon your space and number of shoes.
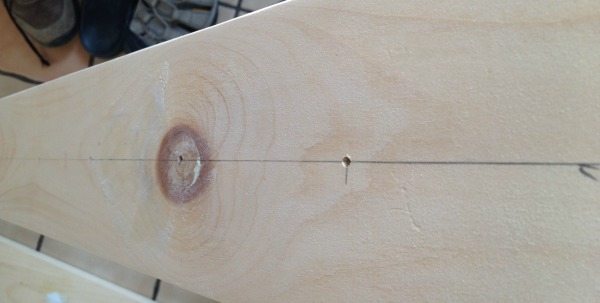
To mark the location of the holes, snap or draw a line down the center of the board. Then make hash marks on the line for the holes. Next because the drill bit is large, it is a good idea to create an indentation with an awl or nail to mark where the center of each hole should be. This will allow you to get the drill centered evenly on each hole.
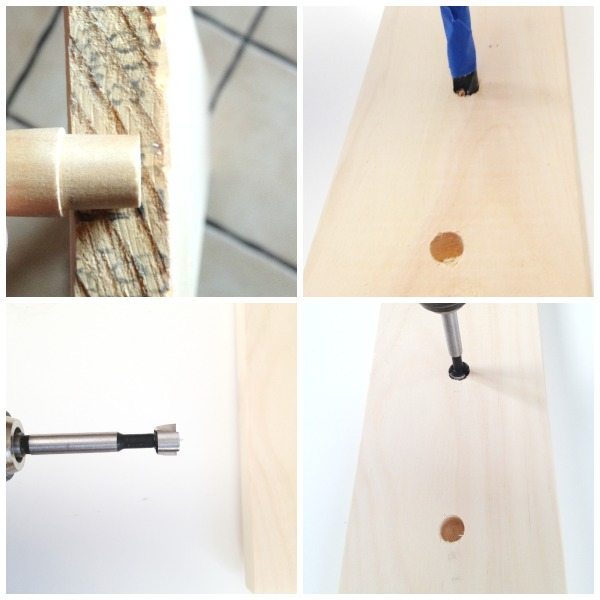
If you have a drill press, drill the holes at a bit of an upward angle so that the pegs tip up. If using a hand drill, be careful to keep the drill level and straight. The angle of the hole will dictate the direction that the pegs protrude from the boards. If your holes are crooked the pegs will be crooked also. You can use a forstner bit, which will create a hole with a flat back. If you don’t have a forstner, use a stop block or depth gauge (or tape if you are lazy like me) so that the hole depth is correct and you don’t drill through.
3. Attach boards to wall.
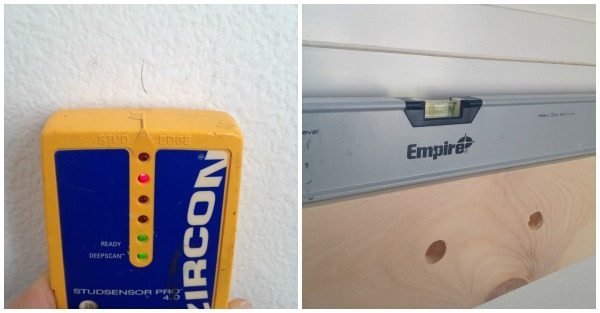
Find and mark studs, if there are no studs make sure to use drywall anchors. Screw the board onto the wall at appropriate height on one side. Place a level on the board and screw the opposite side to the wall.
If you will have two rows of shoe pegs, make sure to hang the lower board so that the shoes have room to hang without hitting the lower pegs or the floor. I spaced mine 12” apart, again, this can be adjusted slightly depending upon your space constraints and shoe size.
4. Add Pegs
Glue the pegs into the holes following glue instructions. I like Gorilla glue for pegs as it swells to fill in any gaps or voids. The pegs should fit snugly, if a peg is loose, shave a few slivers of wood from some scrap lumber that can be shimmed into the hole with the peg to create a tight fit. If the pegs are not tight, the glue will fail over time and the peg will get wiggly and fall out. Clean off any excess glue.
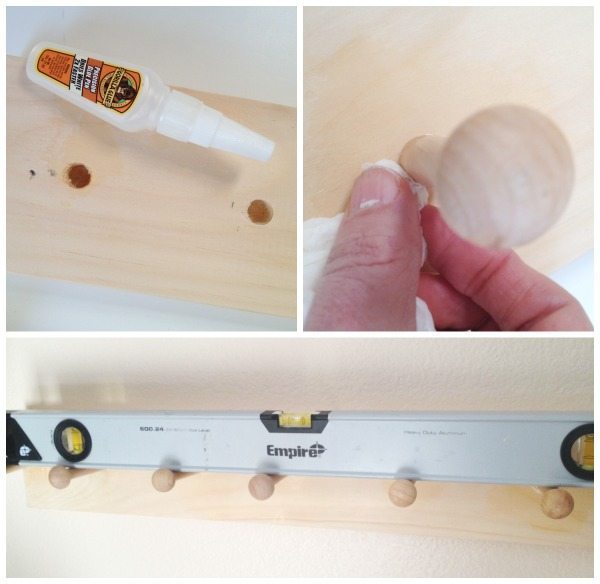
Once all of the pegs are in, stand back and see if any of them need to be adjusted. I like to place a level across the pegs to make sure that they are at the same height. Tap any wayward pegs into place then let the glue dry.
5. Finish
Caulk any gaps and fill holes or cracks, then paint or finish the pegs to your liking. Once they are dry you can hang shoes on them and conquer your own shoe mountain!

Awesome tips and idea. Thanks a lot for sharing 🙂
Love the idea! Unfortunately, at our house with a family of 4, we have like 30 pairs of shoes (or more) that need organization. This would be good for the “go-to” shoes for each person during the season that you’re in. It’s very neat and easy for people to find their shoes. Thanks for posting!
What size shaker pegs would you recommend if the board is 1″ thick? Thanks!
I think you could use any size that you find aesthetic and functional for your space. The pegs used on these boards were 3 1/2” with a 1/2” tenon.