Master Closet Design Overview
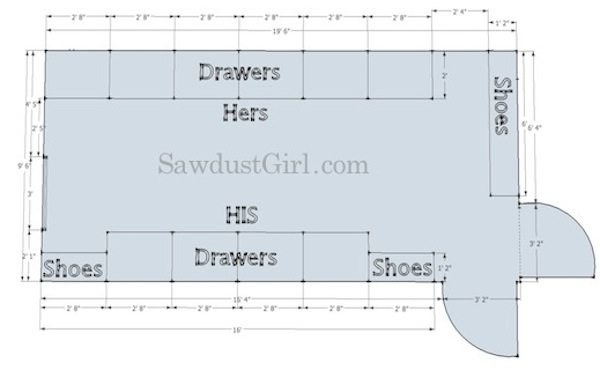
I thought I’d share my process to designing a space (and more specifically, designing the built-ins that will go into said room). In case it might be helpful to someone out there wanting to take a leap but not sure where to start.
First, lets go over a little vocab to make sure we’re all on the same page.
Plan view (or floorplan) is a view from above. Looking straight down.
Elevation is a view of one side. Looking at a wall or facade straight on.
I either draw by hand or use Google Sketch Up which is nice if I’m messing around with dozens of different design options without completely starting over each time I make a change.
OK, now on to my process.
-First, I get the dimensions of the room and draw up a floorplan.
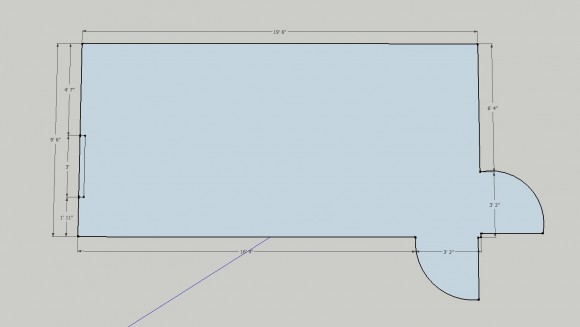
-Then I draw up all the different possible layouts or versions of what I want. Sometimes dozens! To do this, I have to draw up elevations for each wall first, then incorporate that into the floorplan.
I try to optimize every bit of space that I can while getting the look that I want. So, my main focus is on how a space function, then I figure out how to make that look good.
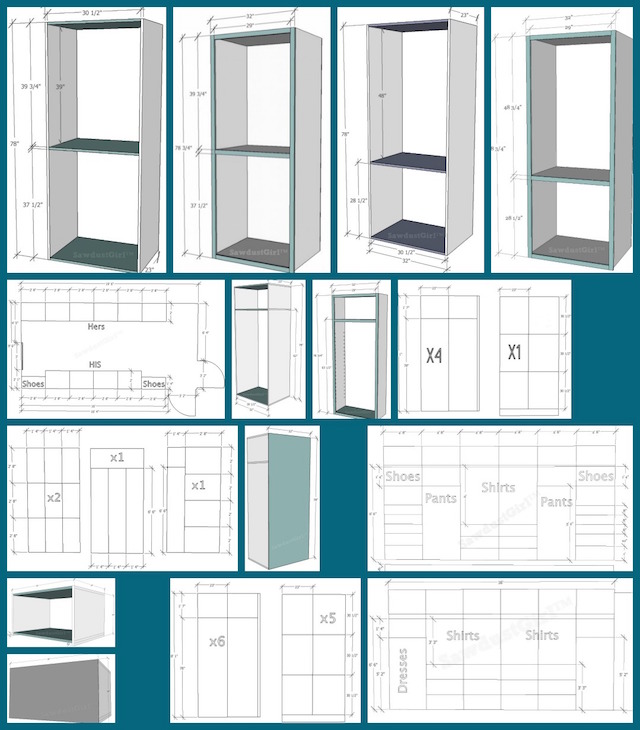
These are my final plans for my master closet.
Floorplan

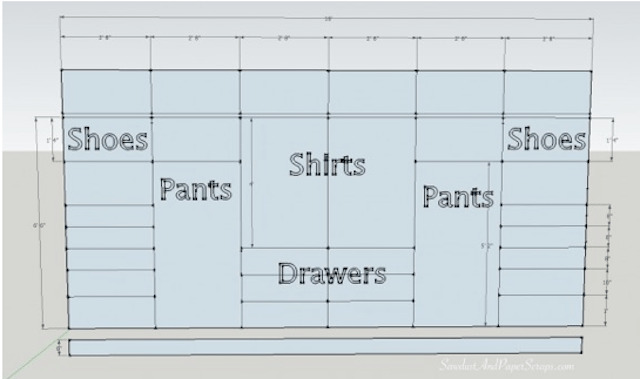
Elevation for “His” side.
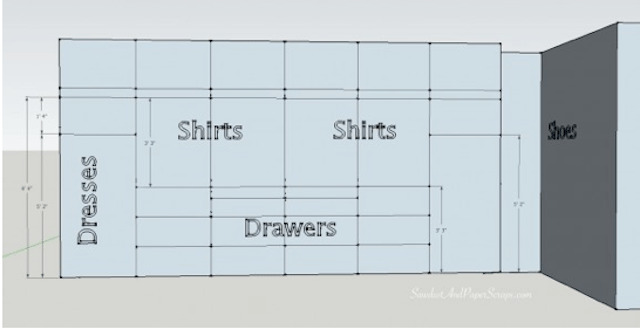
Elevation for “Her” Side
-Then I draw up build plans for each specific cabinet that I will build.
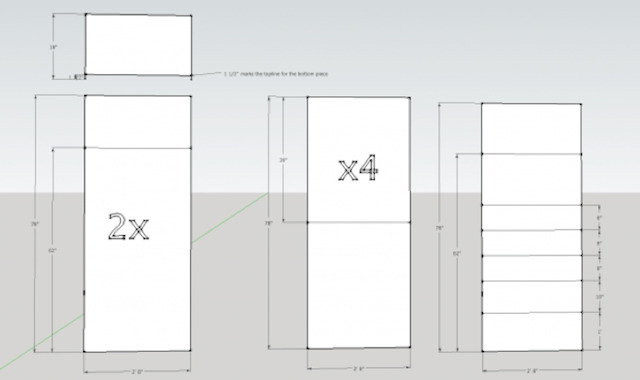
-Then I draw up a cut list so I can maximize my materials and get the least waste possible.
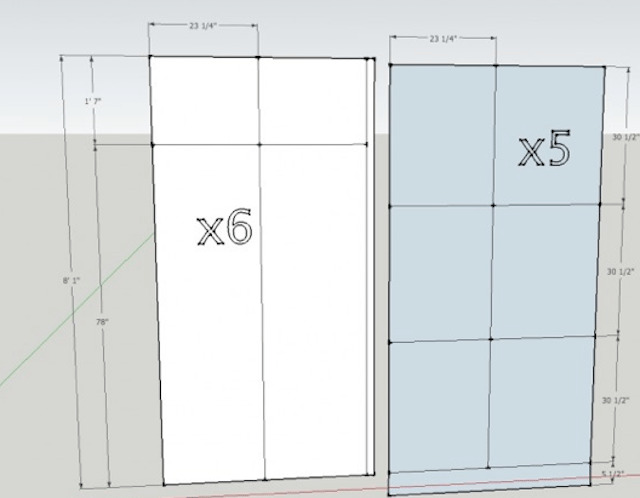
You’ll notice in Wes’ Elevation, I have a 6″ base that the cabinets will sit on top of. I did that to avoid wasting a 48″x12″ section on about 20 sheets of MDF in my cuts! That’s a lot of waste. Sure, I could probably use it sometime in the future but I don’t want to store that much MDF. (My side is also on a 6″ base, I just didn’t draw it in.)

Just a bit of adjusting: creating a separate 6″ base instead of making the cabinets 6″ longer gave me 18″after I cut my 78″ side pieces instead of only 12″ and I can use the 18″ for the sides of the top cabinets.
Of course, it isn’t always possible to use every scrap of material in your project. I was able to because I have 5 1/4″ baseboards and was going to cut my cabinet sides 6″ longer but attach the bottom shelf 6″ from the bottom. Building a separate base achieves the same result.
*I’m also waiting to build the top cabinets until all the main cabinets are built and installed. That way I can remeasure to see if everything is going to fit as originally planned or if I have to make adjustments.
Measure twice, cut once and expect that things still might not be perfect. Then you won’t be irritated/angry if/when it happens.
*Be sure to check out my post: How to plan and design a master closet so you can customize your own closet to fit your specific needs.
You can purchase my Master Closet Plans as well as my Cabinet Building 101 eBook in my “Shop” or below.
Master Closet Plans
$9.99Add to cart
Cabinet Building 101 eBook
$9.99Add to cart


Fabulous. Just want I needed as I want to do my closet. Looking forward to all the progress and update posts! 🙂
WOW! This looks great. I love sketch up. I wish Mr. Woodsy would use it more often. Most of the time he scribbles on a piece of paper that normally gets lost in the shuffle.
That is really neat. Well thought out and organized. Unlike all the home remodeling projects my mom attempted over the years. Ugh.
Thanks for the planning tips–I’m following closely since I want to redo my closet sometime. Although I don’t have all the fantastic space you do!
Sometimes old fashioned pencil and paper is faster and easier! If I’m tossing around lots of ideas, I like to be able to save my floorplan and then “Save As” Plan1, Plan 2, etc. It’s so much easier to move a cabinet, stretch out a wall out, delete a section… But I often just grab a pencil too.