How to Make an Industrial Platform Bed – Woodworking Plans
Recently, we let Madison move down into the guest bedroom in the basement because it is much larger than her old room. I drew up woodworking plans for this DIY industrial platform bed to build for her new room.
We love the industrial look with the metal casters. Plus, the mobility of the bed frame make it easy to redecorate you room as often as you like. It’s important to be able to change the style, as Madison likes to change up her décor pretty frequently. If any of you have older children or teens, I’m sure you understand. I’m glad that she’s experimenting with style, and I want to make sure she can express herself however she chooses while still not creating too much more work for me!
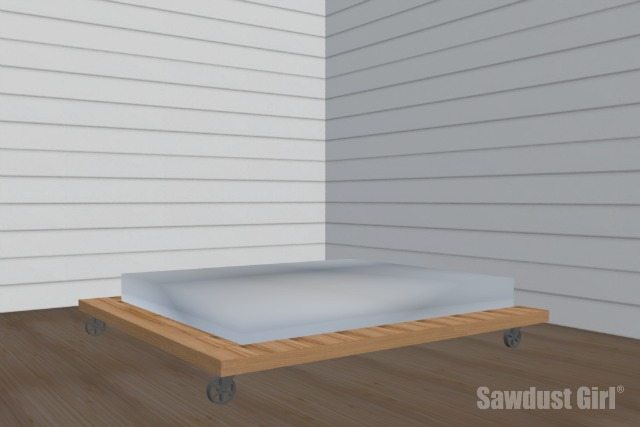

Industrial Platform Bed Free Woodworking Plans
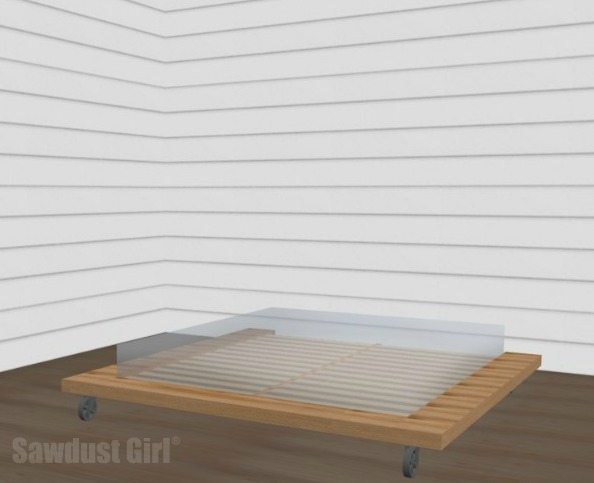
This plan is for a Cal King mattress. The mattress will sit slightly inside the platform. Make sure to adjust the plan according to your mattress size.
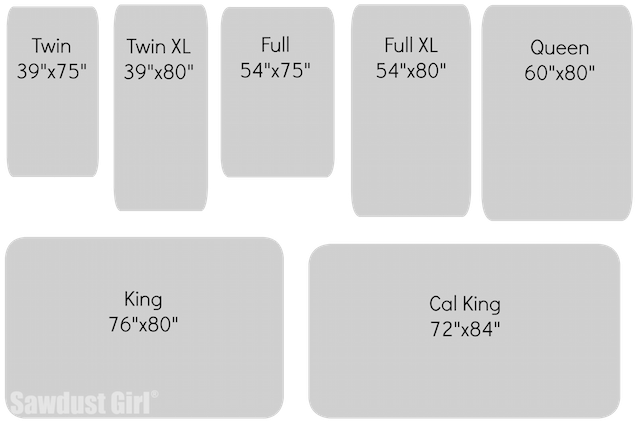
Materials List
- Three – 8′ 2×12
- cut down to: 82″, 82″ and 91″
- Three – 8′ 2×10
- cut one of these down to 72″
- One – 82″‘ 2×6
- One – 91″ 2×3 (you might have to cut down a 2×4)
- One – 72″ 2×3
- One – 82″ 1×2
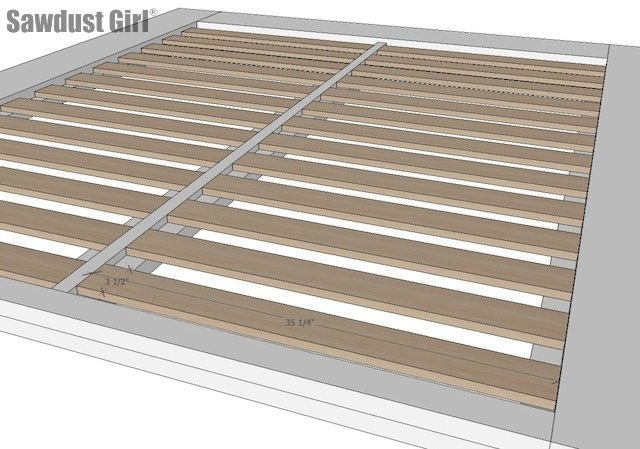
- 26 – 3/4″ slats sized at 3 1/2″ x 35 1/4″
- Four – 8″ Casters
- Fasteners (pick what works for you)
- 2 1/2″ pocket screws
- mortise and tenons (loose tenons)
- dowels
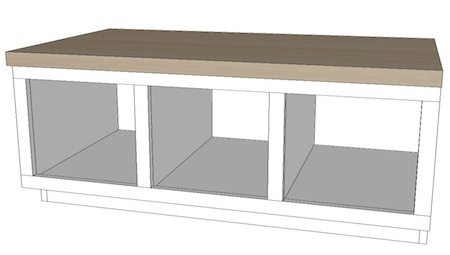
Step 1 – The Base/Slat Supports
Use your preferred method for fastening, whether pocket holes, dowels, mortise and tenon, or something else. Again, make sure to adjust the sizing based on your mattress as shown in the above image.
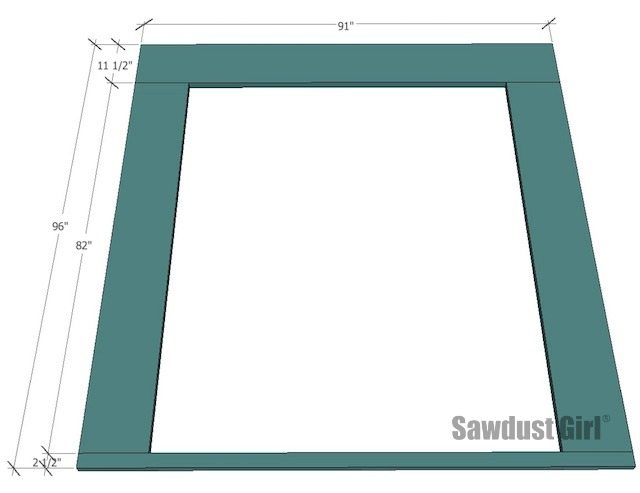
Step 2 – The Platform
Attach the 2×10 stock on top of the 2×12, making sure the edges are flush on the outside.
Use glue, clamps, nails, or heavy weights to attach these two layers of wood. Please note, there will be an overhang of the base layer which will support your slats.
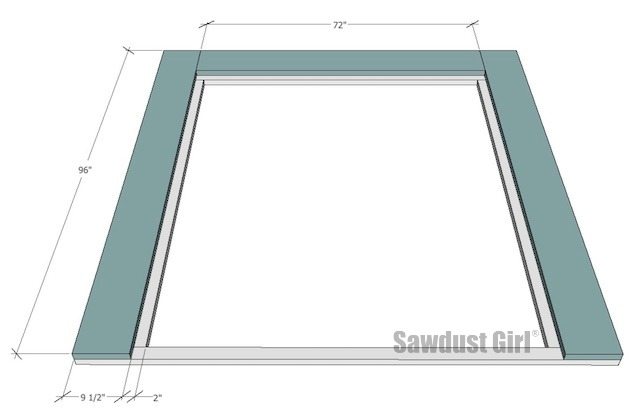
Step 3 – Center Slat Support
Attach your center 2×6 support.
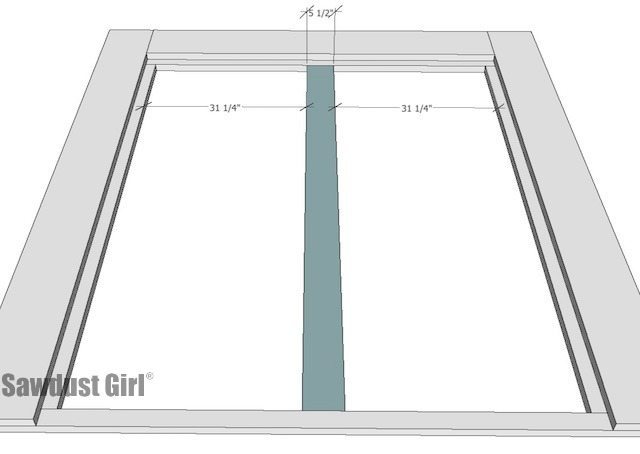
Step 4 – The Slat Divider
Attach 3/4″ slat divider in the center of the center slat support. Use glue and nails.
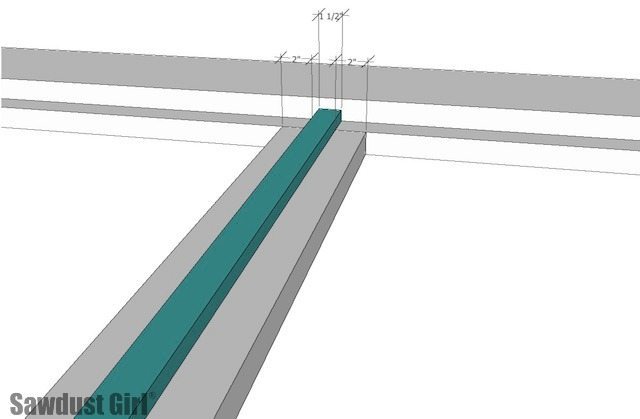
Step 5 – Attach the “Bedhead”
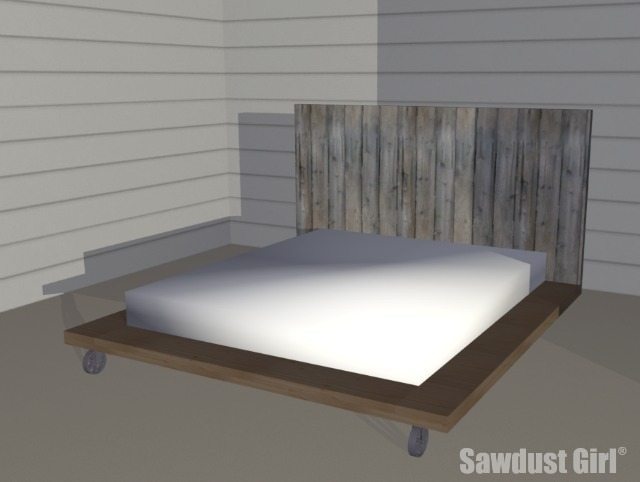
Attach your 72″ 2×3 to the base layer at the head of the bed
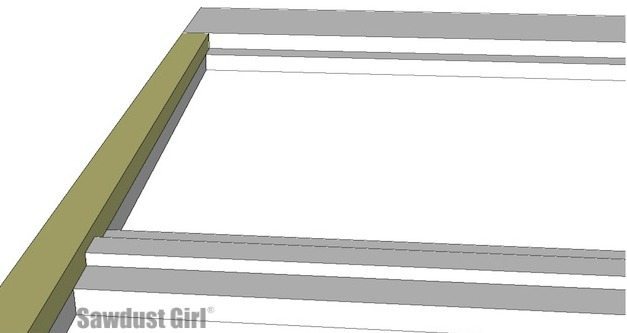
Step 6 – The Casters
Install the casters. Be warned! These suckers can be expensive, so shop around! I shopped until my eyes were blurry, and this is what I found.
I purchased two different brands of 8″ metal casters for two different projects. This one is $31.25 plus $10 shipping and is available now. This one is $28.40 and free shipping but says it won’t ship for 1-3 months. I did receive mine in a matter of weeks though.
If you’re lucky, you might find something near you, but be prepared to have to wait for a little bit. If you’re planning to make this as a gift, make sure you give yourself enough time to wait for shipping. I think of woodworking kind of like show business–if something can go wrong, it usually will. It’s our job to find a way around it!
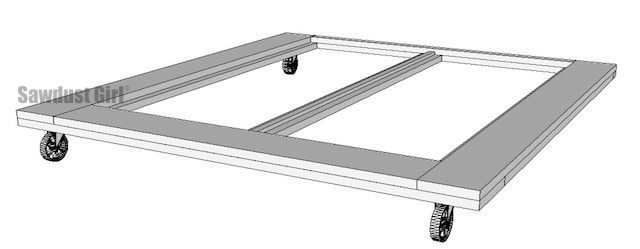
Step 7 – The Slats
Set your slats into place, evenly spaced. Secure each one with a screw in each end.
I have to say, as someone who’s put together many an Ikea bed, making my own from the ground up is actually easier than trying to put together their beds. The slats normally make me want to tear my hair out and go take a nap, but these were fairly easy compared to what I normally have to deal with!

After that, you are all done! Just make sure to actually put a mattress on there. I really like how this bed turned out, and I am excited to see what Madison thinks. I know she’s excited to make her move into the basement, and while I’m sad to see our storage room go, I am glad she gets to branch out and get some more room for herself.
If you guys enjoyed these plans, check out the rest of my blog as I have lots of other free plans available, as well as more tutorials for making your home into your dream home. If you are new to remodeling I have some beginner tutorials as well for your first ventures into the DIY world. Happy building!
You might also like these free bed plans.
This looks SO cool! Though of course my first thought was that this is definitely a bed for someone with a better back than mine, lol! Would love to see this in real life.