How to bulk up your window casing in 5 easy steps
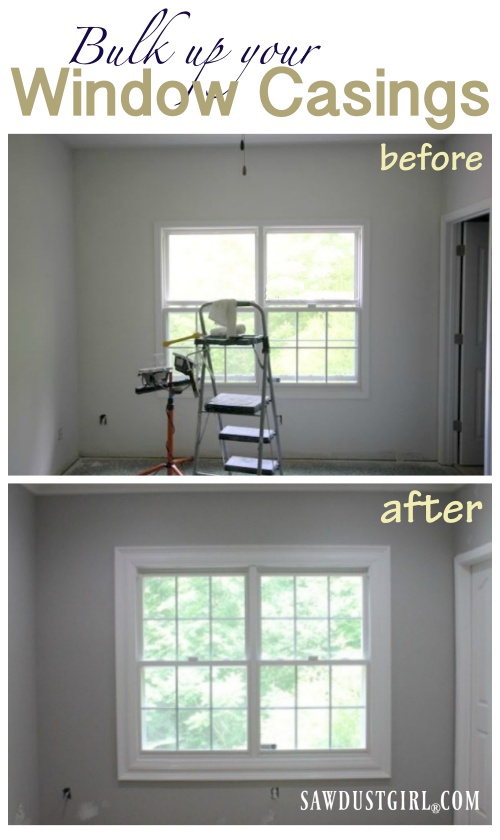
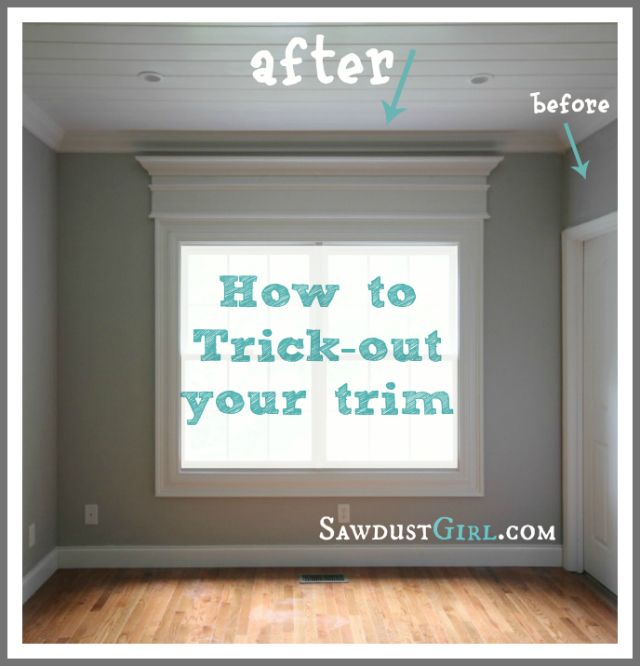
Take your window casings from blah to Ta-Da! The window casing in this entire house is the most boring, basic, builder grade molding available. It’s funny to me the things builders skimp on. There is no need to live with blah trim! Trick out your existing window casings by adding another layer of trim moulding (or two or three layers) to really amp up the awesomeness of your doors and windows!
Bulking up your window casings can as easy as adding another layer of trim molding to the existing trim. Or, if you feel the way I do about window treatments, you don’t want empty space above the window. If you don’t need any sort of window treatment for functional purposes you can use trim to raise the window height. 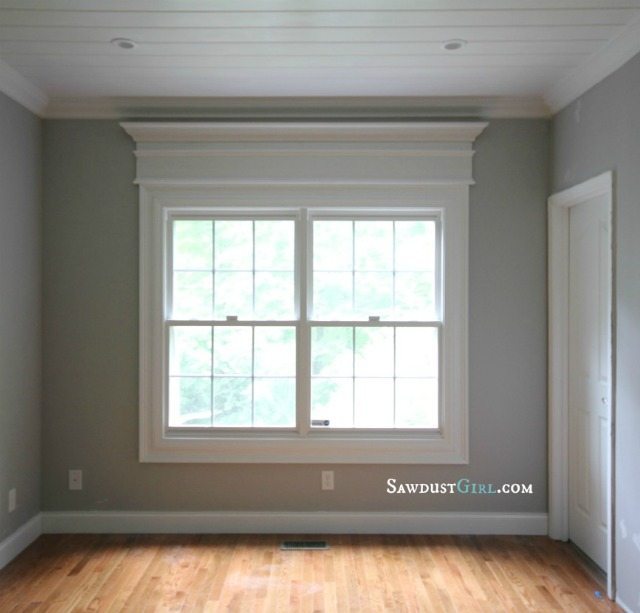
How to bulk up your window casing
Starting with blah skimpy molding with mitered corners.

1. Add an additional layer of molding with mitered corners to match the corners of your existing trim.

2. Add a piece of MDF that extends beyond your molding by 1″ on each side and is a similar thickness to the outer edge of your second layer of molding. The height will vary depending on your ceiling height. Mine is 3/4″ thick and 14″ tall.

3. Add a detailed molding in proportion to the height of your MDF. I added one piece of small trim at the bottom of the MDF and another piece of the same trim about 5″ up — upside down.
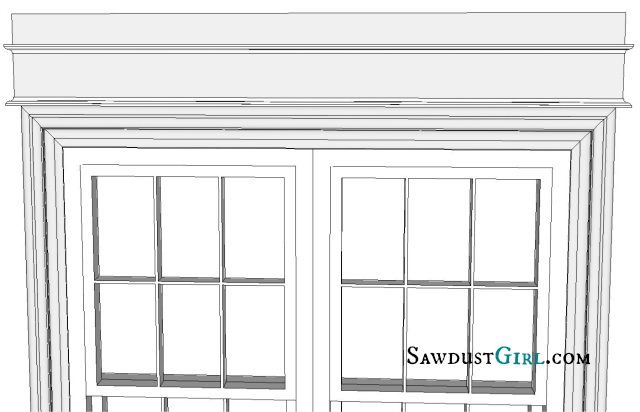
*Make sure to wrap the detailed trim around the edge of the MDF with a “return” with 45 degree beveled cuts.
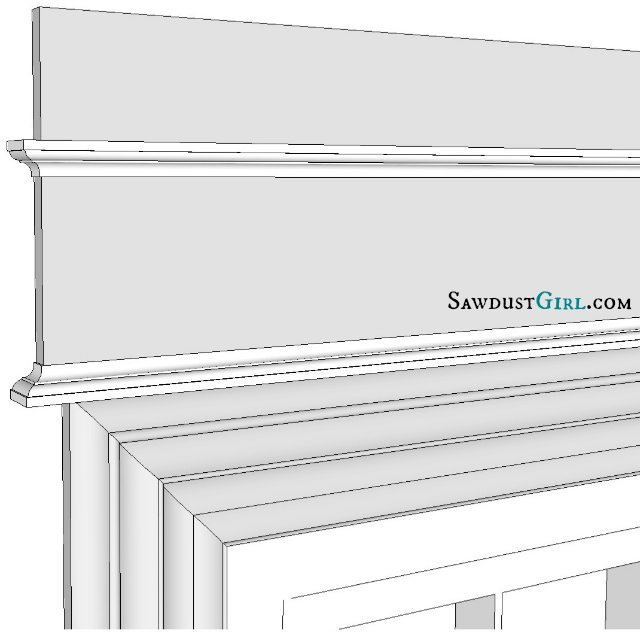
4. Add crown molding to the top, wrapping around the MDF with a return (cut as an outside corner using your preferred method of cutting crown molding). 
You could take your cross header all the way to the ceiling and integrate the crown molding into the crown molding for the entire room. (I would have done this but I got lazy on account of I had JUST installed the crown molding before I decided to do this treatment.)
If you don’t like painting everything white, install wood molding that you can stain.

That was easy, right? 😉


My windows have molding only at the bottom of the windows. Would your idea for the crown molding at the top of the windows look good without any molding down the sides of the window?
I love it! Can you tell me what color and brand of paint was used? Thanks so much!
Hi there! I have “rounded” 1950′ molding around all of my doors and windows. Do you recommend removing this layer first, or literally building around them as you suggest in this tutorial? I want to trick out my doors, but am thinking of pulling all of the trim first – and also doing the baseboards while I’m at it. I appreciate any suggestions.
what is an easy way to miter the corners
This looks amazing! We too have considered beefing up our moldings but we have a sill that sticks out on either side of the windows. Any suggestions? trim it out anyway and notch around the existing sill? try and cut back the sill so it’s flush with the 1st piece of window molding? (probably hard to do cleanly) Or do we just accept that fact that we probably would need to redo it all to beef it up? I would really appreciate your input! Love your blog and all your projects! : )