Patching Wood Floors
Patching Wood Floors is nothing to fear. If you have prefinished flooring and have enough extra pieces on hand, it’s a breeze. I want to show you how replace a section of hardwood floors. 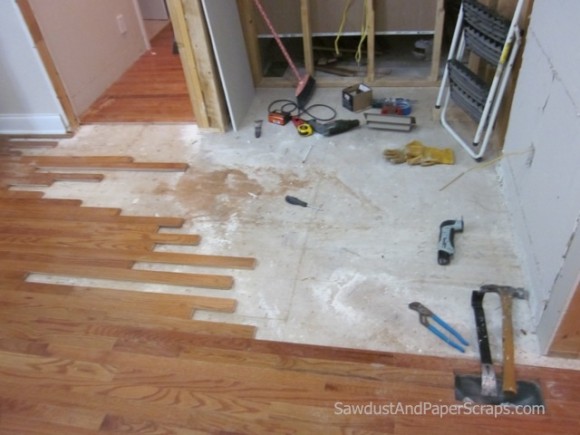
Patching Wood Floors
(If you don’t have flooring to match, you’ll probably have to refinish the entire floor after you patch to get a uniform color and finish…and I don’t envy that job.)
I was able to find the exact flooring in out house at Home Depot so my project went pretty smoothly.
I had a coat closet in my living room that took up too much space, so I tore it out. Then I discovered that the bathtub next door actually stuck out into the wall cavity of said coat closet, so I had to tear that out too.
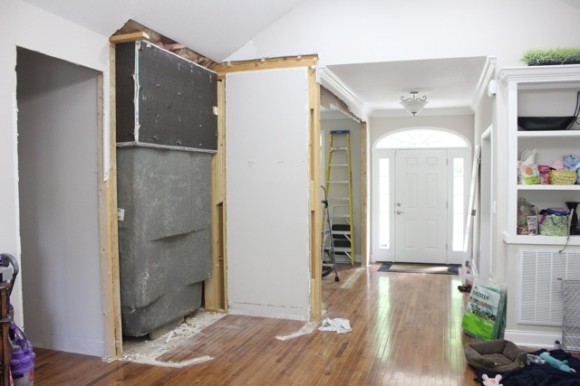
And I was left with this!
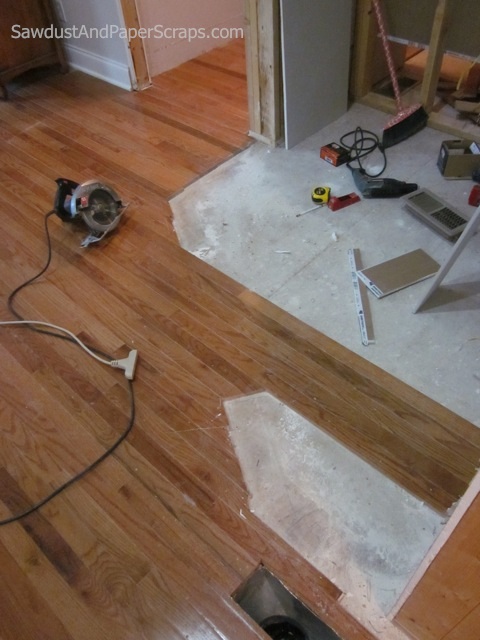
I had to remove additional pieces of flooring so I could seamlessly install my new pieces using the tongues and grooves, nailing through the tongue so the nails are invisible.

I used my circular saw and cut some of the waste out of the way and then used a screw driver and a hammer to smack the rest of the “waste” boards out of place. I hammered the screw-driver straight down into the floor board until it was wedged down in there good. Then I tilted it so I could hammer against it at an angle. (Like in the pic below.)
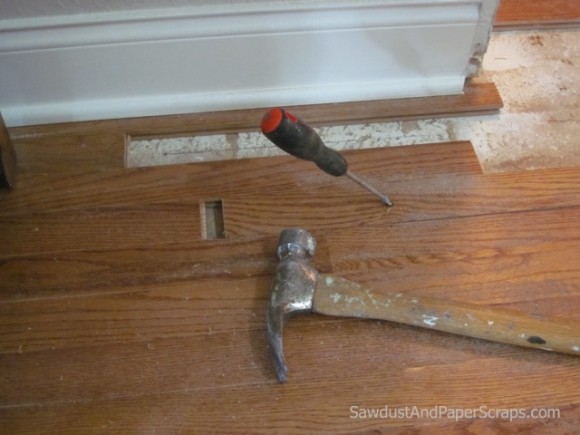
Once the board was out far enough to use the hammer directly on it, it went faster as I was able to hit the board harder with both hands holding the hammer. These floors had been installed with flooring staples and they came out pretty easily.
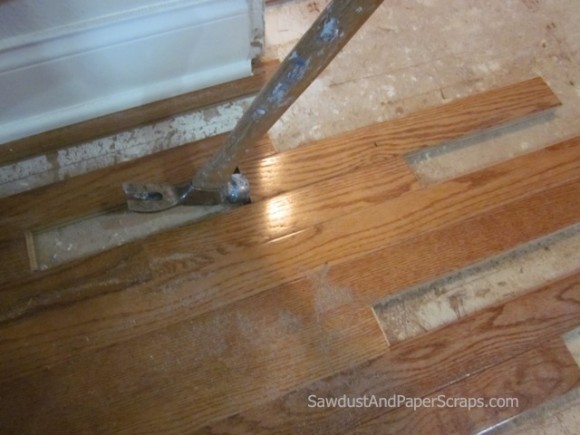
I removed all the boards that had a cut end and some that were fine but would have made it difficult to install new wood.
How replace a section of hardwood floors

Now all that’s left is to replace which is the easy part. Start the first row against the flooring that is already in and nail it in place.
I just had to ease some of the boards back INTO those “holes” that I’d created by hammering the old boards OUT. I didn’t worry about not being able to put flooring nails into the small sections of new floor that were set back in the old flooring. The old flooring had the tongue and grooves intact so the new floors were wedged in tight.
I also had to patch this area here, where I tore out the wall bet ween the formal living room and the entrance hallway.
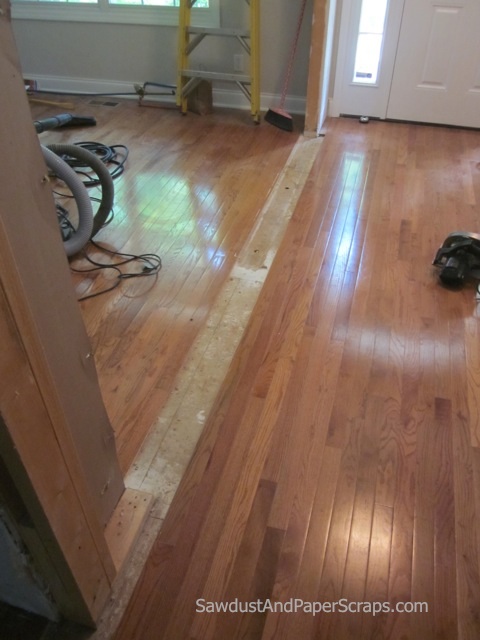
Here, I used the circular saw to remove 3 rows of flooring. I made two seperate cuts down the center row. That allowed me to pull up the first row in pieces and then wedge the rows on either side out without damaging the tongue or groove on the wood that was remaining.
Then replacing the wood, I had to cut the tongue off two rows the new floor I put down. I had to nail right into the top of the flooring on those rows.
You might also like these remodeling tips.
Very informative, I’ll be passing this information along to friends of mine
Installing wood flooring is easy as long as you know those basic, plus having an internet for DIY tutorials/tips/tricks helps a lot. Thanks, you’re a big help! 😀
Sandra you rock! I have really enjoyed watching you through this process because it is exactly the kind of project I do. You’re one of the few women in my life that does these kinds of crazy things to their houses and it makes me feel a little less insane. Or at least a sisterhood of insanity. 🙂 It’s looking awesome! Lisa~
Love it. Sisterhood of Insanity! I definitely feel the sisterhood with you Lisa.
Great meeting you at Haven! Great blog.
What an industrious and clever woman. Inspiring!
It was great meeting you too Amy. I can’t wait to read your book! (Looking forward to learning more from you!)