• Home
  • About
    • Personal Posts
  • Privacy
  • Shop
    • My Account
    • Checkout
    • Email
    • Facebook
    • Instagram
    • Pinterest
    • Twitter
    • YouTube
Sawdust Girl®

Sawdust Girl®

Renovation, cabinet building and woodworking plans and tutorials. Build like a Girl®

  • My Home
    • Clinton TN House
      • Clinton TN House in Progress
    • Maryville TN House
      • Maryville TN House Tour – Completed Rooms
      • Maryville TN House in Progress
        • Basement
        • Basement Storage Closet
        • Bedroom Office
        • Craft Room
        • Dining Room
        • Entry
        • Garage
        • Guest Bedroom
        • Hallway
        • Jack and Jill Bathroom
        • Kitchen
        • Kitchen Entry
        • Laundry Room
        • Library
        • Living Room
        • Loft
        • Madison’s Room
        • Master Bedroom
        • Master Closet
        • Pantry
        • Porch
        • Powder Room
        • Wes’ Office
    • Illinois House
    • Calderwood Cottage
  • My Workshop
    • Clinton Workshop
  • Build & Breakfast
  • Cabinet Making 101
    • Cabinets
    • Doors
    • Drawers
  • Projects and Plans
    • Countertops
    • Beds
    • Benches
    • Bookshelves
    • Desks
    • Gift Ideas
    • Holiday
      • Christmas
      • Halloween
    • Home Accessories
    • Kids
    • Kitchen Cabinets
    • Lockers
    • Nightstands
    • Organization accessories
    • Recipes
    • Sewing
    • Tables
    • Vanities
    • Wardrobes
    • Woodworking
      • Wood Finishing
    • Workshop
    • Workshop Storage and Organization
  • Remodeling 101
    • Baseboard and Trim
    • crown molding
    • Demolition
    • Door and Window Casings
    • Door Installation
    • Drywall
    • Electrical work
    • Flooring
    • Home Maintenance
    • Painting
    • Plumbing
    • Resources
    • Safety
    • Tile
    • Wall and Ceiling Treatments
  • Sawdust Squad
  • The Sawdust Diaries
    • Andrea
    • Ava D.
    • Beckie F.
    • Cara C.
    • Courtney B
    • Fawn T.
    • Jenn D.
    • Kelly C.
    • Kristy K.
    • Lara T.
    • Malisa B.
    • Marnie D.
    • Robin C.
    • Val F.
  • Tools
    • Products
    • Tool Reviews & Overviews
    • Inspiration & Ideas

How to build a hanging file folder drawer

All Posts, Cabinet Making 101, Drawers

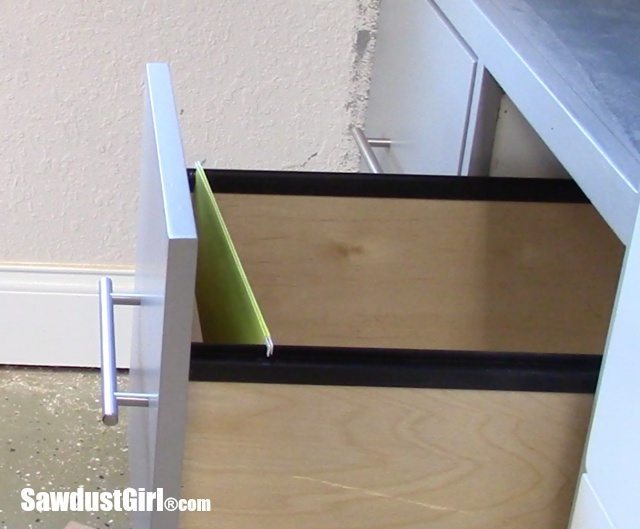
I’m still making slow progress on my new office.  I finally finished building the two cabinets with hanging file folder drawers that will hold up the two ends of the future countertop.  The drawers are 24″ deep with full extension glides so one could store a LOT of folders if they needed.
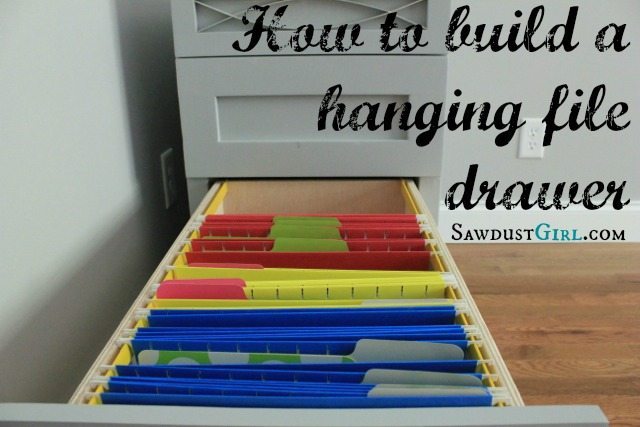
hanging file drawer tutorial at SawdustGirl.com

How to build a hanging file folder drawer

You can build a new drawer or use an existing drawer if it’s the right size.  If building a new drawer, you can follow my simple drawer tutorial but adjust the size to accommodate the files.   I built my drawer 14″ wide by 10″ deep.  When planning your cabinet, make sure to leave 1″ clearance above the top of the file drawer so the hanging file tabs will clear the faceframe or drawer above the files.

I purchased the metal bars at Home Depot.  They’re about 1/8″ thick and 3/4″ tall and came in 3′ lengths.
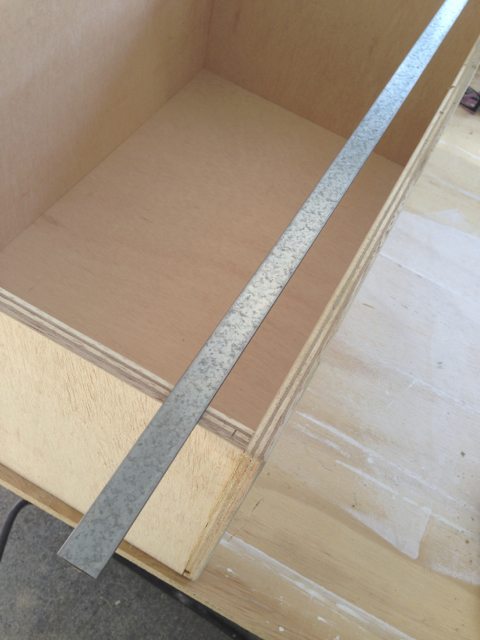
hanging folder drawer tutorial

I marked the top of the drawer box where the center of the bar needed to sit.  The bars will sit 12 1/4″ apart.
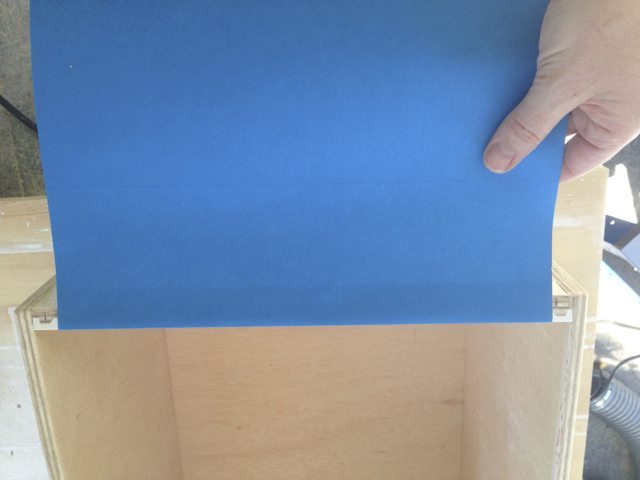
blue file folders


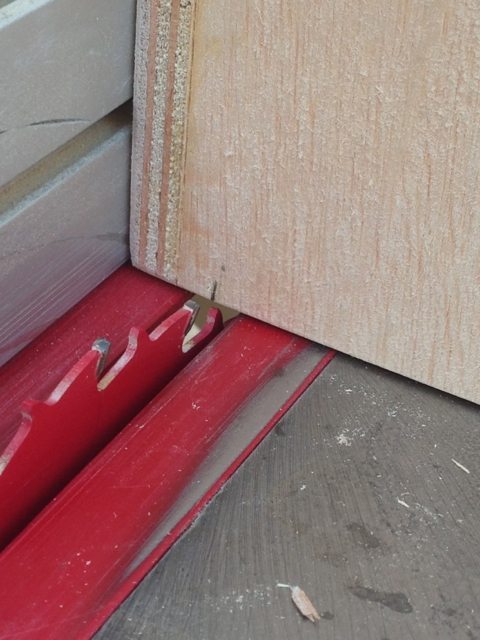
I set up my table saw so the blade would cut about 1/2″ deep (I wanted the bar to sit a bit higher than my drawer) and adjusted the fence so the blade lined up with my mark.
Building a cabinet for folders

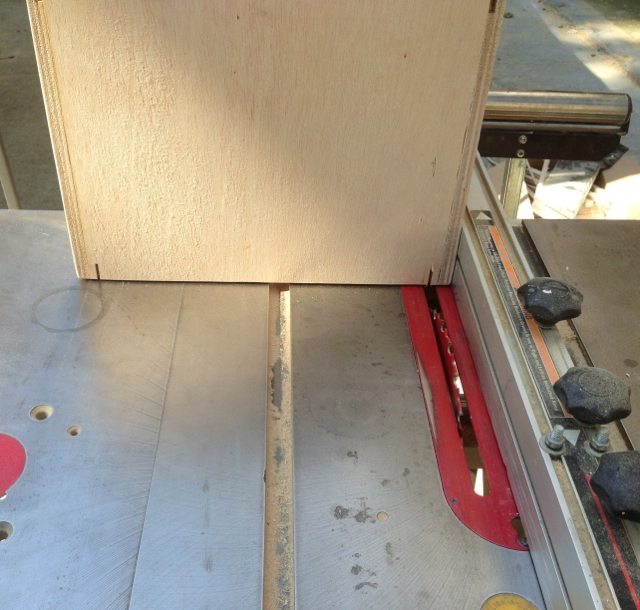
Then I ran my drawer box all the way through so it cut a slit in the front and back parts of the drawer.  Flipped it around and cut slits in the other side.  Obviously the drawer box is sitting on the table upside down –so the slits are being cut into the top of the drawer.
hanging file drawer tutorial at SawdustGirl.com

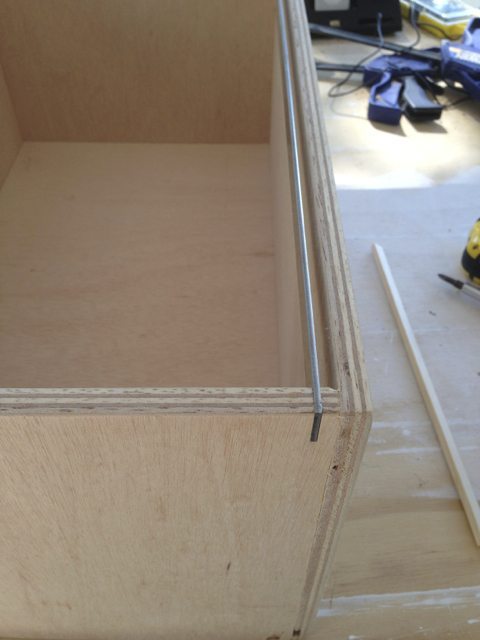
Check to make sure your bar fits in your cut.
hanging folder drawer tutorial

Cut the bar to length with a hacksaw and then rub it on sandpaper to smooth it out so there aren’t any sharp edges.

hanging file drawer tutorial at SawdustGirl.com

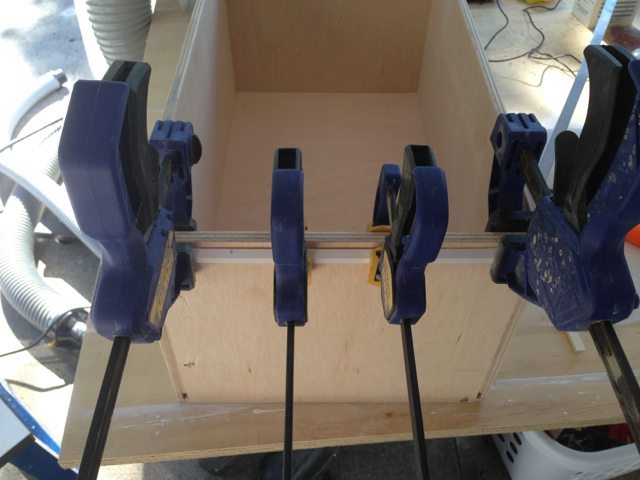
You may have to glue or nail a block on the back of the drawer to keep the bar from sliding back.  The drawer front will hold it in place in the front.  My bars are tight (I used a rubber mallet to ease them in so I don’t think there will be any movement but if your bar is slightly thinner or cut is wider you may need a block).
hanging file drawer tutorial at SawdustGirl.com


Just for fun, I wanted to paint my bars with a bright color.  I cut slits in some scrap wood to hold the bars upright while I sprayed them.
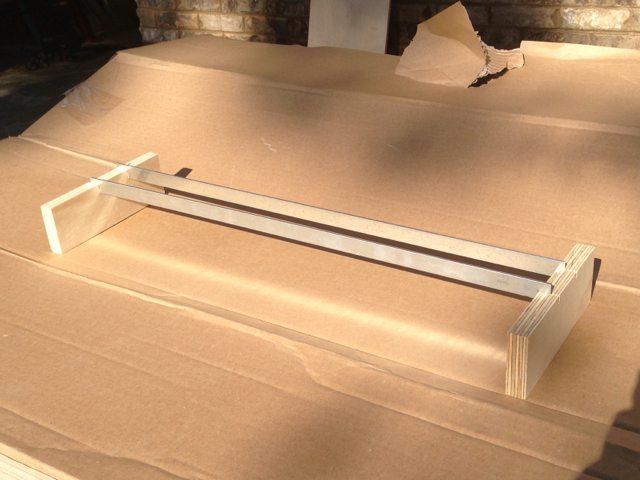
hanging file drawer tutorial at SawdustGirl.com

Wes thought the bright yellow bars were odd but I like ’em.  He can sand the paint off of his if he wants to bring them back to plain ole’ metal.  😉
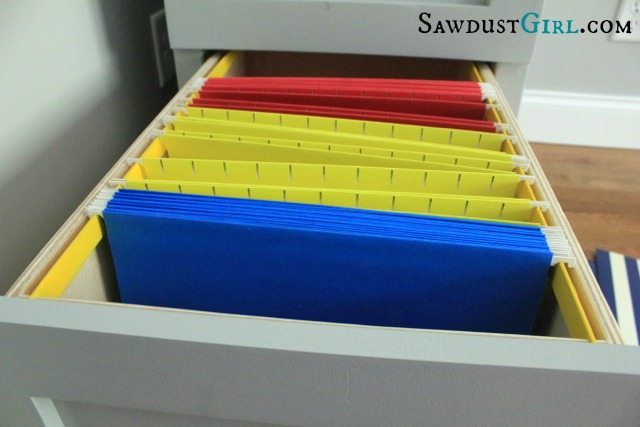
How to make a hanging folder drawer

If you liked this post, you might find other helpful posts in my “Cabinet Making Tips” gallery.
July 18, 2017 · 11 Comments

« Easy Fix for short screws when attaching drawer fronts
Marking correct location for an electrical outlet in built-ins »

Comments

  1. lara thomas says

    July 18, 2013 at 4:35 pm

    I love this.

    Reply
  2. Colleen says

    July 18, 2013 at 6:36 pm

    I’ve debating about how to do this, so your post is timely. How did you go about selecting the full extension drawer glides to hold all that paper. I was also wondering if you’ve done a tutorial on full overlay drawers and doors.

    Reply
  3. Nancy Williams says

    July 18, 2013 at 7:13 pm

    Looks great! You’ll have all of those file folders full in no time!

    Reply
  4. Malisa says

    July 19, 2013 at 1:59 am

    Awesome.

    Reply
  5. Teresea says

    July 19, 2013 at 3:10 pm

    Just what I needed. I plan to build hanging files into a low window seat. The area is too low to install drawers so I will just have a lift top to access the hanging files. This is a craft space so I will have a place to put all my accumulated design/craft tear sheets. I wasn’t sure where to find the hanging metal rails so this is most helpful. Thanks Sandra!

    Reply
  6. Towhid, Jig Saws says

    August 5, 2013 at 6:44 am

    Oh! my goodness, Its looks so amazing and cool.Overall all of those so awesome,thanks for your sharing post.

    Reply
  7. Caroline C. says

    November 12, 2017 at 3:06 pm

    Thanks for this. My husband bought this mid-century desk at an estate sale and it was missing a metal bar to hold the files. I had just ordered this self standing rack to replace it from Amazon and it was just a smidge too big to fit in there without jamming in the rolling wheels. I had no ideas they sold the metal bar at the big box, thanks a lot, you gave me a filing drawer and probably saved the desk for under $3.

    Reply
  8. Andrew says

    July 28, 2018 at 4:47 pm

    I am currently building a hanging file cabinet. The choice for me comes down to using metal rails as you did, or plastic rails (Rockler/Amazon) that sit atop the drawer sides. The metal rails will be more durable, but any paper hanging out of the side of the file folder will hang up on the rails as I pull the folder out. Hmm…

    Reply
    • Sandra says

      July 30, 2018 at 1:05 pm

      You just have to plan for a taller drawer front. Make the drawer front a couple inches taller than the drawer.

      Reply
  9. Trent Wilms says

    February 20, 2019 at 11:51 am

    Great. Thank you.

    Reply
  10. Kathy Fisher says

    August 1, 2022 at 2:25 pm

    I’m looking to some help. I want to build a small cabinet with a file drawer that pulls out sideways instead of lengthwise. I want the measurement of the drawer itself to be 15×15 inches length approximately 24 inches. Any suggestions. This is to use for scrapbook paper
    Thank you

    Reply

Leave a Reply Cancel reply

Your email address will not be published. Required fields are marked *

Categories

New Post email notification signup

You Subscribed!

Legal Stuff

Terms of Use

Privacy Policy

Disclosure

Recent Posts

  • January 2023 Lodge Update
  • Lodge Update – Floors, Cabinets, Countertops, and Appliances
  • Lodge Kitchen Cabinet Progress
  • Halloween Mad Gab – Halloween Party Ideas
  • Concrete Backsplash or Vertical Wall Treatment

Disclaimer:

Although it is my intention to provide accurate plans and clear instructions, not all plans have been tried and tested. Using plans or information found on SawdustGirl.com indicates that you agree with the Terms of Use policy and will accept full responsibility for the process and outcome of any project you attempt. All plans are for private use only. Plans and information published on SawdustGirl.com may not be reproduced, republished or distributed in any manner without written permission from Sandra Powell, Sawdust Girl. Actual projects built using Sawdust Girl plans may be published on your own site without instructions or "tutorial" as long as you provide a link to my original post with full post title or "SawdustGirl.com" as link title.

Copyright © 2023 · anchored theme by <a target="_blank"