DIY Holiday Sign – it’s the most wonderful time of the year
Hey Sawdust Fans! Kellyn here again, and do I have a treat for you today. I love the Holidays. Isn’t it the most wonderful time of the year? Last year, I finished building a massive built-in around our fireplace, just in time to decorate for the holidays, so I made this DIY Holiday sign for my new mantle. It cost me less than $5 for the wood to make this sign. (I already had stain, transfer paper, paint and glitter on hand.) And I’m going to show you how to make one for yourself!

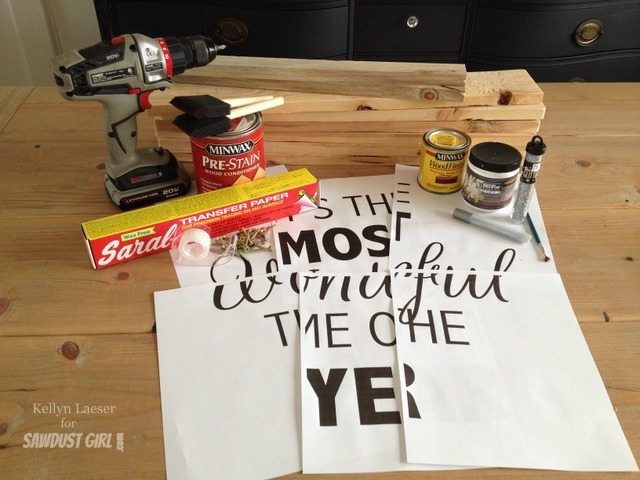
Materials:
- 2 – 1×4@8ft – the cheapest standard or construction grade wood
- 1 – 1×2@8 ft furring strip (or scrap wood you have on hand)
- Drill and drill bit
- Screws (1¼ in)
- Wood conditioner
- Stain (Dark Walnut)
- wonderful template
- Saral Transfer Tracing Paper- WHITE
- Ballpoint pen
- White paint
- Small craft paint brush
- Glitter Glue Pens (I used Silver, but you could do Gold, Red, Green.)
- Glitter (same color as the Glitter Glue Pen you choose)
step 1: building the sign
For projects like this, I use the cheapest 1×4’s I can buy. At my Menards, they are called standard or quality boards, at Home Depot or Lowes, they call them 1×4 furring strips. I love finding the straightest boards with the most character.
-
First cut your boards.
6 – 1×4 at 24inches
2 – 1×2 at 18inches
-
Lay boards face up moving the boards around to create the look you want.
-
Flip all the boards upside down, and line up on a square (I used my tile floor)
-
Line up the 1×2 furring stips on the back, drill pilot holes (1-2 per board), then screw to the 1x4s.

step 2: sand and stain
-
Sand your sign.
-
Because I like my signs to have a more rustic look, I’m not as concerned with making the wood super smooth, but sand until you are content with the look and feel of your sign.
-
You can even bang up your sign a little with a hammer, chains, screwdrivers.
-
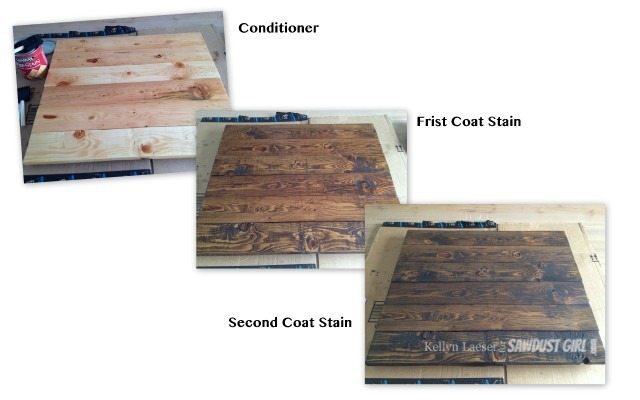
Stain your sign.
-
Don’t forget to use a wood conditioner first before you stain.
-
Stain the sign with 2-3 coats of Dark Walnut, Espresso or other dark stain color you like. (This will take 1-2 days for drying time.)
step 3: paint and glitter
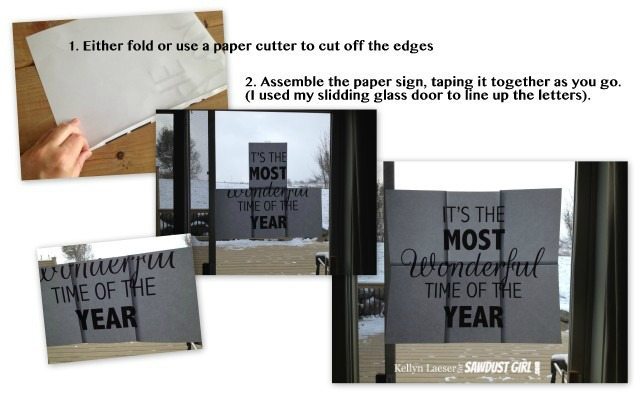
While the stain is drying, print out the “It’s the Most Wonderful Time of the Year” sign. It will be on six pages, and have a half inch overlap.
You can either use a paper cutter to cut off the edge, or like I did, just fold it over.
This is where a sliding glass door, or big window comes in handy, I tape the sign together using the light to match up the letters.
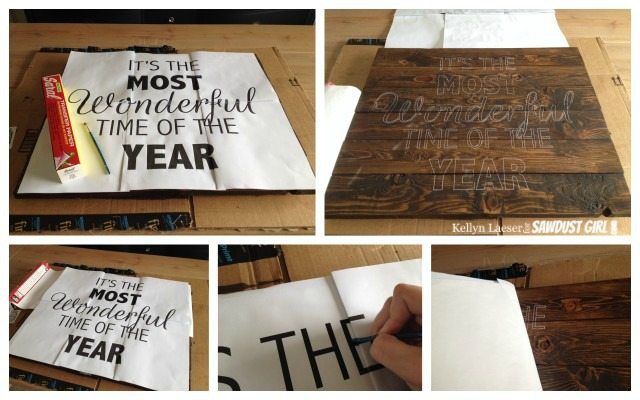
Once the stain is dry, place the transfer paper,white graphite face down, onto the wood, then top with the “Wonderful” sign, taping the top and bottom to the wood to prevent it from moving.
With either the butt of your craft paint brush, or a ballpoint pen, tracing the letters onto the wood. Don’t forget to move the white graphite paper down as you get to the “Time of the Year.”
Finally the good part, glitter and painting. I strongly suggest starting in the middle with the glitter for “Wonderful”.
With the glitter glue, apply the glue to 1-2 letters at a time, then with your craft paint brush, smooth the glue until it covers the entire letter. Before the glue dries, sprinkle the glitter over the letters, let it sit for a minute then tip the sign to the side over a folded piece of paper to collect the excess glitter. Repeat until Wonderful is all sparkly with glitter.
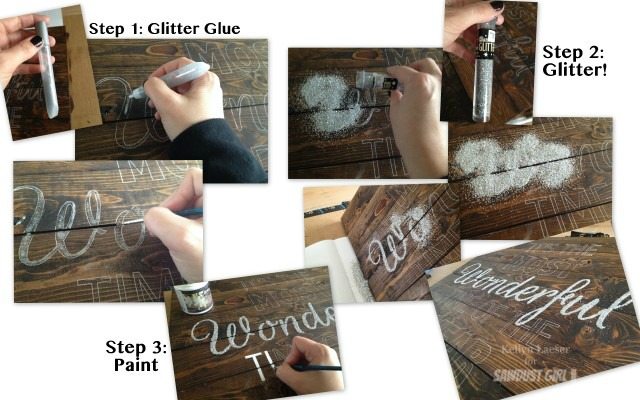
Again starting from the middle, with white paint, paint each of the letters. Until TADA! you have a beautiful holiday sign, perfect for your mantle.
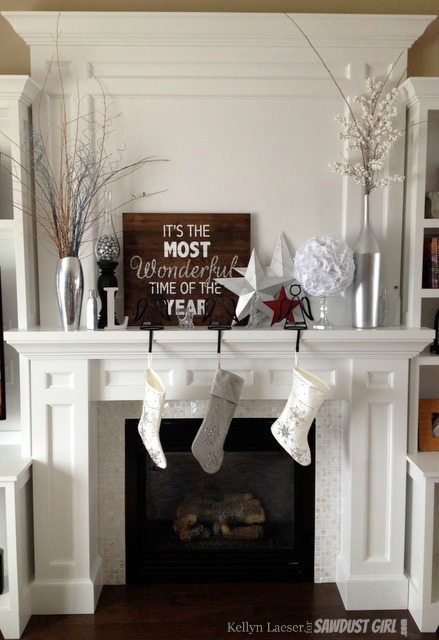
Happy Holidays everyone! Spread the love, and build two signs! Keep one for yourself and surprise a neighbor, or a loved one with the other.



Hey Heather, check out the staining like a pro post we did a couple weeks ago.
http://sawdustgirl.com/2014/11/19/how-to-stain-wood-like-a-pro-the-basics/
I explain what wood conditioner is and why to use it. I use it on all pine projects I stain.
Never heard of wood conditioner, what is it and do you use on all wood projects