Bookshelf Base Cabinet- Cara Collection
This is the first installment of the Cara Collection. This post include free plans for the base cabinets for this bookshelf. You can configure the function of each side separately. You could have both sides be doors with adjustable shelves or both sides have drawers or one side of each like Cara did in her office. The large bottom drawer is a file cabinet. Mix and match and do what works for you.
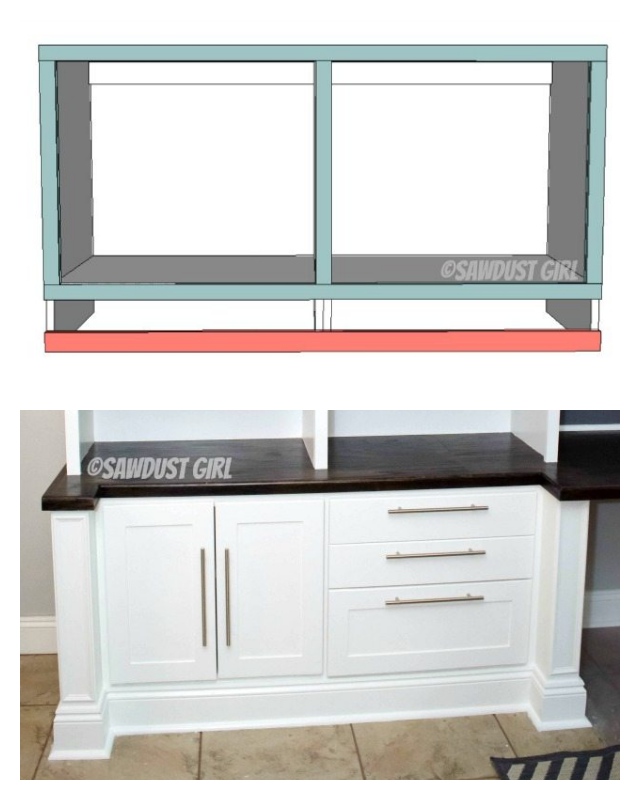
Builtin Bookshelf Base
Materials for 2 bookshelf bases (4 cabinets total):
- 2 sheets of 3/4″ cabinet grade plywood
- 1 sheet of 1/4″ plywood or backerboard
- Pocket hole jig and screws
- 1 3/4″ wood screws
- 1 1/4″ cabinet screws (washer head)
- 3″ cabinet screws (washer head
- Wood glue
- 3/4″ – 1 1/2 staples or #6 wood screws (to attach the back)
- 1×2 Poplar for faceframes
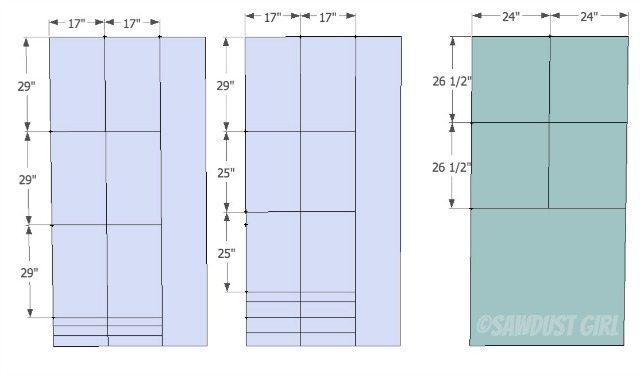
- Cut plywood as shown.
- Use the leftover sections to cut 3″ strips to use as cleats.
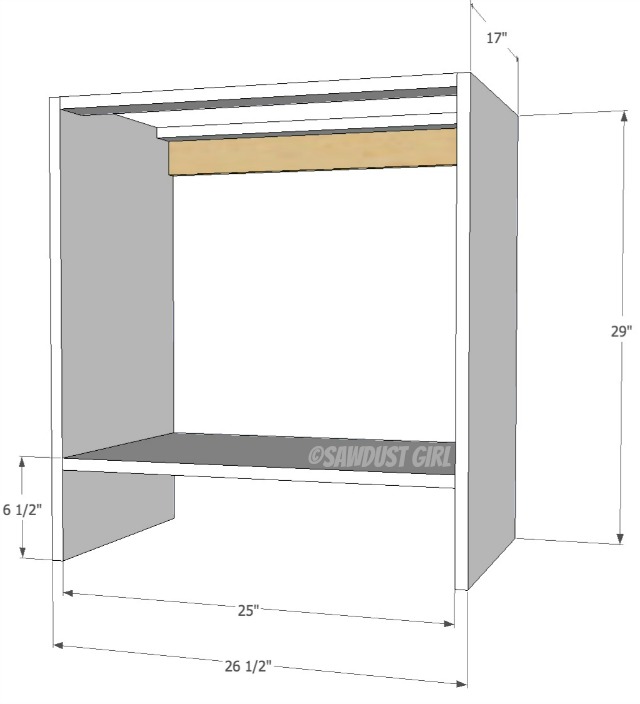
Step 1: Attach bottom and cleats to sides.
- Sides are 17 x 29
- bottom is 17 x 25
- cut cleats to 3 x 25
- Use wood glue and 1 3/4″ wood screws to secure bottom to sides. Make sure bottom is square to sides while assembling. Use assembly square and clamps or corner clamps to hold cabinet square while you secure it with screws. (See my post on handy gadgets for the new carpenter.) I also like to shoot some nails in to hold everything in place while I drive in my screws.
- Note that the placement of the bottom can be adjusted to fit your baseboard. I like between 1/4″ to 1″ of the bottom faceframe rail to show above the baseboard. Cara had 5 1/2″ baseboards. If your baseboards are only 3 1/4″ tall, adjust the bottom to be about 4″ from the bottom of the sides.
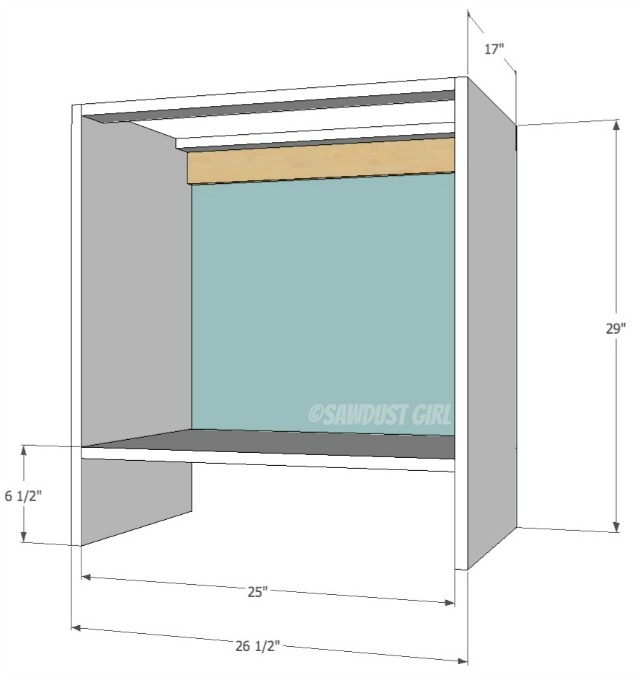
Step 2: Square up and secure back.
- Square up your cabinet by laying it on it’s face. Measure diagonally from top right to bottom left and visa vera. The measurement should be exactly the same. If it’s not, manipulate the cabinet (generally by pushing, pulling or kicking) until the measurement comes out exactly the same. Squaring up is my lease favorite part of cabinet building.
- Once you get the cabinet square, secure the back with either 3/4″-1 1/2″ staples or wood screws. Small #6 wood screws work well for this purpose but a pneumatic stapler is easiest –if you have one.
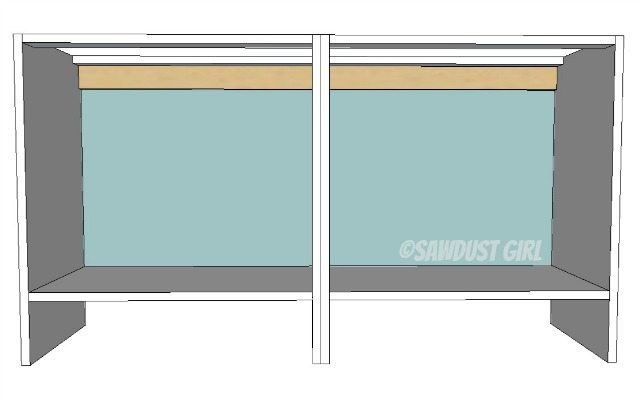
Step 3: Attach cabinets together.
- Place cabinets side by side making sure the front edges are flush. Use clamps to hold them in place while you drive 1 1/4″ washer-head screws to hold them together. Secure the cabinets together near the front and back. Use as many screws as necessary to hold the sides flush together. If there is any warping or bowing screwing the cabinets together should take care of that.
Step 4: Build Faceframe
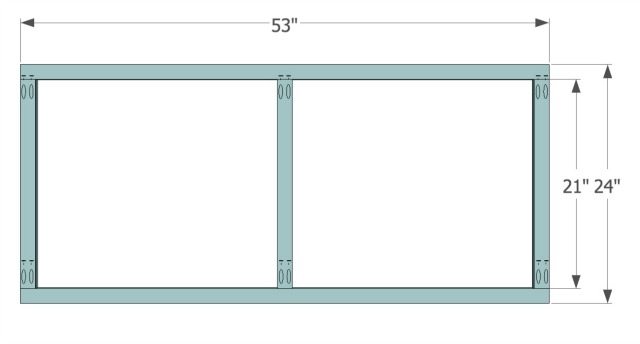
- Use wood glue and 1 1/4″ pocket hole screws to build the faceframe out of 1×2 poplar (actual size 3/4″ x 1 1/2″) as shown below.
Step 5: Attach Faceframe
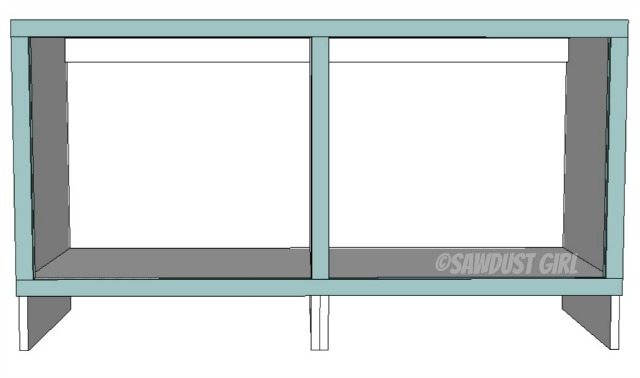
- use wood glue and pocket hole screws or finish nails to secure the faceframe to the base
Step 6: Attach Baseboard Cleat
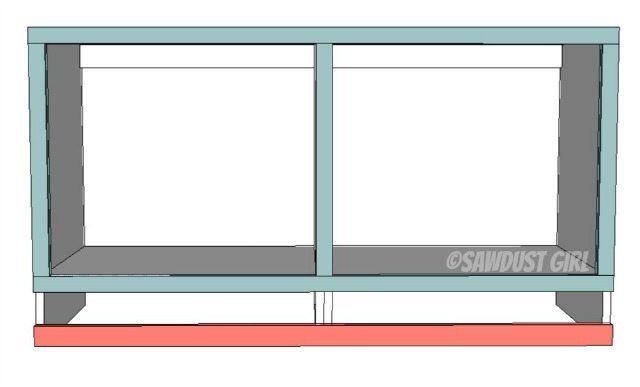
- Use any piece of 3/4″ scrap wood of any height to creat a cleat that spans the width of the double base. Nail or screw it in place.
- This will ensure when you attach your baseboard it will be flush with the faceframe above the cleat since we didn’t build the faceframe to go all the way to the floor. (That would have been a waste of poplar!)
*Get the entire collection of built-in furniture plans for the Cara Collection and read all of Cara’s project post.
These look beautiful. Thanks for sharing the project details. I hope to make a vanity cabinet doors this year when we update our bathroom. Your detailed blog will be one of the reasons I am going to try it!
You are such an inspiration and I hope you keep sharing.
Maria