• Home
  • About
    • Personal Posts
  • Privacy
  • Shop
    • My Account
    • Checkout
    • Email
    • Facebook
    • Instagram
    • Pinterest
    • Twitter
    • YouTube
Sawdust Girl®

Sawdust Girl®

Renovation, cabinet building and woodworking plans and tutorials. Build like a Girl®

  • My Home
    • Clinton TN House
      • Clinton TN House in Progress
    • Maryville TN House
      • Maryville TN House Tour – Completed Rooms
      • Maryville TN House in Progress
        • Basement
        • Basement Storage Closet
        • Bedroom Office
        • Craft Room
        • Dining Room
        • Entry
        • Garage
        • Guest Bedroom
        • Hallway
        • Jack and Jill Bathroom
        • Kitchen
        • Kitchen Entry
        • Laundry Room
        • Library
        • Living Room
        • Loft
        • Madison’s Room
        • Master Bedroom
        • Master Closet
        • Pantry
        • Porch
        • Powder Room
        • Wes’ Office
    • Illinois House
    • Calderwood Cottage
  • My Workshop
    • Clinton Workshop
  • Build & Breakfast
  • Cabinet Making 101
    • Cabinets
    • Doors
    • Drawers
  • Projects and Plans
    • Countertops
    • Beds
    • Benches
    • Bookshelves
    • Desks
    • Gift Ideas
    • Holiday
      • Christmas
      • Halloween
    • Home Accessories
    • Kids
    • Kitchen Cabinets
    • Lockers
    • Nightstands
    • Organization accessories
    • Recipes
    • Sewing
    • Tables
    • Vanities
    • Wardrobes
    • Woodworking
      • Wood Finishing
    • Workshop
    • Workshop Storage and Organization
  • Remodeling 101
    • Baseboard and Trim
    • crown molding
    • Demolition
    • Door and Window Casings
    • Door Installation
    • Drywall
    • Electrical work
    • Flooring
    • Home Maintenance
    • Painting
    • Plumbing
    • Resources
    • Safety
    • Tile
    • Wall and Ceiling Treatments
  • Sawdust Squad
  • The Sawdust Diaries
    • Andrea
    • Ava D.
    • Beckie F.
    • Cara C.
    • Courtney B
    • Fawn T.
    • Jenn D.
    • Kelly C.
    • Kristy K.
    • Lara T.
    • Malisa B.
    • Marnie D.
    • Robin C.
    • Val F.
  • Tools
    • Products
    • Tool Reviews & Overviews
    • Inspiration & Ideas

$3 DIY Macramé Ribbon Headboard

All Posts

$3 DIY Macrome Headboard

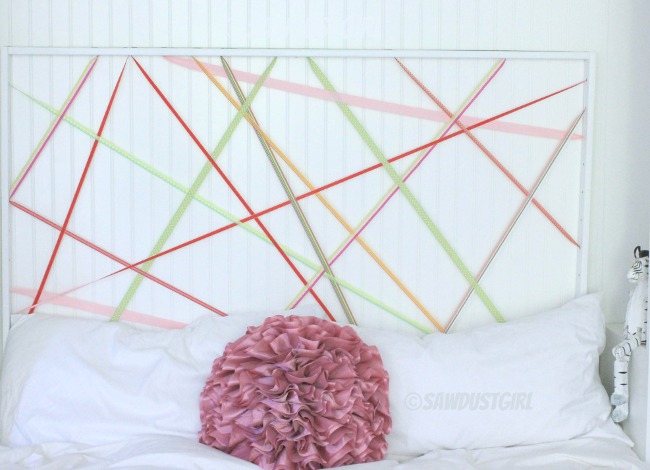
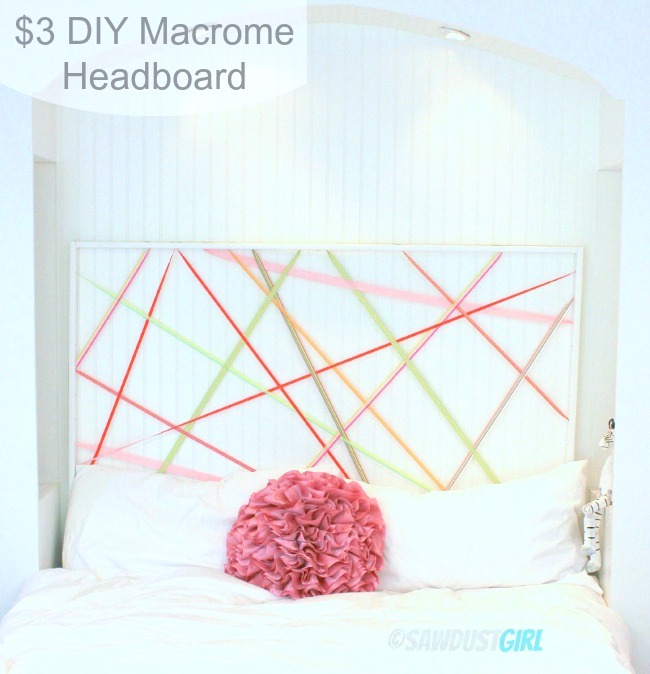
Macramé is Back Baby!  And I’m not talking about hemp plant hangers or string vests, puhlease! Today’s macramé means sophisticated materials, bright colors and fab patterns woven into amazing textiles! This weekend Sophie and I experimented with it a bit and created this cheerful headboard.

I have been obsessing over these artistic textiles for awhile, and have been itching to give it a try. Here are some inspiration pics that I have been collecting on Pinterest. I love it!

Macrome is back

Sources: 1.  Casasugar  2. Blueberrymodern  3. Asgoodasknitgets  4. Redbubble

Meanwhile, poor Sophie has been living with a very unfinished bedroom. It seems that as soon as I get one project to the “livable” stage, the basement floods, or some other emergency drags me away before I can actually finish anything, GRRRRRRR! So until I have time to build her a custom headboard and the Kristy storage platform bed, this $3 DIYed macramé headboard will have to do. That’s right 3 bucks, am I the queen of cheap or what?!!!

3-Macrome-Headboard-DIY

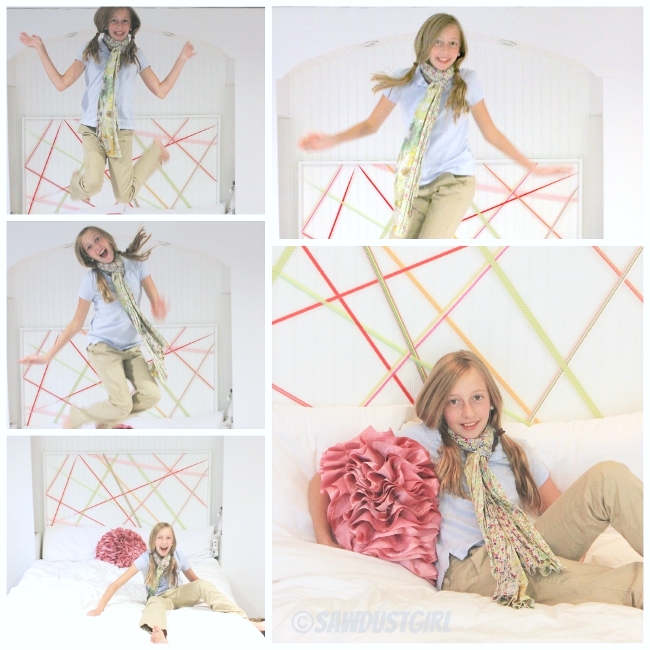
Despite the frugal price tag, she love’s it so much, I only feel half as guilty about not having finished her room yet.

DIY macrome headboard steps

We used three 8 foot furring strips, you could use 1 x 2’s for a higher quality frame, especially if you want to leave the wood natural. However, I had these on hand, and you really can’t beat the price at less than a buck each. I cut two pieces 5 feet, and two pieces at 44 inches (adjust per your space). Then drilled holes every 3 inches using a 5/16 inch drill bit (In retrospect I would drill the holes 4 -5 inches apart). Next we sanded till smooth, then glued and nailed the strips together to create a rectangle, filled the holes and painted.
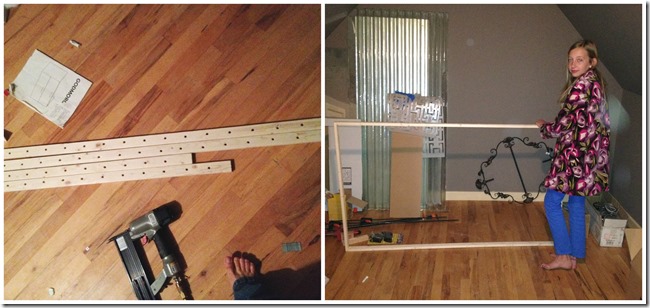
TIP:  Try to place the worst looking side of the boards to the outside as they will get covered with a ribbon.
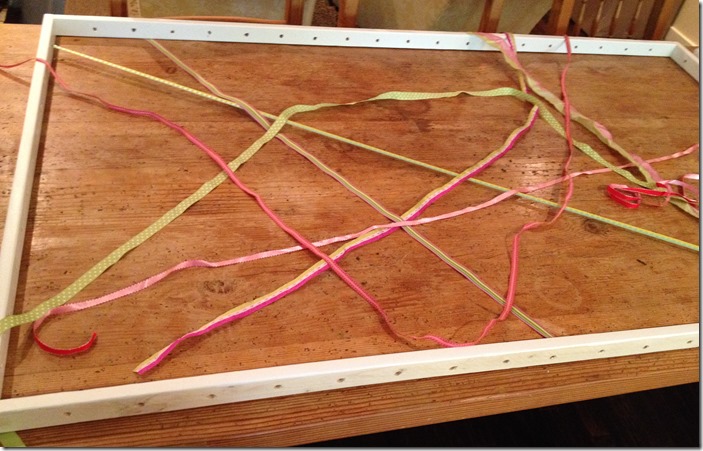
DIY macrome headboard step 3

Next we played around with the layout. We learned that we liked using one ribbon in several places to create continuity, and we liked our weave on the spare side, so we left a lot of the holes blank (which is why I would make fewer holes if doing it over). We used ribbons that we recycled from another project, but I think yarn or colored string would work great as well.
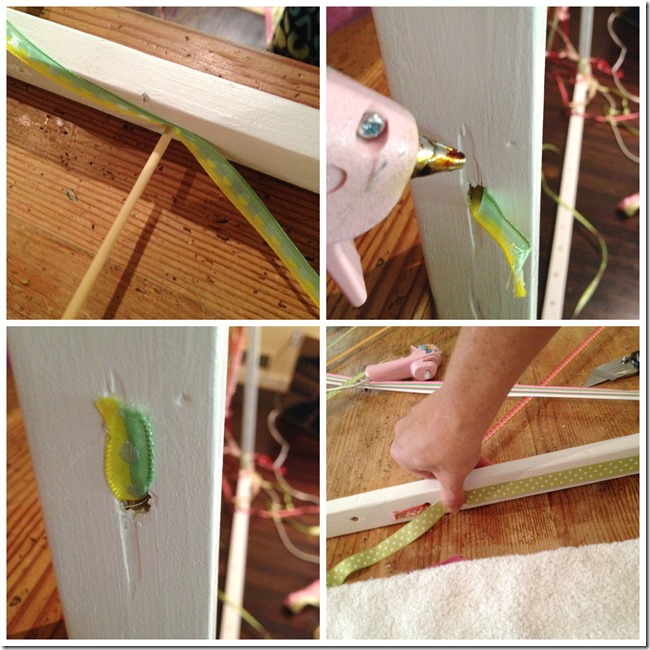
DIY macrome headboard steps 2

Using a wood skewer we threaded the ribbons through the holes and then secured with hot glue on the outside paying attention to keeping the ribbons centered, taught, and neat.  We repeated with the ribbons, weaving and experimenting till we got to the point where we were happy. Then we took another ribbon and secured it around the outside of the whole frame to cover the ribbon bits and glue and create a finished outside edge.
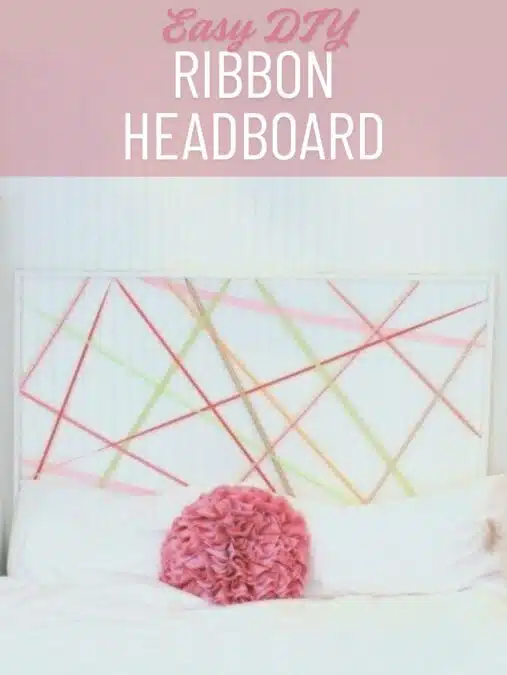
3-DIY-Macrome-Headboard

It is not quite the custom tufted upholstered headboard that I have in my head, but it is bright and cheerful and gives her bed a more finished look. YAY Macramé!!!
October 28, 2013 · 6 Comments

« Fireplace Wall Built-ins – Courtney 3
Fireplace Wall Built-ins – Courtney 4 »

Comments

  1. Kerri @ Simplicity Interrupted says

    October 28, 2013 at 10:41 am

    It looks gorgeous! What a great idea!

    Reply
  2. karin says

    October 28, 2013 at 12:16 pm

    Love it! How was it hung on the wall?

    Reply
    • Julie says

      October 28, 2013 at 2:18 pm

      It’s really light, so I just put 2 small picture nails in the wall and it rests on them. Then I put a bit of museum putty on all four corners so it doesn’t get crooked or knocked off the wall.

      Reply
  3. Feral Turtle says

    October 28, 2013 at 3:44 pm

    What a great project! So pretty too!

    Reply
  4. Naomi J says

    October 28, 2013 at 4:38 pm

    I really like this headboard! It’s so fun and colorful, and it looks like your daughter is really enjoying it. I think it’d be a really fun art project to do with the kids as well! Thanks for the really cool idea!

    The only thing though, is that the title is misleading. Macrame is making textiles using knots instead of weaving or knitting. So while all those pieces are really cool, they aren’t macrame, except for the lamp shade. It just made me kind of bummed to click over expecting to see something cool using macrame and not getting to see it. 🙁 Though I am still happy that I got to see something cool!

    Reply
  5. Caryn S. says

    November 2, 2013 at 8:18 am

    It wasn’t just you Naomi! I thought the same thing, these aren’t macrame. Cool, but not macrame. Kind of the same thing I felt when I searched for knitted snoods…nope, those were not snoods!

    Now, if I could just find the pattern for the amazing macrame hammock that my dad made when I was little…

    Reply

Leave a Reply Cancel reply

Your email address will not be published. Required fields are marked *

Categories

New Post email notification signup

You Subscribed!

Legal Stuff

Terms of Use

Privacy Policy

Disclosure

Recent Posts

  • January 2023 Lodge Update
  • Lodge Update – Floors, Cabinets, Countertops, and Appliances
  • Lodge Kitchen Cabinet Progress
  • Halloween Mad Gab – Halloween Party Ideas
  • Concrete Backsplash or Vertical Wall Treatment

Disclaimer:

Although it is my intention to provide accurate plans and clear instructions, not all plans have been tried and tested. Using plans or information found on SawdustGirl.com indicates that you agree with the Terms of Use policy and will accept full responsibility for the process and outcome of any project you attempt. All plans are for private use only. Plans and information published on SawdustGirl.com may not be reproduced, republished or distributed in any manner without written permission from Sandra Powell, Sawdust Girl. Actual projects built using Sawdust Girl plans may be published on your own site without instructions or "tutorial" as long as you provide a link to my original post with full post title or "SawdustGirl.com" as link title.

Copyright © 2023 · anchored theme by <a target="_blank"