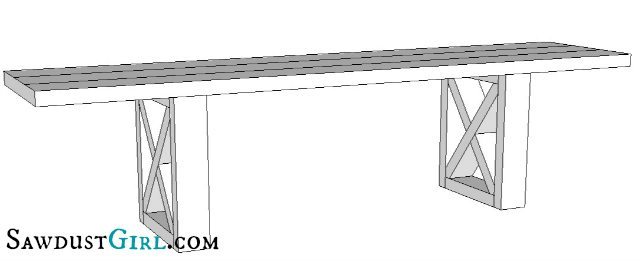
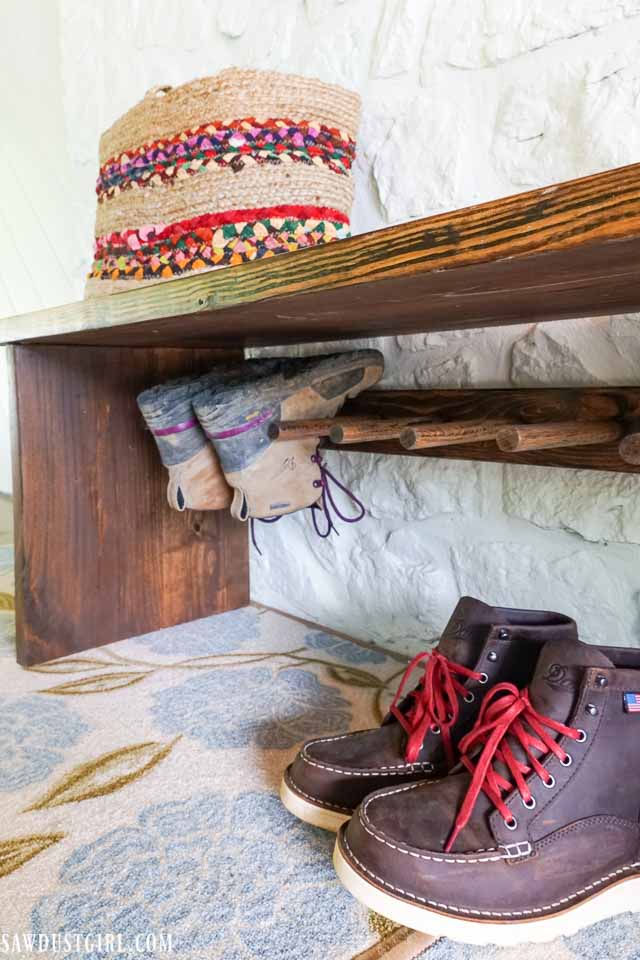
This super easy X Leg Bench can be made for about $20 in only a couple hours. All you need is some good 2x material, a miter saw and a drill. This woodworking plan utilized simple joinery and inexpensive materials. It’s a great project to use as a jumping off point if you’re new to furniture making and woodworking. This post is sponsored by 3MDIY.
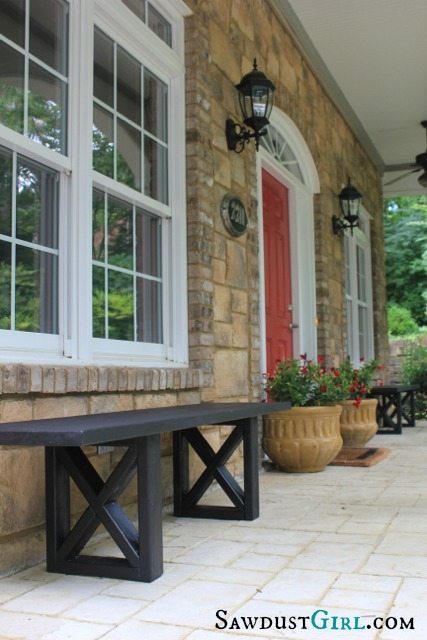
How to build an X Leg Bench
Materials for one X Leg Bench:
- Three 6′ 2×6
- Two 8′ 2×4’s
- 3″ long wood screws
- 2 1/2″ wood screws and washers
- Miter saw
- drill
- safety gear
1. Bench Top
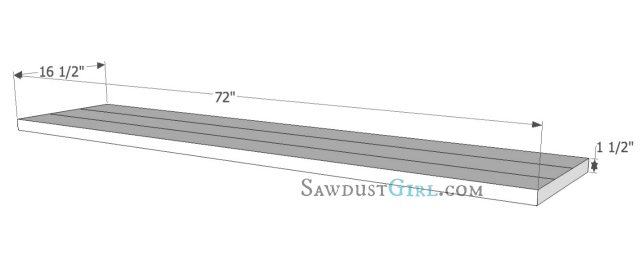
The first thing to do is glue up the benchtop which is made up of three 6′ long 2×6’s. Slather your wood glue on both ends being joined and use LOTS of clamps.
I glued up two 2×6 planks and let that set up and then added the next piece. It’s difficult to glue up too many pieces at one time without things slipping and sliding and buckling.
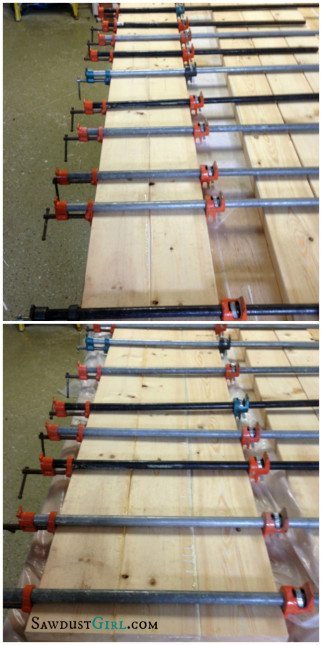
Finished bench top is 16 1/2″ wide.
While the glue on your bench top is setting up you can work on your legs.
When you cut all your parts, make sure you are wearing proper safety gear– please! I’ve been doing this long enough to have had some close calls and been thankful I had my safety glasses on so I do NOT take chances with safety. Eyes, ears and lungs — ladies and gentlemen. Don’t argue- just do it!
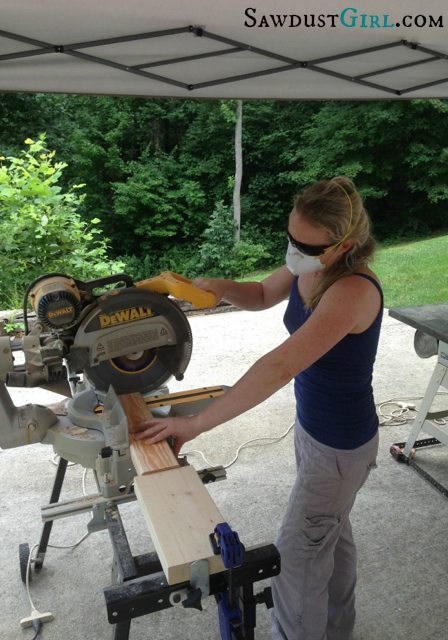
Safety gear is super important!
- 3M Tekk Protection: Holmes Workwear sunglass type safety glasses. (I like the Holmes eyewear because my eyelashes don’t mop the lenses like they do in a lot of other safety glasses.)
- Appropriate dust mask for sawdust (you know there are different ones for painting, sawdust, drywall dust…)
- and little rubber nubby ear protection thingies on a cord that wrap around your neck so you don’t lose them.
2. Leg frames
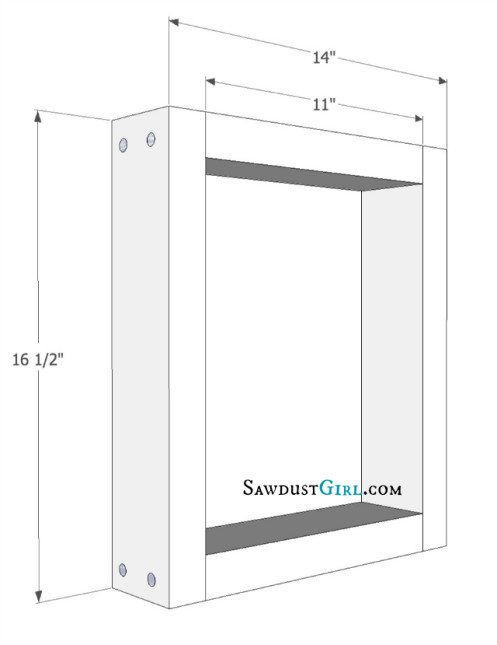
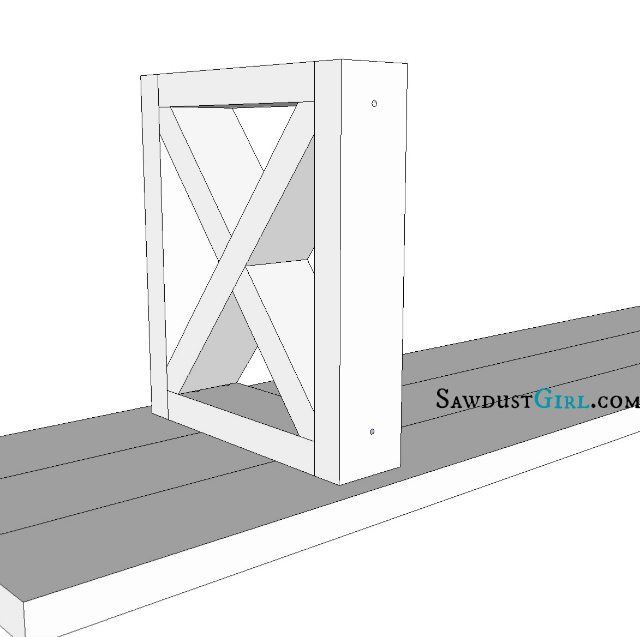
The leg frames (the X will go inside this frame) are made up of 2×4’s cut at 16 1/2″ and 11″. 2 of each for each leg.
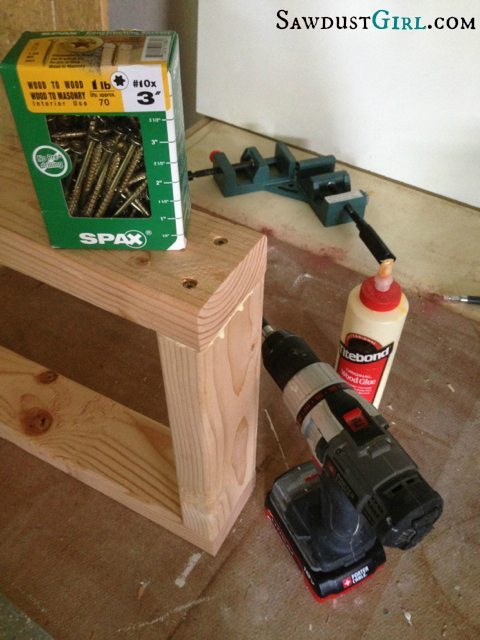
I assemble the leg frames with glue and 3″ #10 wood screws using a corner clamp to ensure the corners were square while I drove in the screws.
3. Cut your X braces
- 4 — 18″ 2×4 pieces
For the X’s. Cut your X pieces at 18″ long and then cut the angles. The easiest way to find the angles is to place a 2×4 behind the frame with the centerline marked so you can line that up with the corners. Then draw lines where you need to cut.
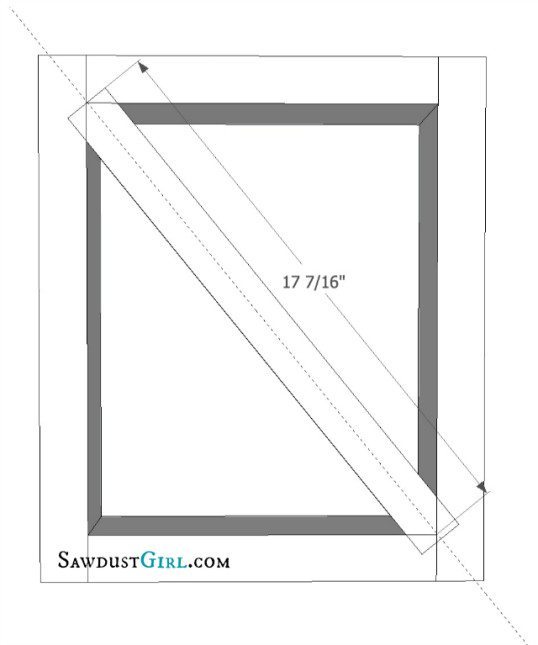
The centerline of the X 2×4 is 17 7/16″ long. The angles for this specific leg are 39 degrees and 51 degrees. If your saw doesn’t cut past a 45 degree angle you’ll have to widen your leg.
Alternate leg for those whose saws don’t cut a miter past 45 degrees.
You’ll need to adjust the width of the leg frame to adjust the angles. The bench top is 16 1/2″ wide so this leg will be as wide as the top which is just fine.
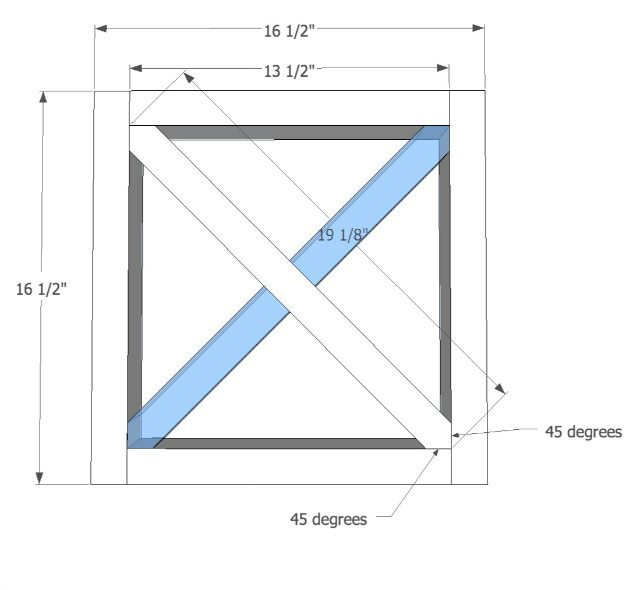
4. Cut notches for half lap joint
Once you have two X pieces cut, insert them into the box (they’ll only fit halfway in at this point) and mark where they cross. Mark one side then flip the entire leg over and mark the other side.
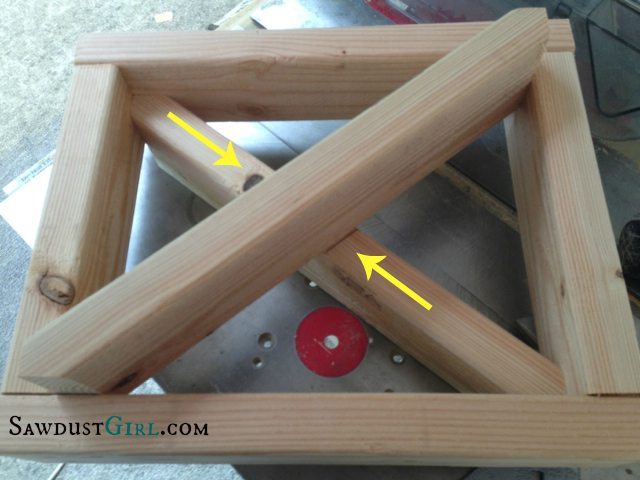
Cut out the wood where you just marked – but only halfway down on both boards — this creates a half lap joint.
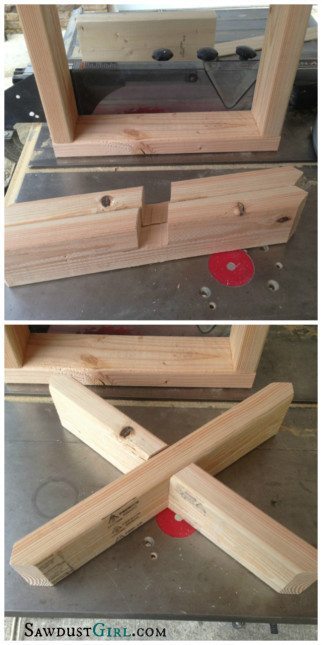
To cut out the notches, I used my miter saw and made a series of cuts about 1/8″ apart from each other — just to the halfway mark on each board. Then I broke out the wood that was left.
Now the legs should fit together like this.
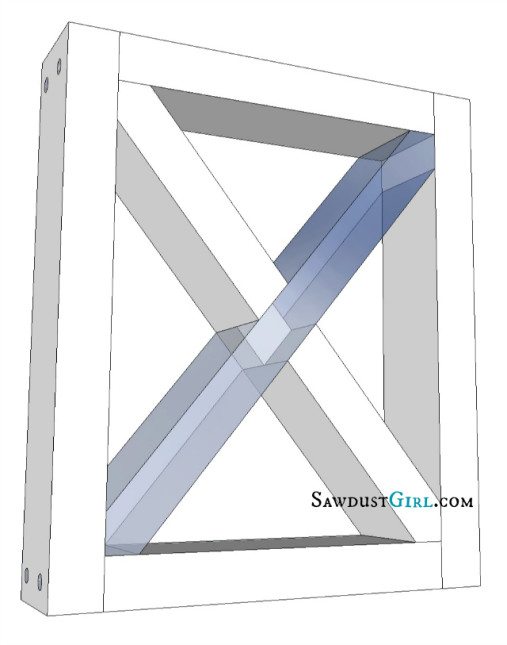
Once I created my fist half lap X and made sure it fit in the leg frame, I used one of the pieces as a template to mark the rest of the 8 boards that needed to be cut at angles and notched out for half lap joints.
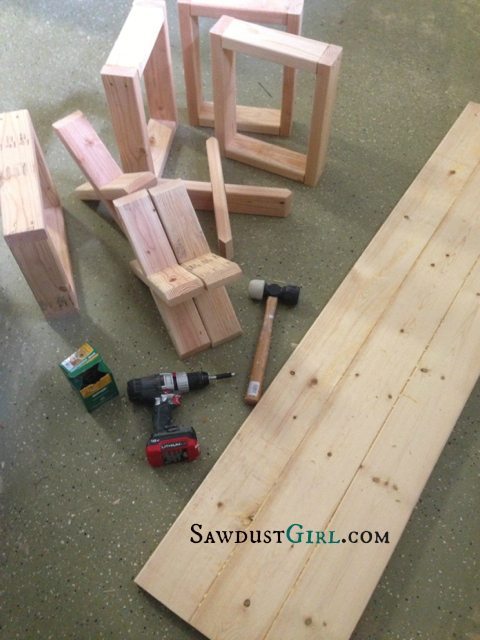
Test each X in it’s frame and make sure everything fits before you start gluing up. Trim as needed.
5. Attach leg frames to bench top.
Measure in 14″ from the ends and 1 1/4″ in from the front and back for leg placement.
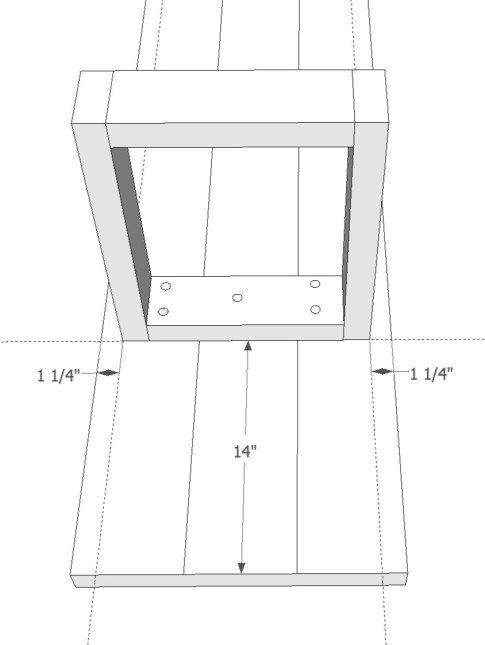
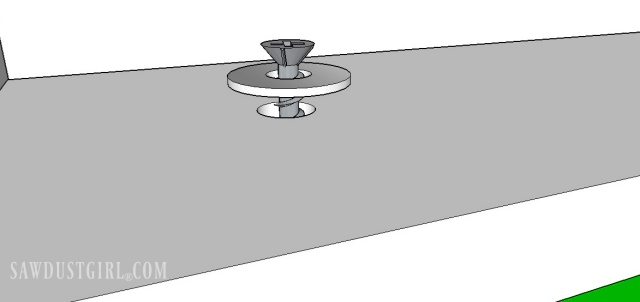
- Drill holes in the top of the leg that are larger in diameter than the 2 1/2″ screws.
- Use washers to keep the screw from pulling through the hole.
- This oversized hole will allow for wood movement which is especially important for outdoor furniture that will be exposed to frequent environmental changes.
6. Add X to leg frames
Apply glue to all the X angles that will contact the leg frame then insert the X into the frame. You might need to use a rubber mallet to help it into place. Drive one 2 1/2″ screw from the side of the frame into each end of the X to keep it in place.
7. Sand
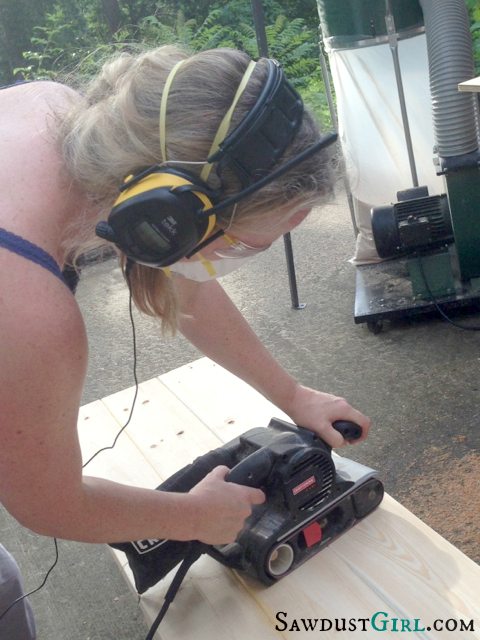
I plugged into some good music with my 3M Tekk Protection Digital WorkTunes and sanded to bench top with my belt sander to clean up any unevenness.
Then I finished with my orbital sander making sure to round off all the edges to make it nice and comfy. This is a rustic bench so I’m not sanding perfectly or filling all the cracks and knots. I just want it smooth enough that no one gets any slivers.
8. Stain and Poly or Paint
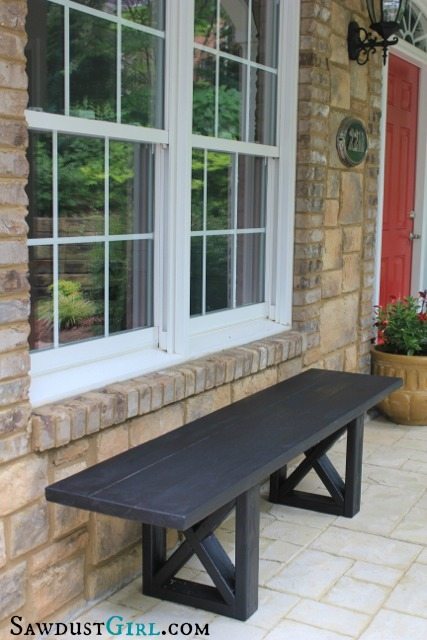
I used exterior, satin black paint to finish my X leg bench.
I love the benches and the front porch now. It looks like a real home. You’d never know what chaos lies in wait once you walk through the front door — unless you happen to read my blog. 🙂
I am proud to be a 3M- sponsored blogger, and, as part of my responsibilities, I get the opportunity to evaluate products from 3M DIY. Opinions are my own and additional product used in the project were selected by me.
follow 3M DIY here: 3M DIY Twitter 3M DIY Instagram 3M DIY Facebook 3M DIY Pinterest
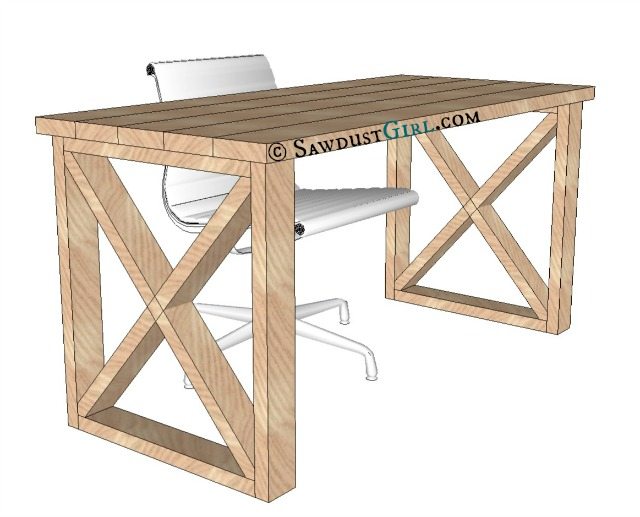
You might also like my plans for this X-leg desk!
Rebecka says
I hope this isn’t a silly question.. We I have a ton of left over wood from pur deck, but it’s pressure treated. Do you think it’s Okay to use pressure treated or should we get different wood?
Sandra says
If you are making a bench for outside I don’t see an issue with using it. Use a good mask when cutting and sanding pressure treated lumber.
RITESH says
what kind of wood did you use for the project? I am planning to build this bench and put it outside. Will douglas fur wood for this?
Ritesh agrawal says
Love the idea and the post. What kind of wood did you use? I went to lowes for wood and realized that the wood is pretty expensive. I looked at redwood and a single 2X4X8 itself costs about $10.
Therese says
Loving the red color of your door. What color is it?
Elizabeth says
Absolutely love this post!! Making these benches this weekend – also my front door is already red – I’m gonna copy your whole design – where did u get your planters? Love all of it!
Julie C says
When you cut the notches for the cross braces, what kind of saw did you use? That to me looks like the most difficult part of the project. Love the bench and would love to make one but a little intimidated by the cross brace part.
Sandra says
I cut out the half lap on my miter saw so it is totally doable. Nothing fancy, just lots of cutting, moving the board, cutting, moving the board…
Miranda bolt says
If I wanted to make these benches for my dining room farmhouse table and I need to make them longer would you suggest adding a 3rd leg?
Sandra says
Holy moly, how long is your dining room table? LOL These are already 6′ long. I guess it depends on how long you want to make them. Try it with two legs and see if it feels like you need another. 🙂
Betty819 says
Sandra,
I wondered what happened to you; I used to follow you when the name of your blog was sawdust and paper scraps..Boy, with 2X6’s and 2 x4’s..that’s going to be a sturdy but heavy table. I’ve been looking for a used table that I can make into a computer table and when I saw yours thought it might do. I didn’t check out the height of yours but cutting those end pieces looks like I’d get over my head in fitting them into the end box/squares. I am so tired of this small Sauder computer desk and having to almost stand on my head to load paper into my printer or get printed pages from letter tray. I want a table long enough that I can have a lamp there plus computer monitor and printer plus desk accessories. Plan to look at SA, GW or Habitat for Humanity resale store. Something I can sand and repaint and then I saw an idea of putting shelves on the wall and a white table skirt around the table edge, hiding the tower, etc. Or maybe Free cycle or Craig’s list.
Will print off your tuitorial and see if it will work and show it to my home improvement/handyman and see if he can build it.
Yours are the only pictures I’ve seen from the Haven Conference so far. Guess everybody has been resting from last weekend’s events. Glad everybody had a great time and it was successful.
Sandra says
It isn’t that heavy but it IS sturdy. The design would make a cool desk but changing the height of the legs would completely change the angles for the X’s. hmmm, sounds like a great idea for another set of plans!
Robin says
how us it stable without swaying with only the legs?
Sandra says
It is completely stable. The legs are 3 1/2″ by 14″ wide each. I can stand and jump on these and sit on them and swish back and forth without any wobble. Try it!
Teresa says
Absolutely fantastic!!! I have always wanted to learn how to do those types of cuts. This is a fantastic way to learn and not spend a ton of money on the lumber as well. I love love love that bench for out in front. I would love to be able to change out my summer seating on the front porch with these benches for winter. I have to say you have been a the major inspiration to my new found hobby of carpentry. Our poor old house here in Pennsylvania has never had any storage and the closets are a crime — I will have to show pictures soon (they are quite laughable — I think no one owned clothes a hundred years ago) they certainly didn’t own any shoes ;o). And a shout out to Centsational Girl for posting your items without whom I would never have found you and started on the road to Carpenter Nirvana.
Sandra says
Yeah. Please do share Teresa.
Katie & Jon says
I love this bench and LOVE 3M Tekk Protection. We finally have a his and hers pair of worktunes, so no more fighting over who gets them now!
Cara B says
Could you use a kreg jig and glue to secure the 2×6’s together for the bench seat? I don’t have that many clamps, (any at all actually) and that’s too many to buy all at once!)
the cape on the corner says
wow, that’s awesome. and i’m loving those giant urn planters, too.
Jake's a Girl says
Love these and they look great on your front porch.
btw…Got my BH&G in the mail today and found 2-absolutely beautiful ladies in the
back. Sweet. I LOVE that travel to wall!
Jake’s a Girl
Feral Turtle says
Great project Sandra!! This would be nice, maybe when we build our new deck. Pinning for the future!
Caralyn225 says
So nice! Wish I had a porch big enough for them. Maybe I will do one for the back patio?!?
AYISHA says
I removed this from my to do list when you said that one of those angles are cut @ 51 degrees. My saw only cuts to 48.5.
Sandra says
Ayisha, you just have to adjust the width of the leg to change the angles. I edited the post and added instructions for an alternate leg with 45 degree angles on all parts of the X so anyone with a miter saw can build this bench. Thank you for reminding me that not all saws are alike. Mine cuts to 55 degrees.
kristin says
Rockin’ it again! Love the benches and your front entrance looks great. I really like the stone on the house too. We need to paint our front door!!! Would you be able to post a how to, the cleaners that work, prepping, etc.??? Our door, besides being filthy (wiped it down once–oh my!) is stained brown right now–we would like to paint it black. Oh, we need your help 🙂 Pretty please?
Sandra says
I wiped my door down with a cleaning scrubber and dish soap and water. No special cleaners involved in my process. I didn’t even sand. Just painted over the existing white with the red. It took three coats…but I will post more on the door at some point.
kristi@ishouldbemoppingthefloor says
Love it! I’m pinning…may have to build it to use with one side of my kitchen table! 🙂
mark says
with nothing to support the legs, it seems like it would wobble a bit side to side, is this an issue?
Looks great!
Sandra says
Nope, it is rock solid. The legs are wide and thick and are secured to the top with five #10 2 1/2″ wood screws each. One bench could hold an elephant — possibly. I’ve stood on them myself but don’t weigh as much as an elephant so that remains to be tested.